

Cyllo Shopfloor Documentation
Introduction
The Cyllo Shop Floor module adds a dedicated, full-screen production interface to Manufacturing (MRP). It is designed for use on a tablet or shared screen on the factory floor, so operators can start, pause, and finish work orders, report missing components, and move between work centers without opening the standard backend forms.
1. Accessing the Shop Floor
1.1 Opening Shop Floor from a Manufacturing Order
You can jump directly into a specific manufacturing order's work orders from its form view:
- Open the manufacturing order (Manufacturing → Operations → Manufacturing Orders).
- Click the "Shopfloor" smart button in the top-right corner of the form (visible once the order is confirmed, and hidden for draft or cancelled orders).
- The Shop Floor screen opens with the order's work center pre-selected and its order card pre-opened, with the filter set to All Orders so the order is visible regardless of its state.
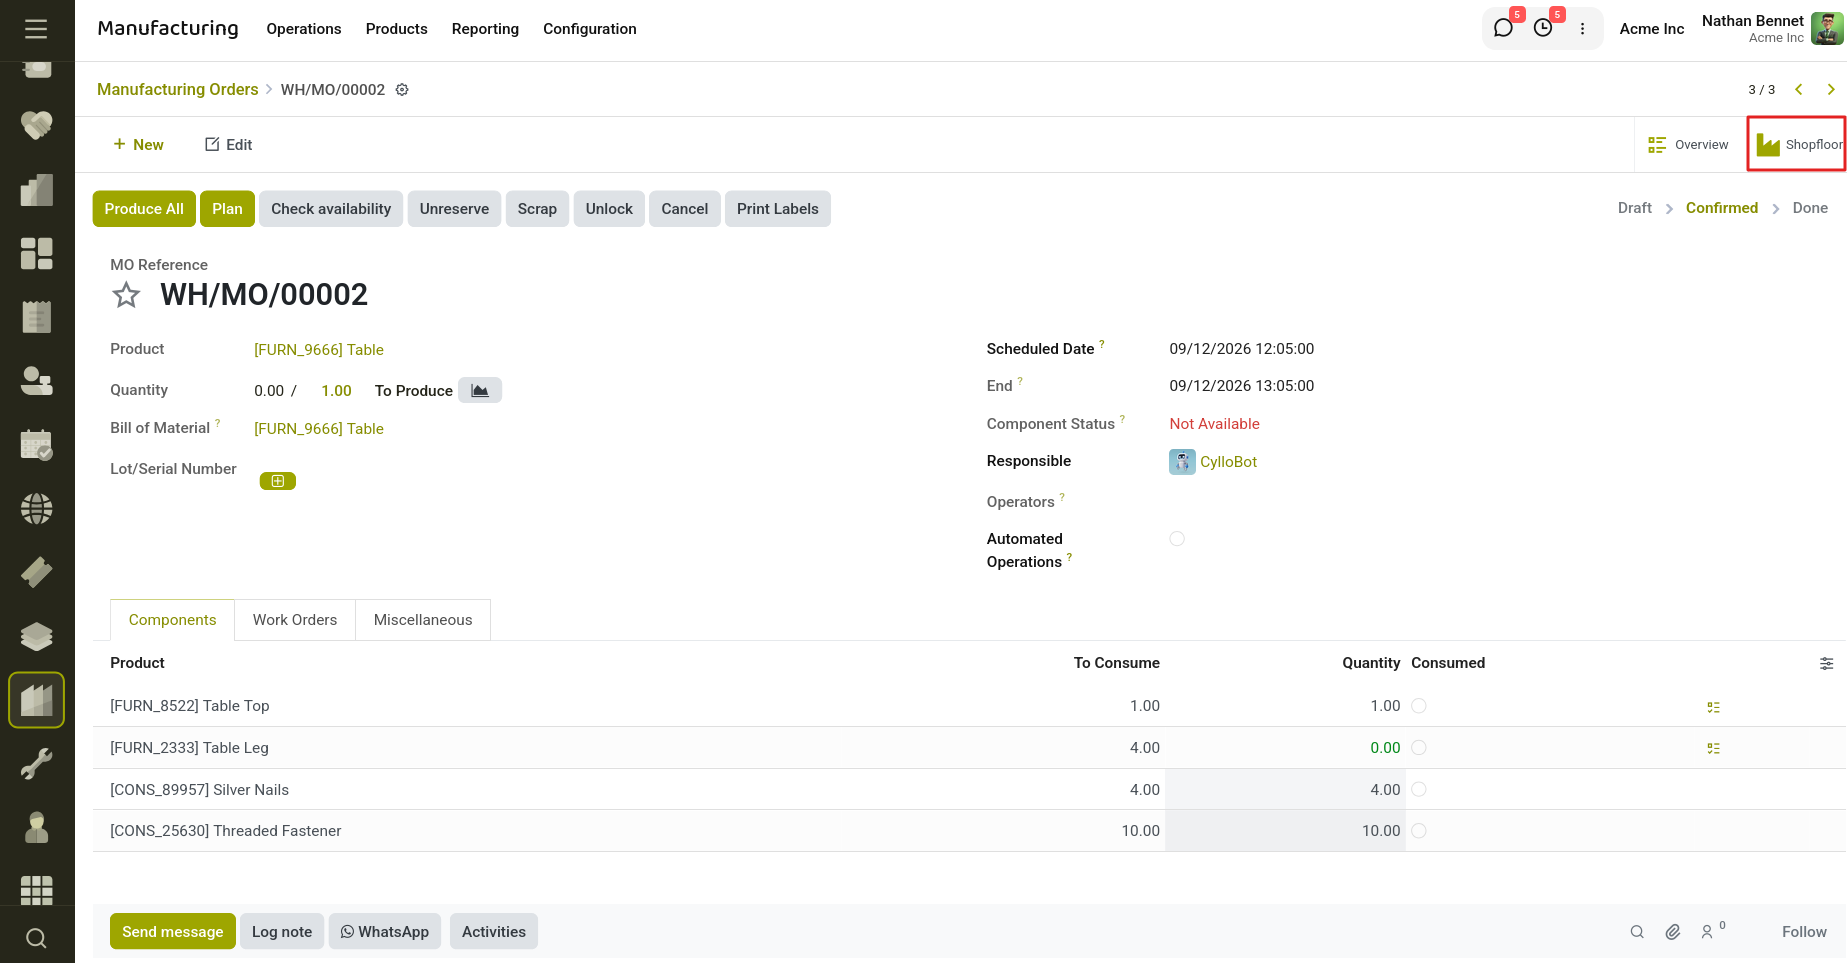
Fig 1.1 — Opening Shop Floor from a Manufacturing Order.
1.2 Work Center Selection (Home View)
When you first open the screen, you see a card for every work center. Each card shows:
- Work center name and code
- OEE (Overall Equipment Effectiveness) percentage
- Total blocked time for the work center
- A lock / unlock toggle — used to mark the work center as blocked or to release a blockLive counts of work orders that are in progress and completed Click any work center card to drill into its work orders.
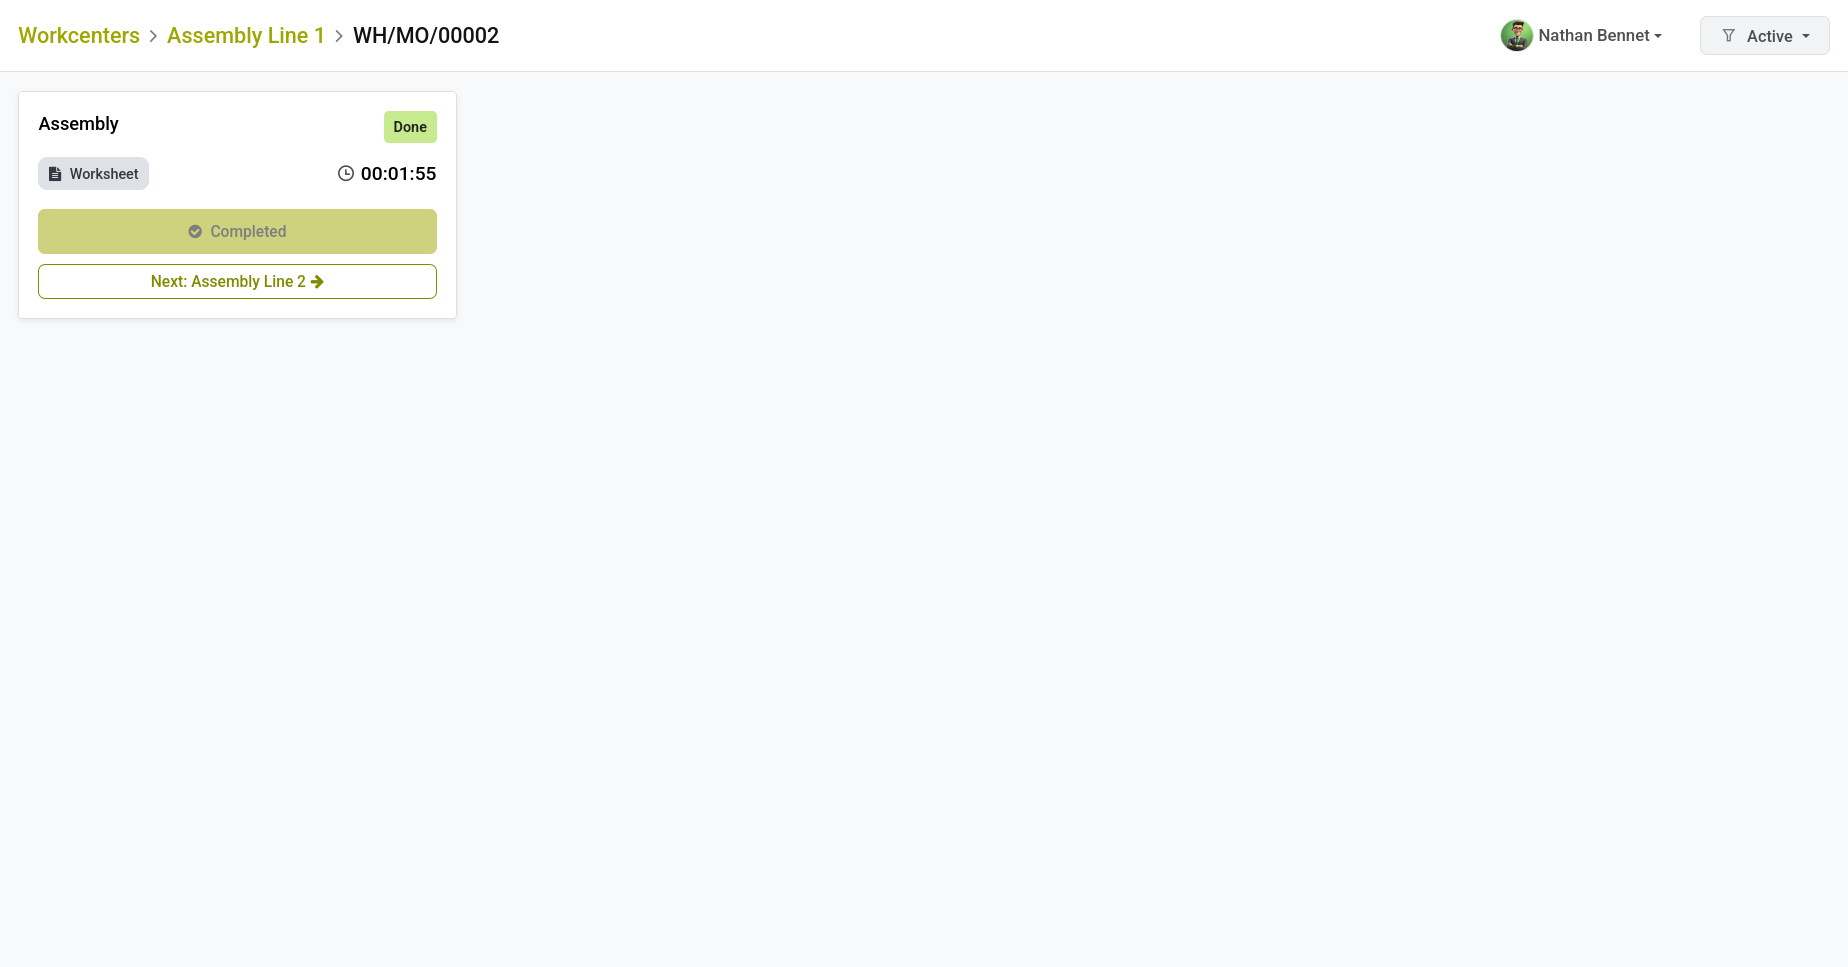
Fig 1.2 — Opening Shop Floor from a Manufacturing Order.
1.3 Running a Work Order
Each work order in the expanded card view has its own timer and action buttons:
- Start - Begins the work order. If no operator is currently selected, the screen tries to use the employee linked to your own account; the operator is then linked to the manufacturing order automatically.
- Pause - Stops the running timer for that work order (the order moves to Pending) without marking it finished.
- Finish - Completes the work order. Requires an operator to be selected. If this was the last incomplete work order on the order, the manufacturing order is automatically prepared for closing.
- Worksheet - Opens the operation's worksheet (text instructions, a PDF, or an embedded Google Slides preview) in a pop-up, if one has been attached to the operation.
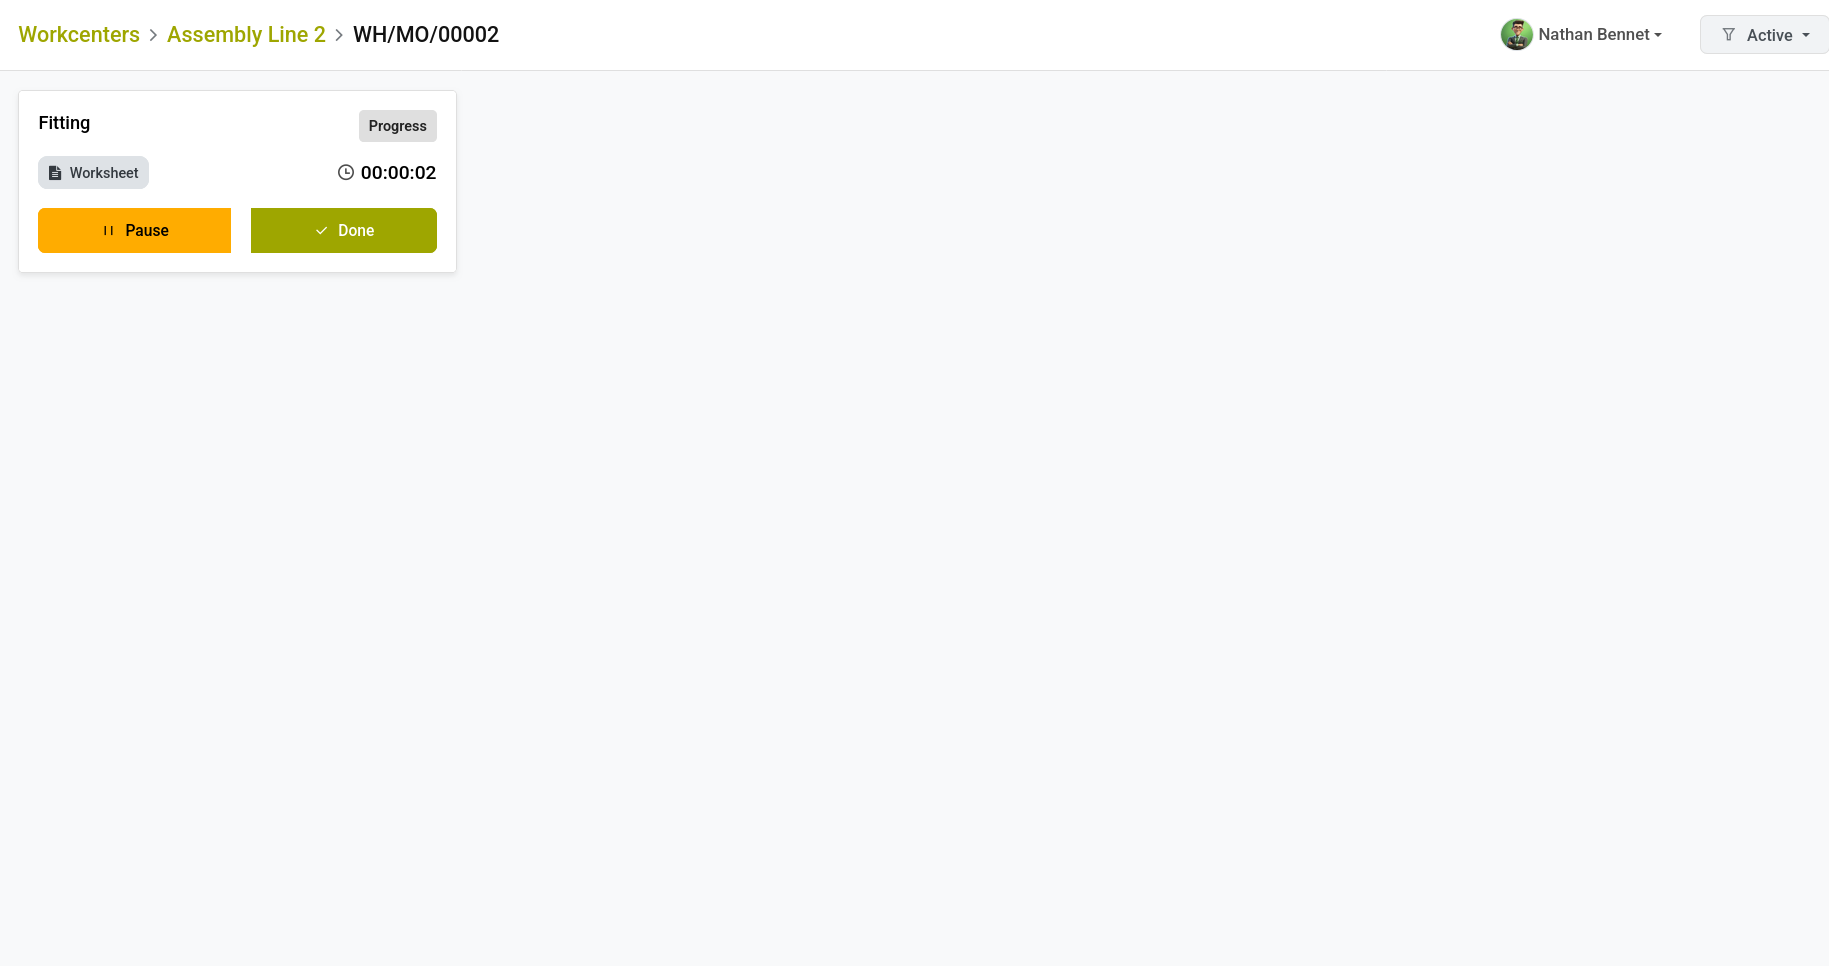
Fig 1.3 — Work Orders.
2. Adjusting Components and Work Orders
Use the kebab (⋮) menu on a manufacturing order card to access the following quick actions. Each opens a pop-up; closing the pop-up automatically refreshes the order list.
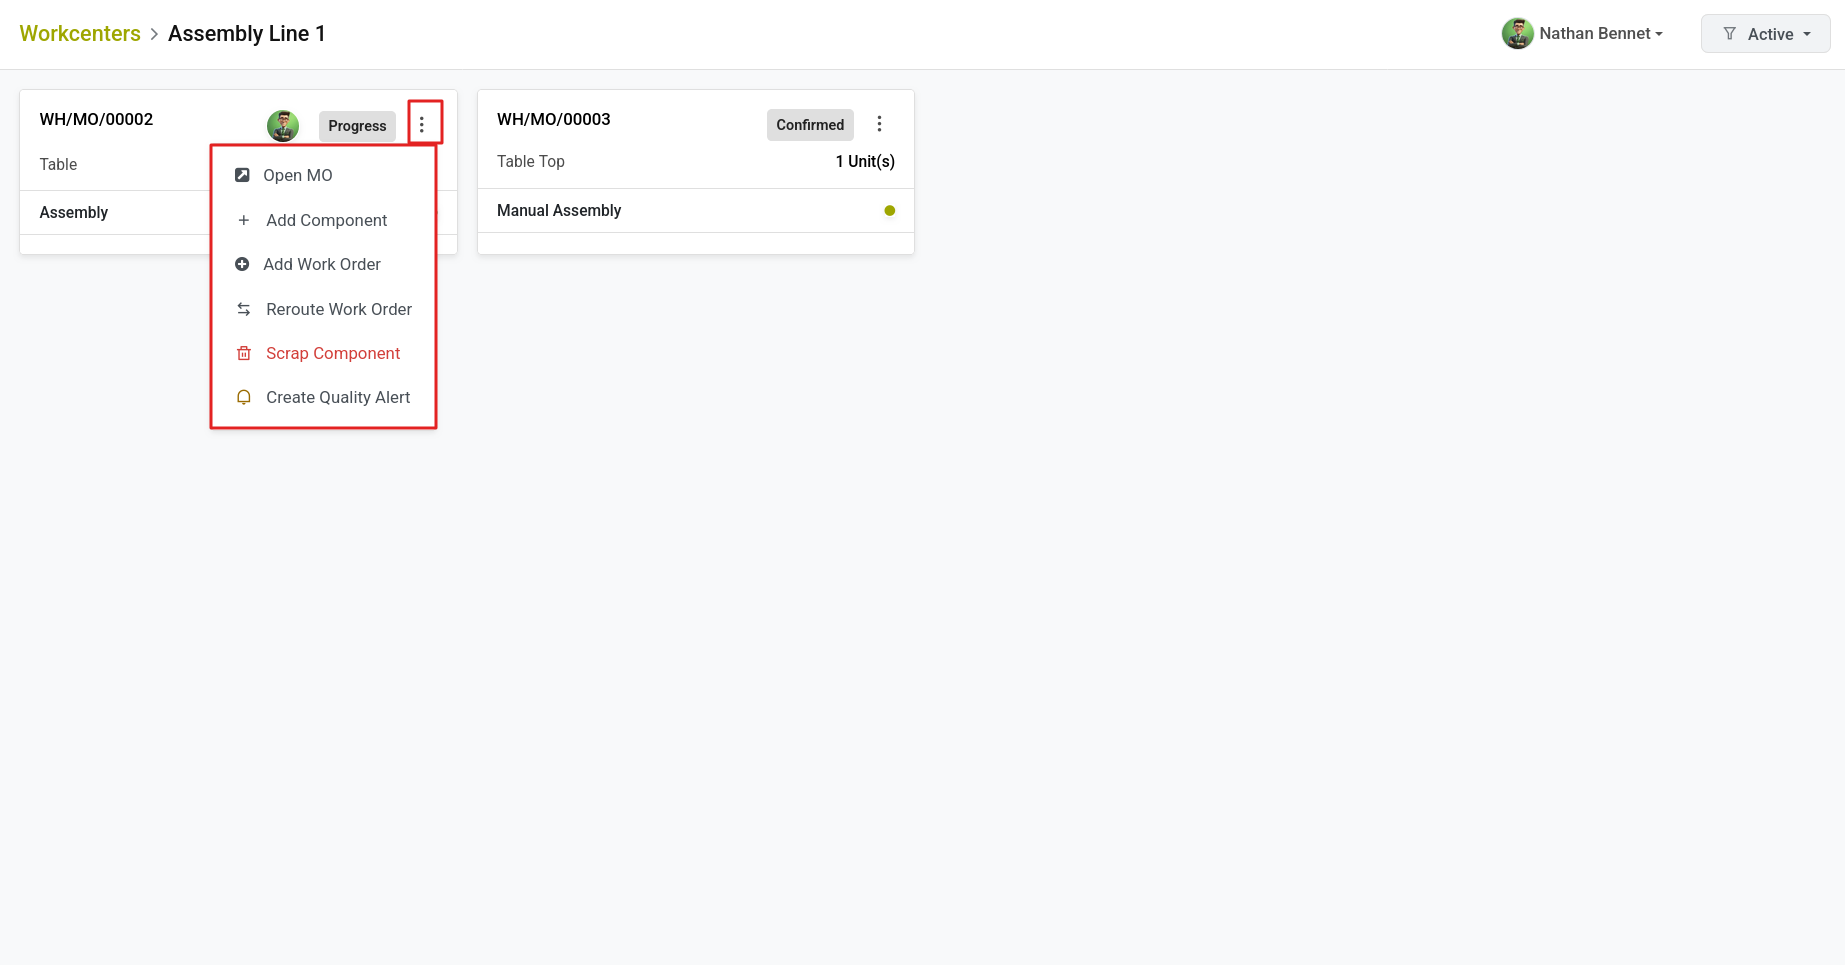
Fig 2.1 — Quick actions for a Work Order.
2.1 Add Component
Use this to add extra raw material to the order, or to top up the quantity of a component that is already planned.
- Open the kebab menu on the order card and choose "Add Component."
- By default, only products already planned on the order are selectable. Toggle "Add New Product" on to choose from any storable or consumable product instead.
- Select the product and enter the quantity to add.
- The form displays the quantity still needed against the order's plan, for reference, next to the field.
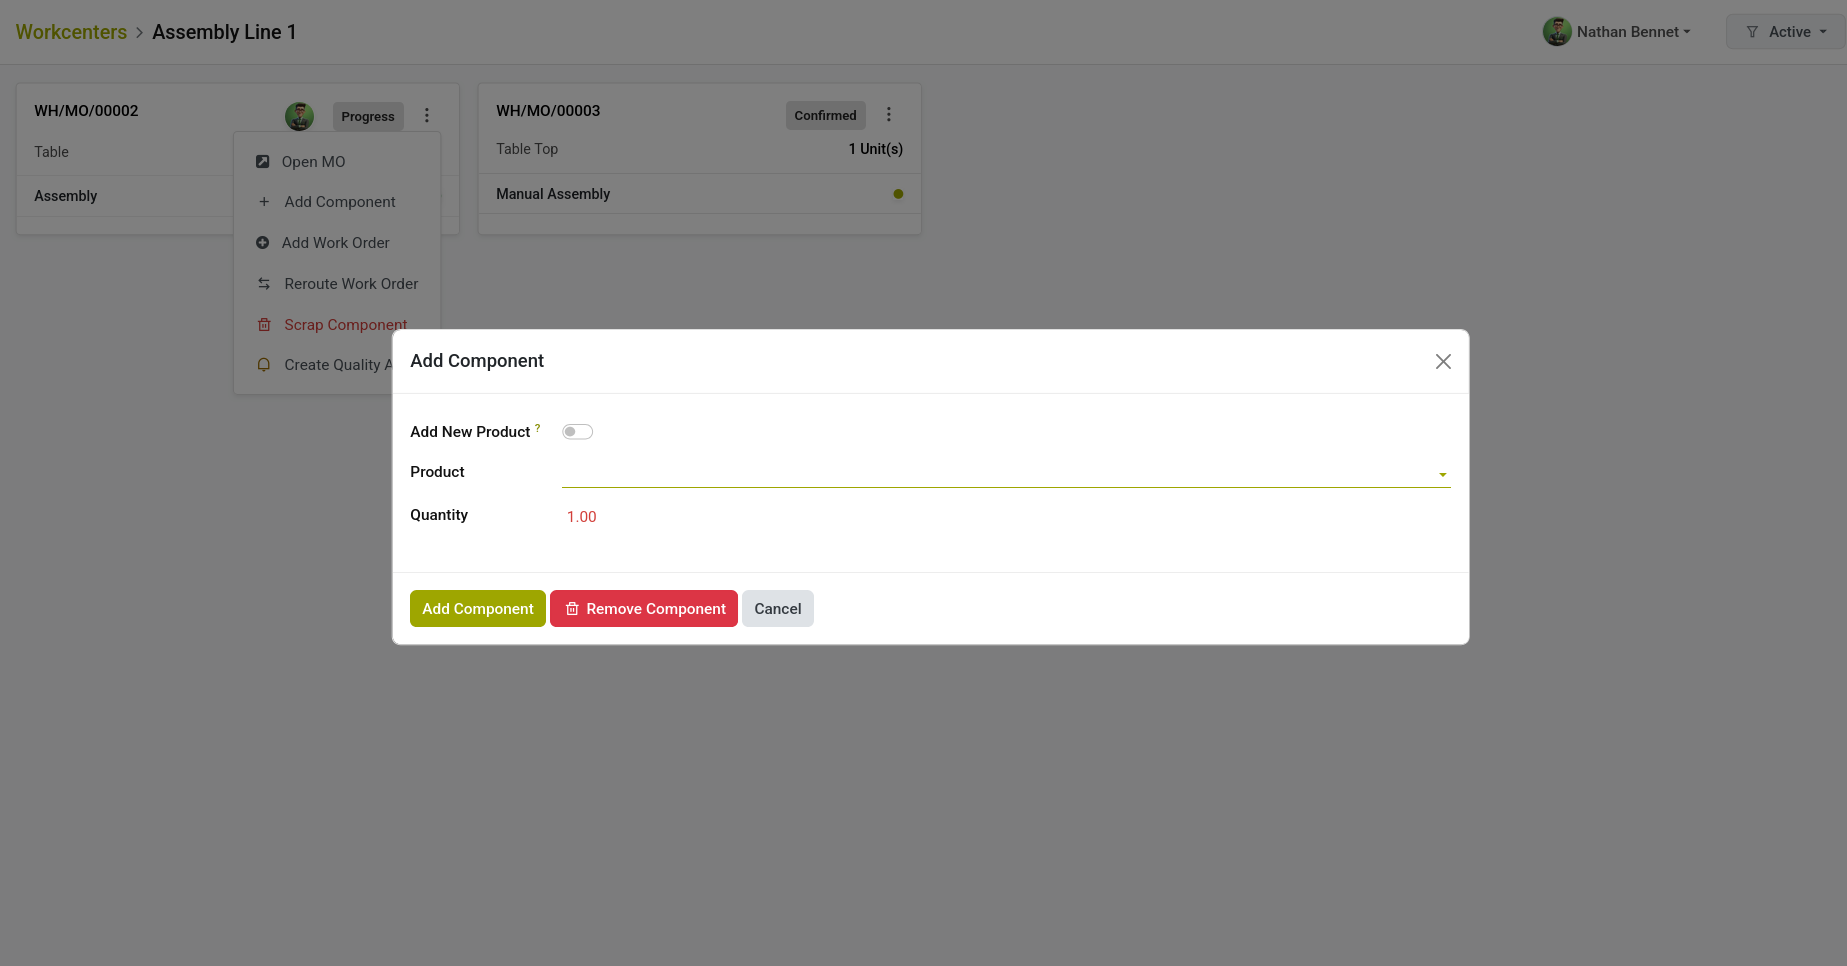
Fig 2.2 — Add Components to Work Order.
- Click "Add Component" to confirm. If the product is already on the order, the new quantity is added to the existing line rather than creating a duplicate.
Fig 2.3 — Updates the Components in the Manufacturing Order.
The same screen also has a Remove Component button, which deletes the selected component line from the order entirely (only for lines that are not yet done or cancelled).
2.2 Scrap Component
Use this to record material that was damaged or lost during production.
- Open the kebab menu on the order card and choose "Scrap Component."
- Select the component (only components already planned on the order are selectable), the quantity, and optionally a reason.
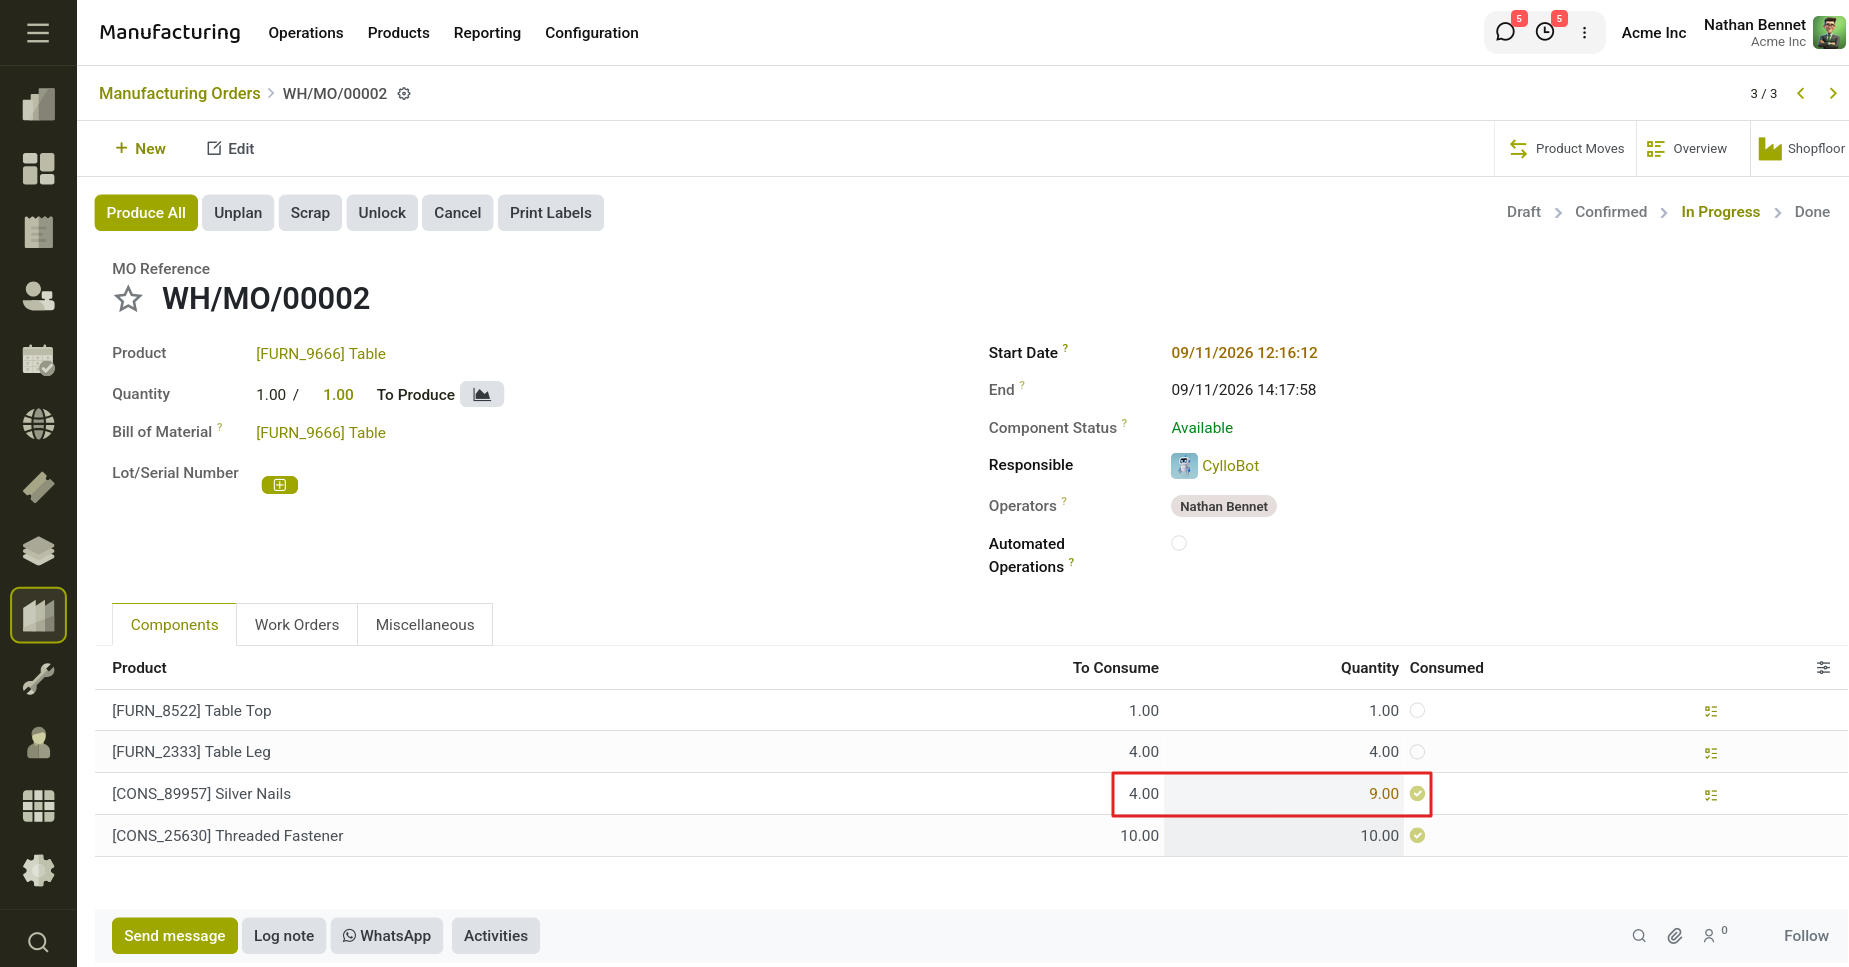
Fig 2.4 — Remove the component to scrap.
- Click "Scrap" to confirm.
Note
The quantity entered cannot exceed the total planned quantity for that component on the order, and must be greater than zero. The system will block the action and show a message if either condition is not met.
2.3 Reroute Work Order
Use this to move the order's current operation to a different work center — for example, if the usual machine is unavailable.
- Open the kebab menu on the order card and choose "Reroute Work Order." (This option only acts on the order's current active, unfinished work order.)
- Choose the new work center.
- Click "Confirm."
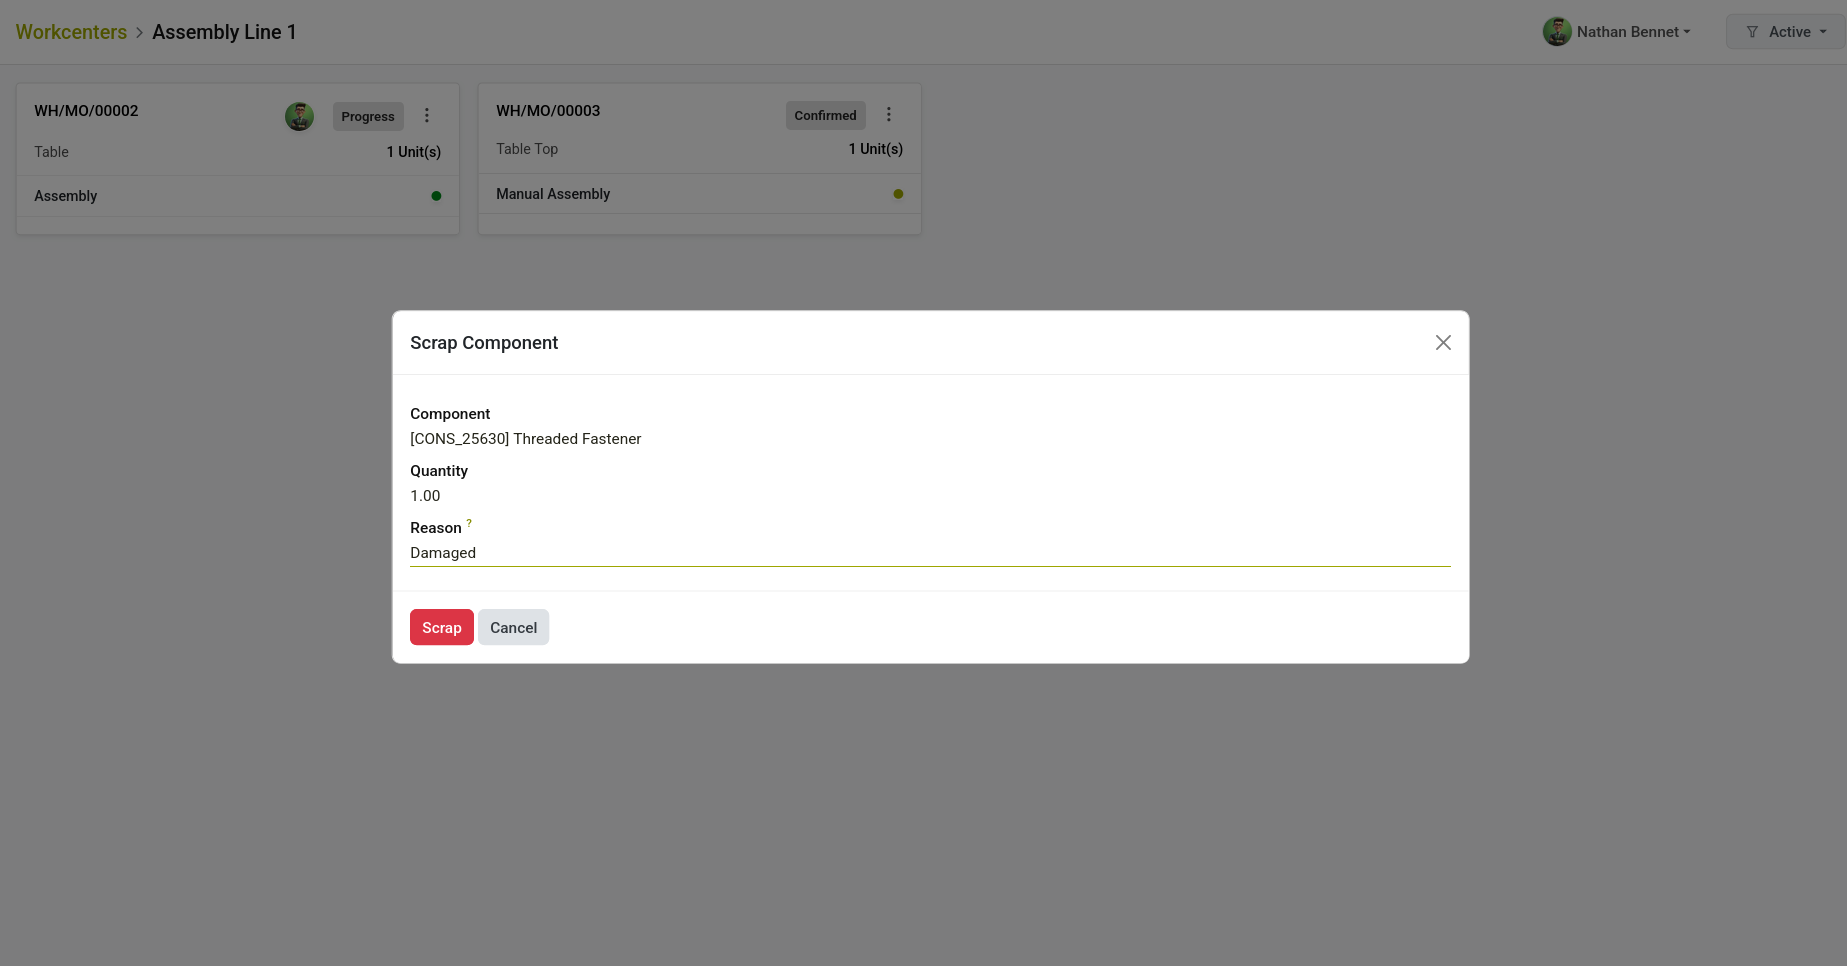
Fig 2.5 — Reroute or change the order to another work center.
3. Shopfloor Quality
The Shopfloor Quality module (cyllo_shopfloor_quality) is a frontend integration bridge that brings quality control directly into the Cyllo Shop Floor tablet interface. Instead of leaving the shop floor screen to check or record quality results, workers can now access all Quality Check controls from within the same MO card they are already working on.
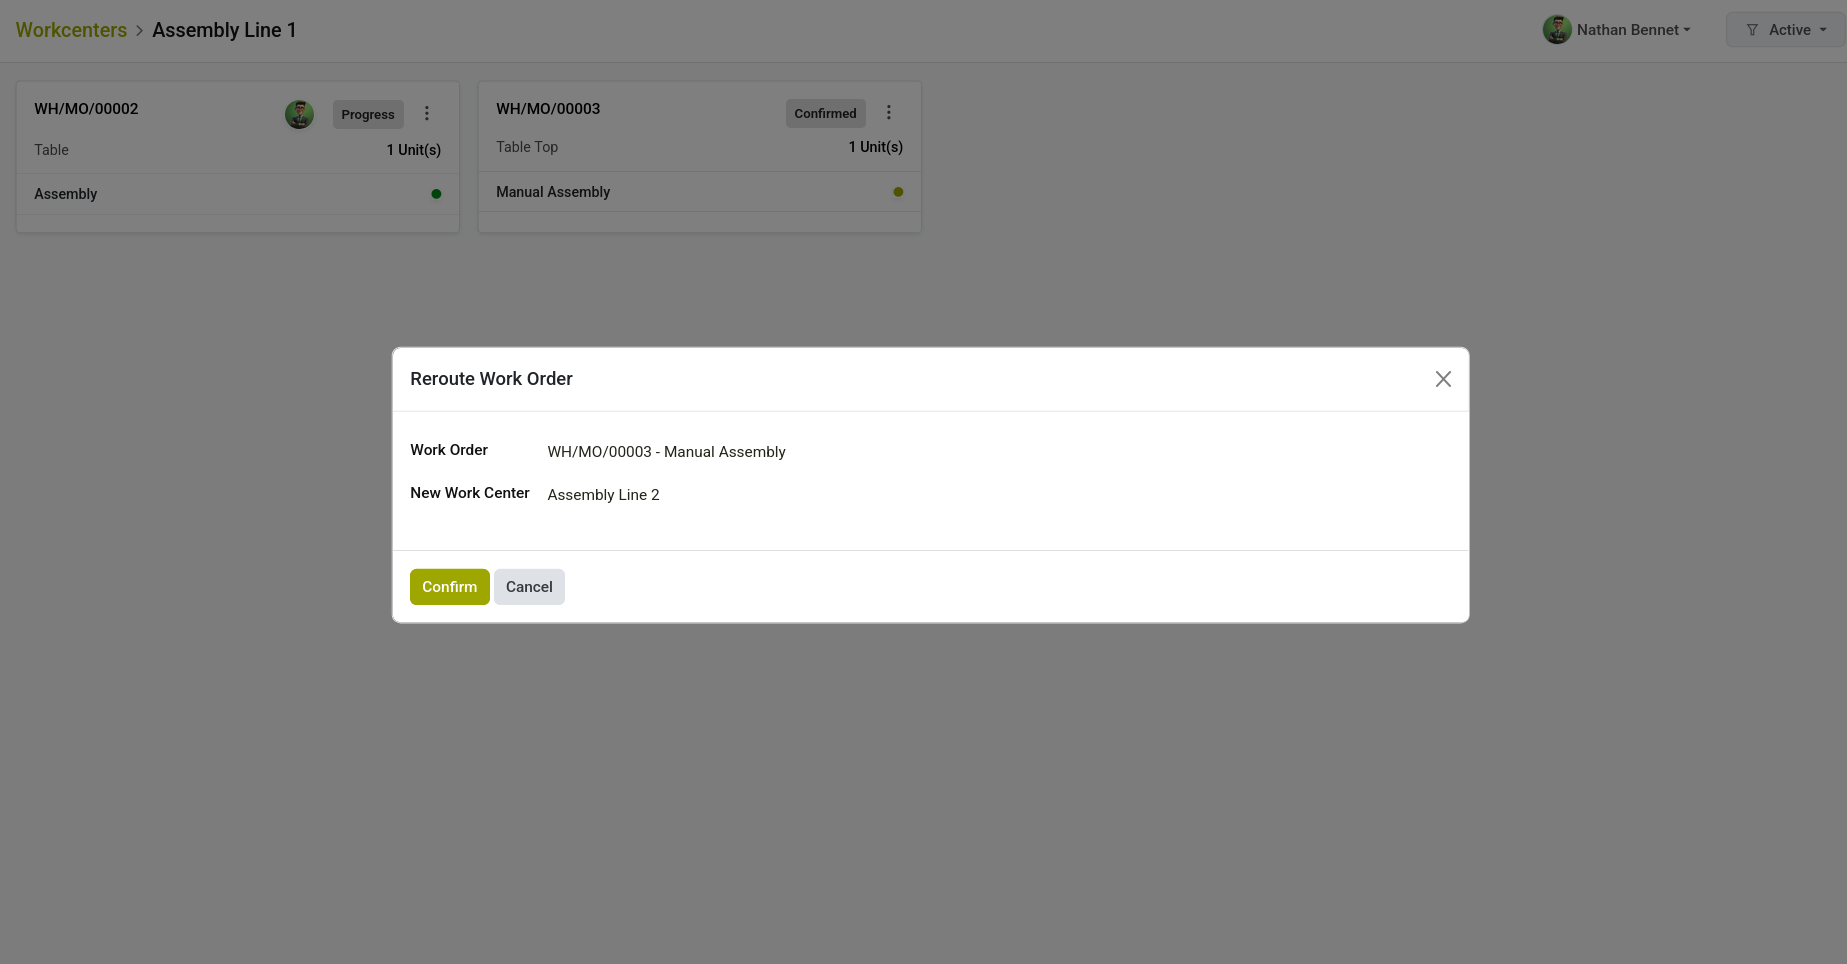
Fig 3.1 — Quality Check on Work Orders.
3.1 Performing a Quality Check
Follow these steps when the QC button appears on an MO card:
- Navigate to the Shop Floor view on your tablet or workstation.
- Locate the Manufacturing Order card for your current job. The card must be in "To Close" or "Done" state for the QC button to appear.
- Look at the bottom of the MO card. You will see the QC button to the left of the dropdown (three-dot) menu.
- Tap the QC button. The colour tells you where you stand:
- Red button : No checks have been done. Tap to start.
- Yellow button : Some checks are done. Tap to continue.
- Green button : All checks are done. Tap to review if needed.
- The Quality Check sidebar opens on the right. Work through each check in the list.
- For each check, enter the required result (e.g., Pass/Fail, a measured value).
- When all checks are completed, the button on the card turns green. The MO is now ready to be closed.
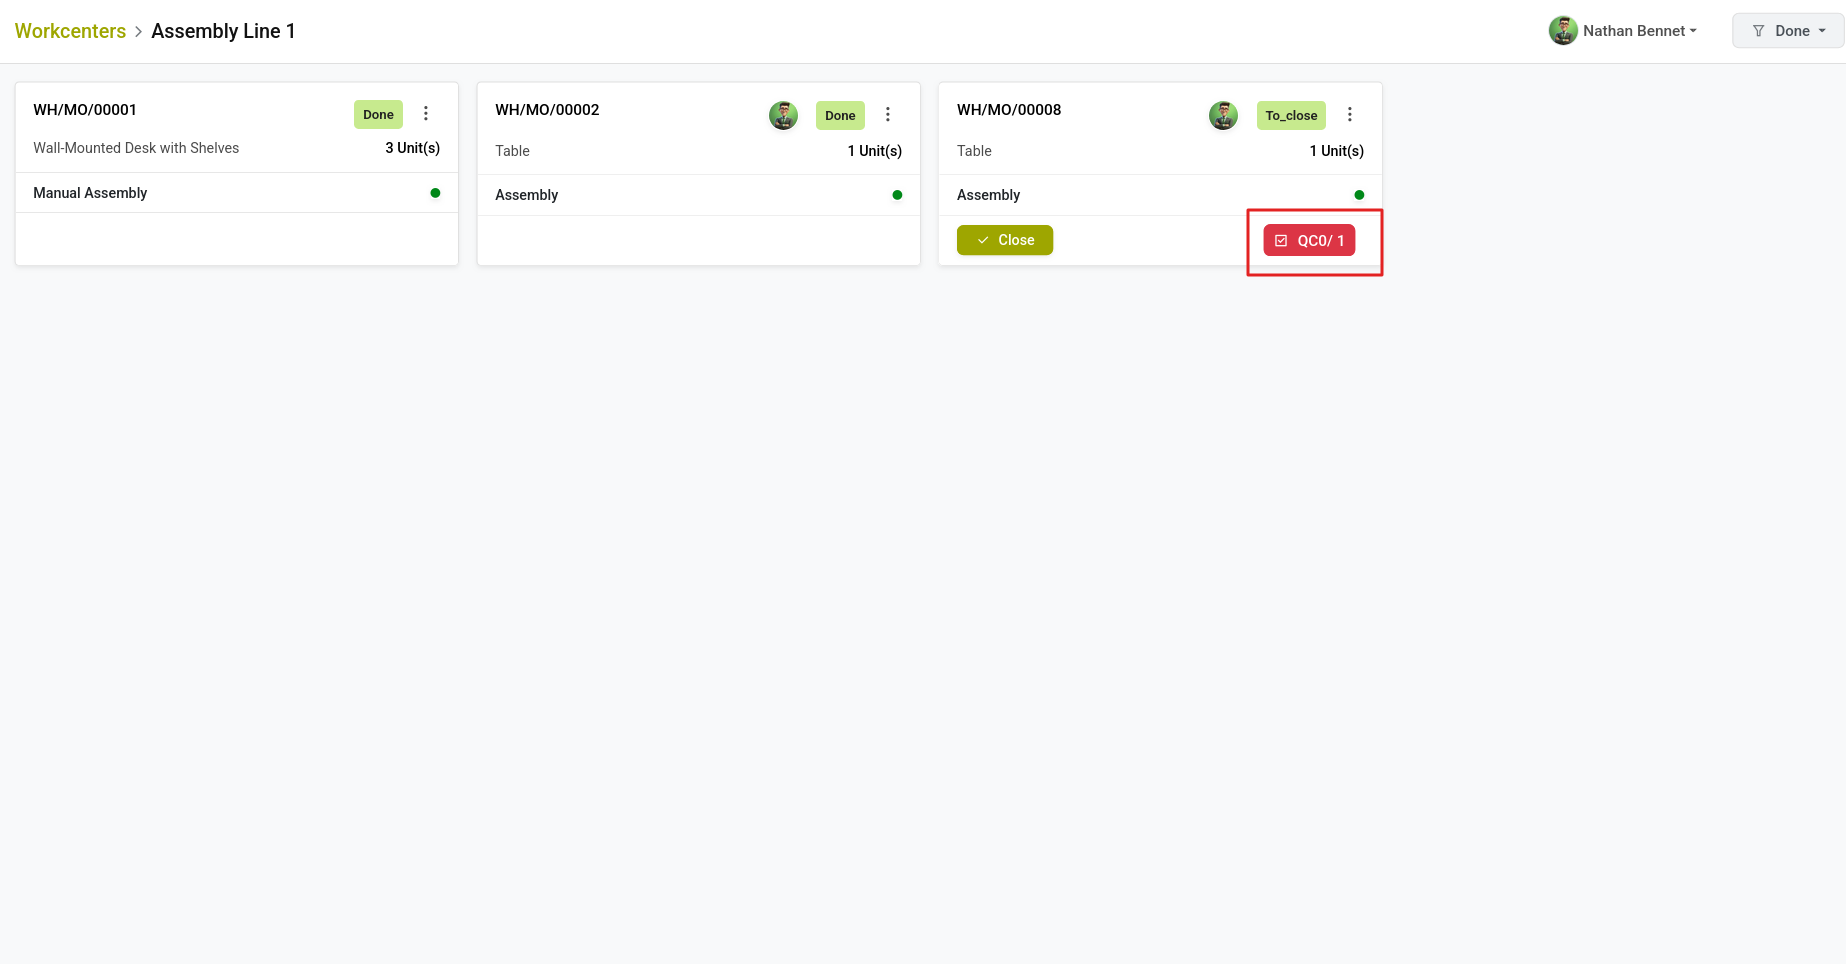
Fig 3.1 — QC button on work orders.
3.2 Creating a Quality Alert
Use this when you notice a quality issue that needs to be investigated or escalated, even if the production itself is continuing.
- Find the MO card where the quality issue was observed.
- Tap the dropdown menu (three-dot icon) in the card footer.
- Select "Create Quality Alert" from the dropdown options.
- A popup form opens. The Product field is already filled in from the MO.
- Fill in the remaining fields:
- Title — A short description of the issue (e.g., "Surface scratches on batch")
- Description — Detailed observations
- Assignee — The quality person responsible
- Deadline — When this needs to be resolved
- Tap Save. The alert is created and will appear in the Quality Alerts list for supervisors.
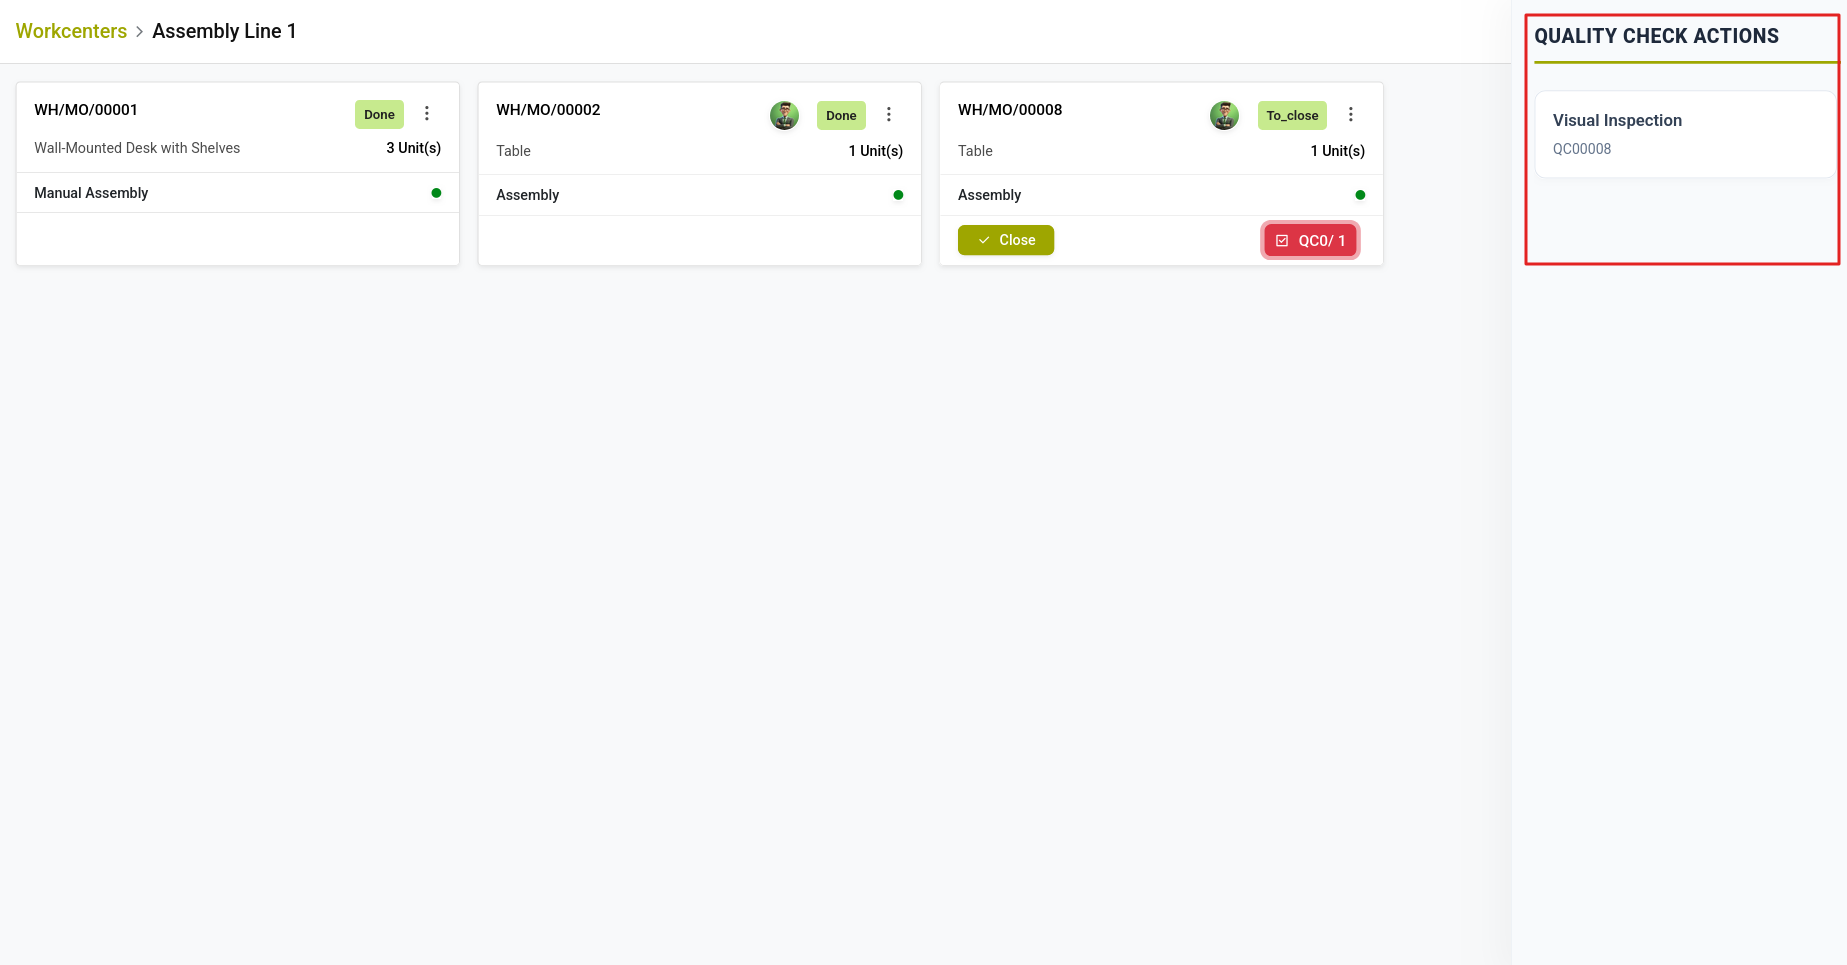
Fig 3.2 — QCreate Quality Alert from work Orders.