

Cyllo Hire to Retire Documentation
Introduction
Cyllo's Hire-to-Retire process is the complete employee lifecycle workflow — a connected, end-to-end journey that begins the moment a vacancy is created and ends when an employee's final settlement is paid and their record is archived. Unlike standalone HR tools where each stage lives in a different system, Cyllo manages every step in a single unified platform — recruitment, onboarding, contracts, attendance, timesheets, leave, payroll, and offboarding all flow seamlessly from one stage to the next without manual data re-entry. This document maps the full Hire-to-Retire journey in Cyllo — showing exactly what happens at each stage, which module handles it, and how the data moves forward automatically so nothing falls through the gaps.
1. Hire Talent Acquisition
1.1 Job Position Creation
The Hire-to-Retire journey begins with an approved vacancy. A Job Position defines the formal role being filled — the department it belongs to, how many seats are needed, and whether recruitment is open or on hold.
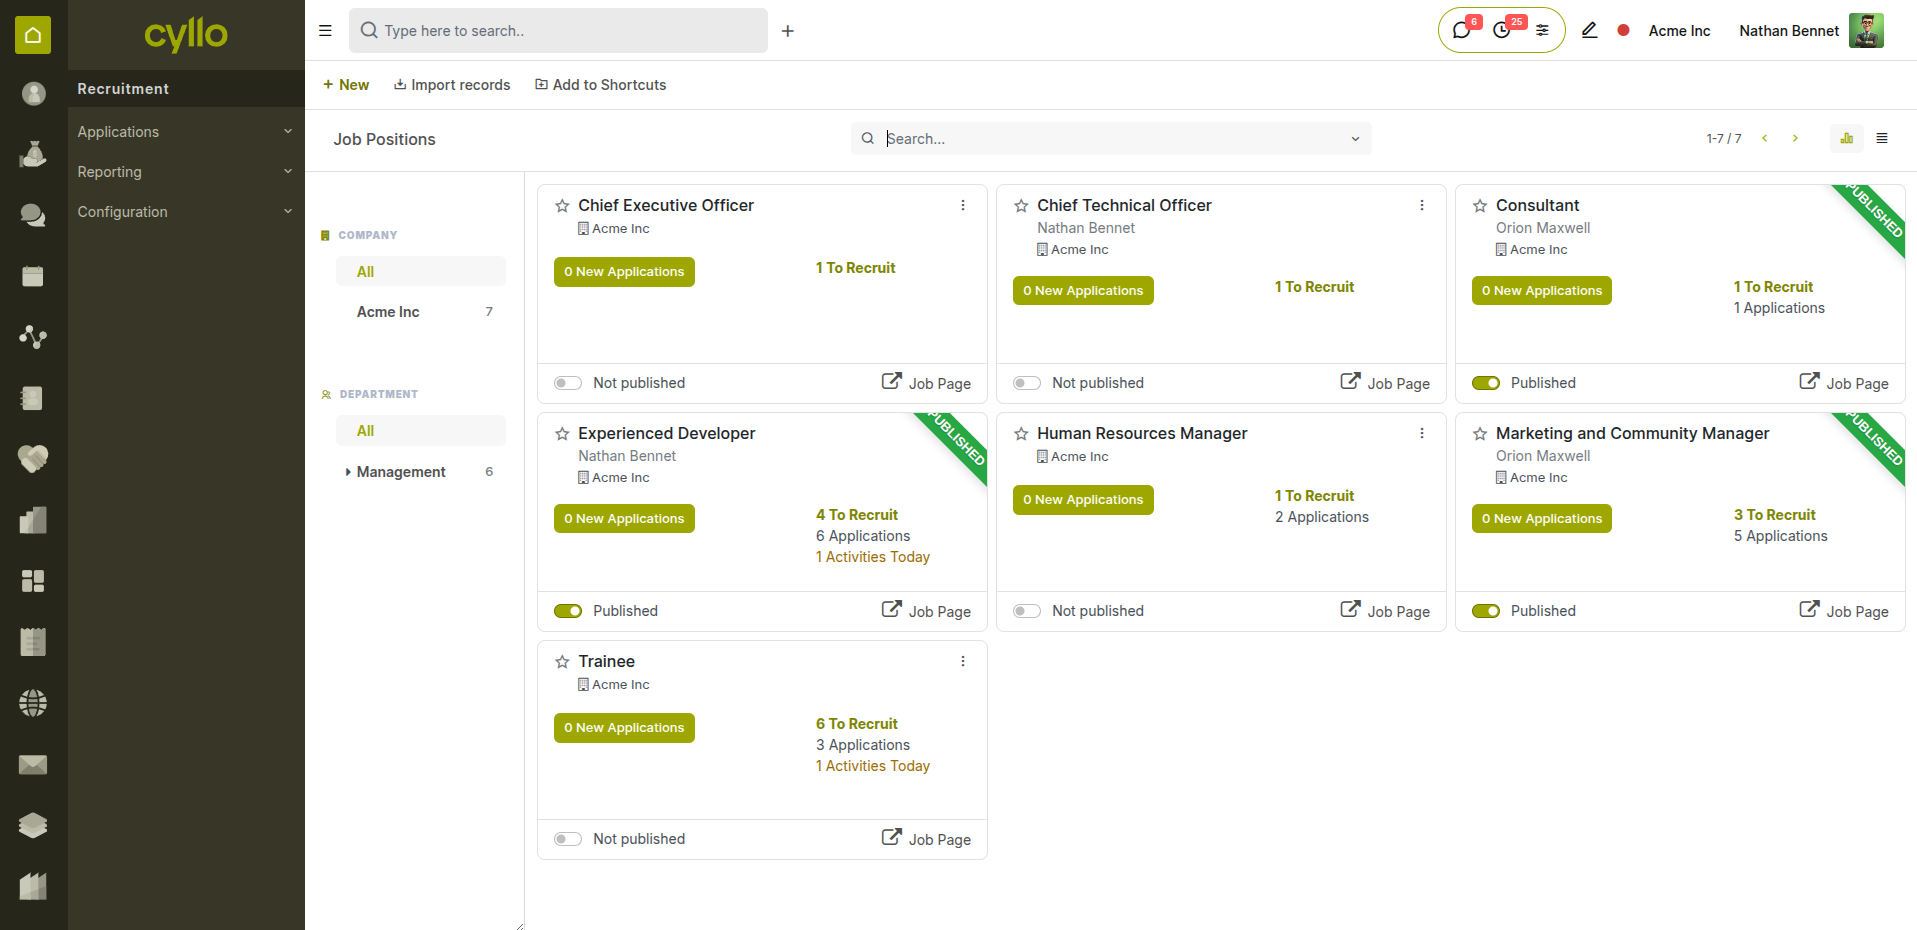
Fig 1.1 — Job position list showing open vacancies with department and expected headcount
How to Create a Job Position:
- Go to Recruitment → Job Positions → New
- Enter the Job Position name (e.g., Finance Manager, Warehouse Supervisor)
- Select the Department it belongs to
- Set the Expected New Employees count — the number of seats to fill
- Click Start Recruitment to open the position for applications
- The position is now visible in the recruitment pipeline
Key Fields
- Job Position: The formal role name linked to a department and org chart.
- Department: The business unit this vacancy belongs to.
- Expected New Employees: How many people need to be hired for this position.
- Status: Recruitment Open → Filled → On Hold.
Note
Job Positions drive headcount reporting. When a candidate is hired and converted to an employee, the expected headcount for that position decreases automatically.
1.2 Job Advertisement & Application
Once a vacancy is open, it can be published to the company website with one click — allowing candidates to apply online directly, with their applications flowing automatically into the recruitment pipeline.
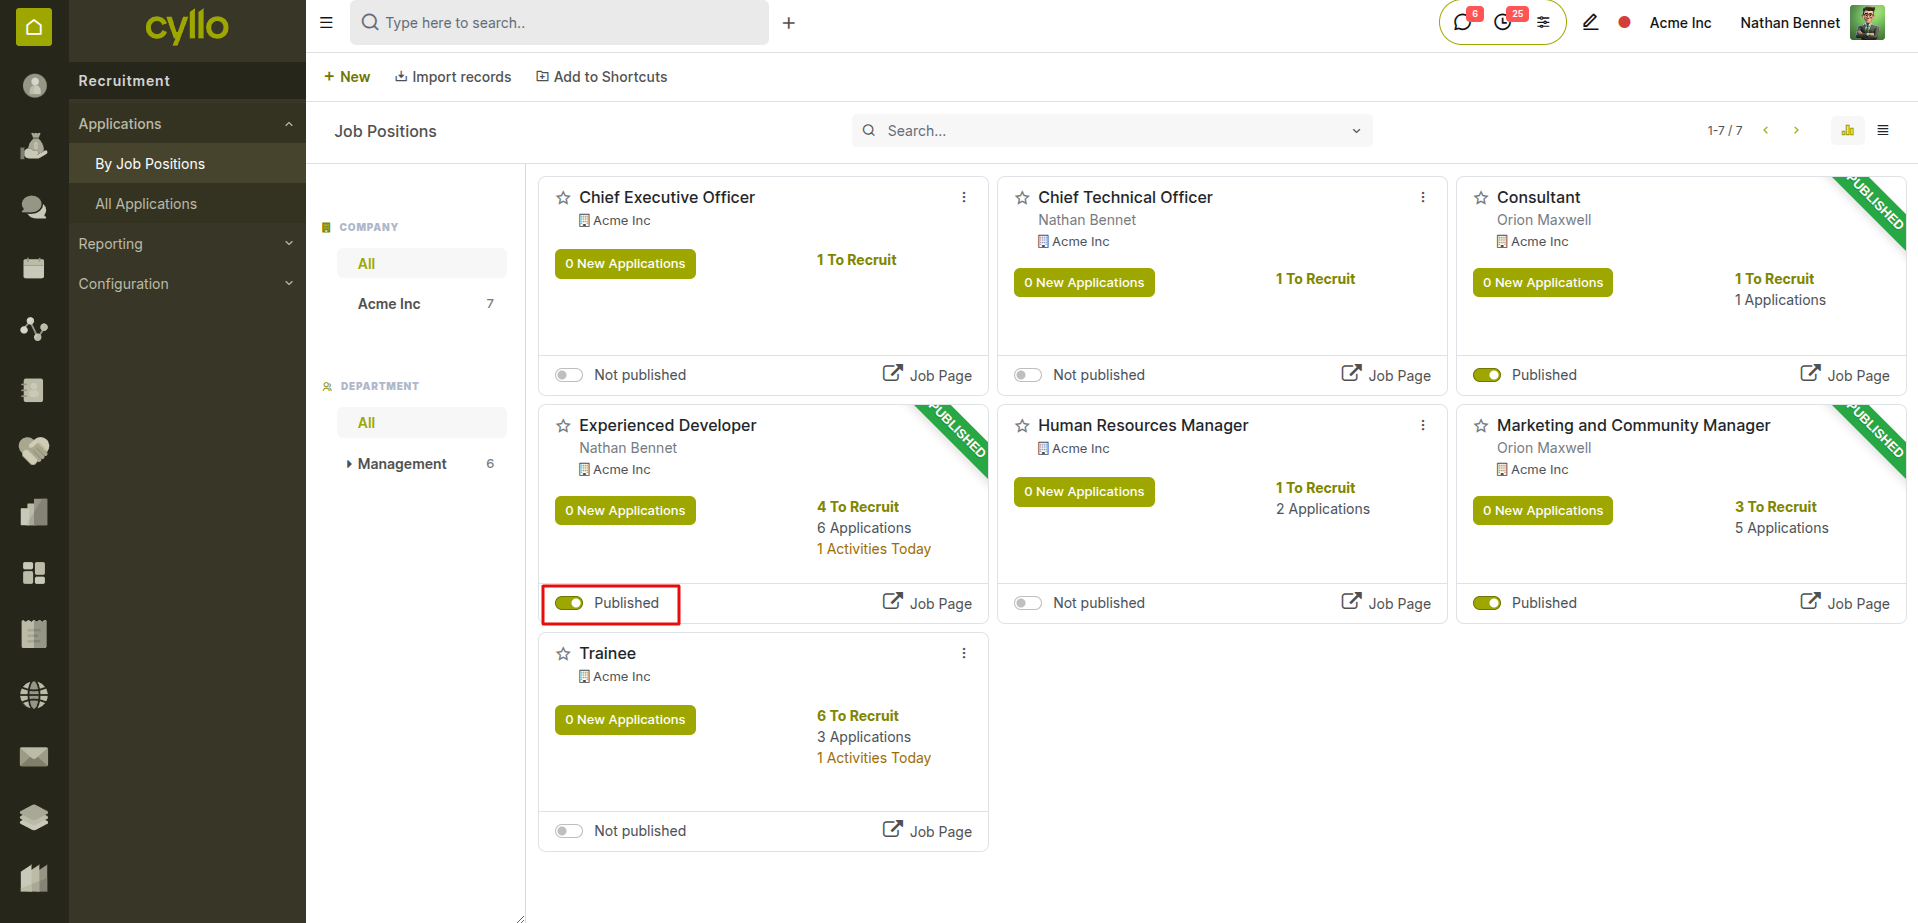
Fig 1.2 — Job advertisement published on the company website with Apply button
How to Publish a Job Vacancy:
- Open the Job Position in Recruitment → Job Positions
- Click Publish to Website to make the vacancy live on the company careers page
- Copy the vacancy link to share on LinkedIn, WhatsApp, or email
- Candidates apply via the online form — their applications appear automatically in the pipeline
- Alternatively, create applications manually: Recruitment → Applications → New
Note
Applications received from the website, email, or manual entry all land in the same Kanban pipeline — giving recruiters one unified view of all candidates regardless of how they applied.
1.3 Screening & Interview Pipeline
All candidate applications are managed in a Kanban pipeline — moving from initial screening through interviews to a final decision. Every interaction, document, and note is logged on the application record.
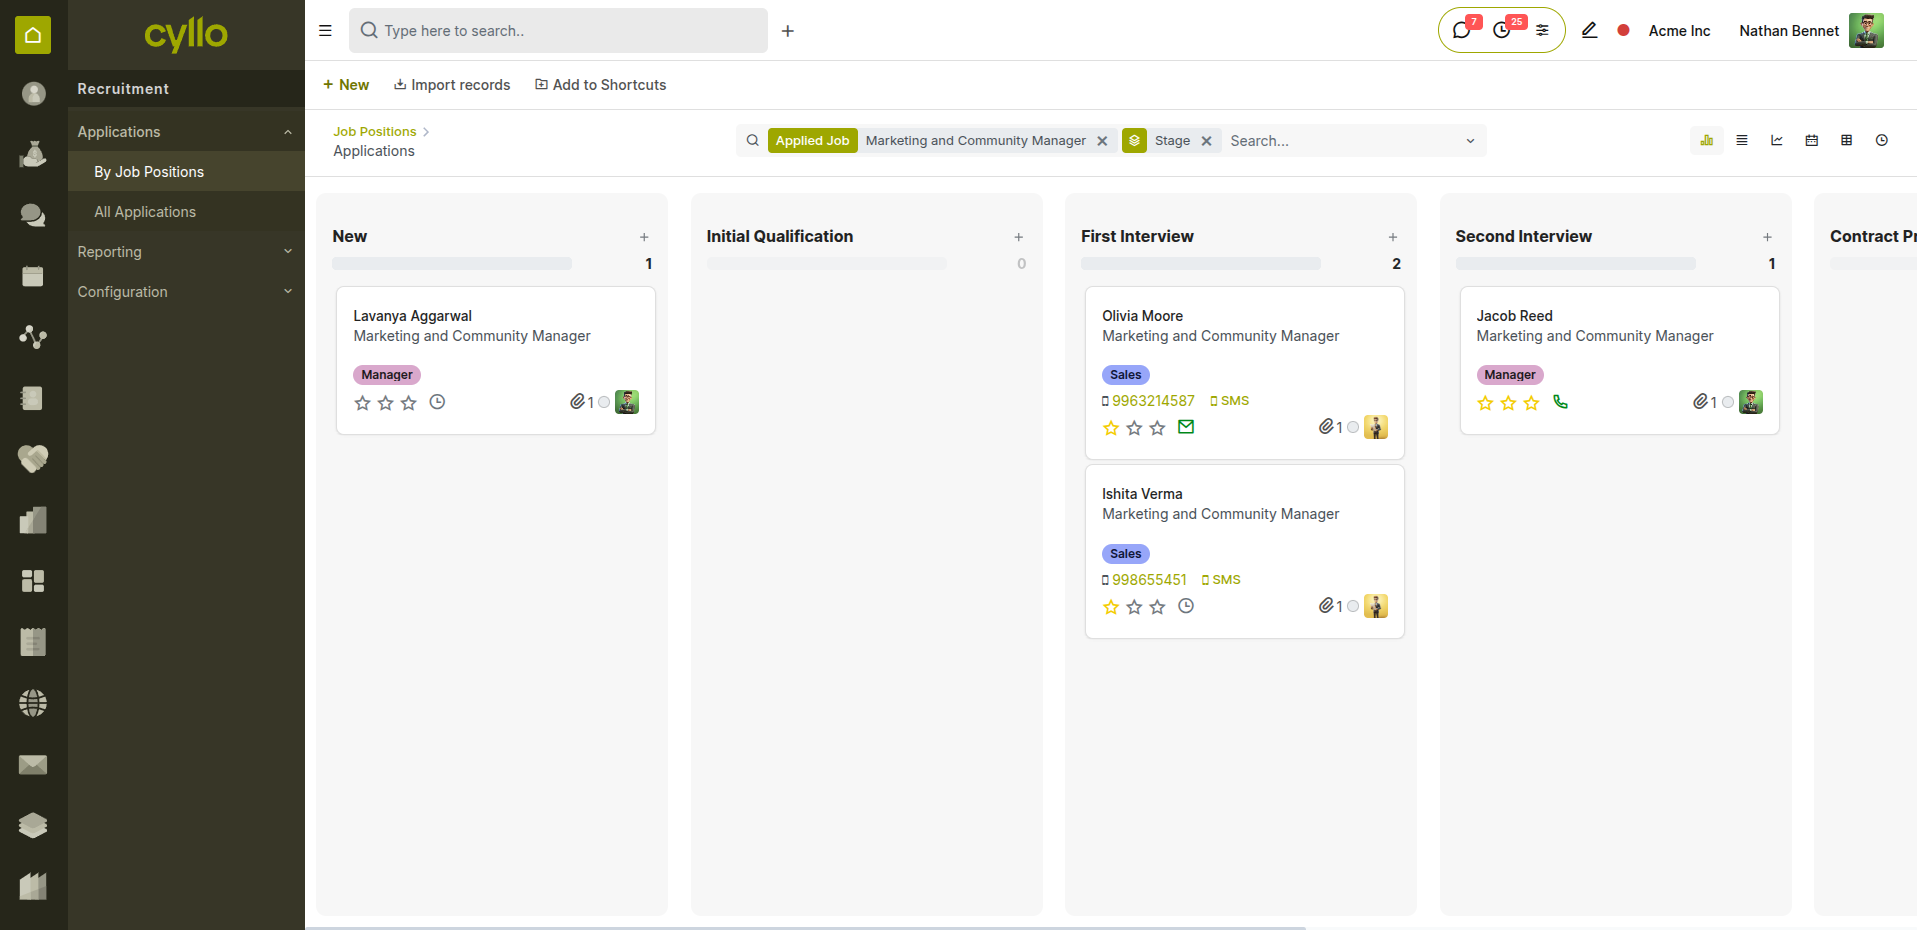
Fig 1.3 — Recruitment pipeline in Kanban view with candidates across interview stages
How to Manage the Recruitment Pipeline:
- Go to Recruitment → Applications → All Applications
- Drag candidate cards across stages as they progress
- Open a candidate record to log interview feedback, schedule meetings, and send emails
- Use the Schedule Activity button to set interview reminders for the hiring manager
- Add an Appreciation rating (Good, Very Good, Excellent) to each candidate for comparison
- Move declined candidates to the Refused stage — preserving the record for future reference
Pipeline Stages:
- New Application: Candidate has applied — initial review pending.
- Initial Qualification: Screened against minimum job requirements.
- First Interview: Interview scheduled or completed.
- Second Interview: Follow-up or panel interview stage.
- Contract Proposed: Offer extended — awaiting candidate response.
- Contract Signed: Contract executed by both parties.
- Hired: Candidate converted to an employee record.
Note
All emails, interview notes, and documents sent from the recruitment pipeline are logged automatically in the chatter — creating a full audit trail for every hiring decision.
1.4 Offer & Contract Proposal
Once a candidate is selected, an offer is prepared and the contract terms are proposed. Cyllo tracks the offer stage and converts the accepted candidate directly into an employee record without re-entering any data.
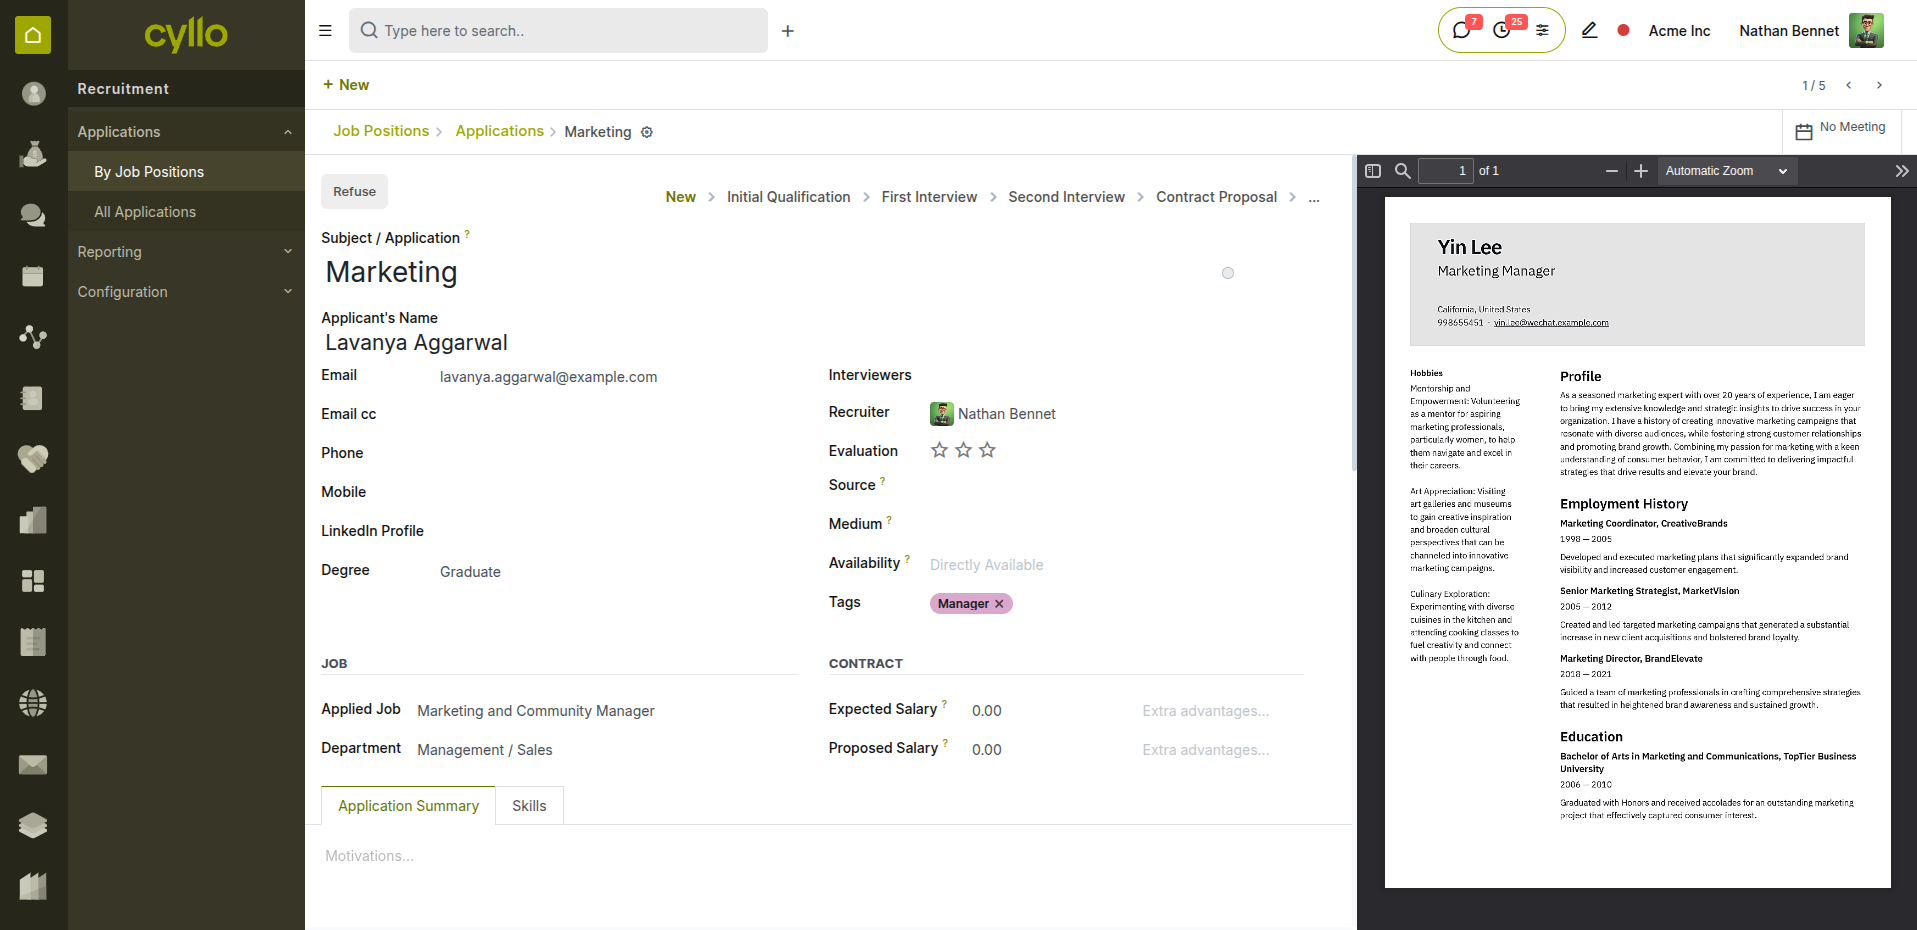
Fig 1.4 — Application form at "New" stage with offer details and next steps
How to Propose a Contract:
- Open the candidate's application record
- Move the stage to Contract Proposed
- Document the agreed salary, start date, and contract terms in the application notes
- Send the offer letter via email directly from the chatter
- Once the candidate accepts and signs, move the stage to Contract Signed
- Click Create Employee — Cyllo copies all candidate details into a new employee record automatically
Note
The Create Employee button on a recruited application pre-fills the employee form with the candidate's name, job position, department, and contact details — saving HR teams significant data entry time.
2. Onboard — Employee Setup
2.1 Employee Record Creation
The employee record is the foundation of everything that follows in the Hire-to-Retire journey. Created from the recruitment application, it becomes the single source of truth for all HR, payroll, and operational data.
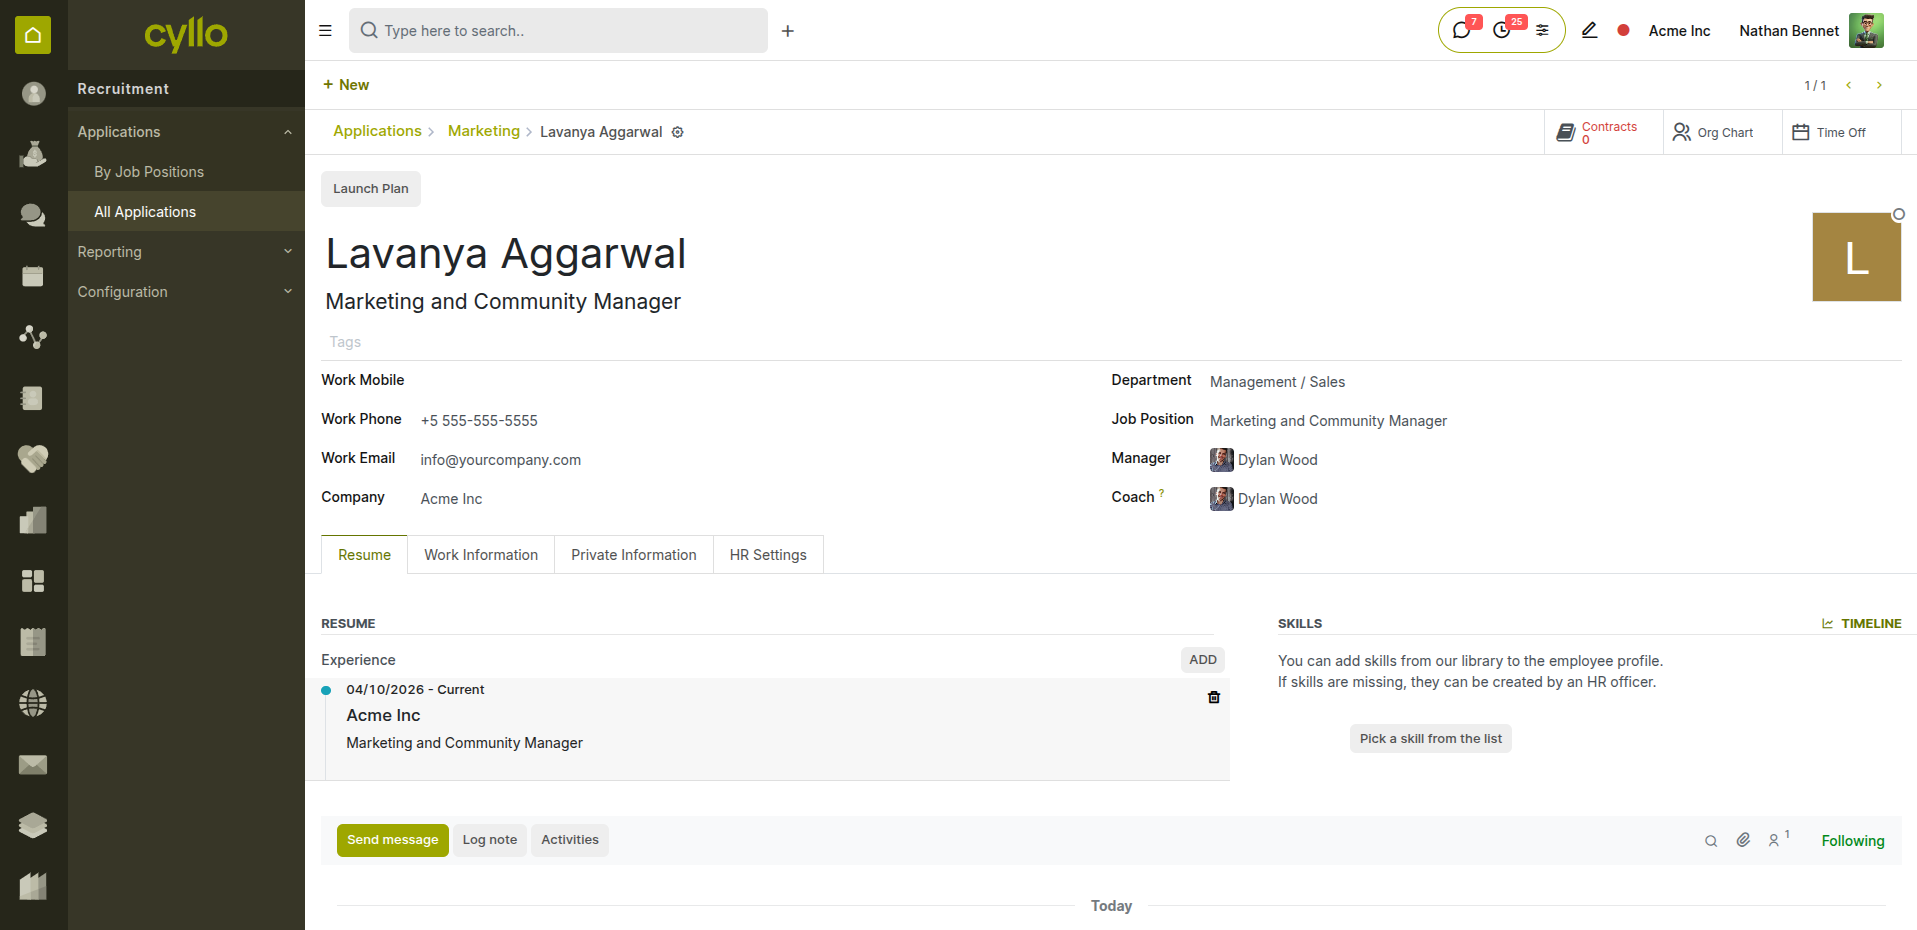
Fig 2.1 — New employee record created from recruitment with pre-filled details
How to Complete the Employee Record:
- Open the newly created employee record (from Recruitment → Create Employee, or Employees → Employees → New)
- Verify the pre-filled Name, Job Position, and Department
- Assign the Manager and Coach
- Configure the Work Information tab: work location, work schedule, timezone
- Complete the Private Information tab: date of birth, nationality, ID number, emergency contact
- Configure the HR Settings tab: link a Related User account, set attendance PIN
- Upload identification documents to the chatter for record-keeping
- Save the record
Key Fields
- Employee Name: Full legal name as it will appear on contracts and payslips.
- Job Position: Formal role linked to department and org chart.
- Manager: Direct reporting line — drives leave and approval workflows.
- Work Schedule: The working hours pattern that drives attendance and payroll.
- Related User: Links the employee to a system login for portal and self-service access.
Note
Complete the Private Information tab carefully at onboarding — date of birth, nationality, and ID numbers are required for payroll compliance, visa tracking, and end-of-service benefit calculations.
2.2 Contract Creation & Activation
Every employee must have an active contract before payslips can be generated. The contract defines their salary, employment type, and the payroll structure used to compute their compensation.
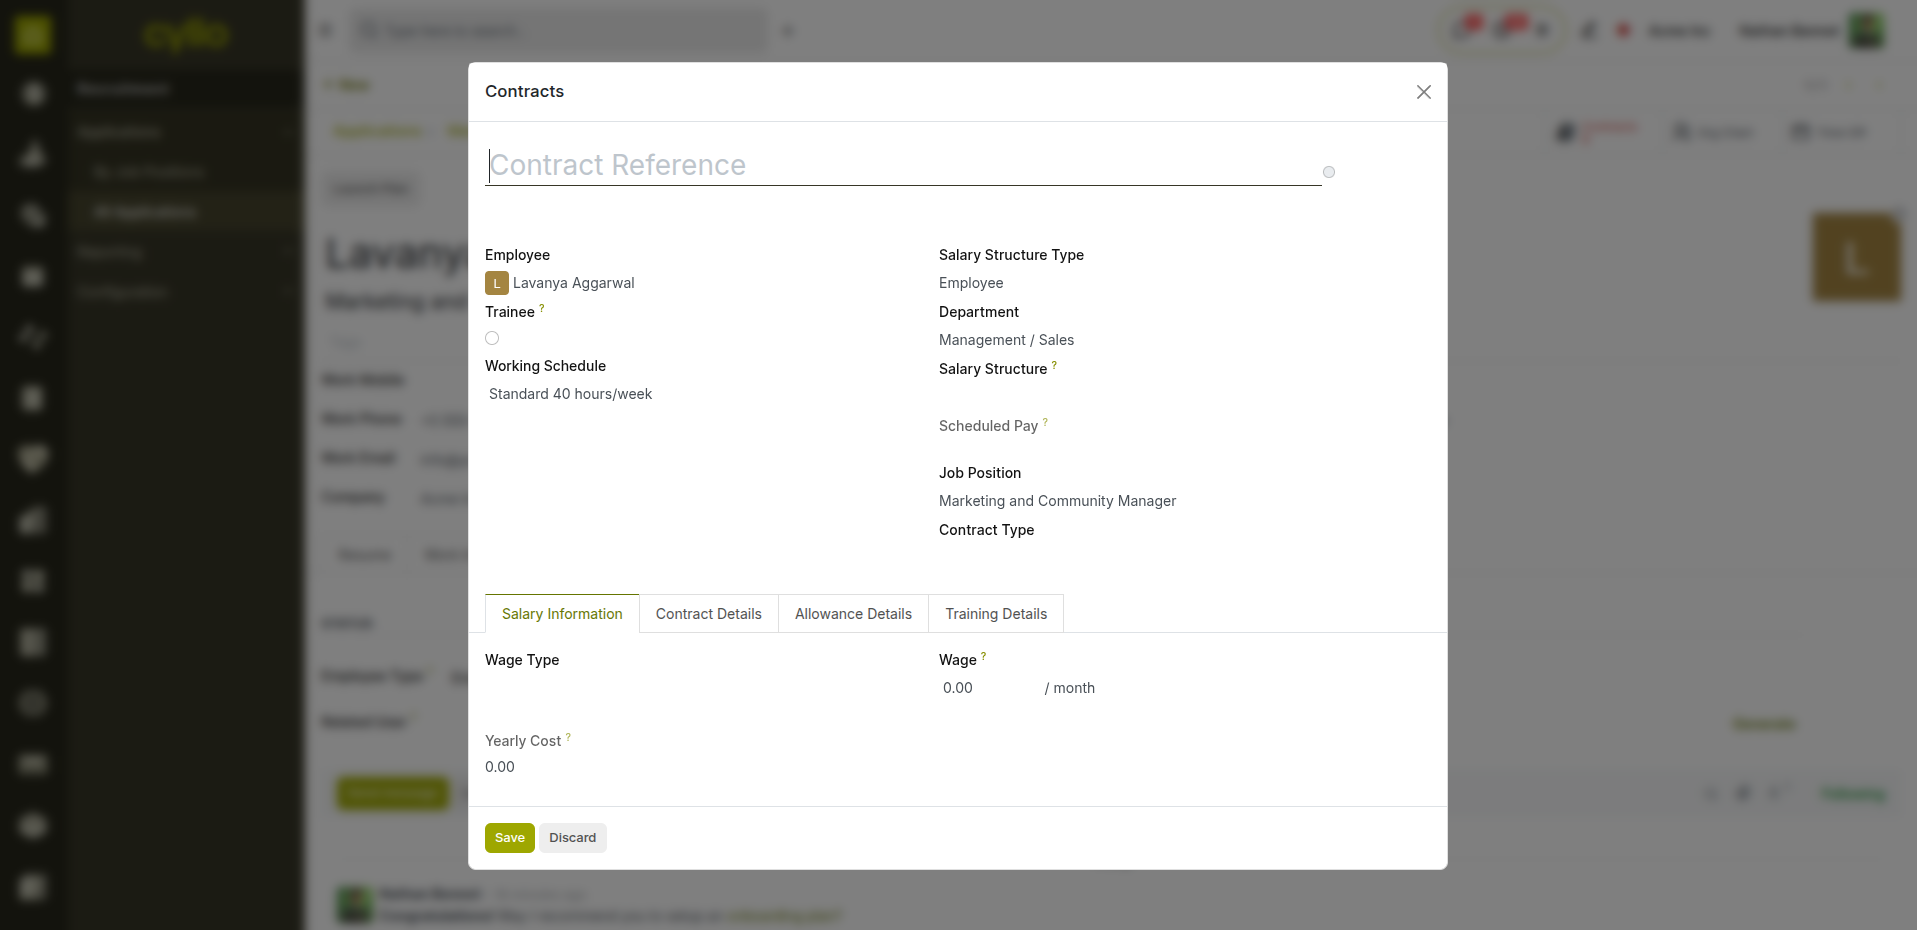
Fig 2.2 — Contract form linked to the new employee with salary and structure configuration
How to Create and Activate a Contract:
- Open the employee record and click the Contracts smart button
- Click New
- Enter the Contract Reference
- Set the Start Date — the first day of employment
- Select the Contract Type: Limited (fixed term) or Open (indefinite)
- Set the Wage (monthly or hourly gross salary)
- Select the Salary Structure (e.g., Employee Monthly)
- Set the Work Schedule on the contract
- Save and set the status to Running
Contract States:
- New: Contract drafted — not yet active.
- Running: Active contract — employee is employed and payroll can be processed.
- Expired: End date has passed — renewal or offboarding action required.
- Cancelled: Contract terminated before its end date.
Note
An employee can have only one Running contract at a time. If a contract is renegotiated or renewed, set the old contract to Expired before creating the new one.
2.3 Portal Access & Self-Service Setup
From day one, employees should have access to the self-service portal — where they can view their payslips, submit leave requests, log timesheets, and update personal information without contacting HR.
How to Set Up Portal Access:
- Open the employee record
- Go to the HR Settings tab
- In the Related User field, link to an existing user account or create a new one
- The employee receives a portal invitation email with their login credentials
- They can now access the Cyllo employee portal from any browser or the mobile app
What Employees Can Access on the Portal:
- Personal profile and contact details
- Payslips and salary history
- Leave balances and leave request submission
- Attendance records and worked hours
Note
Without a Related User linked, the employee cannot access the portal, submit expenses, or use self-service features. Set this up on the first day of employment.
2.4 Asset & Custody Allocation
At onboarding, employees are typically issued company assets — a laptop, mobile phone, access card, uniform, or vehicle. These are tracked in the Service & Custody Management module throughout the employee's tenure.
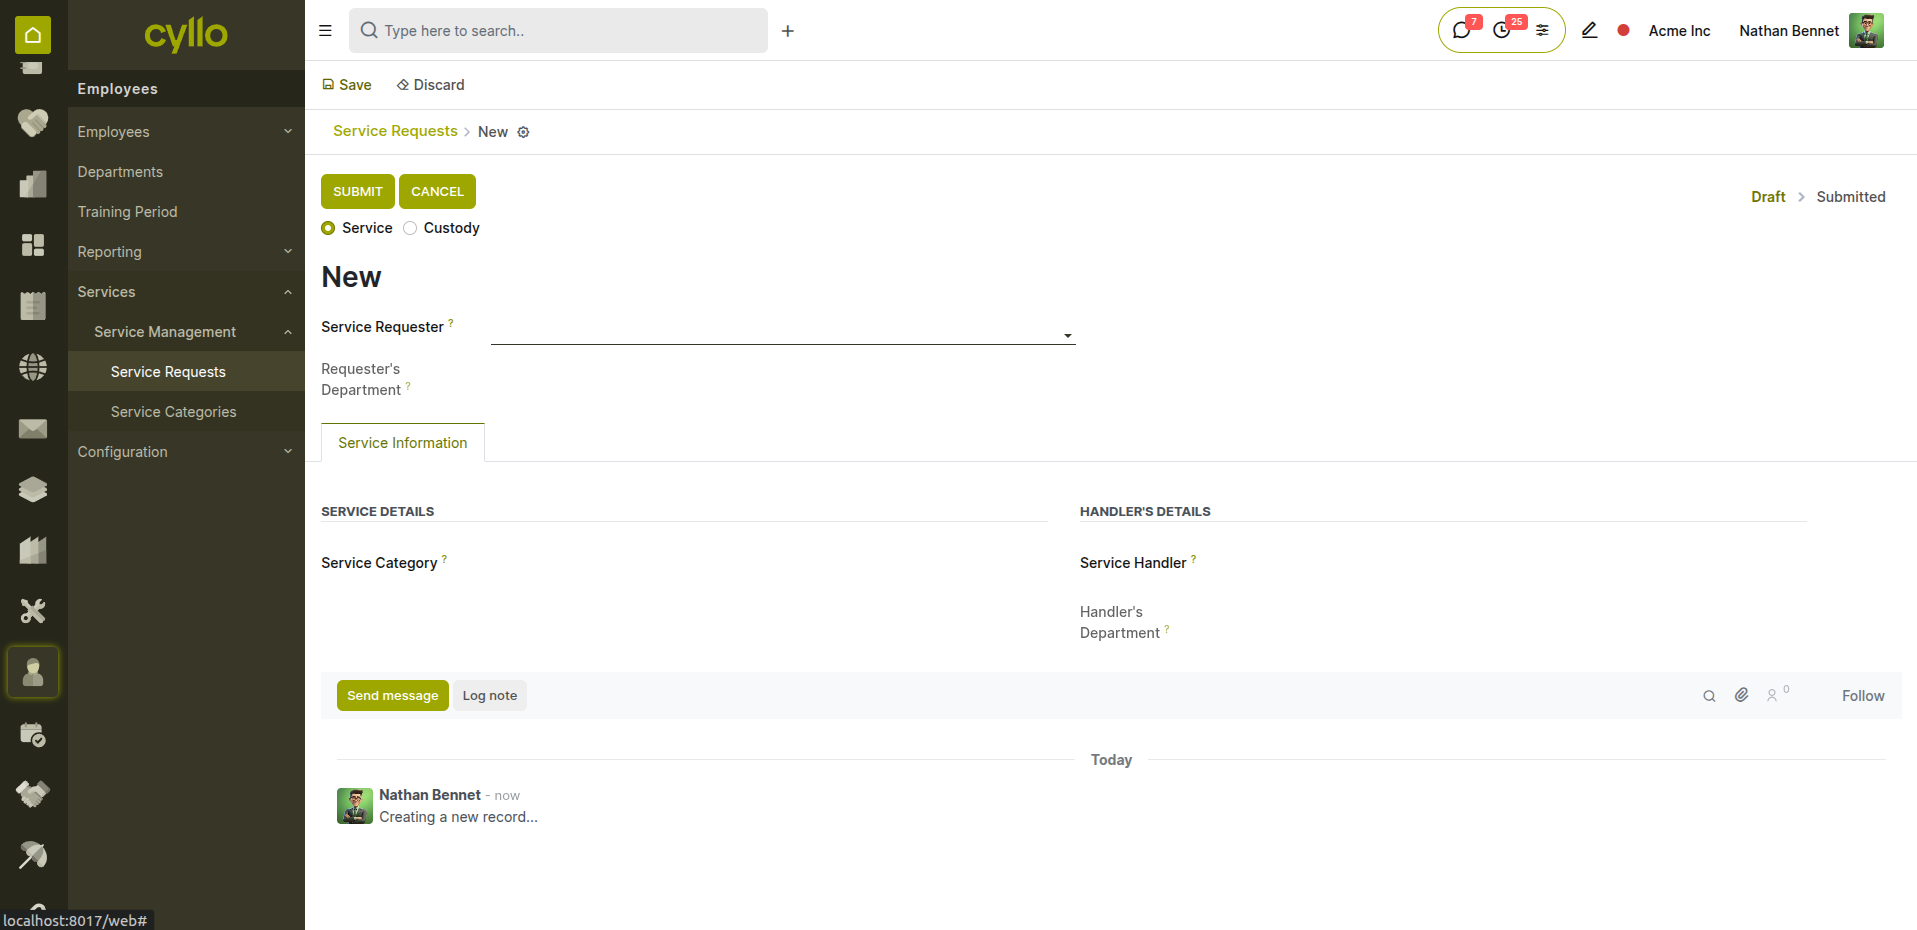
Fig 2.3 — Service request form for issuing a laptop to a new employee at onboarding
How to Issue Assets at Onboarding:
- Go to Employees → Service Requests → New
- Select the Employee
- Select the Service Category (e.g., IT Equipment, Vehicle, Uniform, Access Card)
- Describe the item being issued in the Description field
- Set the Issue Date (the first day of employment or asset handover date)
- Set the Expected Return Date (end of contract or open-ended)
- Approve and confirm the request — the asset is now in the employee's custody
- Print the service request record for the employee to sign
Note
Issue one service request per asset category — this keeps the custody record clean and makes it easy to track what each employee has been given when they eventually offboard.
3. Operate — Daily HR Management
3.1 Attendance Tracking
Once onboarded, the employee's daily working hours are tracked through the Attendance module. Check-in and check-out records form the basis of payroll computation and overtime tracking.
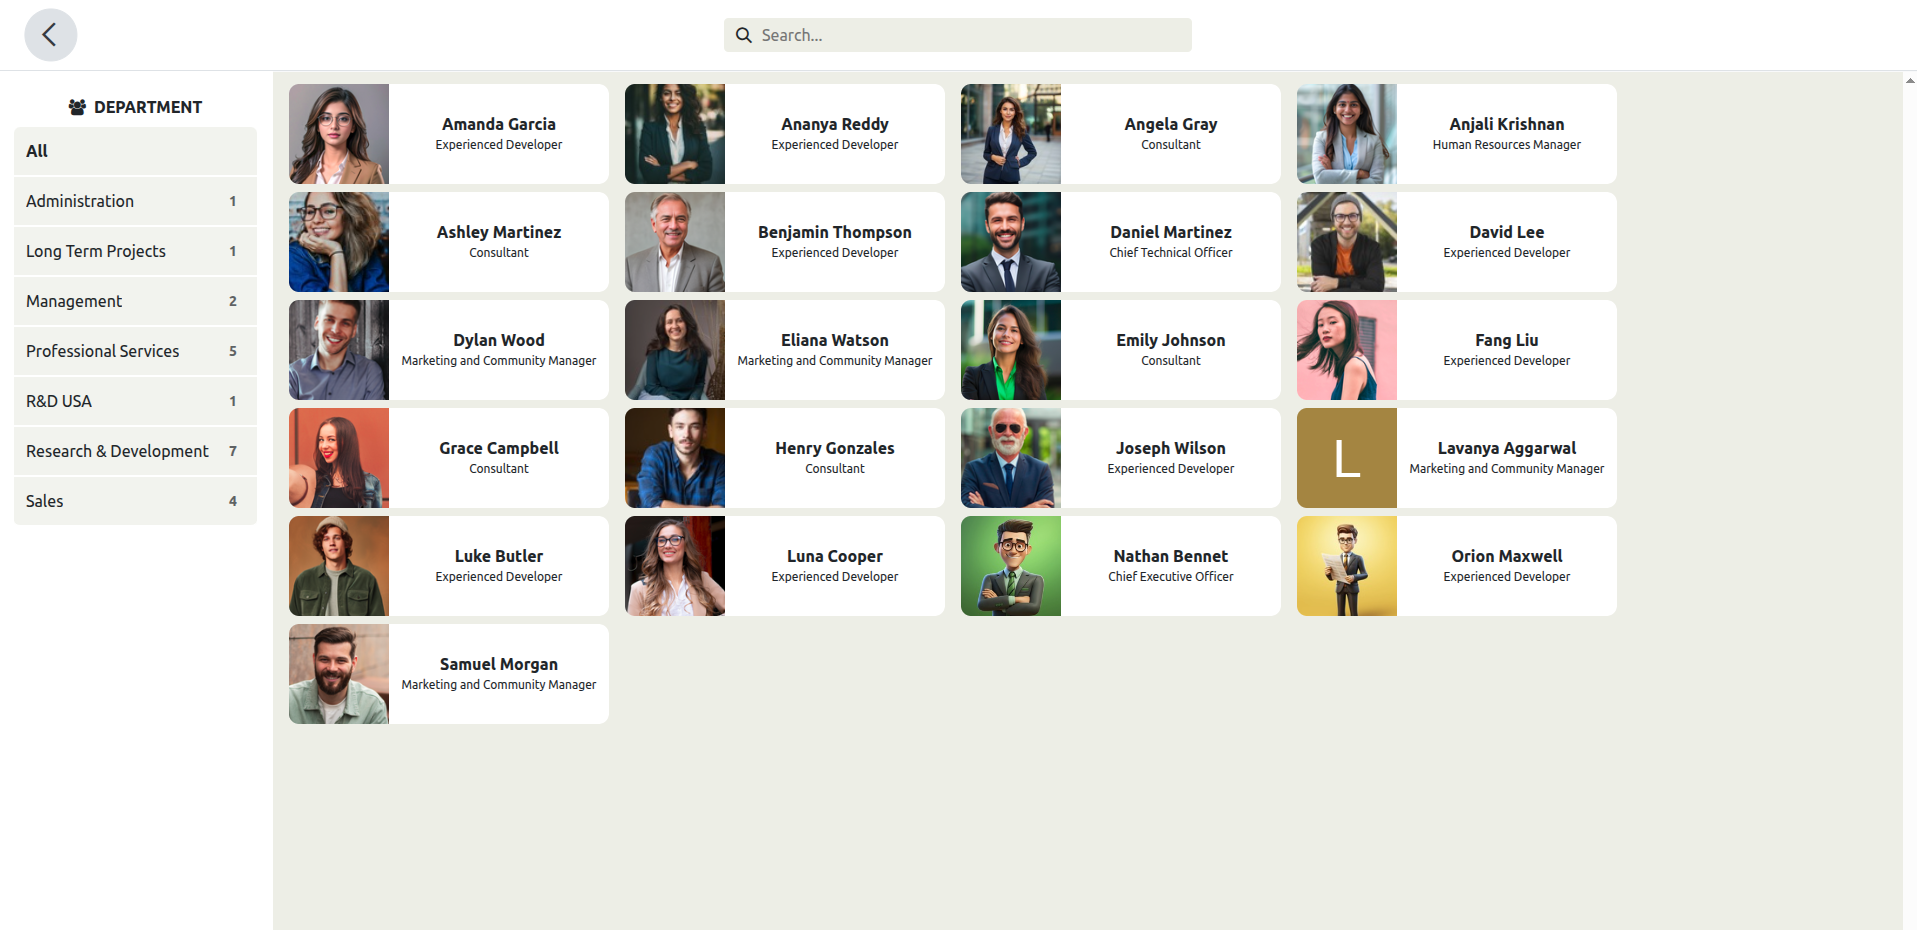
Fig 3.1 — Attendance dashboard showing live check-in status and daily worked hours
How Attendance Works Day-to-Day:
- Employees check in and out via Kiosk Mode (shared touchscreen), the employee portal, or the Cyllo mobile app
- Each check-in and check-out creates a timestamped work entry
- The system calculates worked hours and overtime automatically based on the employee's work schedule
- Managers review attendance records in Attendances → Attendances
- HR validates attendance before each monthly payroll run
Note
Attendance data feeds directly into payroll. Any unresolved attendance errors — missed check-outs, incorrect times — must be corrected before the payroll batch is confirmed to avoid payslip errors.
3.2 Timesheet Logging
For employees working on projects or billable tasks, timesheets provide task-level time tracking — linking working hours to specific projects, clients, and activities.
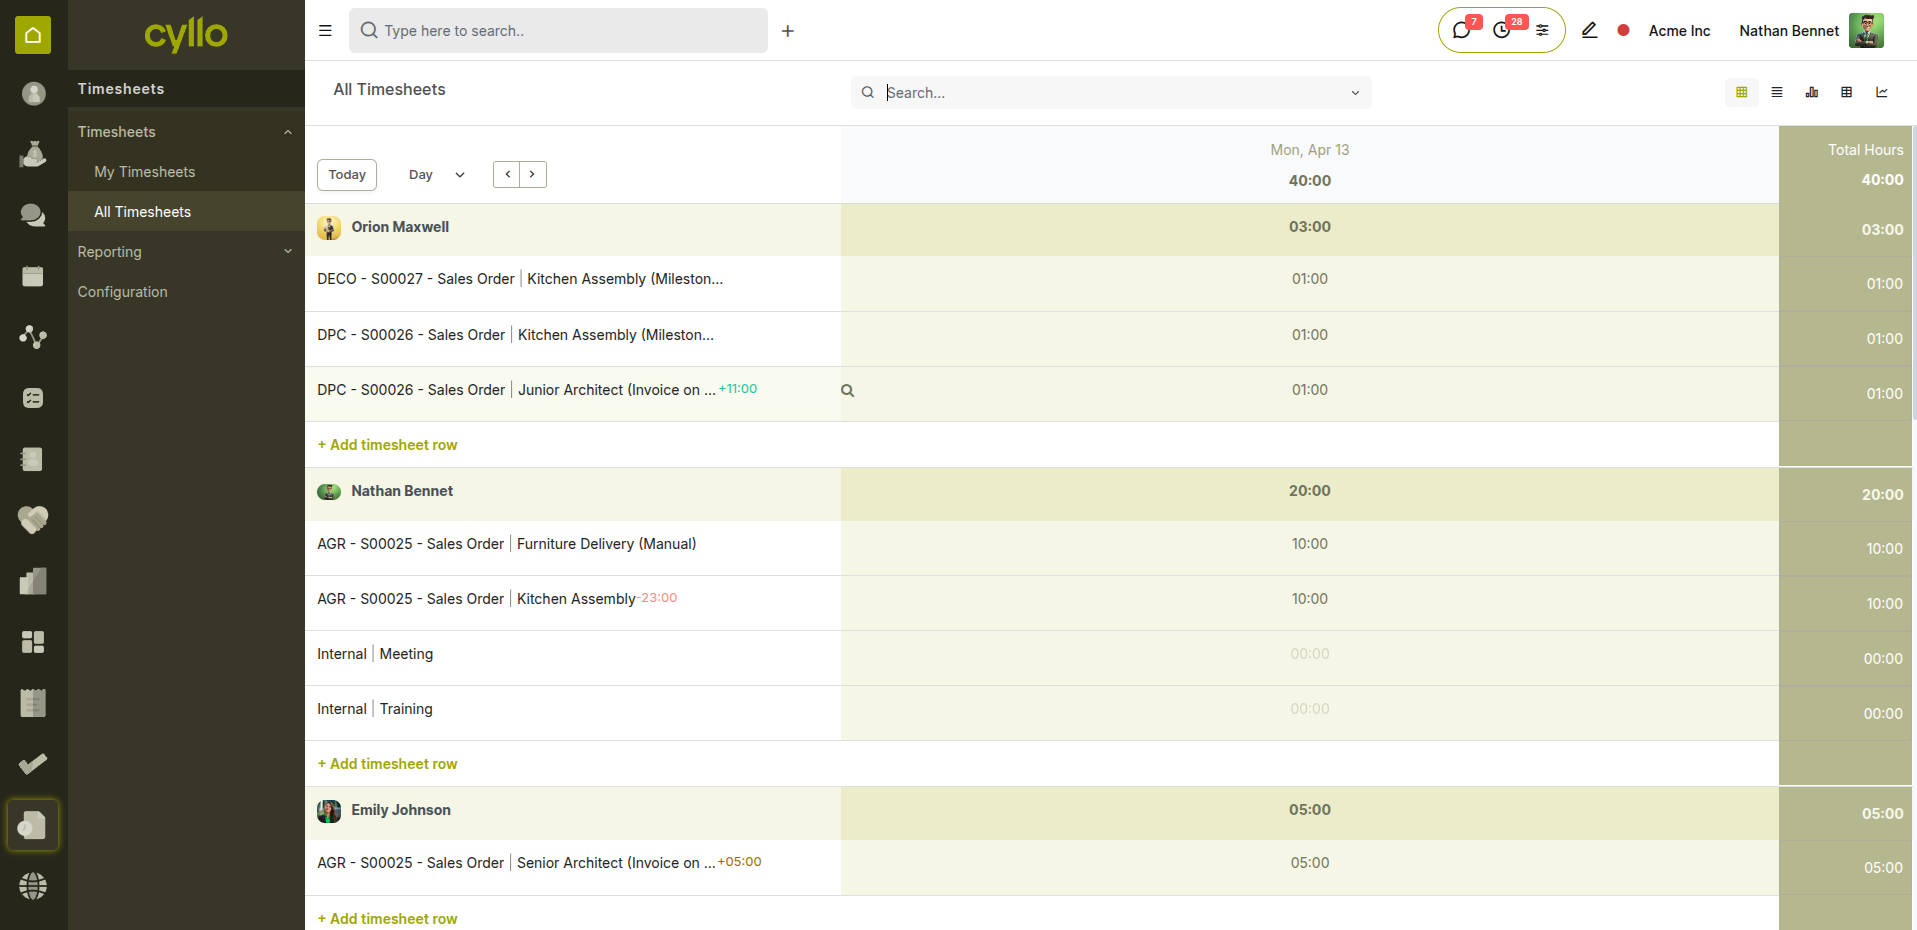
Fig 3.2 — Weekly timesheet grid view with hours logged against projects and tasks
How Timesheets Work Day-to-Day:
- Employees log time via Timesheets → My Timesheets or directly from a Project task
- The Live Timer lets employees start a timer when beginning a task and stop it when done
- The weekly Grid View allows bulk entry for employees who prefer to log hours at the end of the week
- Managers review and approve team timesheets from Timesheets → All Timesheets
- Timesheet hours feed into project billing and resource utilisation reports
Note
For employees on hourly contracts, timesheet hours must be reconciled with attendance before payroll to ensure the correct number of billable hours is used for wage calculation.
3.3 Leave Management
Throughout their employment, employees submit leave requests through the Time Off module. Leave balances are tracked automatically — accruing over time and deducting on approval.
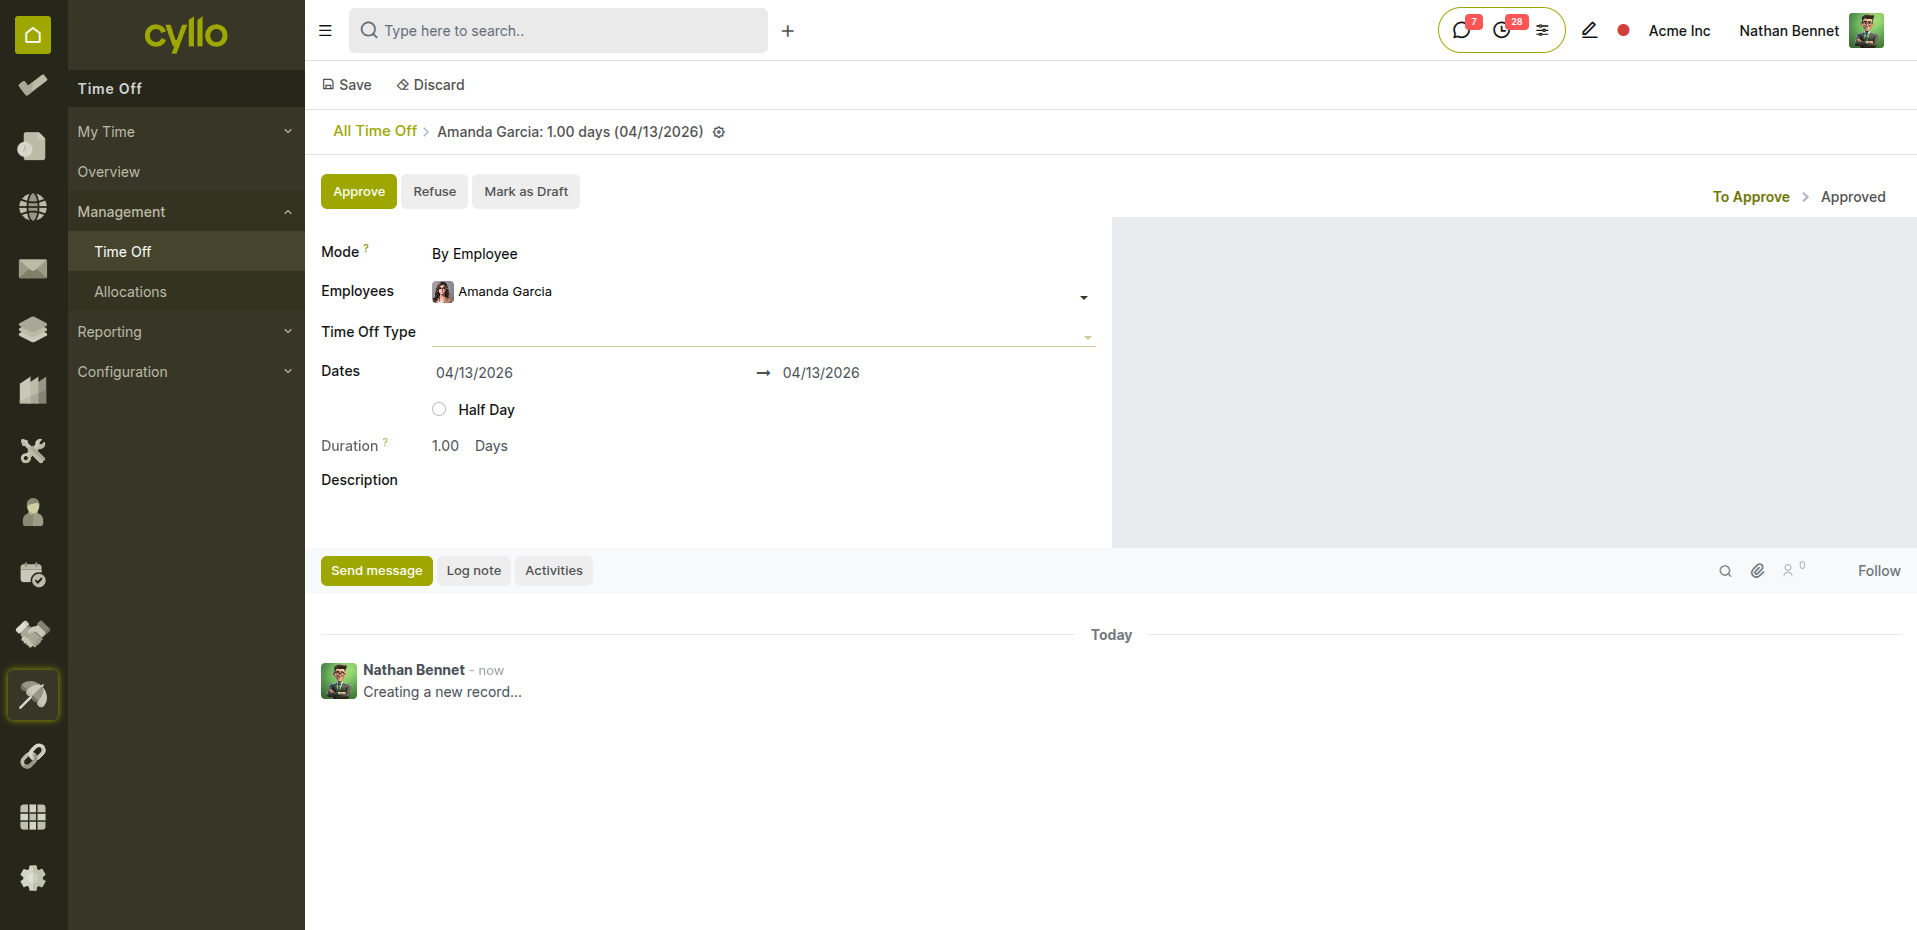
Fig 3.3 — Leave request submitted by employee with type, dates, and "To Approve" status
How Leave Works Day-to-Day:
- Employees submit requests via Time Off → New or through the employee portal
- Requests route to the manager or HR team based on the leave type approval setting
- Approved leave deducts automatically from the employee's leave balance
- The leave calendar shows team absences — helping managers plan coverage
- Public holidays and mandatory working days are excluded from leave duration calculations
Leave Types Typically Configured at Onboarding:
- Annual Leave: Paid time off — usually accrues monthly based on an accrual plan.
- Sick Leave: Medical absence — may require a doctor's note after a set number of days.
- Unpaid Leave: Absence without pay — deducted from salary in the payroll run.
- Compensatory Leave: Time off earned by working on public holidays or weekends.
- Maternity / Paternity Leave: Statutory leave as per company or legal policy.
Note
Set up accrual plans and leave allocations at onboarding — employees should see their correct opening leave balance from their first working day, not weeks later when HR gets around to it.
3.4 Payroll Processing
Every month, the Payroll module processes compensation for all active employees — computing payslips from attendance, leave, salary structures, and any active salary attachments.
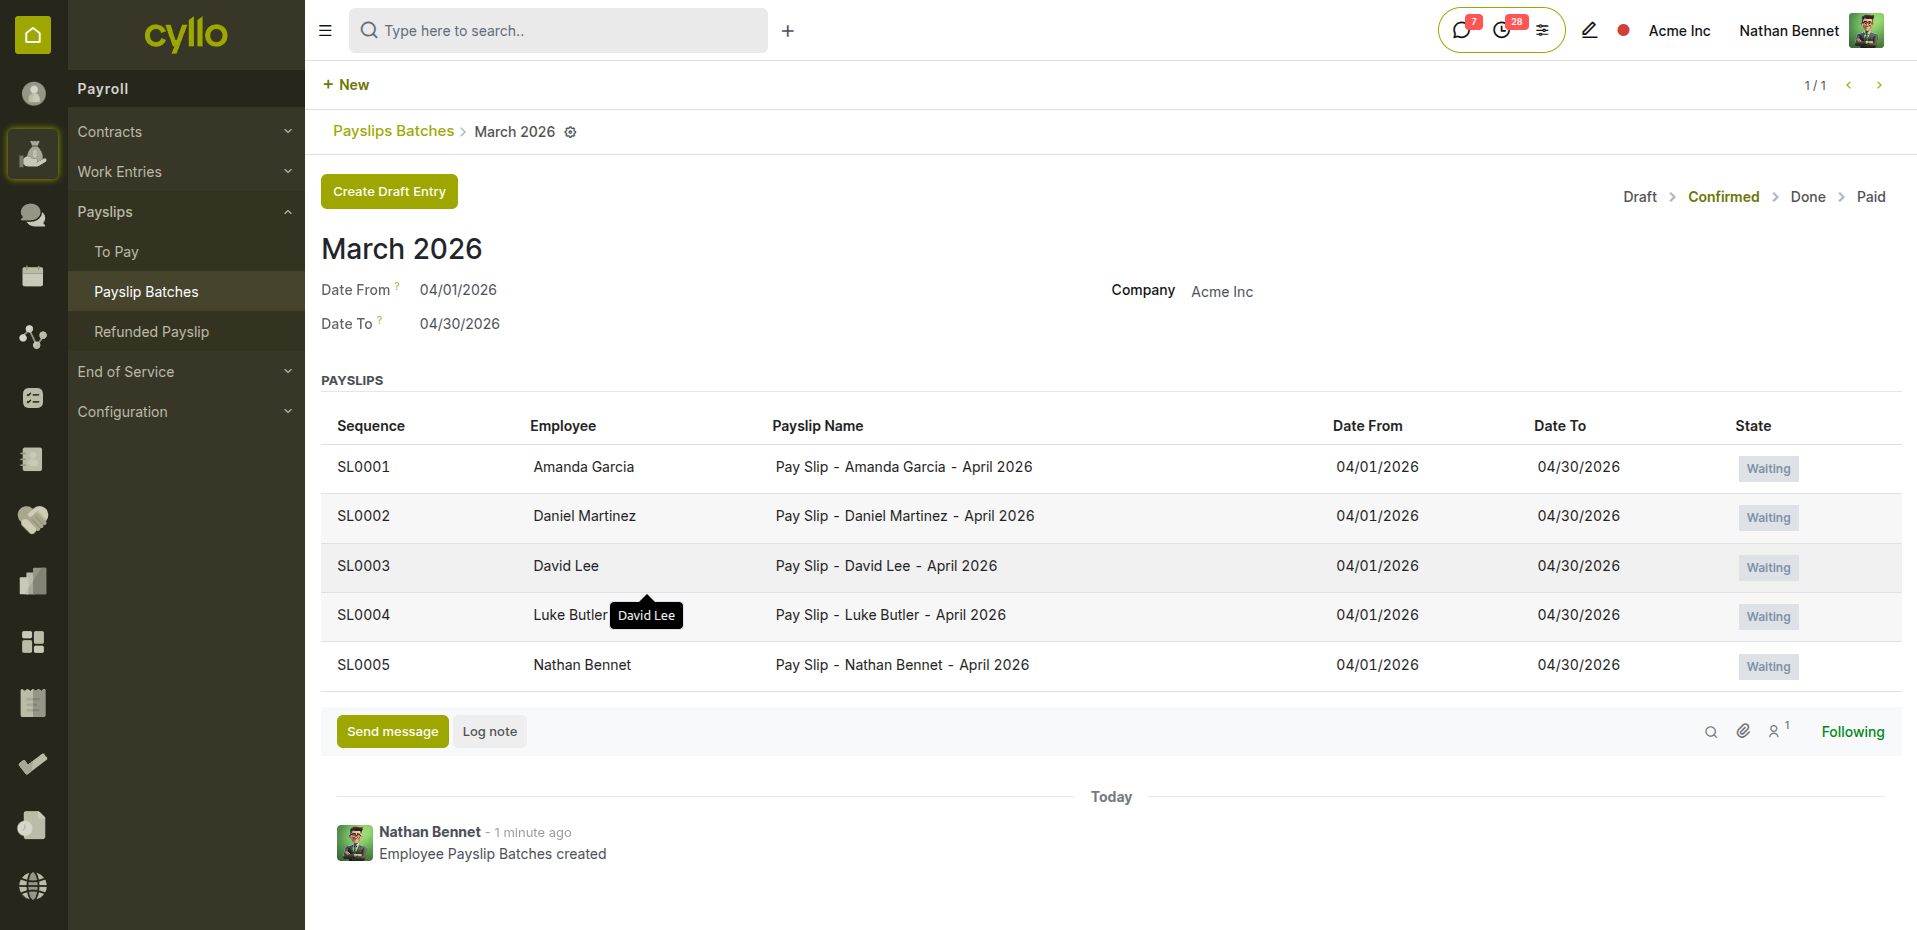
Fig 3.4 — Monthly payslip batch in progress with employee list and computation status
How Monthly Payroll Works:
- Go to Payroll → Payslips → Batches → New
- Enter the Batch Name (e.g., April 2026 Payroll) and set the Pay Period dates
- Click Generate Payslips — Cyllo creates individual draft payslips for all selected employees
- Click Confirm — Cyllo computes all payslips using salary structures, work entries, and attachments
- HR reviews payslips for any anomalies — incorrect hours, missing allowances, unexpected deductions
- Click Validate to post all payslips and create the accounting journal entries automatically
- Mark as Paid once salaries are transferred to employee bank accounts
Note
Run the payroll batch in this exact order — Generate → Confirm → Review → Validate → Paid. Skipping the review step before validation is the most common cause of payroll errors that require correction payslips.
3.5 Salary Attachments
During an employee's tenure, deductions or additions outside the standard salary structure — such as loan repayments, advance salary recovery, or court-ordered attachments — are managed through Salary Attachments.
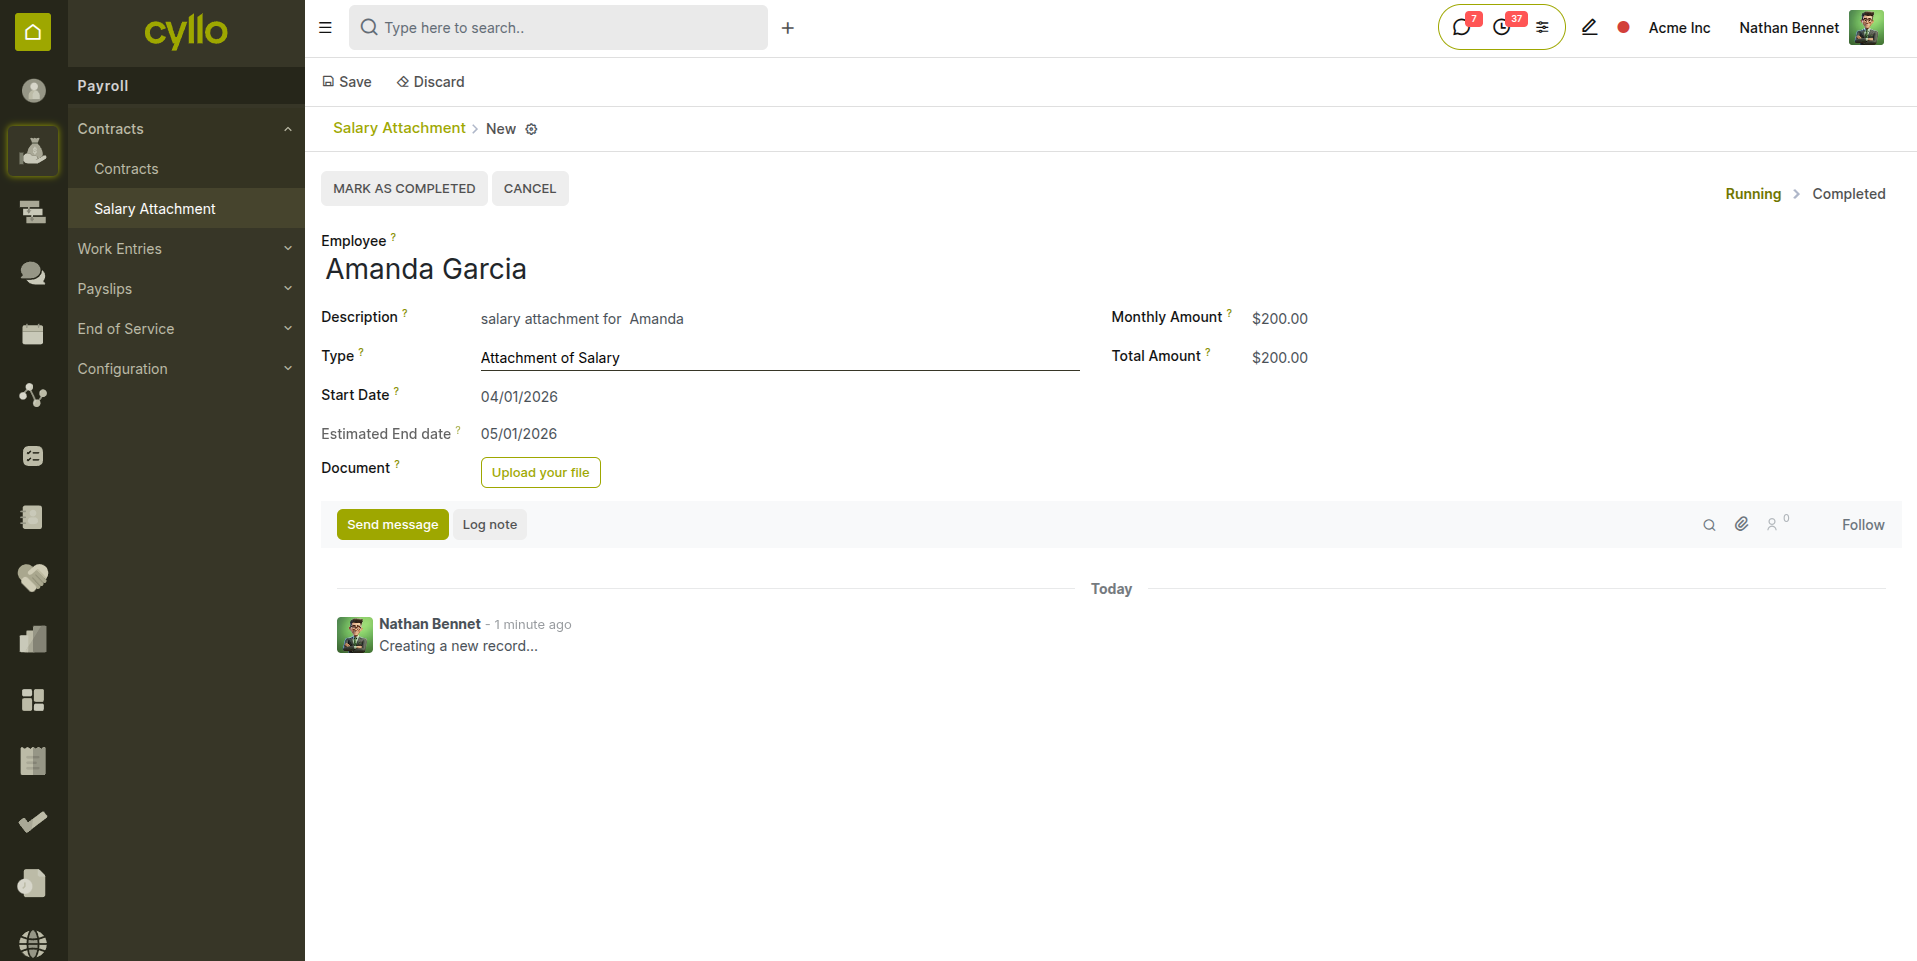
Fig 3.5 — Salary attachment record linked to an employee
How to Create a Salary Attachment:
- Open the employee record and click the Salary Attachments smart button
- Click New
- Select the Type: Attachment of Salary, Assignment of Salary, or Child Support
- Enter the Monthly Amount or Total Amount
- Set the Start Date and End Date
- Attach the supporting document (loan agreement, court order)
- Save — the deduction appears automatically on future payslips until the balance reaches zero
Note
Salary attachments are active across all payroll periods until the end date or total amount is reached. Cyllo tracks the remaining balance automatically — no manual monitoring required.
4. Develop — Performance & Planning
4.1 Skills & Resume Management
As employees grow within the organisation, their skills profile in Cyllo should be kept up to date — reflecting new competencies, completed training, and career progression. This data is used for internal mobility decisions and field service worker matching.
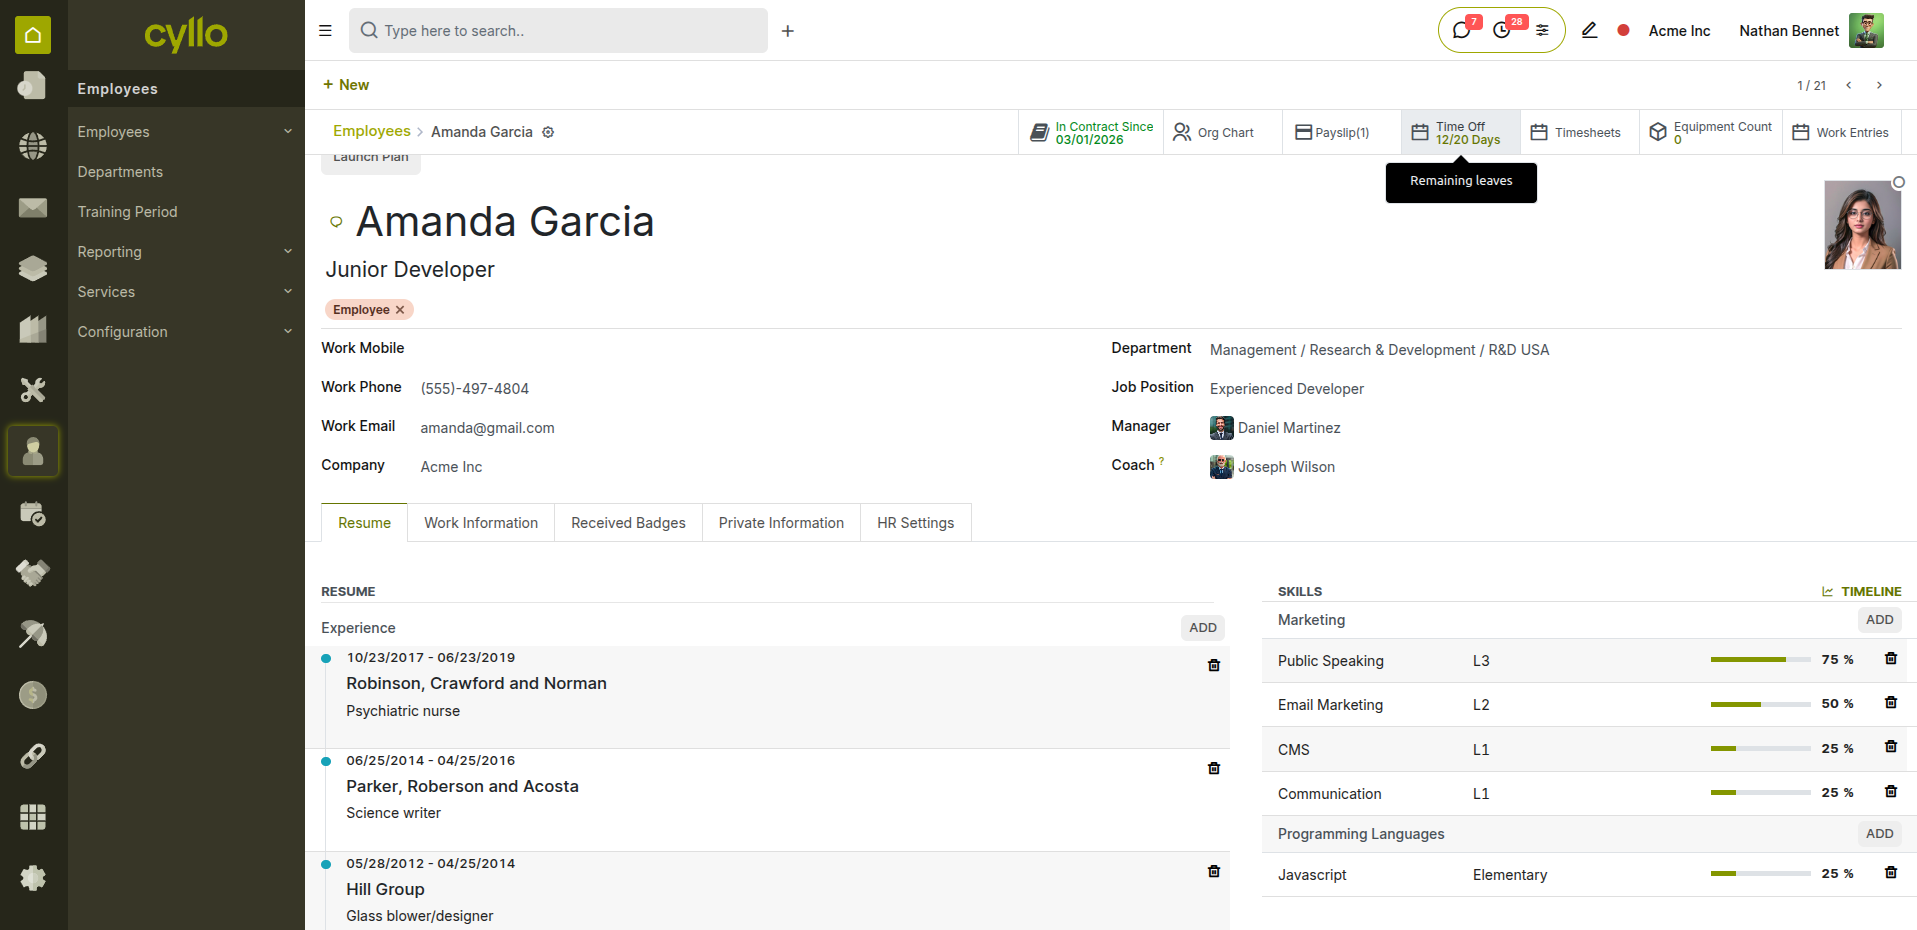
Fig 4.1 — Employee resume tab showing updated skills, certifications, and work history
How to Update Skills & Resume:
- Open the employee record and go to the Resume tab
- Under Resume Lines, add new entries: Internal Training, Certification, Promotion, or Education
- Set the dates and description for each entry
- Under Skills, add new skill lines: select Skill Type → Skill → Level (Beginner / Intermediate / Expert)
- Save the record
- The updated skills profile is immediately available for Field Service matching and HR reporting
Note
Keep the Resume tab updated after every completed training course or role change. This creates an internal talent database that HR can search when looking for candidates for internal promotions or cross-department moves.
4.2 Work Schedule & Planning
The Planning module manages how employees are scheduled across projects, shifts, and departments — ensuring the right people are in the right place at the right time.
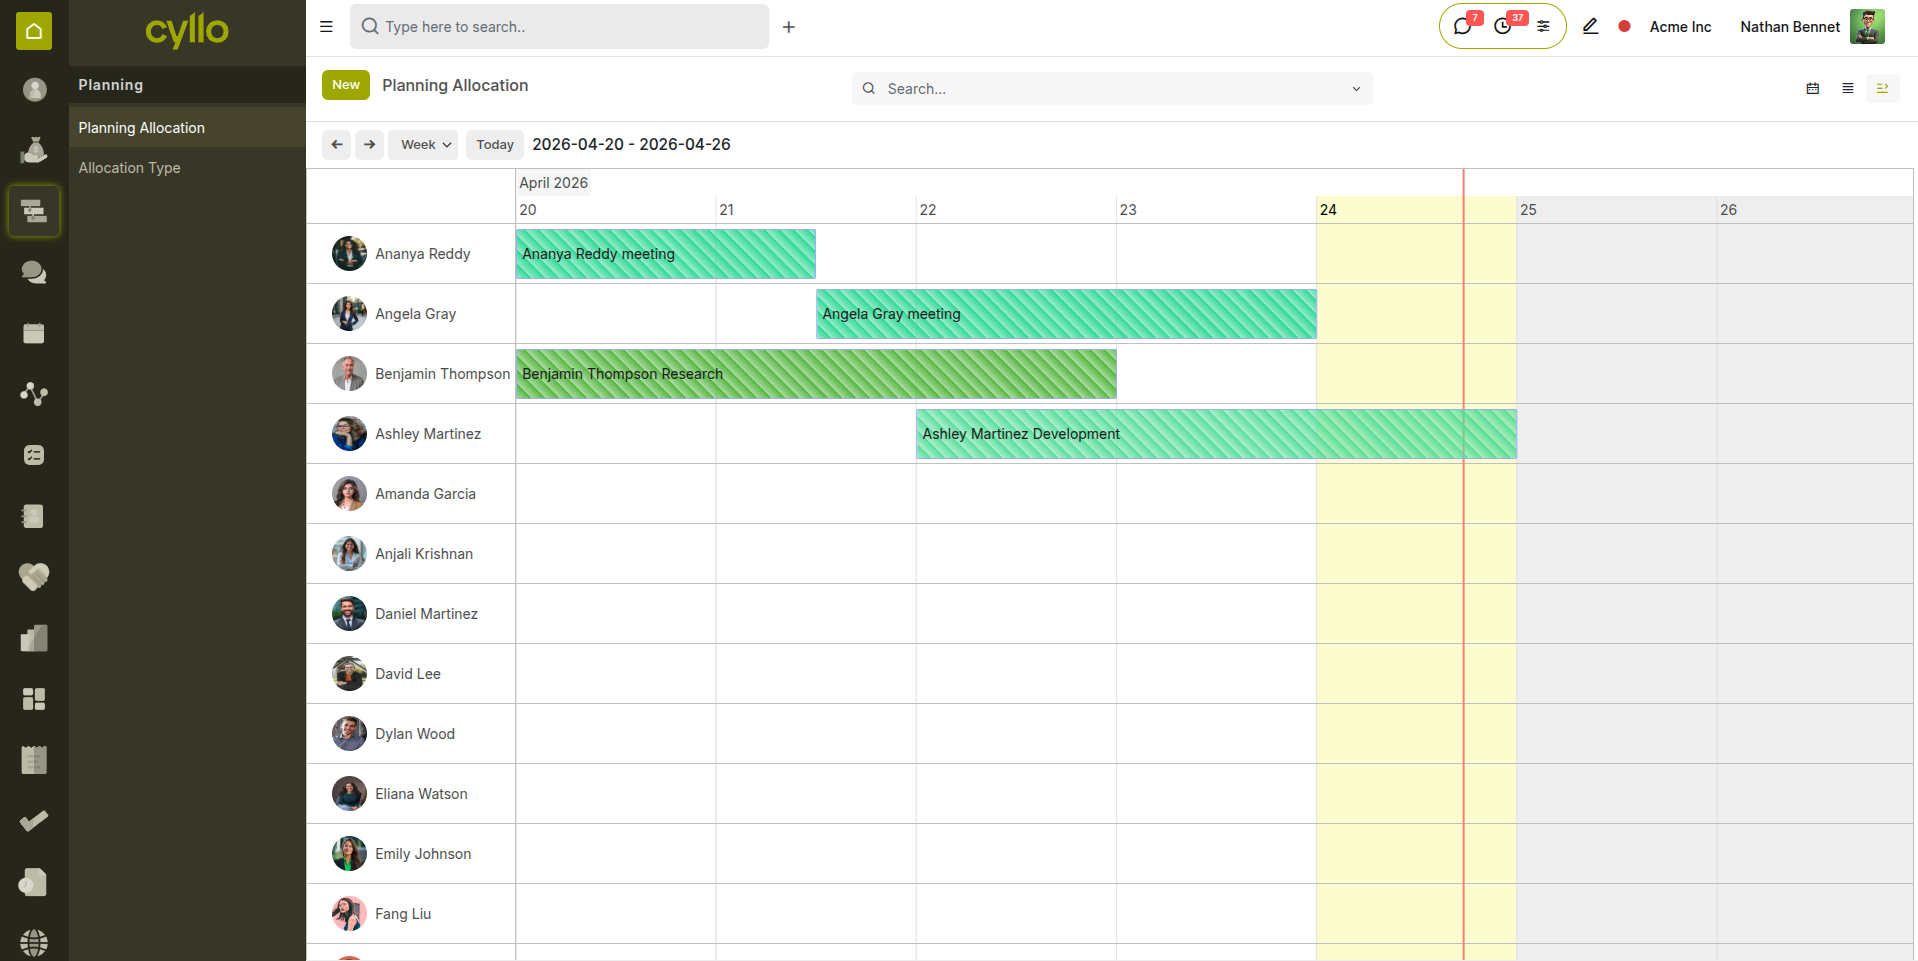
Fig 4.2 — Planning calendar showing employee shift allocations across the week
How to Manage Work Planning:
- Go to Planning → Schedule
- Click New to create a shift slot
- Select the Employee and the Project or Department
- Set the Start and Stop date/time for the shift
- Save — the slot appears on the planning calendar
- Use Send Schedule to notify employees of their upcoming shifts by email
- Adjust slots by dragging them on the calendar to change dates or times
Note
Planning slots link to Work Entries via the Work Entry Contract Planning module — ensuring the hours scheduled match the hours used in payroll computation at the end of the period.
4.3 Fleet Assignment
Employees who require a company vehicle as part of their role have a vehicle assigned to them through the Fleet module. The vehicle remains in their custody and its costs are tracked throughout their employment.
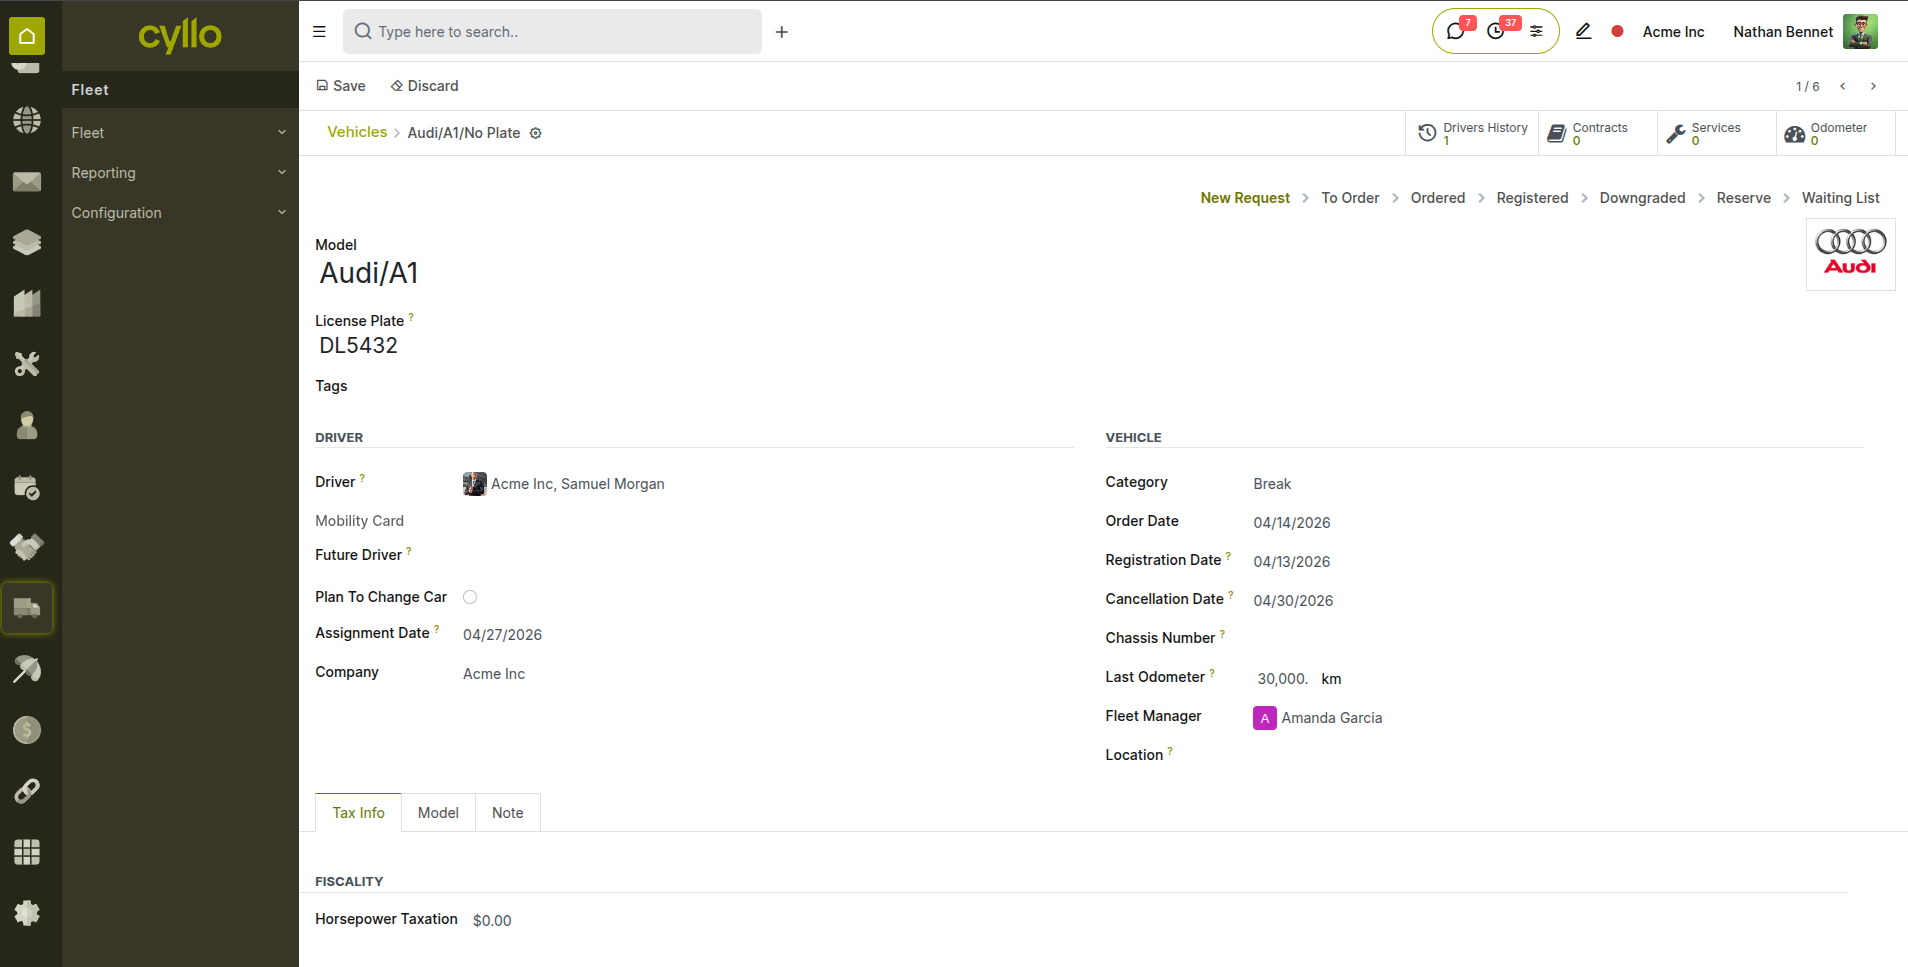
Fig 4.3 — Fleet vehicle assigned to an employee with contract and maintenance details
How to Assign a Vehicle to an Employee:
- Go to Fleet → Fleet → Vehicles → Open the vehicle record
- Set the Driver field to the employee
- Update the Current Contract to reflect the assignment terms
- All fuel logs, maintenance records, and service costs are now tracked against this employee's assigned vehicle
- When the employee changes role or leaves, update the Driver field to the new assignee or remove it
Note
When an employee is offboarded, always update the Fleet record — reassign or return the vehicle before archiving the employee record. Orphaned vehicle assignments cause errors in fleet cost reporting.
5. Manage — Compliance & Incidents
5.1 Contract Renewal & Monitoring
Fixed-term (Limited) contracts have an end date that must be actively monitored. Cyllo allows HR to filter contracts by expiry date so renewals or offboarding decisions are made in time.
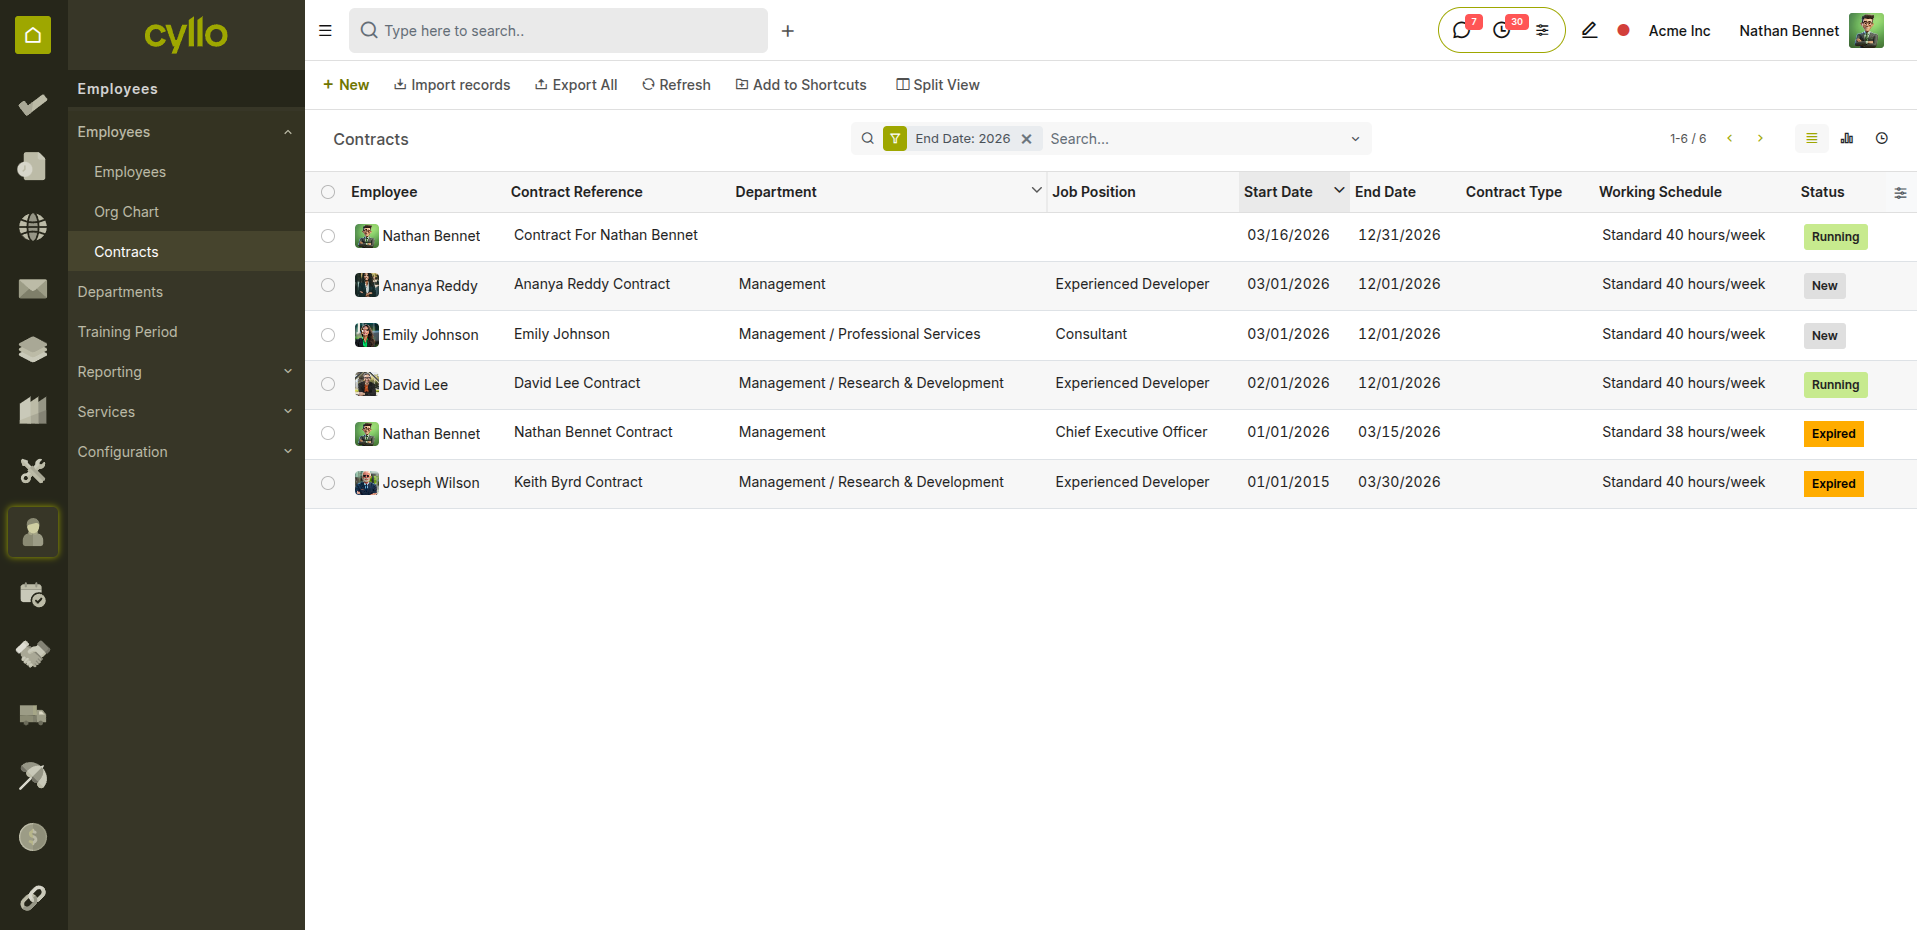
Fig 5.1 — Contract list filtered by expiry date showing contracts due for renewal
How to Monitor Contract Expiries:
- Go to Employees → Employees → Contracts
- Apply the filter: End Date → is in the next 30 / 60 / 90 days
- Review the list of contracts approaching expiry
- For each contract, decide: Renew (create a new contract), Convert to Open, or Begin Offboarding
- If renewing: create a new contract with the updated terms and set the old one to Expired
- If offboarding: begin the Resignation and Gratuity workflow
Note
Set up a Workflow Automation in Cyllo to automatically notify the HR manager by email when a contract end date is within 30 days — this eliminates the risk of contracts lapsing unnoticed.
5.2 Incident Management
Workplace incidents — safety events, conduct issues, or equipment damage — are recorded and managed in the Incident Management module throughout an employee's tenure.
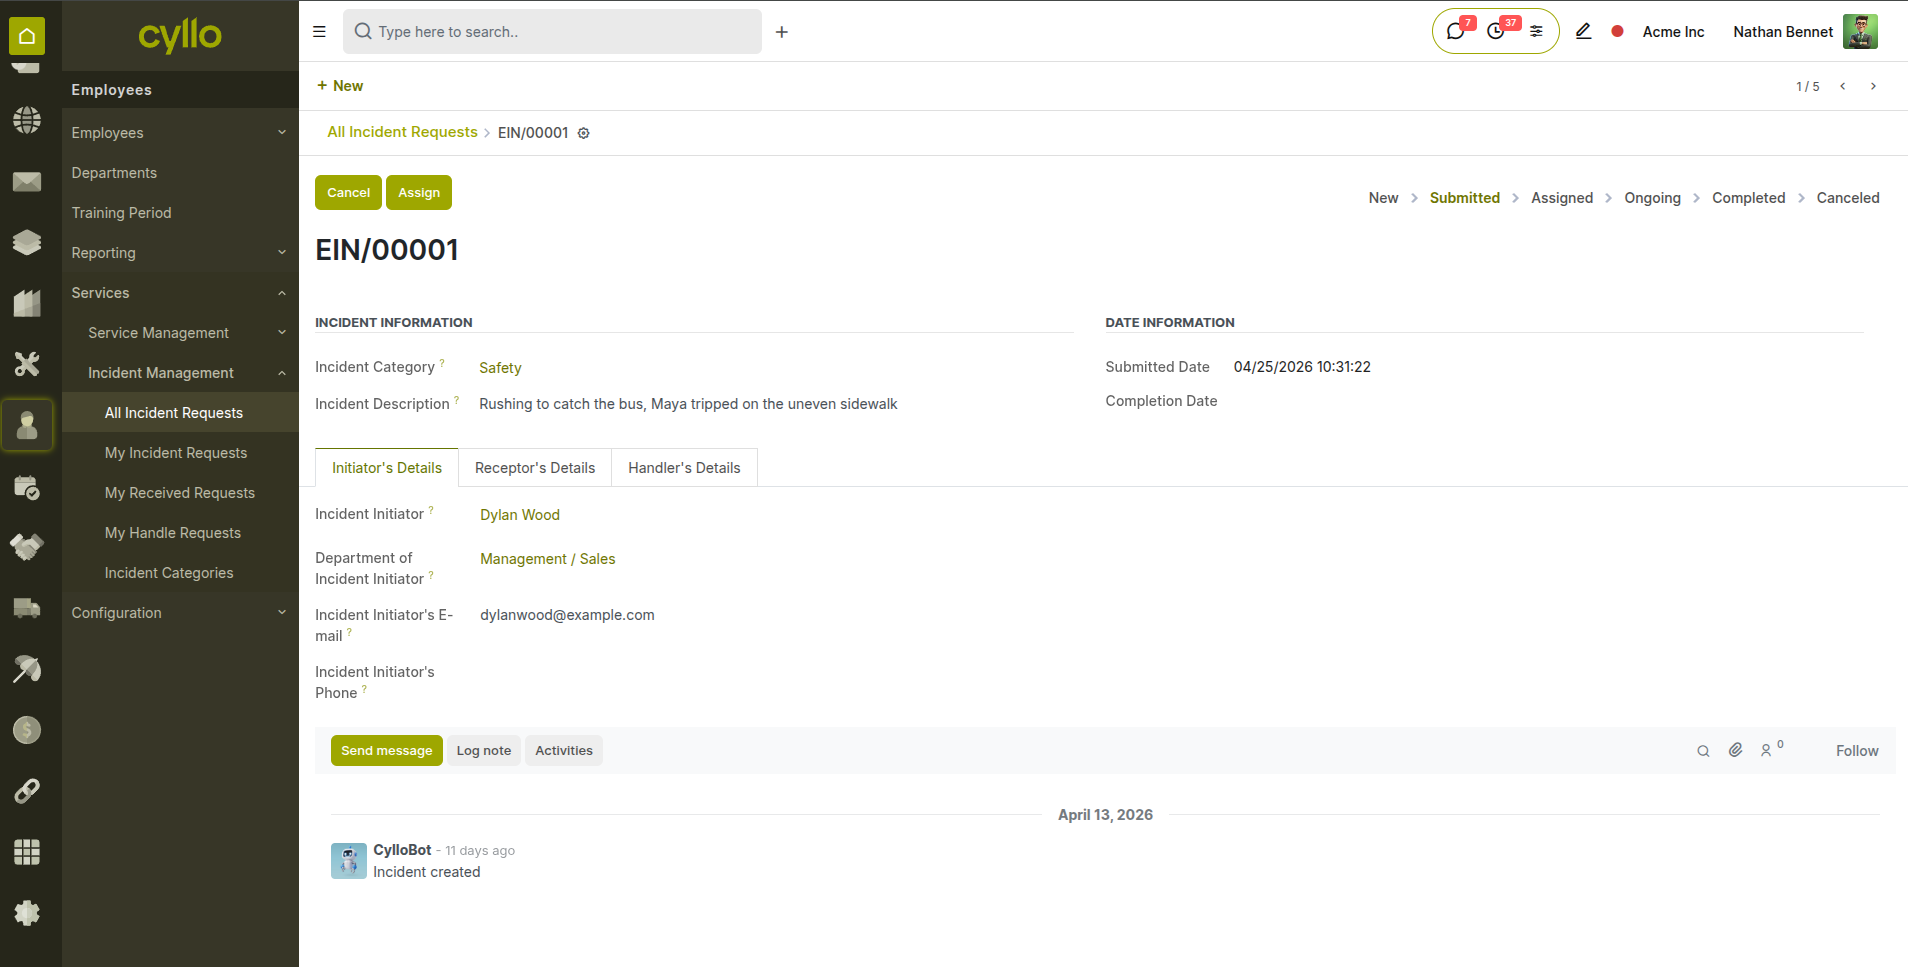
Fig 5.2 — Incident record showing initiator, receptor, handler, and resolution status
How to Record an Incident:
- Go to Employees → Incidents → New
- Enter the Incident Title and select the Incident Category
- Select the Initiator, Receptor, and Handler
- Set the Submission Date
- Describe the incident and the action taken
- Track status from open to resolved
- Record the Completion Date when the incident is closed
Note
Incident records are permanently linked to the involved employees' records. During offboarding, review open incidents to ensure all are resolved before the employee's final working day.
5.3 Custody & Asset Tracking
Throughout an employee's employment, their custody of company assets is tracked in real time. HR always knows which assets are with which employee and when they are due for return.
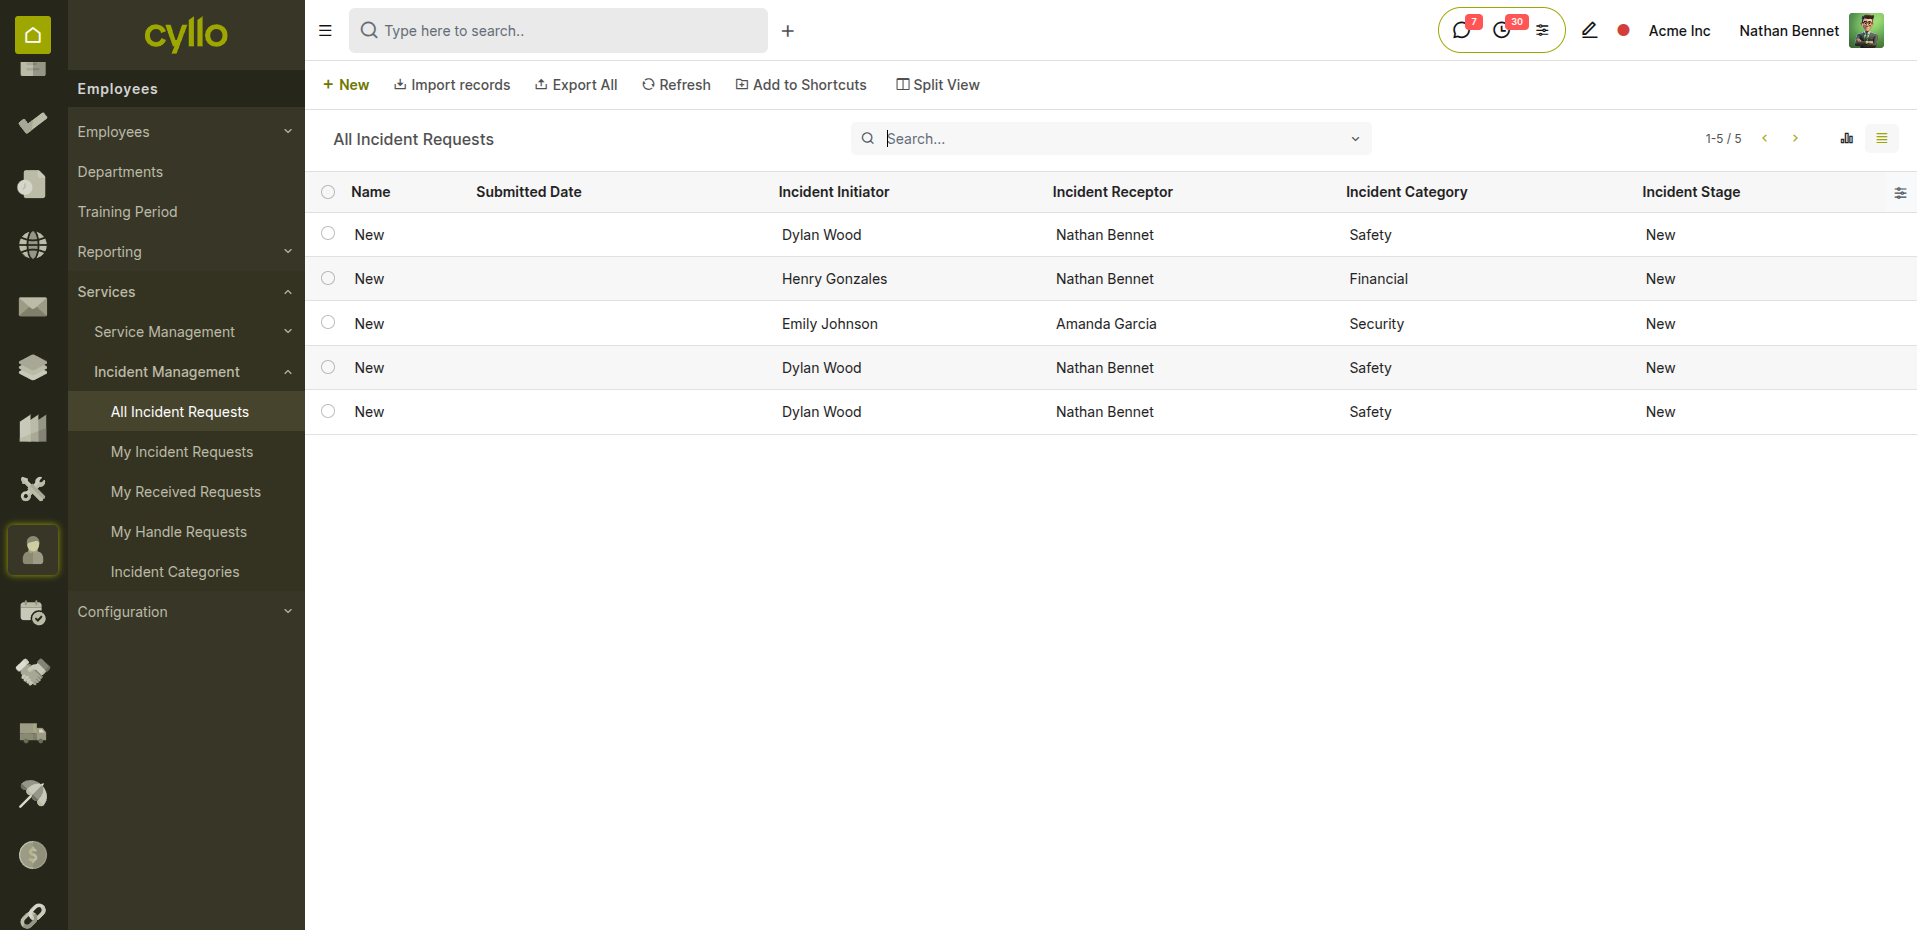
Fig 5.3 — Service request list showing all assets currently in an employee's custody
How to Track Active Custody:
- Go to Employees → Service Requests
- Filter by Employee to see all assets currently in their custody
- Review Issue Date and Expected Return Date for each item
- For assets approaching or past the return date, use the Late Return Wizard to document the situation
- Update the Actual Return Date when an asset is returned
Note
Run a custody audit at least every six months — open all active service requests filtered by department and confirm that each listed asset is still with the listed employee. Update records for any that have changed hands informally.
6. Offboard — Exit & Settlement
6.1 Resignation Management
When an employee decides to leave — or their contract ends — the Resignation Management module handles the formal departure workflow, ensuring notice periods are tracked and the employee record is updated correctly.
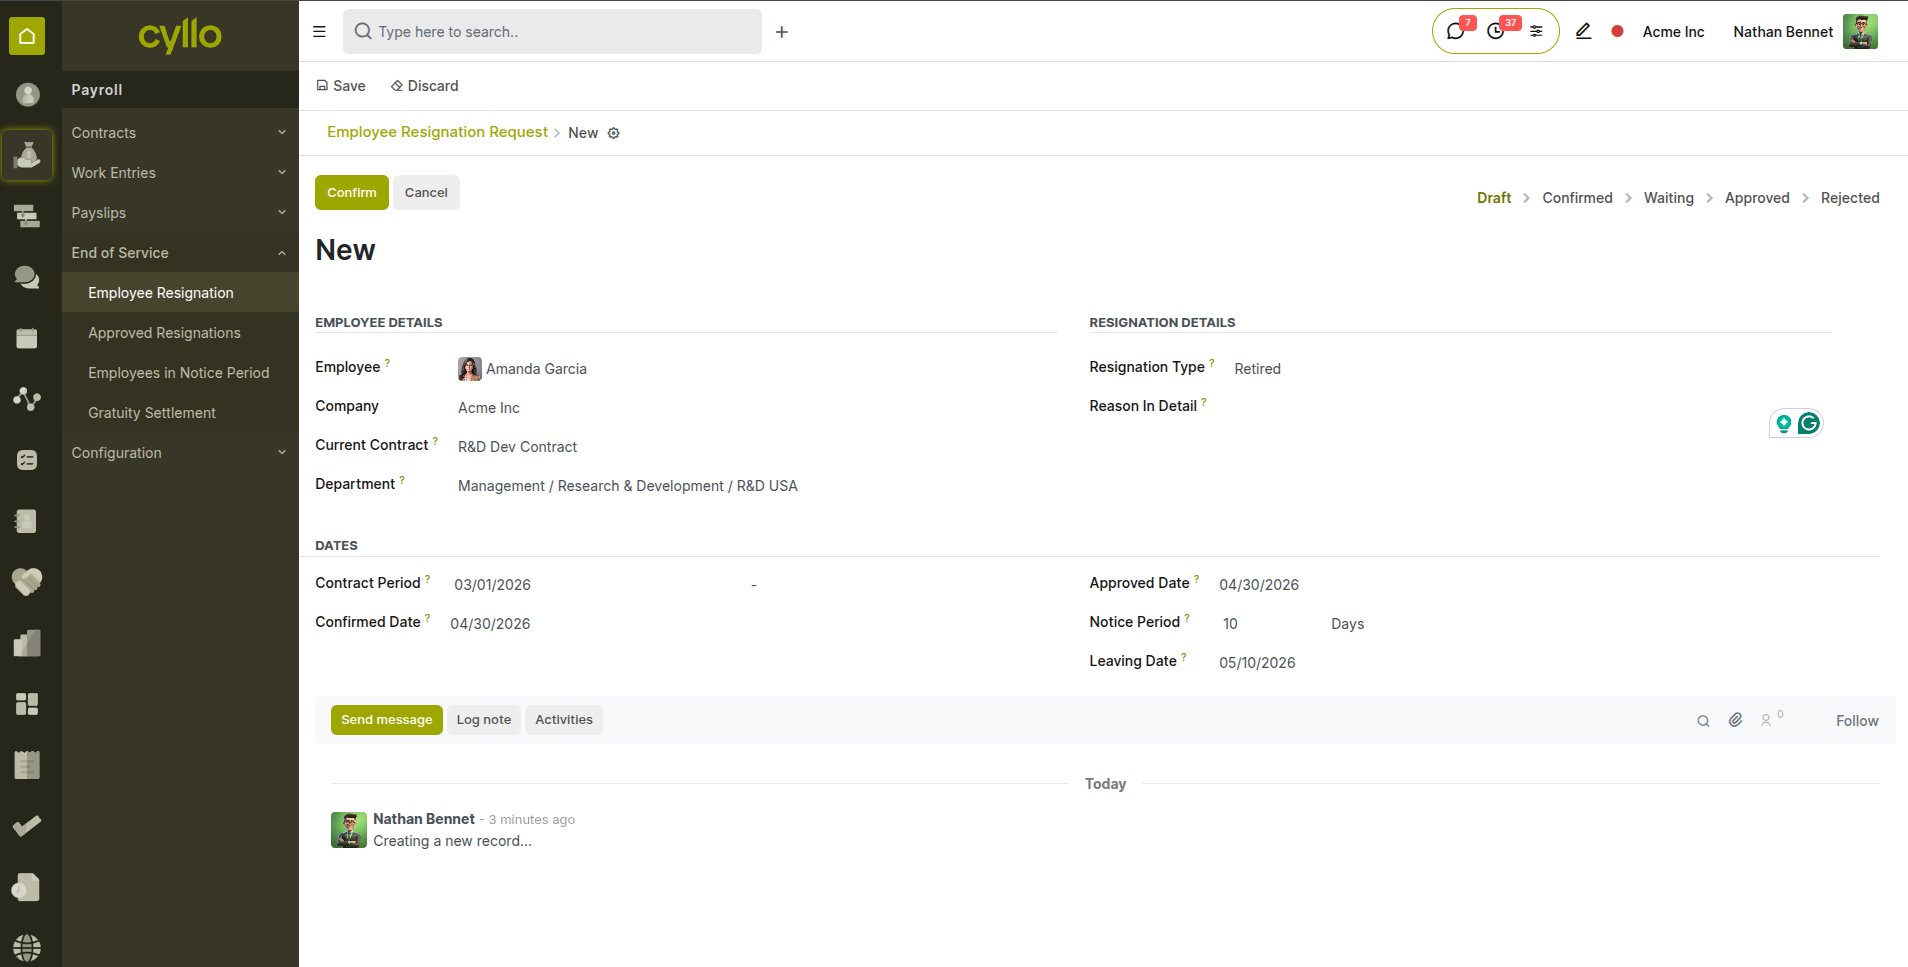
Fig 6.1 — Resignation request form showing notice period, type, and approval stages
How to Process a Resignation:
- Go to Payroll → Resignation → Resignation Requests → New
- Select the Employee
- Set the Resignation Date (the date notice is formally given)
- Enter the Notice Period in days
- Select the Resignation Type (e.g., Voluntary Resignation, End of Contract, Mutual Agreement)
- Enter a Reason
- Click Confirm — the request moves from Draft to Confirmed
- Manager or HR reviews and clicks Approve
- The employee record is automatically marked as Resigned on approval
Resignation States:
- Draft: Request created and saved — not yet submitted.
- Confirmed: Employee has formally submitted their resignation.
- Waiting: Pending manager or HR review and decision.
- Approved: Resignation approved — employee status updated to Resigned.
- Refused: Request rejected or withdrawn by the employee.
Note
Process the resignation approval before the employee's last working day. The Approved status is required before a Gratuity Settlement can be created — the system links both records automatically.
6.2 Gratuity Settlement
After the resignation is approved, the Gratuity Settlement calculates the employee's end-of-service entitlement automatically — based on their total working years, contract type, salary, and the company's configured gratuity rate brackets.
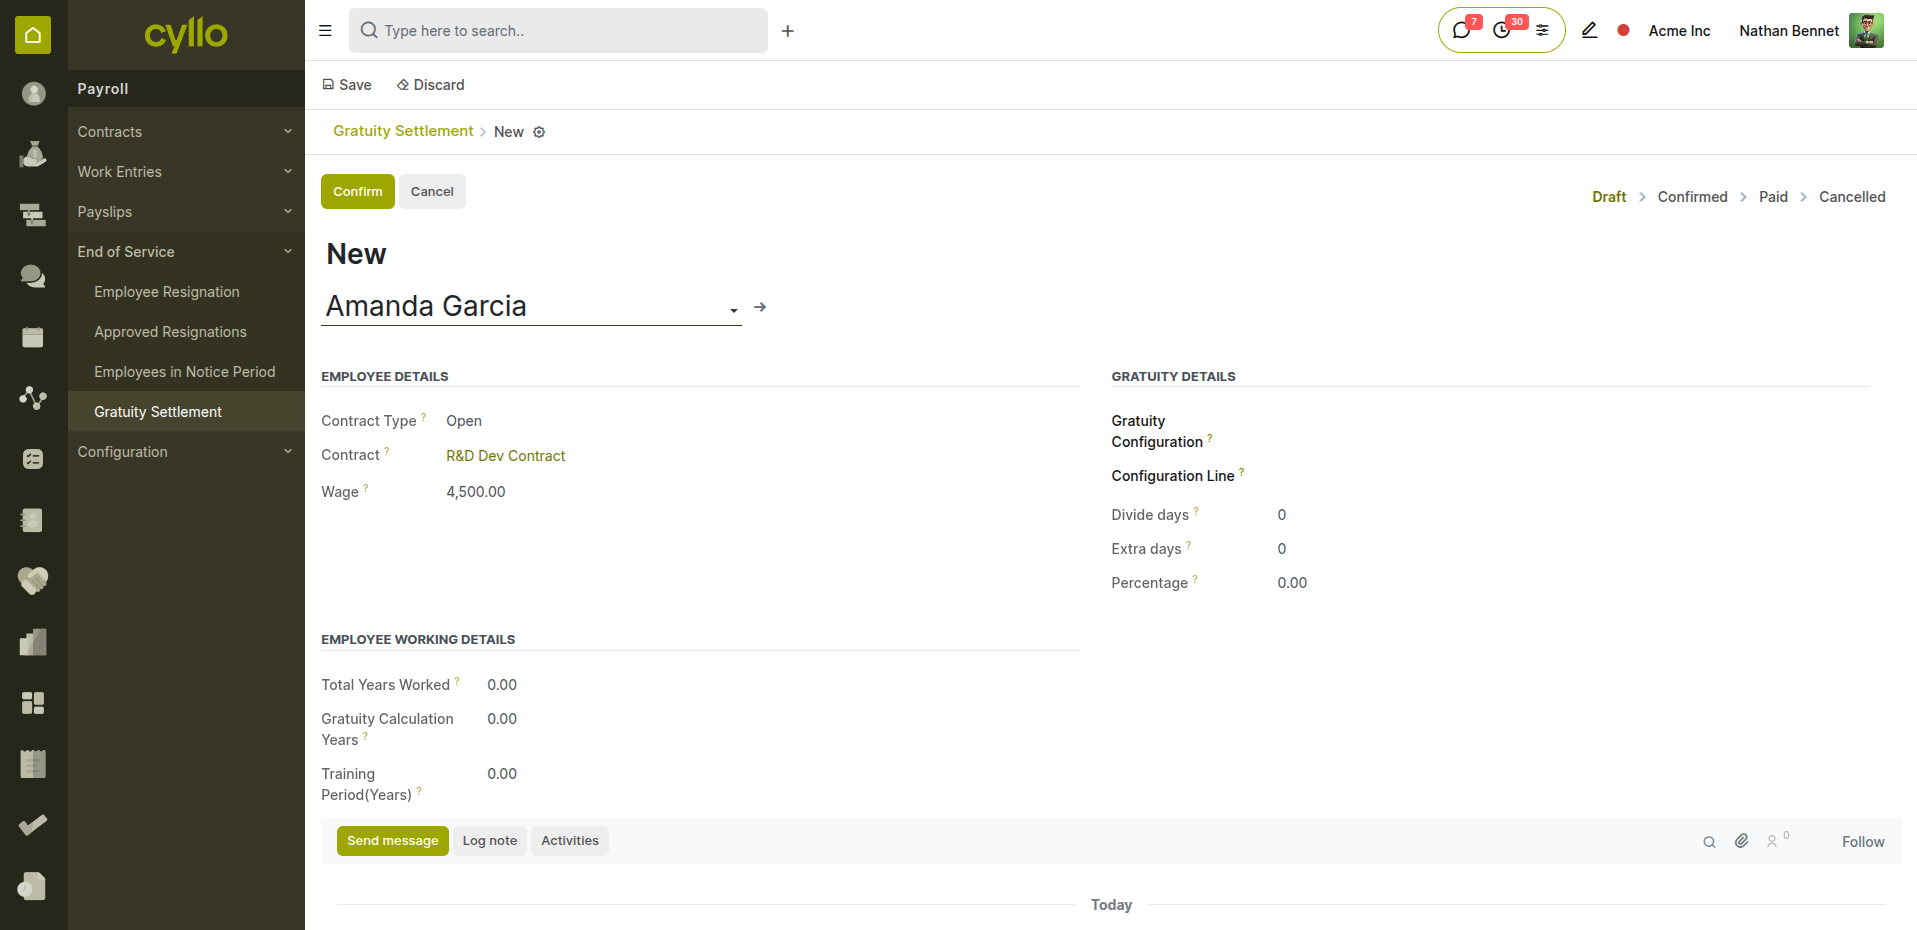
Fig 6.2 — Gratuity settlement form showing auto-calculated years, deductions, and final amount
How to Create a Gratuity Settlement:
- Go to Payroll → Resignation → Gratuity Settlements → New
- Select the Employee
- Cyllo auto-fills: joining date, leaving date, and total working years
- Any training period or approved unpaid leave is automatically deducted from gratuity years
- Select the Contract Type: Limited or Open
- The Gratuity Amount is calculated automatically from the configured rate brackets
- Click Confirm → HR reviews and clicks Approve → Finance clicks Mark as Paid after disbursement
Gratuity States:
- Draft: Settlement created — calculations not yet confirmed.
- Confirmed: Amount reviewed and confirmed by HR.
- Approved: Approved by Finance or senior management for payment.
- Paid: Gratuity disbursed to the employee.
- Cancelled: Settlement cancelled — e.g., resignation withdrawn.
Note
Gratuity rate brackets are configured per company from Payroll → Configuration → Gratuity Settings. Ensure these are set up correctly before processing your first gratuity settlement — incorrect bracket configuration will result in wrong amounts.
6.3 Final Payslip
Before the employee is archived, a final payslip must be generated and confirmed — covering their last partial pay period, any outstanding overtime, and deducting unpaid leave or advance salary recoveries.
How to Generate the Final Payslip:
- Go to Payroll → Payslips → All Payslips → New
- Select the Employee
- Set the Pay Period: from the start of the final month to the employee's last working day
- Click Compute Sheet — Cyllo pro-rates the salary to the actual days worked
- Verify: all salary attachments are fully deducted, all outstanding amounts are cleared
- Click Confirm to post the final payslip and create the accounting entry
- Ensure the payslip is marked as Paid before archiving the employee
Note
Do not archive the employee before confirming the final payslip. Once a record is archived, generating payslips for that employee requires unarchiving — adding extra steps and potential payroll period conflicts.
6.4 Employee Archiving
The final step in the Hire-to-Retire journey is archiving the employee record. Archiving removes the employee from all active lists, payroll runs, and attendance tracking — while preserving their complete historical record for compliance and audit purposes.
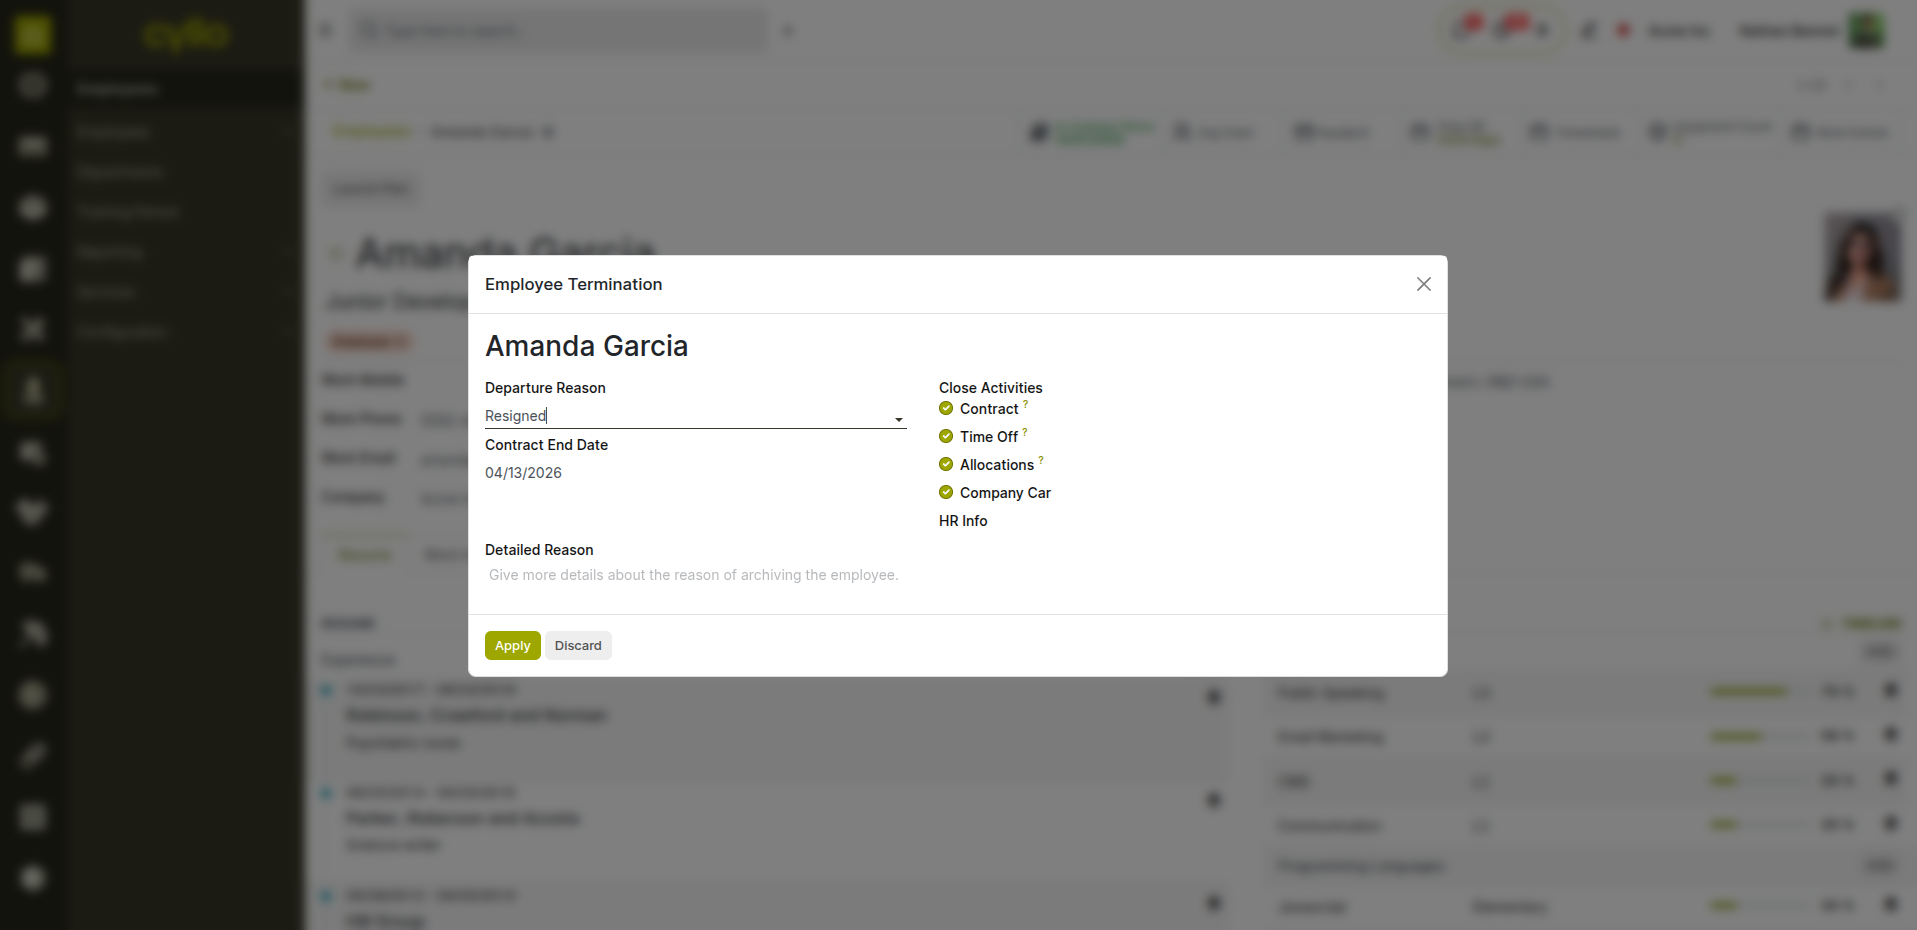
Fig 6.3 — Archive confirmation dialog on the employee record with final checklist
Offboarding Checklist Before Archiving:
- Resignation approved and leaving date confirmed
- All open incidents resolved and closed
- All company assets returned — custody records closed with actual return dates
- Final payslip confirmed and marked as Paid
- Gratuity Settlement marked as Paid
- Fleet vehicle reassigned or returned to pool
- Portal access revoked (unlink or deactivate the Related User account)
- All timesheets for the final period submitted and approved
How to Archive the Employee:
- Open the employee record
- Click the Action menu (⚙ gear icon)
- Select Archive
- Confirm the action
- The employee is removed from all active views — their full history is preserved
Note
To view archived employee records at any time, go to Employees → Employees and apply the filter Filters → Archived. All payslips, contracts, leave records, and incident history remain fully accessible for audit and compliance purposes.
7. Lifecycle Overview
7.1 Hire-to-Retire Flow Summary
The complete Hire-to-Retire journey in Cyllo flows as follows:
- Stage 1 — Hire: Job Position Created → Vacancy Published → Applications Received → Pipeline Managed → Offer Made → Contract Signed → Employee Created
- Stage 2 — Onboard: Employee Record Completed → Contract Activated → Portal Access Granted → Assets Issued
- Stage 3 — Operate: Attendance Tracked Daily → Timesheets Logged → Leave Requests Submitted & Approved → Monthly Payroll Processed → Salary Attachments Managed
- Stage 4 — Develop: Skills Updated → Training Recorded → Work Schedules Planned → Fleet Assigned
- Stage 5 — Manage: Contracts Monitored for Renewal → Incidents Recorded & Resolved → Asset Custody Audited
- Stage 6 — Offboard: Resignation Submitted & Approved → Gratuity Calculated & Paid → Final Payslip Confirmed & Paid → All Assets Returned → Employee Archived
7.2 Module Cross-Reference
- Stage: Hire
- Module: Recruitment
- Key Actions: Job Position, Application Pipeline, Offer, Create Employee
- Stage: Onboard
- Module: Employees, Contracts, Service/Custody
- Key Actions: Employee Record, Contract Activation, Portal Setup, Asset Issuance
- Stage: Operate
- Module: Attendance, Timesheets, Time Off, Payroll
- Key Actions: Check-in/out, Time Logging, Leave Requests, Monthly Payslips
- Stage: Develop
- Module: Employees (Skills), Planning, Fleet
- Key Actions: Resume Update, Shift Planning, Vehicle Assignment
- Stage: Manage
- Module: Contracts, Incident Management, Service/Custody
- Key Actions: Contract Renewal, Incident Recording, Custody Audit
- Stage: Offboard
- Module: Payroll (Resignation & Gratuity), Employees
- Key Actions: Resignation Approval, Gratuity Settlement, Final Payslip, Archive
Note
Every stage in the Hire-to-Retire journey is connected in Cyllo — data created at the Hire stage (name, department, contract type) flows automatically into Payroll, Attendance, and ultimately the Gratuity Settlement at offboarding. No manual re-entry. No data loss. No gaps.