

Cyllo Installation & Deployment Documentation
Introduction
Cyllo is a free, open-source ERP platform. It can be deployed in three ways: using the Linux installer package for the fastest possible setup, using Cyllo Cloud for a fully managed hosted environment, or installing directly from the source code on GitHub for teams that need full control over the server environment and the ability to customize the codebase. All three methods result in a fully functional Cyllo instance — the choice between them depends on the team's technical capability, infrastructure preferences, and operational requirements.
This guide covers all three installation paths in full detail, including the exact commands required for each step of the source installation process as published in Cyllo's official technical blog. It also covers production deployment hardening with Nginx as a reverse proxy, Let's Encrypt SSL certificate setup for HTTPS, and the first-time setup wizard that runs after installation — from database creation through the mass app installer, company configuration, and user setup.
System administrators who want professional guidance through the deployment process can also engage the Cyllo Success Pack — a structured implementation service with dedicated consultants.
1. System Requirements
Before beginning any installation, verify that the target server or machine meets the minimum requirements for Cyllo. Under-provisioned servers are the most common cause of performance issues after deployment.
1.1. Minimum Requirements
| Component | Minimum Specification |
|---|---|
| Operating System | Ubuntu 20.04 LTS or newer (Ubuntu 22.04 LTS recommended for new installations) |
| RAM | 4 GB (sufficient for a single-user or evaluation instance) |
| Storage | 10 GB free disk space for Cyllo files, PostgreSQL data, and log files |
| CPU | 2-core processor (64-bit) |
| Python | Python 3.10 or higher |
| Database | PostgreSQL 14 or higher |
| Network | Outbound internet access required for package installation and GitHub clone |
1.2. Recommended Production Specifications
For a production environment supporting concurrent users, the minimum specifications will result in poor performance. The following specifications are recommended for a reliable production deployment:
| Component | Recommended for Production |
|---|---|
| Operating System | Ubuntu 22.04 LTS |
| RAM | 8 GB or more (16 GB for organisations with 20+ concurrent users) |
| Storage | 50 GB SSD (more for organisations with large file attachments or database history) |
| CPU | 4-core processor, 64-bit |
| Database | PostgreSQL 15 — separate server recommended for large deployments |
| Web Server | Nginx (reverse proxy, SSL termination, static file serving) |
| SSL Certificate | Let's Encrypt (free) or a commercial certificate authority |
| Backup | Daily automated backup to a separate location (see Cyllo Database Backup module) |
TIP
For organisations deploying Cyllo for the first time, start with a single server (application + database on the same machine) and move the database to a dedicated PostgreSQL server once user load grows. Cyllo's configuration file makes this migration straightforward.
1.3. Supported Operating Systems
Cyllo's official support and documentation targets Ubuntu Linux. While Cyllo can technically be run on other Linux distributions or macOS (for development), Ubuntu is the only operating system with an official installer package and documented production deployment path.
| Operating System | Support Status |
|---|---|
| Ubuntu 20.04 LTS | Supported — minimum required version for the installer. |
| Ubuntu 22.04 LTS | Supported — recommended for all new installations. |
| Ubuntu 24.04 LTS | Supported — compatible with source installation. |
| Debian 11/12 | Community supported — source installation only. |
| macOS | Development use only — not recommended for production. |
| Windows | Not supported for production — development environment via WSL2 only. |
2. Installation Options Overview
Cyllo offers three distinct installation options, each designed for a different audience and use case. The table below summarises all three so administrators can choose the right path before proceeding.
| Installation Option | Best For | Key Characteristics |
|---|---|---|
| A — Linux Installer | Teams wanting the fastest possible on-premise setup with no manual configuration. | Pre-packaged Linux installer. Guides through setup interactively. Quickest path to a running instance. |
| B — Cyllo Cloud | Organisations that prefer a fully managed, hosted environment with no server administration. | No installation required. Access Cyllo via browser. Hosted at cyllo-cloud.com. Automatic updates and backups. |
| C — Source Code (Git) | Developers and administrators who need full control, custom module paths, or code-level access. | Clone from github.com/Cyllo. Full manual setup. Maximum flexibility. Suitable for production with proper hardening. |
All three options result in the same Cyllo ERP platform. The installation method does not affect which modules are available or how the system behaves once running — it only affects how the system is set up and maintained.
3. Option A — Installer (Linux Package)
The Cyllo Linux installer is the fastest way to get a Cyllo instance running on an Ubuntu server. It handles dependency installation, PostgreSQL setup, and service configuration automatically, reducing a multi-step manual process to a guided installation sequence.
3.1. What the Installer Provides
- Automated installation of all Python and system dependencies.
- Automatic PostgreSQL database setup and user creation.
- Cyllo service registration as a systemd service — starts automatically on server reboot.
- Default cyllo.conf configuration file with correct paths and database credentials.
- Cyllo is accessible at http: //your-server-ip: 8069 immediately after installation completes.
Note
The installer is optimised for Ubuntu 20.04 or higher. Running it on an older Ubuntu version or a different Linux distribution may result in dependency errors. Always verify the OS version before proceeding.
3.2. Downloading the Installer
The Cyllo installer package is available from the official download page. Navigate to cyllo.com/download and select the Installer tab to access the download link.
- Open a browser and navigate to https:/ /www.cyllo.com/download.
- Click the Installer tab at the top of the download page.
- Click Download Installer. The installer package downloads to your machine.
- Transfer the installer to your Ubuntu server using SCP or SFTP if downloading to a local machine.
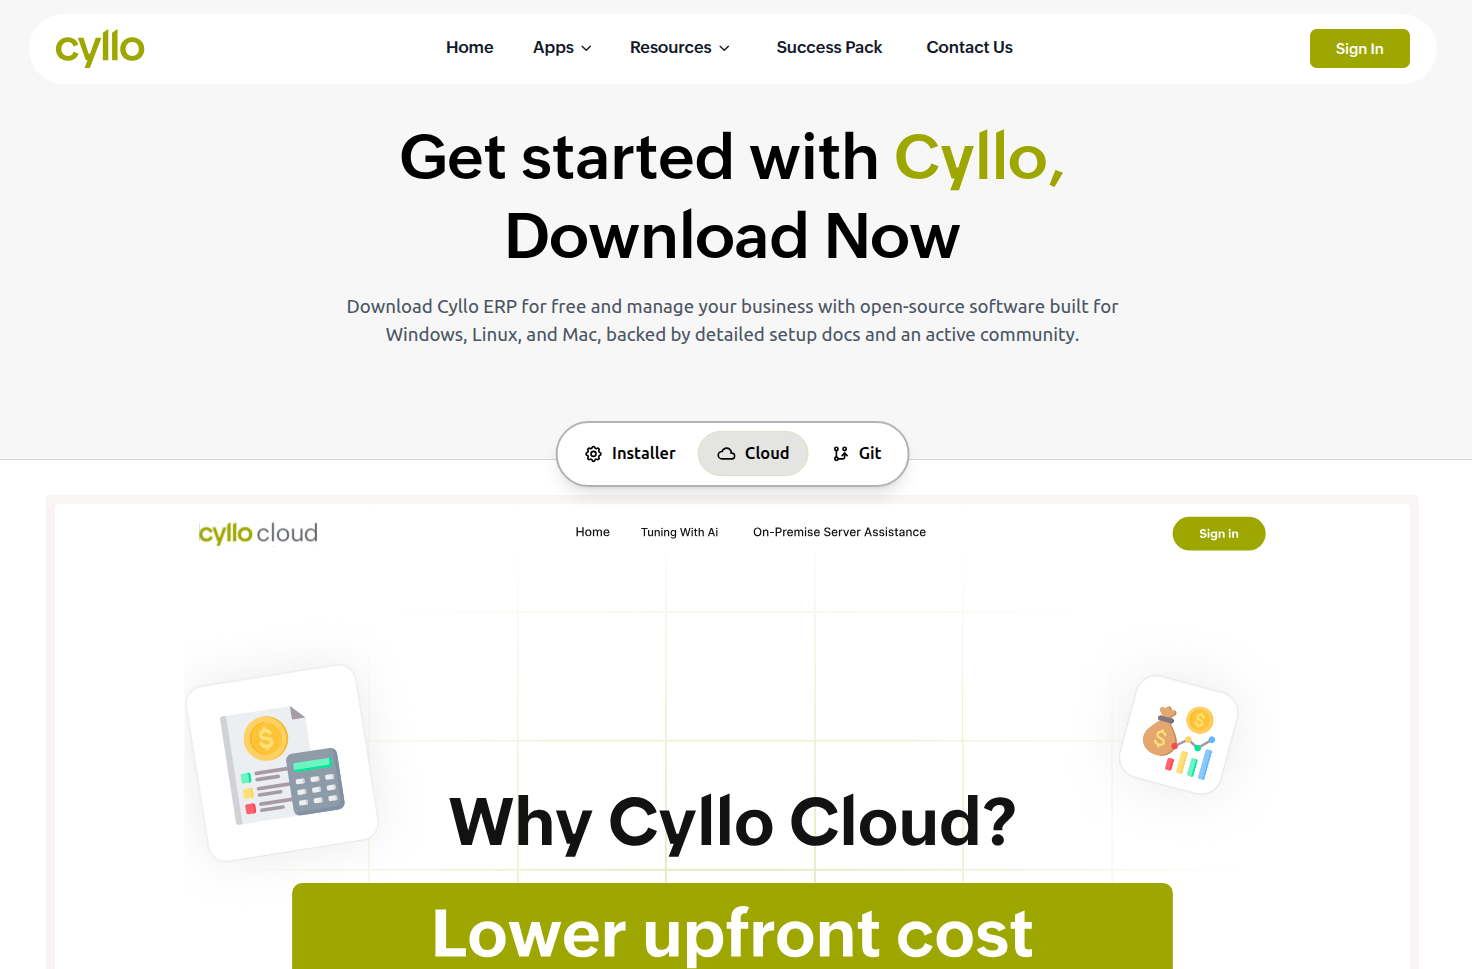
Fig 3.1 — Cyllo download page — three tabs visible: Installer, Cloud, Git; Installer tab active with Download Installer button
3.3. Running the Installer
Once the installer package is on the Ubuntu server, run it with administrator privileges. The installer guides through the setup process interactively, prompting for configuration choices at each stage.
- Open a terminal on the Ubuntu server.
- Navigate to the directory containing the downloaded installer package.
- Make the installer executable and run it:
sudo chmod +x cyllo-installer.run
sudo ./cyllo-installer.run- Follow the on-screen prompts. The installer will:
- Update system packages.
- Install Python 3, pip, and all required libraries.
- Install and configure PostgreSQL.
- Create a dedicated cyllo system user.
- Copy Cyllo files to /opt/cyllo.
- Generate the configuration file at /etc/cyllo.conf.
- Register and start the cyllo.service systemd unit.
- When installation is complete, the terminal displays the URL to access Cyllo: http:/ /your-server-ip:8069.
3.4. Post-Install Verification
After the installer completes, verify that the Cyllo service is running correctly before proceeding to the first-time setup.
## Check service status
sudo systemctl status cyllo.service

## View live logs
sudo tail -f /var/log/cyllo/cyllo.log
The status command should show Active: active (running). Open a browser and navigate to http:/ /your-server-ip:8069 to confirm the Cyllo login page loads. Then proceed to Section 7 for the first-time setup.
4. Option B — Cloud (Cyllo Cloud)
Cyllo Cloud is a fully managed, hosted version of Cyllo ERP accessible at cyllo-cloud.com. It requires no server, no installation, and no system administration — Cyllo handles infrastructure, updates, backups, and security patches. The business accesses Cyllo through a web browser from any device.
4.1. What Cyllo Cloud Provides
- Instant access: No installation or server provisioning. The environment is ready within minutes of sign-up.
- Automatic updates: Cyllo applies version updates and security patches automatically — no downtime or manual upgrade steps.
- Managed backups: Database and file backups are handled by Cyllo's hosting infrastructure. No backup configuration required.
- Scalability: Server resources scale with usage. No capacity planning or hardware upgrades needed as the business grows.
- SSL included: HTTPS is enabled by default on all Cyllo Cloud instances. No certificate configuration required.
- Anywhere access: The instance is accessible from any device with a browser and internet connection — no VPN or IP restrictions.
4.2. Signing Up for Cyllo Cloud
Cyllo Cloud is accessed through cyllo-cloud.com. Contact the Cyllo team via cyllo.com/contact-us to request a cloud instance or discuss cloud hosting options.
- Navigate to https:/ /cyllo-cloud.com or contact Cyllo via https:/ /www.cyllo.com/contact-us.
- Request a new cloud instance. The Cyllo team provisions the environment and provides login credentials.
- Access the instance URL provided, log in with the initial credentials, and proceed through the first-time setup.
Note
Cyllo Cloud is ideal for businesses that want to use Cyllo immediately without IT infrastructure investment. Organisations requiring data sovereignty, custom server configuration, or offline capability should consider the self-hosted installation options instead.
4.3. Cloud vs Self-Hosted Comparison
| Consideration | Cloud | Self-Hosted (Installer / Source) |
|---|---|---|
| Setup time | Minutes — no infrastructure needed | Hours to days depending on method and team experience |
| Server management | None — fully managed by Cyllo | Full responsibility — OS updates, security patches, backups |
| Customisation | Limited — standard Cyllo modules only | Full — custom modules, code changes, addons path |
| Data location | Cyllo's hosted infrastructure | Your own server — full data sovereignty |
| Uptime | Managed SLA by Cyllo hosting | Depends on your infrastructure and monitoring |
| Offline capability | No — requires internet connection | Yes — internal network access is sufficient |
| Cost | Hosting fee — contact Cyllo for pricing | Server costs only — Cyllo software is free |
| Updates | Automatic | Manual — admin triggers updates |
5. Option C — Source Code (Git)
The source installation method clones Cyllo directly from GitHub and configures every component manually. This is the most flexible installation path — suitable for production deployments where administrators need full control over the environment, custom addons paths, or the ability to modify the codebase. All commands in this section are taken from Cyllo's official installation blog at cyllo.com/blog/install-cyllo-on-ubuntu-server.
5.1. When to Use Source Installation
- When custom Cyllo modules or addons need to be added at installation time.
- When the organisation requires a specific Python or PostgreSQL version not bundled with the installer.
- When developers need direct access to the Cyllo source code for debugging or customisation.
- When deploying to a server environment that has been pre-hardened with specific security policies.
WARNING
Source installation requires Linux command-line proficiency. Each step must be completed in order. Skipping steps or entering commands incorrectly can result in a non-functional installation. Take note of all passwords created during setup — they are required in the configuration file.
5.2. Step 1 — Connect to the Server via SSH
All installation steps are performed on the Ubuntu server via an SSH terminal session. Connect to the server as a user with sudo (administrator) privileges.
ssh username@IP_Address -p Port_number5.3. Step 2 — Update the Server
Ensure all existing system packages are current before installing new software. This prevents version conflicts between existing and newly installed packages.
sudo apt-get update
sudo apt-get upgrade
5.4. Step 3 — Enhance Server Security
Install Fail2ban to protect the server from brute-force SSH attacks. Fail2ban monitors login attempts and automatically blocks IP addresses that repeatedly fail authentication.
sudo apt-get install openssh-server fail2banNote
Fail2ban is configured with sensible defaults out of the box — no additional configuration is required for basic SSH protection. For advanced rule customisation, refer to the Fail2ban documentation.
5.5. Step 4 — Install Required Packages & Libraries
Cyllo requires a set of Python, XML, image processing, and build libraries. Install pip3 first, then all system dependencies, followed by the Node.js/Less compiler required for Cyllo's frontend assets.
Install pip3:
sudo apt-get install -y python3-pipInstall system libraries:
sudo apt-get install python-dev python3-dev libxml2-dev libxslt1-dev \
  zlib1g-dev libsasl2-dev libldap2-dev build-essential libssl-dev \
  libffi-dev libmysqlclient-dev libjpeg-dev libpq-dev libjpeg8-dev \
    liblcms2-dev libblas-dev libatlas-base-dev
Install Node.js and Less CSS compiler:
sudo apt-get install -y npm
sudo ln -s /usr/bin/nodejs /usr/bin/node
sudo npm install -g less less-plugin-clean-css
sudo apt-get install -y node-less
TIP
If any package in the system libraries command fails with a 'package not found' error, run the commands one at a time to identify the specific package. Some library names differ slightly between Ubuntu 20.04 and 22.04.
5.6. Step 5 — Configure PostgreSQL
Cyllo uses PostgreSQL as its database engine. Install PostgreSQL, create a dedicated database user for Cyllo, and grant it superuser privileges so it can create and manage the Cyllo database.
Install PostgreSQL:
sudo apt-get install postgresqlCreate the Cyllo database user:
sudo su - postgres
createuser --createdb --username postgres --no-createrole --no-superuser --pwprompt cyllo
When prompted, enter and confirm a strong password for the cyllo database user. Note this password — it must be entered in the cyllo.conf file in Step 10.
Grant superuser privileges:
psql
ALTER USER cyllo WITH SUPERUSER;
\q
exit
Note
The ALTER USER command grants the cyllo database user full PostgreSQL superuser access. This is required so that Cyllo can create new databases from the web interface when setting up the first database in the first-time setup wizard.
5.7. Step 6 — Create a System User
Create a dedicated Linux system user named cyllo. Cyllo will run as this user — isolating the application from the rest of the system for security. The home directory /opt/cyllo will hold the Cyllo application files.
sudo adduser --system --home=/opt/cyllo --group cyllo5.8. Step 7 — Clone Cyllo from GitHub
Switch to the cyllo system user and clone the Cyllo 17.0 branch from GitHub into the home directory. The --depth 1 flag clones only the latest commit, keeping the download size small.
Install Git and switch to the cyllo user:
sudo apt-get install git
sudo su - cyllo -s /bin/bash
Clone the repository:
git clone https://www.github.com/cyllo/cyllo --depth 1 --branch 17.0 --single-branch .The dot (.) at the end of the command clones the files directly into /opt/cyllo — the current directory — rather than creating a subdirectory. After cloning, exit the cyllo user session:
exitNote
The clone command pulls branch 17.0 from github.com/Cyllo. If a newer stable branch becomes available (e.g. 18.0), replace '17.0' with the desired branch name. Always use --single-branch to avoid downloading the full branch history.
5.9. Step 8 — Install Python Requirements
Cyllo's Python dependencies are listed in the requirements.txt file cloned from GitHub. Install all of them using pip3:
sudo pip3 install -r /opt/cyllo/requirements.txtTIP
If any requirement fails to install, check the Python version with python3 --version. Cyllo requires Python 3.10 or newer. On Ubuntu 20.04, Python 3.8 is the default — install Python 3.10 from the deadsnakes PPA before running this step.
5.10. Step 9 — Install Wkhtmltopdf
Wkhtmltopdf is required to generate PDF reports in Cyllo — invoices, sales orders, delivery notes, and all other printable documents. It converts Cyllo's HTML report templates into PDF format at the time of printing.
sudo wget https://github.com/wkhtmltopdf/wkhtmltopdf/releases/download/0.12.5/wkhtmltox_0.12.5-1.bionic_amd64.deb
sudo dpkg -i wkhtmltox_0.12.5-1.bionic_amd64.deb
sudo apt install -f
Note
The apt install -f command fixes any broken dependencies that may result from the wkhtmltopdf dpkg installation. Always run it after the dpkg command, even if dpkg appears to complete successfully.
5.11. Step 10 — Configure cyllo.conf
The Cyllo configuration file (cyllo.conf) stores all critical settings — database credentials, addon paths, log file location, and the master password for database operations. A template is included in the cloned repository and must be copied to /etc and edited with the correct values.
Copy the configuration template:
sudo cp /opt/cyllo/debian/cyllo.conf /etc/cyllo.conf
sudo nano /etc/cyllo.conf
Configuration file contents:
[options]
   admin_passwd = YOUR_MASTER_PASSWORD
   db_host = False
   db_port = False
   db_user = cyllo
   db_password = YOUR_DB_PASSWORD
   addons_path = /opt/cyllo/addons, /opt/cyllo/cyllo_addons
   server_wide_modules = web, cyllo_web
logfile = /var/log/cyllo/cyllo.log| Configuration Key | What to Set |
|---|---|
| admin_passwd | The master password for Cyllo database operations (create, delete, duplicate databases from the /web/database/manager page). Set a strong, unique value — this is not the same as any user's login password. |
| db_host | Leave as False to connect to PostgreSQL on the same server using a Unix socket. Set to the database server IP address only if PostgreSQL is on a separate server. |
| db_port | Leave as False for the default PostgreSQL port (5432). Change only if PostgreSQL is running on a non-standard port. |
| db_user | The PostgreSQL user created in Step 5 — cyllo. |
| db_password | The password set for the cyllo PostgreSQL user in Step 5. Enter it exactly as typed during user creation. |
| addons_path | Comma-separated list of directories containing Cyllo module addons. The default paths include both the core addons and Cyllo's proprietary addons. Add custom module directories here separated by commas. |
| server_wide_modules | Modules loaded at server startup before any database is selected. Leave as default unless advised otherwise. |
| logfile | Path to the Cyllo log file. The directory must exist with cyllo user write permissions (created in the next command). |
Set permissions and create the log directory:
sudo chown cyllo: /etc/cyllo.conf
sudo chmod 640 /etc/cyllo.conf
sudo mkdir /var/log/cyllo
sudo chown cyllo:root /var/log/cyllo
WARNING
The admin_passwd in cyllo.conf is the master password for the entire Cyllo installation — not a user login password. Anyone who knows this password can create, delete, and duplicate databases from the database manager. Set a long, random password and store it securely. Do not use 'admin' as the master password in production.
5.12. Step 11 — Create the Systemd Service
Create a systemd service file so that Cyllo runs as a managed Linux service — starting automatically on server boot, restarting on failure, and manageable with standard systemctl commands.
sudo nano /etc/systemd/system/cyllo.serviceService file contents:
[Unit]
   Description=cyllo
   Documentation=http://www.cyllo.com

[Service]
   Type=simple
   User=cyllo
   ExecStart=/opt/cyllo/cyllo-bin -c /etc/cyllo.conf

[Install]
   WantedBy=default.target
Set service file permissions:
sudo chmod 755 /etc/systemd/system/cyllo.service
sudo chown root: /etc/systemd/system/cyllo.service
5.13. Step 12 — Start and Enable the Service
Start the Cyllo service and verify it is running. Enable it so it starts automatically every time the server reboots.
## Start the service
sudo systemctl start cyllo.service

## Check that the service is active
sudo systemctl status cyllo.service

## Enable auto-start on server reboot
sudo systemctl enable cyllo.service
If the status command shows Active: active (running), the installation is complete. Open a browser and navigate to http:/ /your-server-ip :8069 to confirm the Cyllo interface loads.
6. Production Deployment — Nginx & SSL
Running Cyllo directly on port 8069 without a reverse proxy is acceptable for development and testing but is not recommended for production. Nginx provides SSL termination (HTTPS), improved security, static file serving, and the ability to run Cyllo on the standard HTTPS port 443 without running Cyllo as root.
6.1. Why Nginx is Recommended
- SSL termination: Nginx handles the HTTPS certificate and encryption, passing plain HTTP to Cyllo internally. Cyllo does not need to manage certificates directly.
- Static file serving: Nginx serves Cyllo's static assets (images, CSS, JavaScript) directly without involving the Python application server — significantly improving page load times.
- Port 443: Standard HTTPS port. Users access Cyllo via https:/ /yourdomain.com without specifying a port number.
- Security headers: Nginx can add HTTP security headers (HSTS, X-Frame-Options, Content Security Policy) that Cyllo does not add by default.
- Longpolling: Cyllo uses a separate port (8072) for real-time features (live chat, notifications). Nginx proxies both the main application and the longpolling endpoint transparently.
6.2. Installing Nginx
sudo apt-get update
sudo apt-get install nginx
sudo systemctl enable nginx
sudo systemctl start nginx
Verify Nginx is running by visiting http:/ /your-server-ip in a browser — the default Nginx welcome page should appear.
6.3. Configuring Nginx as a Reverse Proxy
Create an Nginx server block configuration file for Cyllo. This configuration forwards all HTTP requests to Cyllo's application server on port 8069 and routes longpolling requests to port 8072.
sudo nano /etc/nginx/sites-available/cylloNginx configuration file:
upstream cyllo {
    server 127.0.0.1:8069;
}

upstream cyllo-im {
    server 127.0.0.1:8072;
}

server {
    listen 80;
    server_name yourdomain.com www.yourdomain.com;

    # Proxy main application
    location / {
        proxy_pass http://cyllo;
        proxy_set_header X-Forwarded-Host $host;
        proxy_set_header X-Forwarded-For $proxy_add_x_forwarded_for;
        proxy_set_header X-Forwarded-Proto $scheme;
        proxy_set_header X-Real-IP $remote_addr;
        proxy_redirect off;
    }

    # Proxy longpolling (live chat, real-time notifications)
    location /longpolling {
        proxy_pass http://cyllo-im;
    }

    # Serve static files directly from Nginx
    location ~* /web/static/ {
        proxy_cache_valid 200 90d;
        proxy_buffering on;
        expires 864000;
        proxy_pass http://cyllo;
    }

    # Increase upload size for large attachments
    client_max_body_size 200m;
}
Enable the configuration and reload Nginx:
sudo ln -s /etc/nginx/sites-available/cyllo /etc/nginx/sites-enabled/cyllo
sudo nginx -t
sudo systemctl reload nginx
The nginx -t command validates the configuration file for syntax errors before reloading. Always run it before reloading to prevent taking the site offline due to a configuration mistake.
6.4. Enabling HTTPS with Let's Encrypt (Certbot)
Let's Encrypt provides free, automatically renewing SSL certificates. Certbot is the official Let's Encrypt client that installs the certificate and automatically updates the Nginx configuration to serve HTTPS.
Install Certbot and the Nginx plugin:
sudo apt-get install certbot python3-certbot-nginxRequest a certificate for your domain:
sudo certbot --nginx -d yourdomain.com -d www.yourdomain.comCertbot prompts for an email address for renewal notifications, asks you to agree to the Let's Encrypt terms, and then automatically:
- Obtains a certificate for yourdomain.com and www.yourdomain.com.
- Modifies the Nginx configuration to add an SSL server block listening on port 443.
- Configures automatic certificate renewal via a systemd timer — no manual renewal needed.
Verify automatic renewal:
sudo certbot renew --dry-runA successful dry run confirms that renewal is configured correctly. Let's Encrypt certificates expire after 90 days — Certbot renews them automatically 30 days before expiry.
Note
Certbot requires the domain to be pointed at the server's public IP address (DNS A record) before running. The certificate request will fail if the domain does not resolve to the server. Verify DNS propagation before running the certbot command.
6.5. Force HTTP to HTTPS
After SSL is configured, redirect all HTTP traffic to HTTPS so that users who access the site on port 80 are automatically sent to the secure version. Certbot often adds this redirect automatically, but it can be added manually if needed.
Verify the Nginx configuration includes a redirect block for port 80. If Certbot added it automatically, it will look similar to this:
server {
    listen 80;
    server_name yourdomain.com www.yourdomain.com;
    return 301 https://$host$request_uri;
}
Also update cyllo.conf to inform Cyllo it is running behind HTTPS:
sudo nano /etc/cyllo.conf## Add these lines under [options]:
proxy_mode = Truesudo systemctl restart cyllo.service
sudo systemctl reload nginxTIP
Setting proxy_mode = True in cyllo.conf tells Cyllo to trust the X-Forwarded-Proto header from Nginx. Without this, Cyllo may generate HTTP links in emails and reports even when the site is served over HTTPS.
7. Cyllo Success Pack
The Cyllo Success Pack is a structured professional services engagement for organisations that want expert guidance through deployment, configuration, training, and go-live. It provides dedicated access to Cyllo consultants who work directly with the business to ensure a successful implementation.
7.1. What is the Success Pack?
A Success Pack is a pre-purchased block of consulting hours from the Cyllo team. The hours can be used for any combination of implementation services — system setup, workflow configuration, data migration, custom module development, staff training, and post-go-live support. Success Pack consultants are experienced Cyllo specialists who understand both the technical and functional aspects of the platform.
The Success Pack is particularly valuable for businesses that are:
- Deploying Cyllo for the first time without in-house ERP expertise.
- Migrating from another ERP system with existing data to import.
- Requiring custom module development or system integrations.
- Running complex business processes that need careful configuration and testing.
7.2. Success Pack Tiers
| Pack | Price / Hours | Best For |
|---|---|---|
| Team | $900 — 25 Hours | Small teams deploying a focused set of modules with minimal customisation. |
| Standard | $1,700 — 80 Hours | Mid-size organisations deploying across multiple modules with some workflow configuration and training. |
| Business | $3,200 — 190 Hours | Larger organisations require complex configuration, data migration, custom development, and comprehensive staff training. |
Success Pack hours do not expire on a fixed date — they can be used at any pace as the implementation progresses. Unused hours can be carried forward for post-go-live support and ongoing optimisation work.
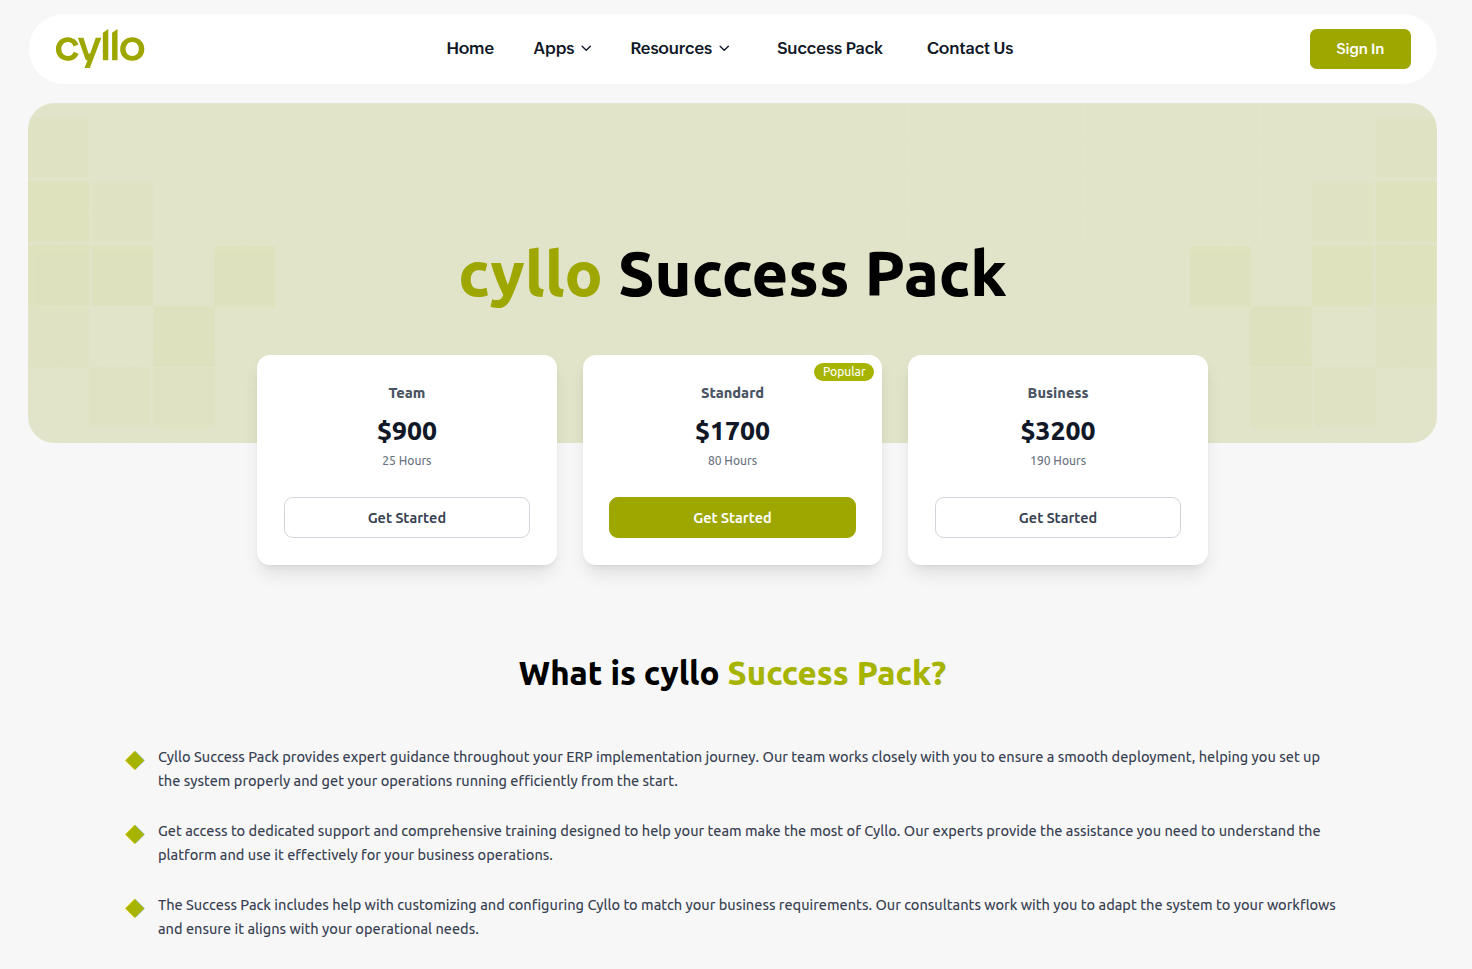
Fig 7.1 — Success Pack pricing page at cyllo.com/success-pack — three tiers: Team ($900/25h), Standard ($1,700/80h), Business ($3,200/190h) with Get Started buttons
7.3. Services Covered
Success Pack hours can be applied to any of the following professional services, in any combination agreed between the business and the Cyllo team:
| Service | Description |
|---|---|
| Implementation | End-to-end ERP deployment — server setup, module installation, configuration, and go-live support. |
| Customisation | Configuration of Cyllo to match specific business workflows, including Cyllo Studio customisations and field additions. |
| Integration | Connecting Cyllo to third-party systems — accounting software, payment gateways, e-commerce platforms, or legacy databases. |
| App Development | Custom Cyllo module development for business-specific features not available in the standard platform. |
| Data Migration | Import of historical records from a previous ERP, spreadsheets, or other data sources into the new Cyllo database. |
| Training | Hands-on training sessions for end users and administrators covering the specific modules deployed. |
| Functional Support | Guidance on how to use Cyllo correctly for specific business processes — configuration advice, best practice recommendations. |
| Technical Support | Developer-level debugging, error resolution, and performance troubleshooting. |
To purchase a Success Pack or request more information, visit https:/ /www.cyllo.com/success-pack or contact the Cyllo team at https:/ /www.cyllo.com/contact-us.
8. Post-Deployment Administration
Once Cyllo is running in production, a small set of routine administration tasks keeps the system healthy — restarting the service after configuration changes, monitoring logs, applying updates, and managing backups.
8.1. Restarting the Service
Restart the Cyllo service whenever cyllo.conf is modified or after installing new modules via the command line. A restart loads the updated configuration and any newly installed Python code.
sudo systemctl restart cyllo.serviceNote
New modules installed through the Cyllo web interface (Settings → Apps) do not require a service restart — they are installed and activated live. A restart is only required when modules are added directly to the addons path on the filesystem or when cyllo.conf is edited.
### 8.2. Viewing Logs
The Cyllo log file records all application events — startup messages, database queries, errors, and warnings. It is the first place to look when diagnosing any issue.

## View live log output in real time
sudo tail -f /var/log/cyllo/cyllo.log

## Search for errors in the log
sudo grep 'ERROR' /var/log/cyllo/cyllo.log

## Check systemd journal for service-level errors
sudo journalctl -u cyllo.service -n 100
TIP
Set up log rotation for /var/log/cyllo/cyllo.log using logrotate to prevent the log file from growing indefinitely. Create a file at /etc/logrotate.d/cyllo with weekly rotation, 4 weeks retention, and compression enabled.
8.3. Updating Cyllo
For source installations, Cyllo is updated by pulling the latest changes from GitHub and restarting the service. Always take a database backup before updating.
## Switch to the cyllo system user
sudo su - cyllo -s /bin/bash

## Pull the latest code from GitHub
git -C /opt/cyllo pull origin 17.0

## Return to the admin user
exit

## Install any new Python requirements
sudo pip3 install -r /opt/cyllo/requirements.txt

## Restart the service
sudo systemctl restart cyllo.service
WARNING
After a major version update, Cyllo may need to run a database migration to update the database schema to match the new code. Run the update with the -u all flag on the command line to force a full module update: sudo -u cyllo /opt/cyllo/cyllo-bin -c /etc/cyllo.conf -u all --stop-after-init
8.4. Backup & Recovery
Cyllo provides a built-in Database Backup module (accessible from Settings) that supports automated backups to local storage, Google Drive, Amazon S3, Dropbox, SFTP, and FTP. For the highest protection, configure at least two backup destinations — one local and one off-site.
Manual database backup via command line:
## Create a PostgreSQL dump backup
sudo -u postgres pg_dump your_database_name > /backup/cyllo_backup_$(date +%F).sql

## Compress the backup
gzip /backup/cyllo_backup_$(date +%F).sql
Restore from backup:
## Decompress the backup
gunzip /backup/cyllo_backup_YYYY-MM-DD.sql.gz

## Restore to a PostgreSQL database
sudo -u postgres psql your_database_name < /backup/cyllo_backup_YYYY-MM-DD.sql
Note
The Cyllo Database Backup module provides a graphical interface for scheduling and managing backups without command-line access. Go to Settings → Database Backup Management to configure automated backup schedules and destinations after installation.
9. Troubleshooting
This section covers the most common issues encountered during Cyllo installation and deployment, with diagnostic steps and solutions for each.
9.1. Common Installation Issues
| Issue | Likely Cause | Solution |
|---|---|---|
| Python package fails during pip3 install -r requirements.txt | Python version mismatch — requirements need Python 3.10+ | Check python3 --version. If below 3.10, install Python 3.10 from the deadsnakes PPA: sudo add-apt-repository ppa:deadsnakes/ppa && sudo apt-get install python3.10 |
| wkhtmltopdf dpkg error during installation | Missing library dependency on Ubuntu 22.04 | Run sudo apt install -f immediately after the dpkg command to auto-resolve dependencies. |
| git clone fails — 'Repository not found' | Incorrect repository URL or network access blocked | Verify the URL: https:/ /www.github.com/cyllo/cyllo. Check outbound HTTPS access from the server. |
| npm install -g less fails | npm not installed or Node.js symlink missing | Run sudo apt-get install -y npm first, then sudo ln -s /usr/bin/nodejs /usr/bin/node before running the npm install command. |
| Permission denied on /opt/cyllo during clone | Git clone run as root instead of the cyllo system user | Switch to the cyllo user first: sudo su - cyllo -s /bin/bash. Then run the git clone command. |
9.2. Service Not Starting
When systemctl start cyllo.service fails or the service shows a failed status, check the logs for the specific error:
sudo journalctl -u cyllo.service -n 50
sudo tail -n 100 /var/log/cyllo/cyllo.log| Error in Log | Solution |
|---|---|
| 'no such file or directory: /opt/cyllo/cyllo-bin' | The ExecStart path in the service file is wrong. Verify the cyllo-bin executable exists: ls /opt/cyllo/cyllo-bin. Update the service file if the path differs. |
| 'could not connect to server: No such file or directory' | PostgreSQL is not running. Start it: sudo systemctl start postgresql. |
| 'configuration file /etc/cyllo.conf not found' | The config file path in the service ExecStart command does not match where cyllo.conf was saved. Verify with: ls /etc/cyllo.conf. |
| 'Permission denied' on log directory | The /var/log/cyllo directory is missing or the cyllo user does not own it. Run: sudo mkdir /var/log/cyllo && sudo chown cyllo:root /var/log/cyllo. |
9.3. Database Connection Errors
Database connection errors appear in the log as 'FATAL: password authentication failed for user cyllo' or 'could not connect to server'. These are almost always caused by an incorrect password in cyllo.conf or the PostgreSQL service not running.
## Verify PostgreSQL is running
sudo systemctl status postgresql

## Test the database connection manually
psql -U cyllo -h localhost -d postgres- If the password test fails: Reset the PostgreSQL password:
sudo -u postgres psql -c "ALTER USER cyllo WITH PASSWORD 'new_password';"then update db_password in cyllo.conf to match.
- If PostgreSQL is not running: Start it with sudo systemctl start postgresql and enable it: sudo systemctl enable postgresql.
9.4. Nginx / SSL Issues
Nginx and SSL issues are the most common post-installation problems. The diagnostics below cover the most frequently encountered cases.
| Issue | Solution |
|---|---|
| Nginx shows 502 Bad Gateway | Cyllo service is not running or is on a different port. Verify the service: sudo systemctl status cyllo.service. Verify the upstream address in the Nginx config matches the actual Cyllo port (default 8069). |
| Certbot fails — 'Could not automatically find a matching server block' | The server_name in the Nginx config does not match the domain used in the certbot command. Ensure they are identical. |
| Certbot fails — 'Domain name not found in DNS' | The domain's A record does not point to the server's public IP. Check DNS propagation with: dig yourdomain.com. Wait for propagation (up to 48 hours) before retrying. |
| HTTPS certificate shows as expired | Certbot auto-renewal has failed. Check: sudo certbot renew --dry-run. If it fails, check the certbot systemd timer: sudo systemctl status certbot.timer. |
| Cyllo generates HTTP links in emails after SSL setup | proxy_mode = True not set in cyllo.conf. Add it and restart the service: sudo systemctl restart cyllo.service. |