

Cyllo Discuss Documentation
Introduction
The Cyllo Discuss module is the unified internal communication hub for your entire organization. It enables teams to collaborate through direct messages, group chats, and topic-based channels — all within Cyllo, eliminating the need for external communication tools. Users can send messages, share files, conduct video meetings, and manage all their notifications from a single, centralized workspace. Discuss integrates seamlessly with every other Cyllo module by embedding a chatter panel directly on each business record — Sales Orders, Purchase Orders, Invoices, CRM Leads, HR Records, Project Tasks, and more. This means any conversation, internal note, file, or activity log tied to a record is always visible in context, ensuring that every team member — from sales to accounting to operations — stays aligned without switching applications or duplicating information. The result is a comprehensive communication framework built directly into your ERP, where every message, mention, attachment, and activity feeds into the same centralized Cyllo database, giving teams full visibility and traceability across all business processes.
1. Discuss Core Operations
The Discuss module provides a complete messaging environment for internal team communication. Access it by navigating to Discuss from the main Cyllo menu.
1.1 Direct Messages (DM)
Direct Messages allow you to have one-on-one private conversations with any colleague in your Cyllo organization. All message history is preserved and searchable, so you never lose important context.
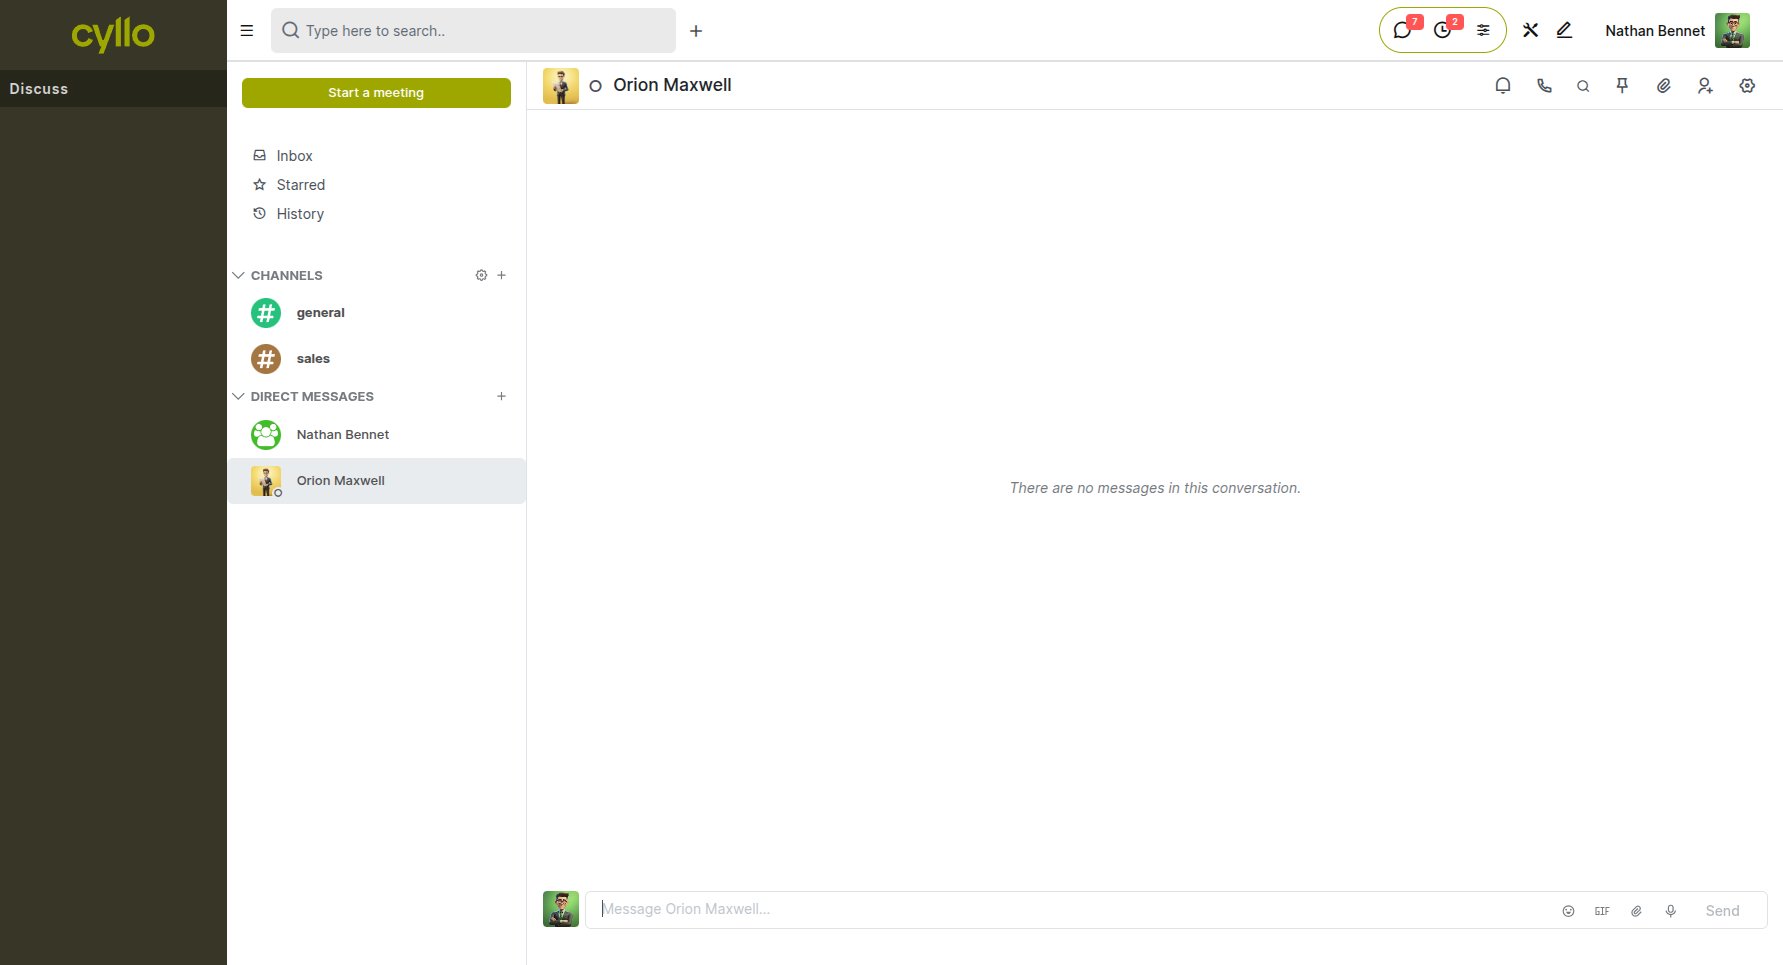
Fig 1.1 — Discuss module showing the Direct Messages panel with an active one-on-one conversation
How to start a Direct Message:
- Go to Discuss from the top navigation bar
- In the left panel, click + New Message under the Direct Messages section
- Search for and select the colleague you want to message
- Type your message in the input box and press Enter or click Send
Key Fields
- Recipient: The Cyllo user you are sending the message to
- Message Box: Text input supporting plain text, emoji, and file attachments
- Attachments: Click the paperclip icon to attach a file to your message
Note
Direct messages are private and visible only to the participants in the conversation.
1.2 Group Chats
Group Chats allow you to bring multiple team members into a single conversation thread, making it easy to collaborate on a topic without the structure of a formal channel. Group chats are ideal for short-term project discussions or ad hoc team coordination.
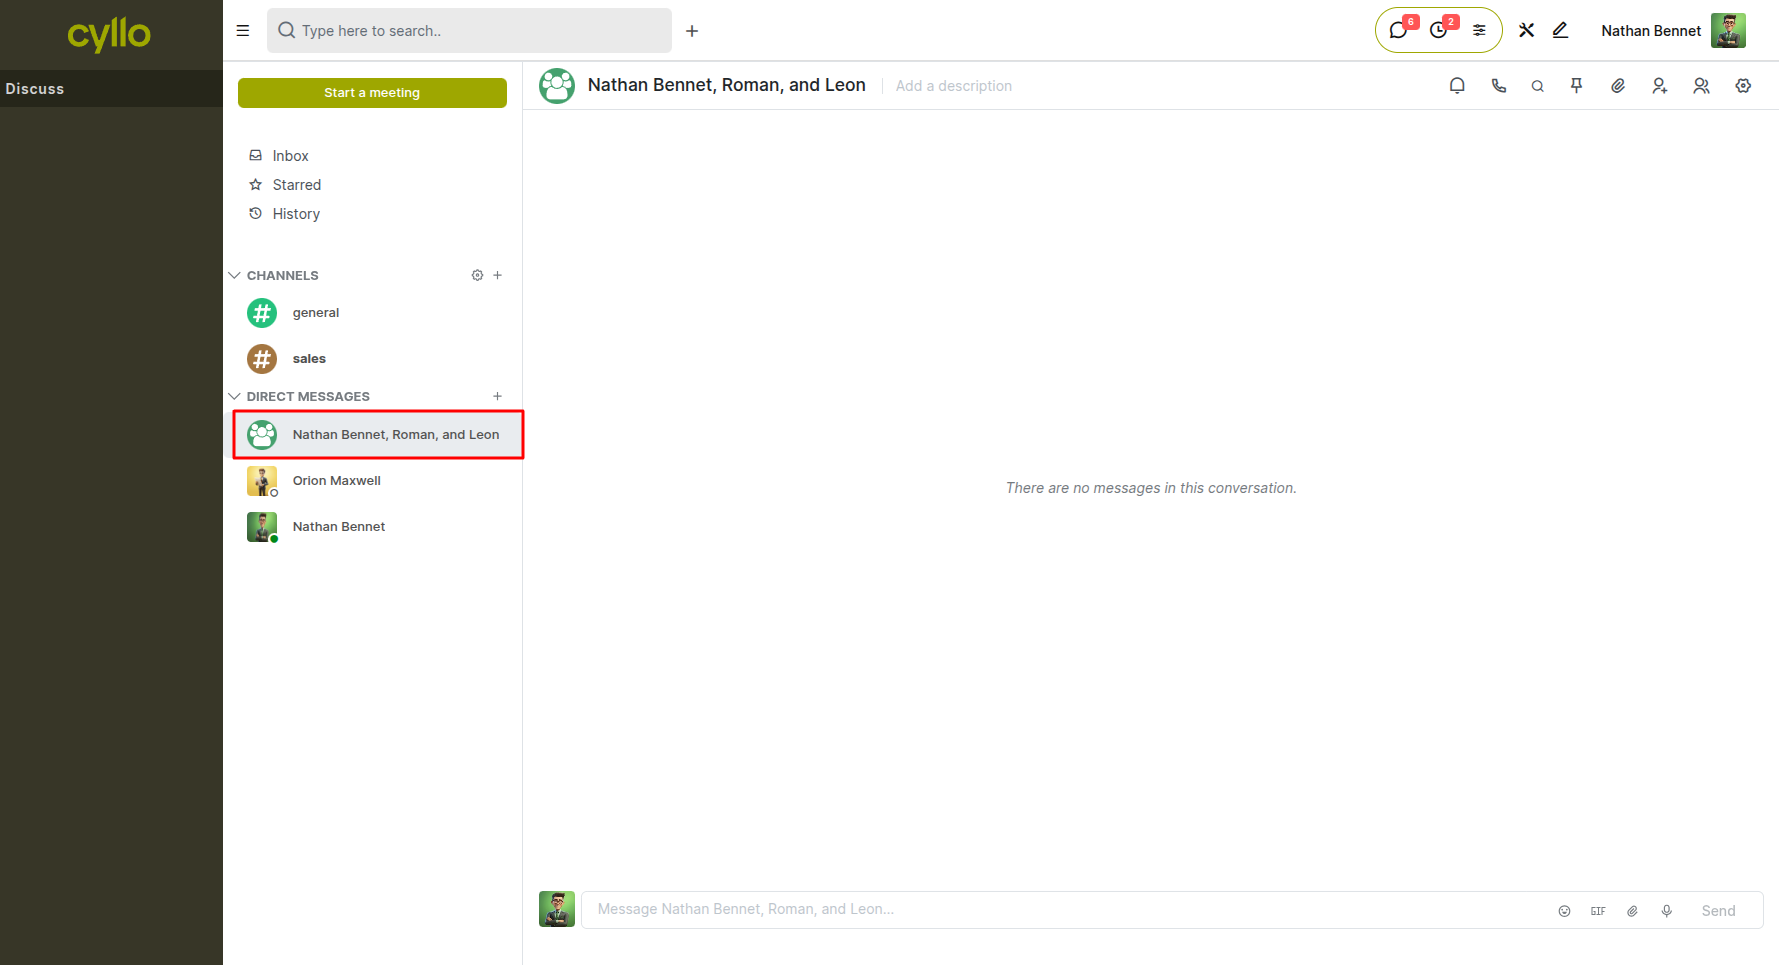
Fig 1.2 — Group chat window with multiple participants and conversation thread
How to create a Group Chat:
- Go to Discuss
- Click + New Message under the Direct Messages section
- Search for and select multiple users
- Cyllo automatically creates a group chat with all selected participants
- Type your message and press Enter to send
Key Fields
- Participants: All members of the group chat; additional members can be added later
- Group Name: Optionally set a name for the group chat for easier identification
Note
Any member of a group chat can add other users to the conversation at any time.
1.3 Channels
Channels are persistent, topic-based spaces where teams can organize ongoing conversations around a specific department, project, or subject. Unlike group chats, channels are discoverable by all users and maintain a complete history of every message.
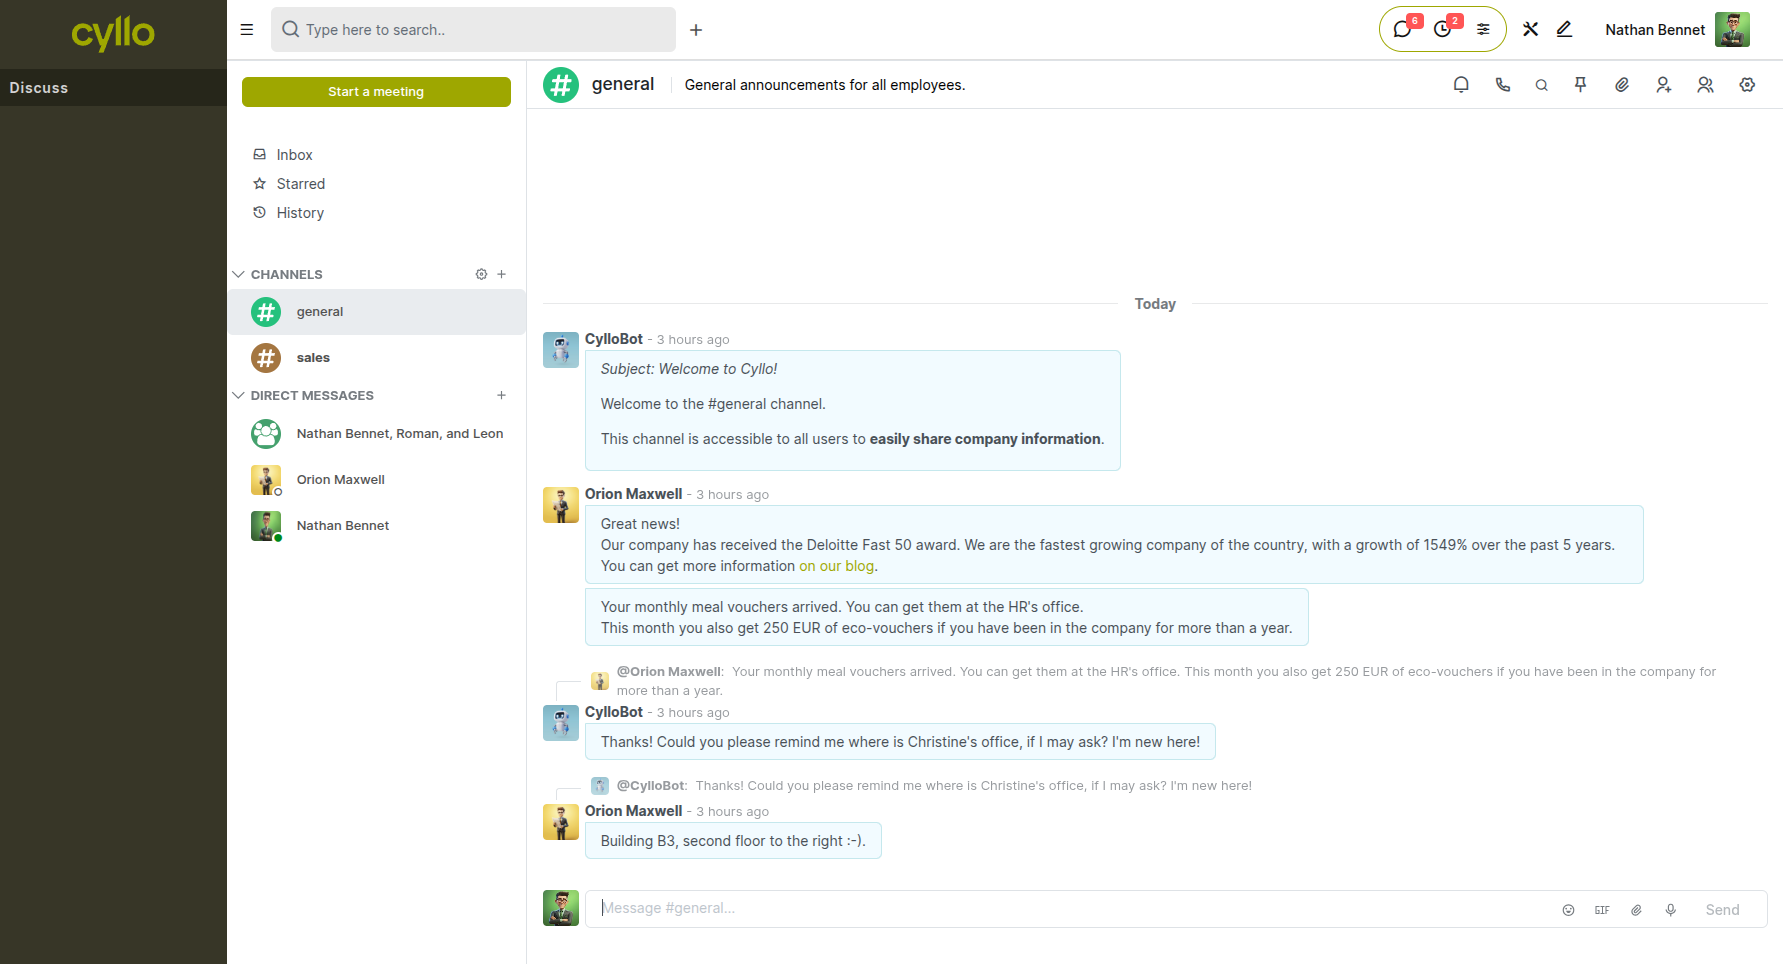
Fig 1.3 — Channel list in the Discuss left panel with an open channel conversation
How to create a Channel:
- Go to Discuss
- In the left panel, click + (Add) next to the Channels section
- Enter a channel name and press Enter
- Invite members by typing their names in the Invite People field
How to join an existing Channel:
- Go to Discuss → left panel → click + Add a channel
- Search for the channel name and click Join
Key Fields
- Channel Name: The topic identifier for the channel (e.g., "Sales Team", "Project Alpha")
- Description: A short summary of the channel's purpose, visible to all members
- Privacy: Set the channel as public (anyone can join) or private (invite-only)
Note
Channel messages are visible to all current members; private channels require an invitation to join.
1.4 Video Meetings
Cyllo Discuss allows teams to start video calls directly from the workspace without switching to an external conferencing tool. Video meetings can be launched from any channel or direct message conversation.

Fig 1.4 — Video meeting interface launched from within a Discuss channel
How to start a Video Meeting:
- Open a Channel or Direct Message conversation in Discuss
- Click the Video Call icon in the top-right corner of the conversation window
- Cyllo opens the video meeting interface in-browser; invite participants directly from the call view
Note
Video meetings require camera and microphone permissions in your browser. Participants must be members of the same channel or DM thread.
1.5 Activity Inbox & Notifications
The Activity Inbox is a centralized notification hub where you can view all pending activities, mentions, and messages directed at you from across the entire Cyllo platform. It ensures no follow-up or action request slips through the cracks.
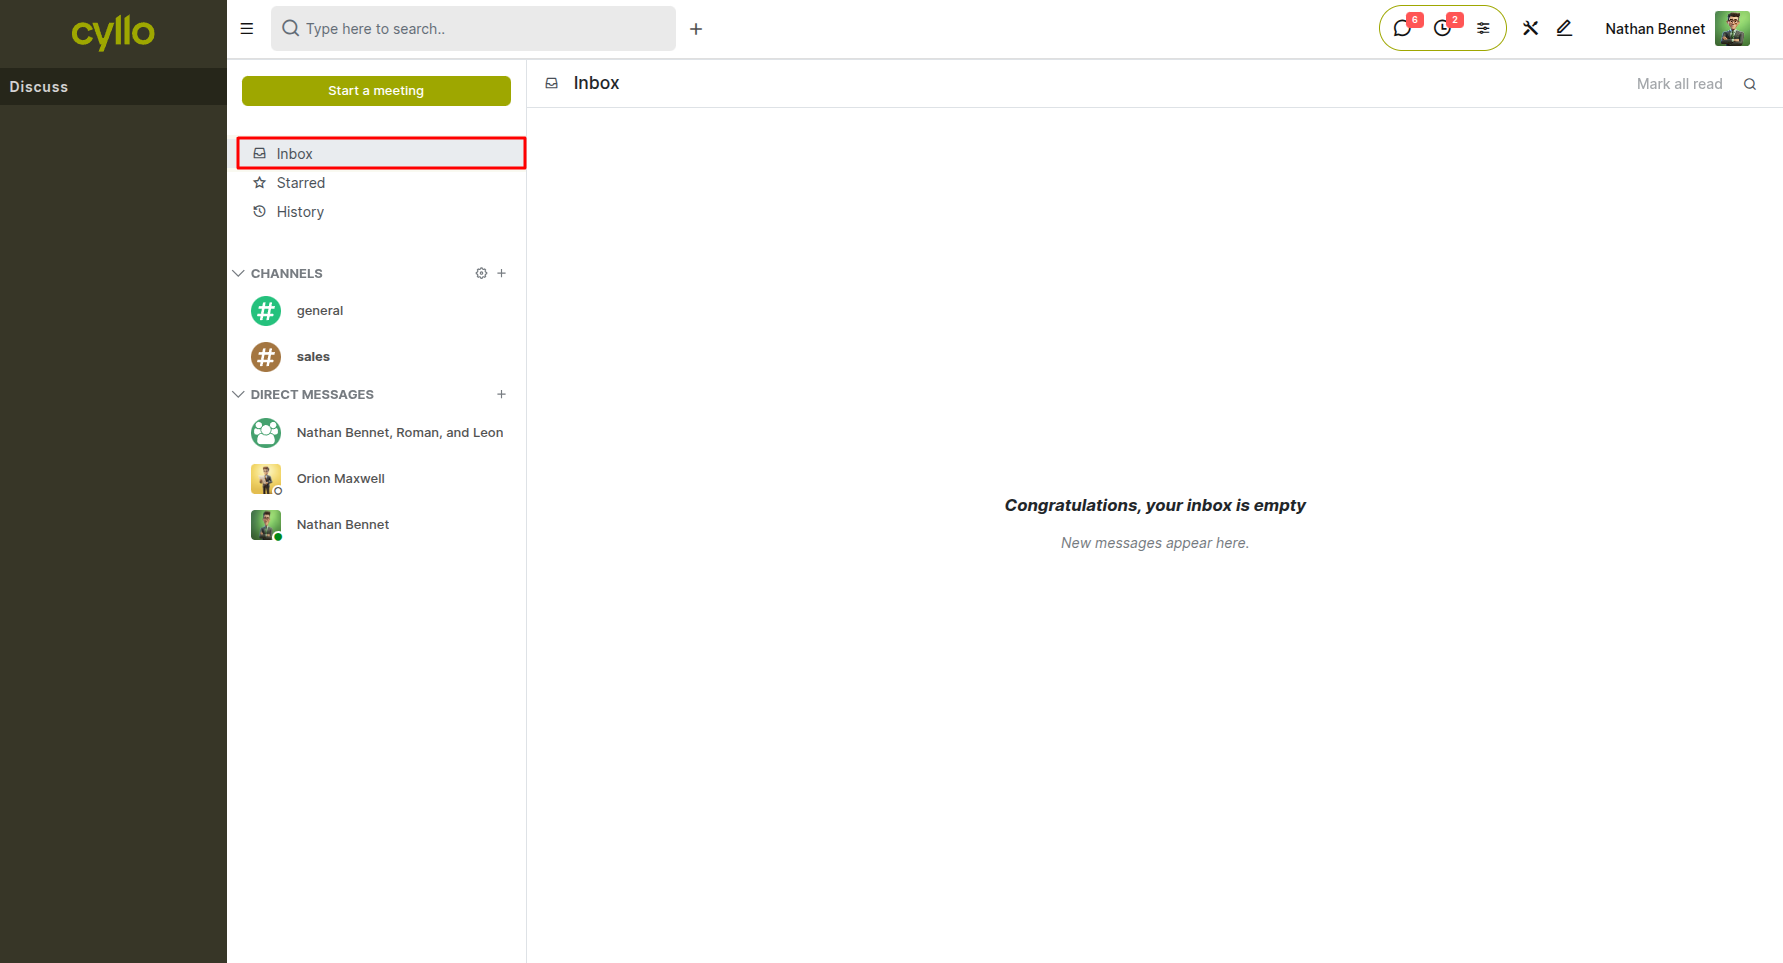
Fig 1.5 — Activity Inbox showing unread messages, mentions, and pending activity notifications
How to access the Activity Inbox:
- Go to Discuss → Click Inbox in the left panel
- All unread mentions, chatter replies, and notifications appear here
- Click any notification to navigate directly to the relevant record or conversation
Actions available in Inbox:
- Mark as Done — resolves and removes the notification from your inbox
- Reply — respond to a chatter message directly from the inbox
- Star — mark a message as important for easy reference later
Note
Starred messages can be accessed under Discuss → Starred for quick retrieval.
2. Integrated Record Messaging (Chatter)
Every Cyllo record — Sales Orders, Invoices, Purchase Orders, CRM Leads, HR records, Tasks, and more — includes a built-in Chatter panel at the bottom of the form. This is where all communication, notes, and activity history for that specific record are stored, making collaboration fully contextual.
2.1 Sending Messages on Records
The Chatter message feature allows you to send a customer-facing or team-facing message directly from any Cyllo record, keeping all communication tied to the relevant transaction or document.
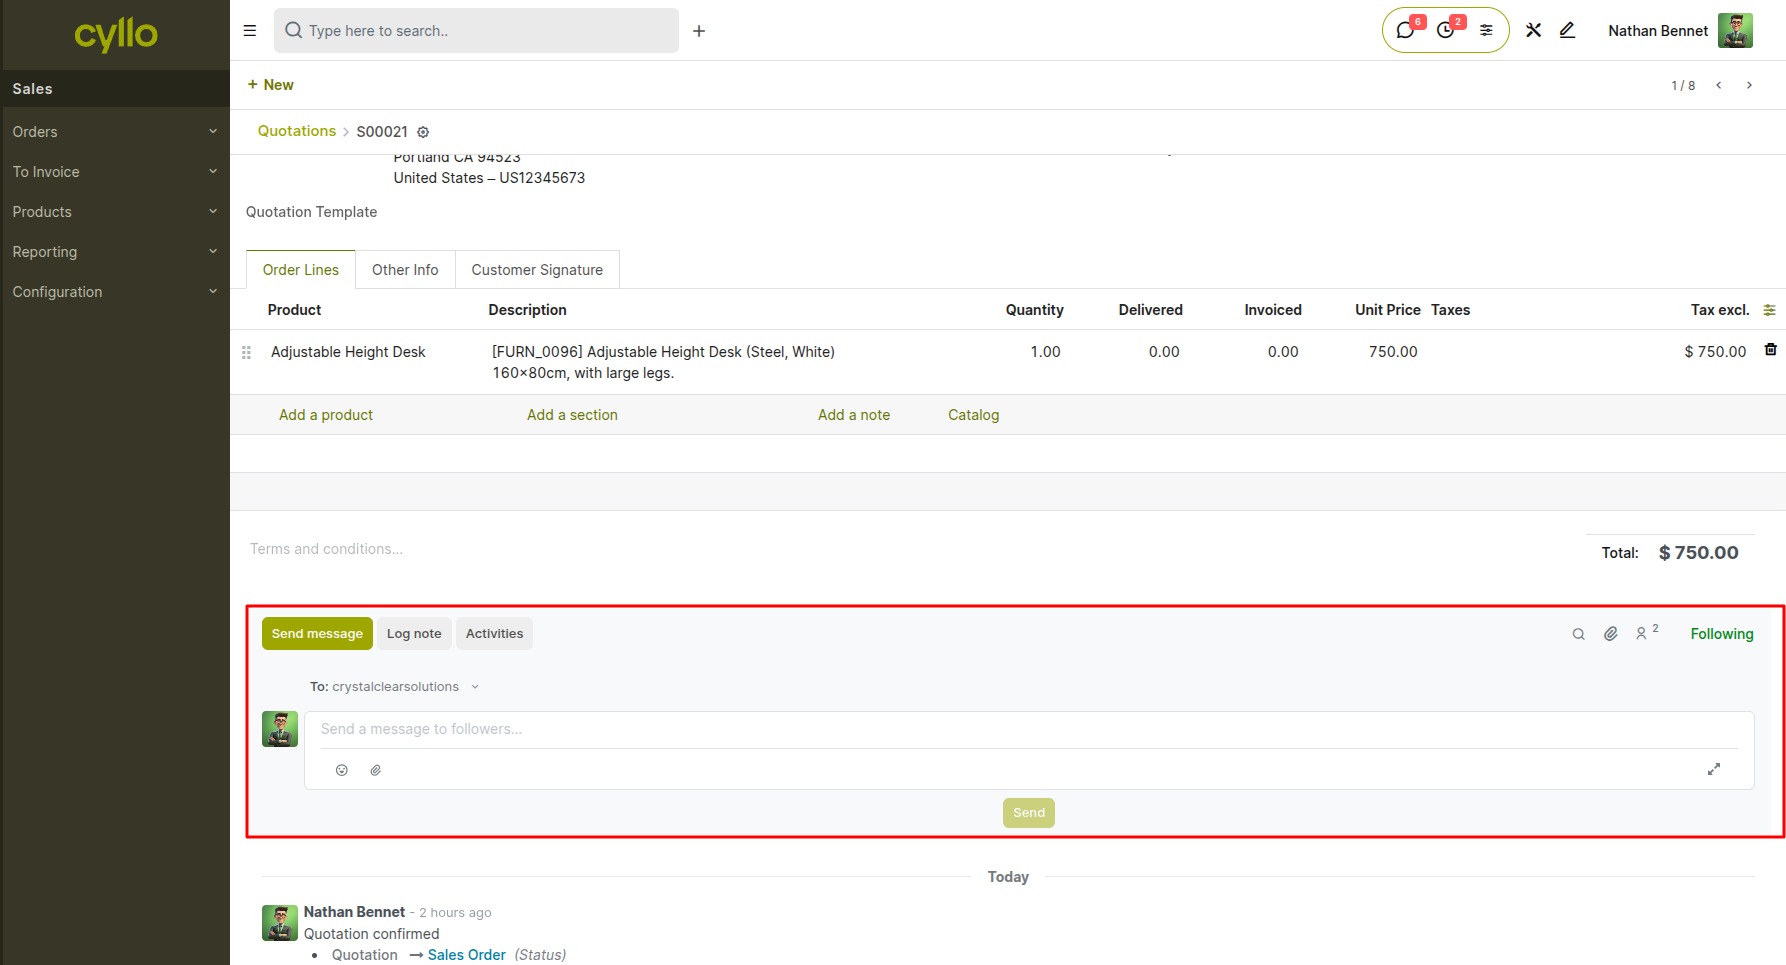
Fig 2.1 — Chatter panel on a Sales Order showing the message thread and Send Message button
How to send a message from a record:
- Open any record (e.g., go to Sales → Orders → Sales Orders and open an order)
- In the Chatter panel at the bottom, click Send Message
- Type your message; optionally tag a colleague using @mention
- Click Send
Key Fields
- To: Recipients of the message — defaults to followers of the record
- @Mentions: Tag specific users to notify them directly; they receive an inbox notification
- Attachments: Add files to the message directly from the chatter
Note
Messages sent from the Chatter are also delivered by email to any external recipients (e.g., customers) who are followers of the record.
2.2 Internal Notes
Internal Notes allow your team to leave private comments on any record — visible only to internal Cyllo users — without notifying external parties such as customers or vendors. They are ideal for handover notes, reminders, and team-only context.
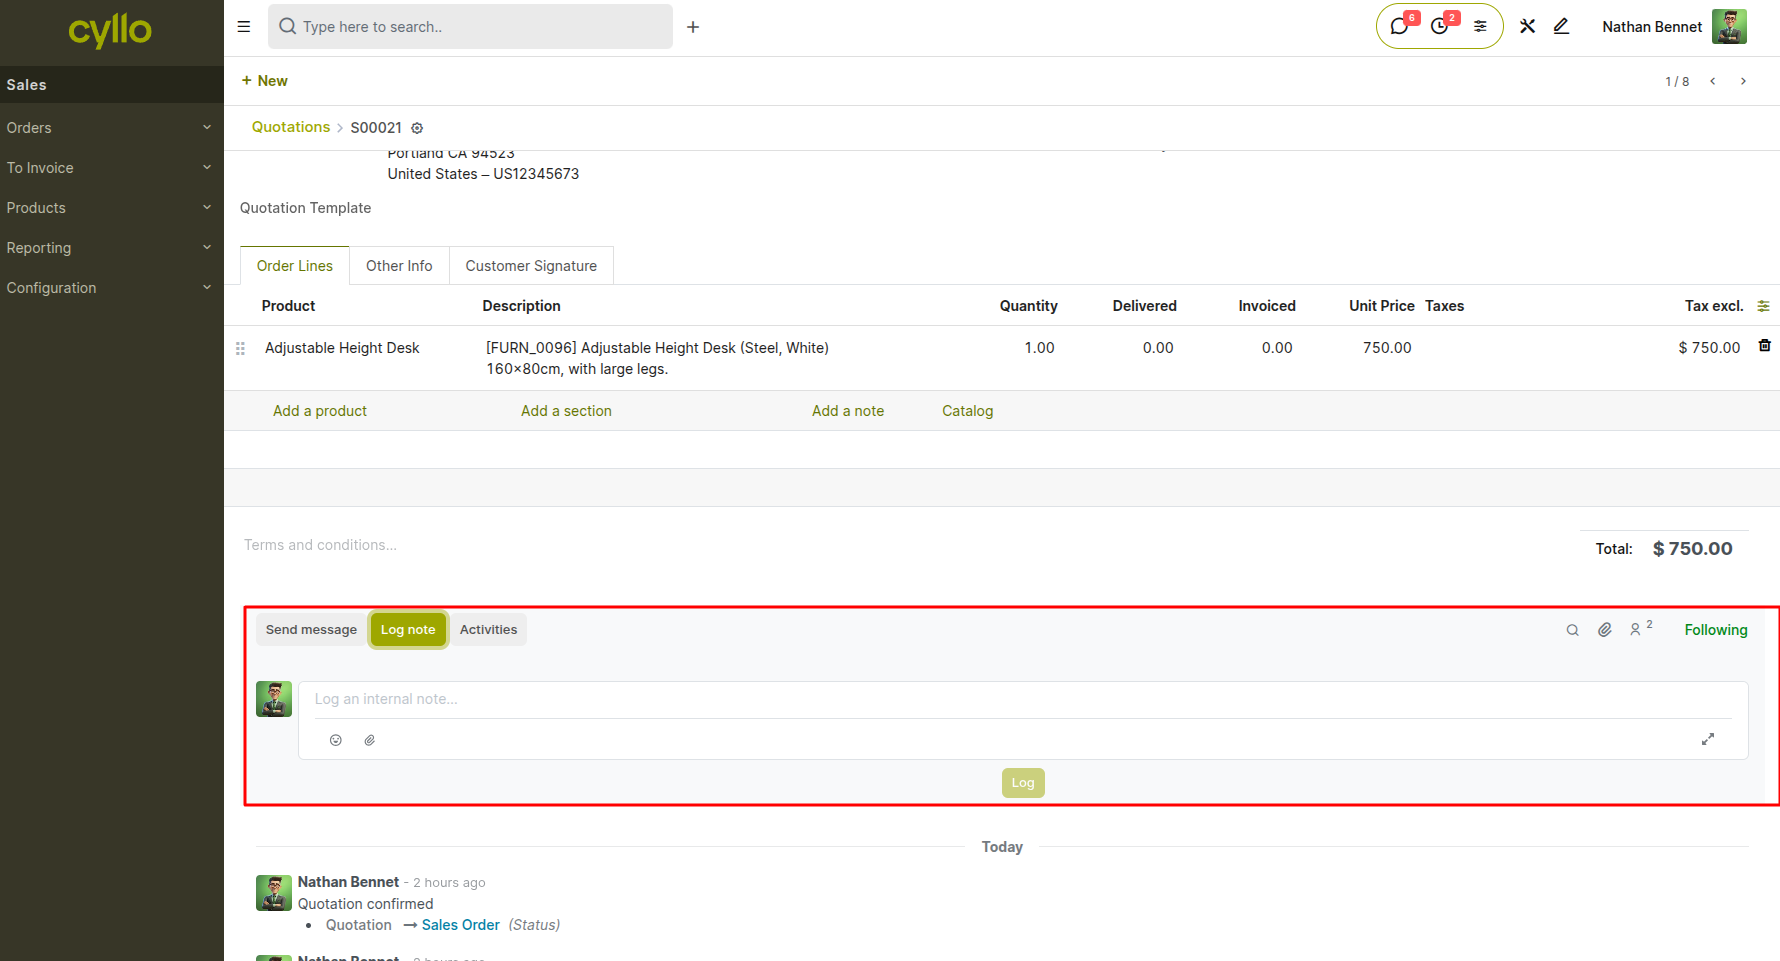
Fig 2.2 — Chatter panel showing an Internal Note in a distinct color to differentiate from customer messages
How to add an Internal Note:
- Open any record and scroll to the Chatter panel
- Click Log Note
- Type your internal note; use @mentions to alert specific colleagues
- Click Add
Note
Internal notes are displayed in a distinct style within the Chatter to visually differentiate them from outgoing customer messages.
2.3 Voice-to-Text Chatter
The Voice-to-Text Chatter feature (powered by the cyllo_voice_to_text_chatter module) lets users record a voice message directly from any record's chatter. Cyllo automatically transcribes the recording and posts it as a text message — saving time for users who prefer speaking over typing.
How to use Voice-to-Text in Chatter:
- Open any record and go to the Chatter panel
- Click the Microphone icon in the message input area
- Speak your message; click Stop when finished
- Cyllo transcribes the audio and displays it as text in the message input
- Review the transcription and click Send to post
Note
Voice-to-Text works on any Cyllo model that has a chatter panel, including Sales Orders, Tasks, Leads, and Helpdesk Tickets.
2.4 Logging Activities
Activities are scheduled follow-up actions — calls, emails, meetings, to-dos — that can be created on any record to remind users of a pending task. Activities are visible in both the record chatter and the Activity Inbox.
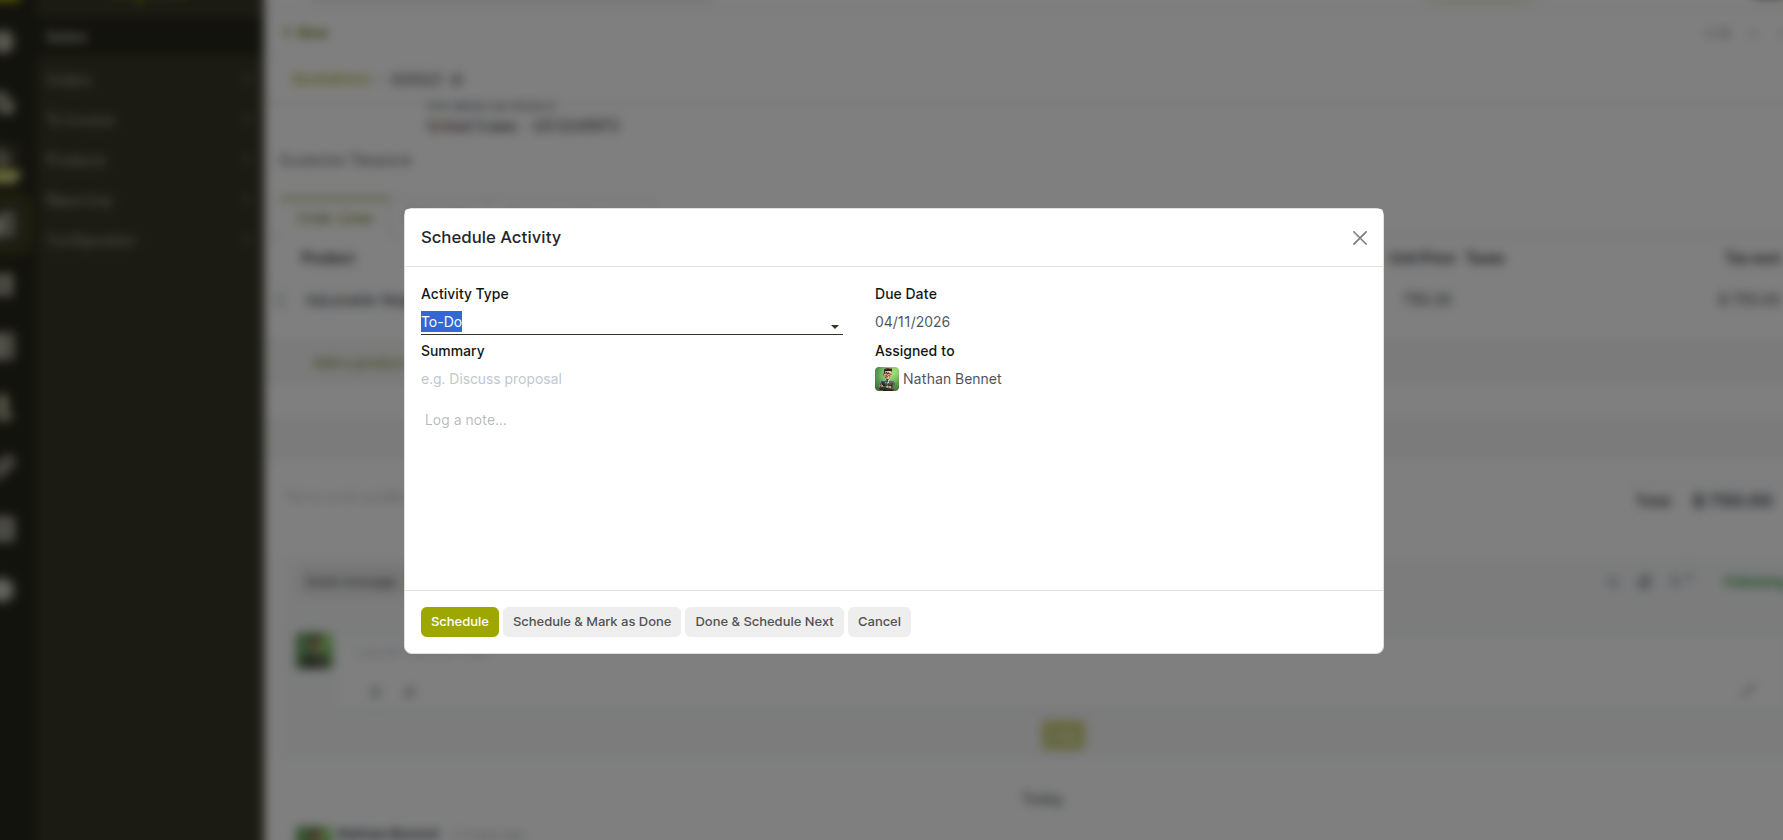
Fig 2.3 — Schedule Activity dialog showing activity type, date, and assigned user fields
How to schedule an Activity:
- Open any record and go to the Chatter panel
- Click Activities (or the clock icon)
- Select the Activity Type (e.g., Email, Phone Call, Meeting, To-Do)
- Set the Due Date and assign to a user
- Add a Summary and any notes
- Click Schedule
Key Fields
- Activity Type: Defines the nature of the follow-up (call, email, meeting, etc.)
- Due Date: The date by which the activity should be completed
- Assigned To: The user responsible for completing the activity
- Summary: A short description of what needs to be done
Note
Overdue activities are highlighted in red across all list views and the Activity Inbox to ensure nothing is missed.
3. File Sharing & Search
3.1 File & Attachment Sharing
Files and attachments can be shared in any Discuss conversation, channel, direct message, or record chatter. Cyllo stores all shared files and makes them accessible from the conversation or the record where they were shared.
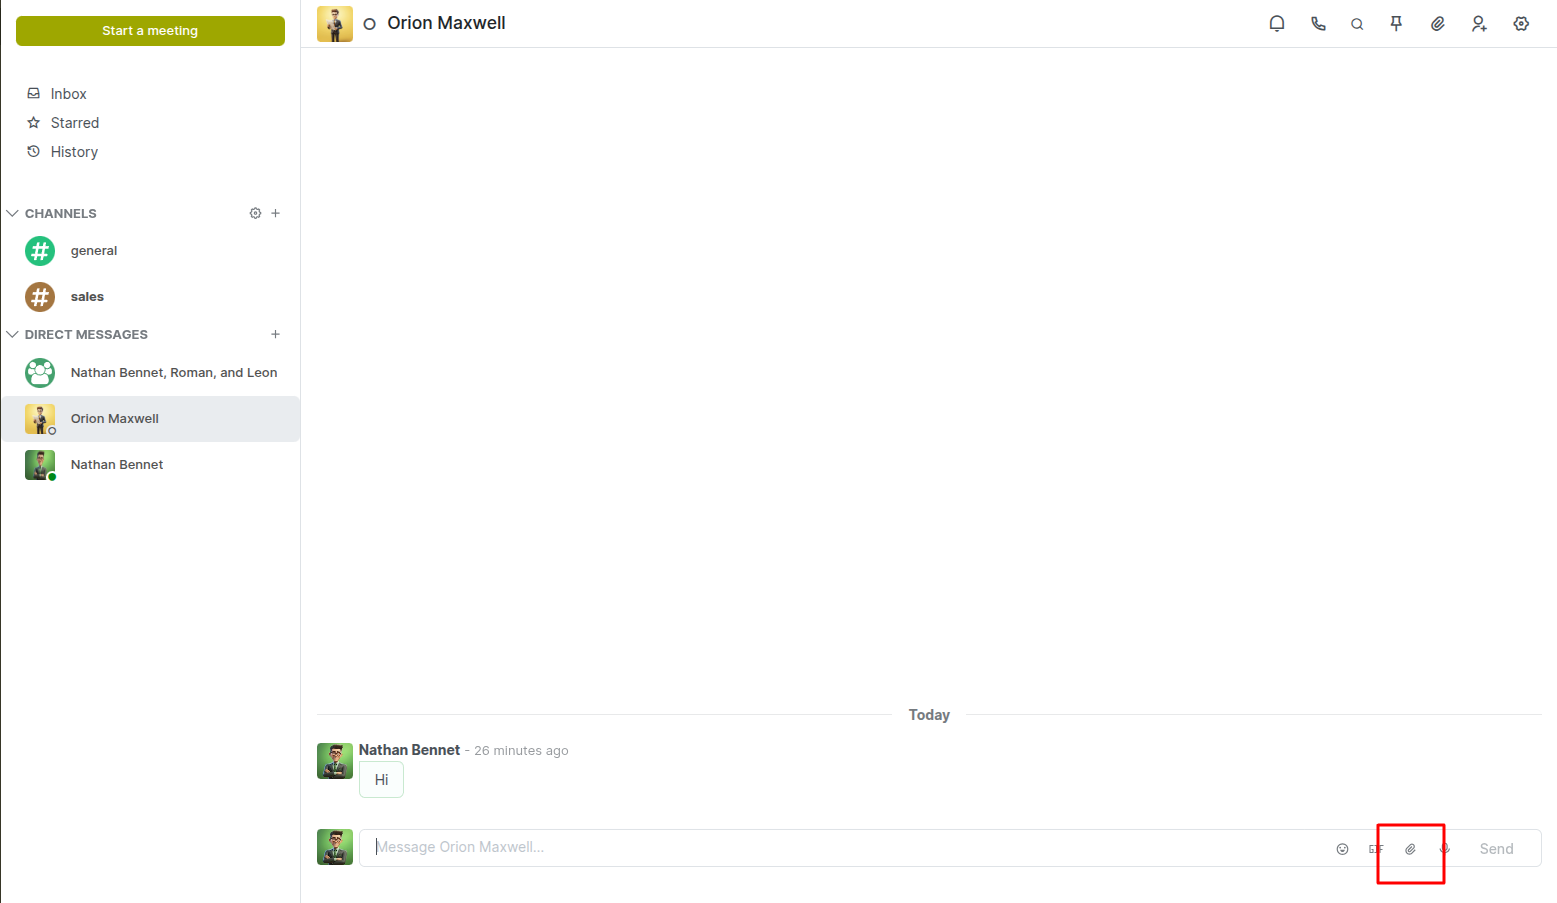
Fig 3.1 — Discuss channel window showing file attachments within the conversation thread
How to share a file:
- Open a Direct Message, Group Chat, or Channel in Discuss
- Click the Paperclip icon in the message input bar
- Select the file from your device
- Optionally type a message to accompany the file
- Click Send
Note
Attachments shared in a record's Chatter are also accessible under the Attachments smart button at the top of the record for quick retrieval.
3.2 Message Search & History
All messages — whether in channels, direct messages, or record chatters — are stored and fully searchable within Cyllo. This gives teams a complete, retrievable communication history without relying on external tools.
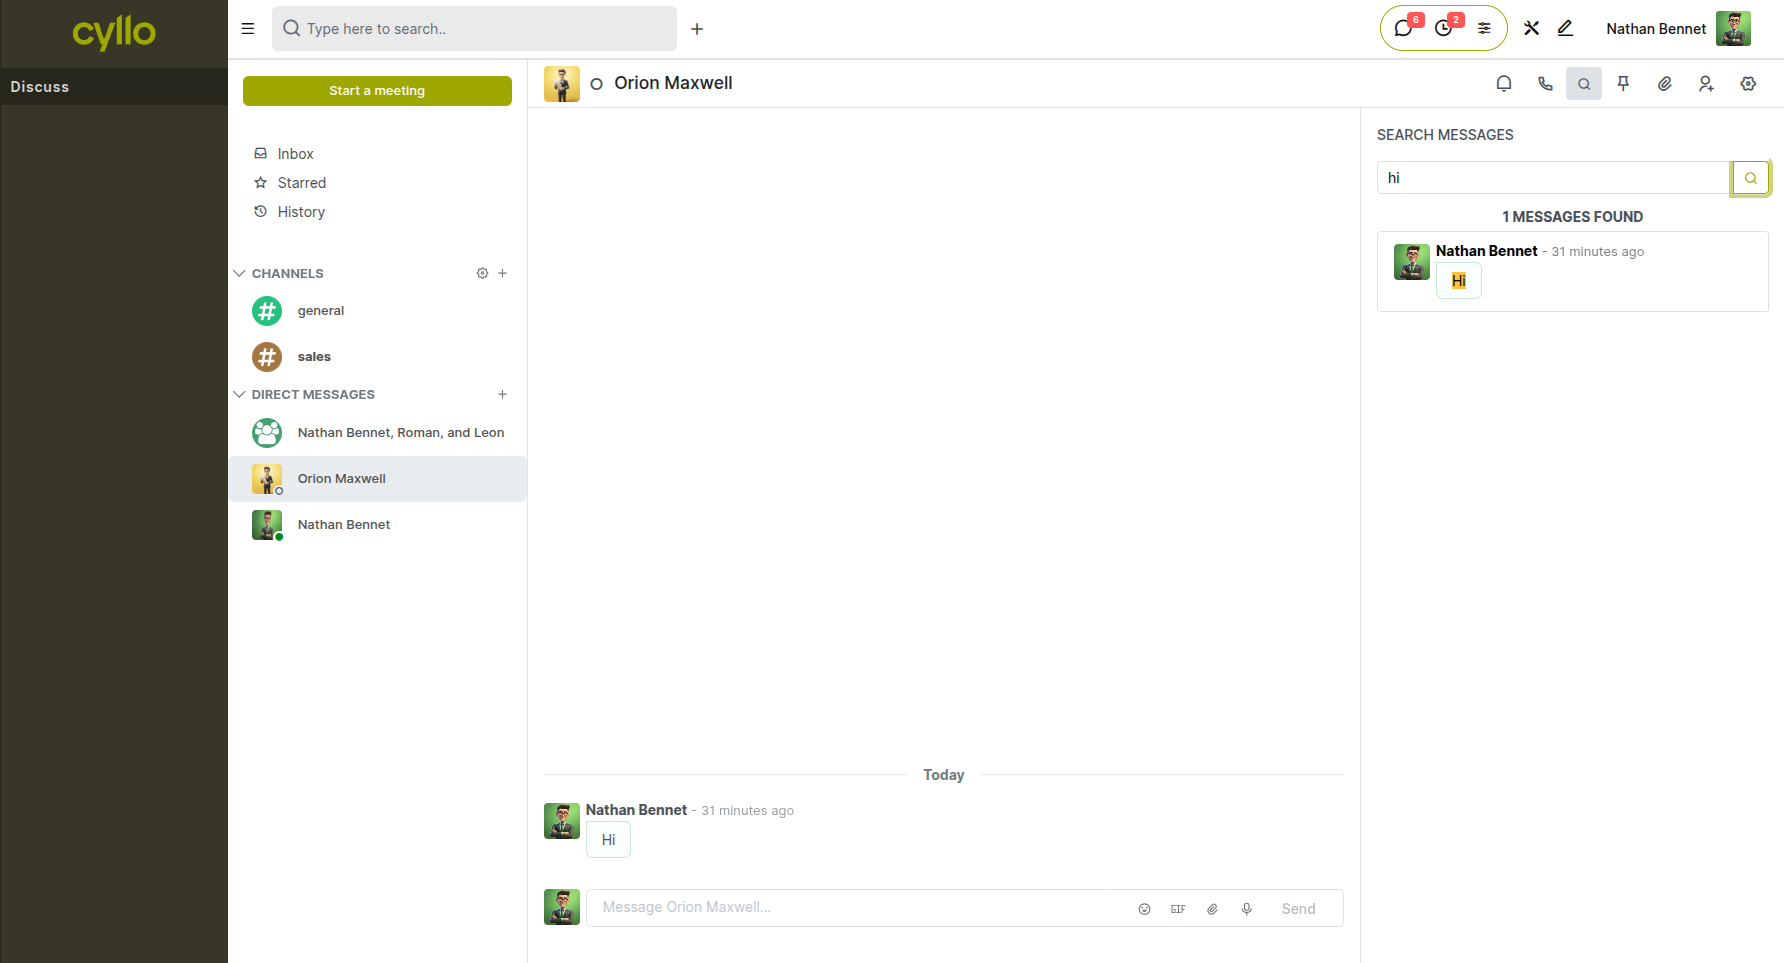
Fig 3.2 — Search bar in Discuss with filtered message results shown
How to search messages:
- Go to Discuss
- Use the Search bar at the top of the left panel
- Type a keyword, colleague name, or topic
- Cyllo filters results across channels and direct messages in real time
Note
Message history is preserved indefinitely, so teams can always reference past decisions, instructions, and shared files from any conversation.
4. System Tray & Quick Access
4.1 System Tray Messaging
The Discuss system tray icon appears in the top navigation bar of every Cyllo screen, giving users instant access to their messages and notifications without having to leave their current module or workflow.
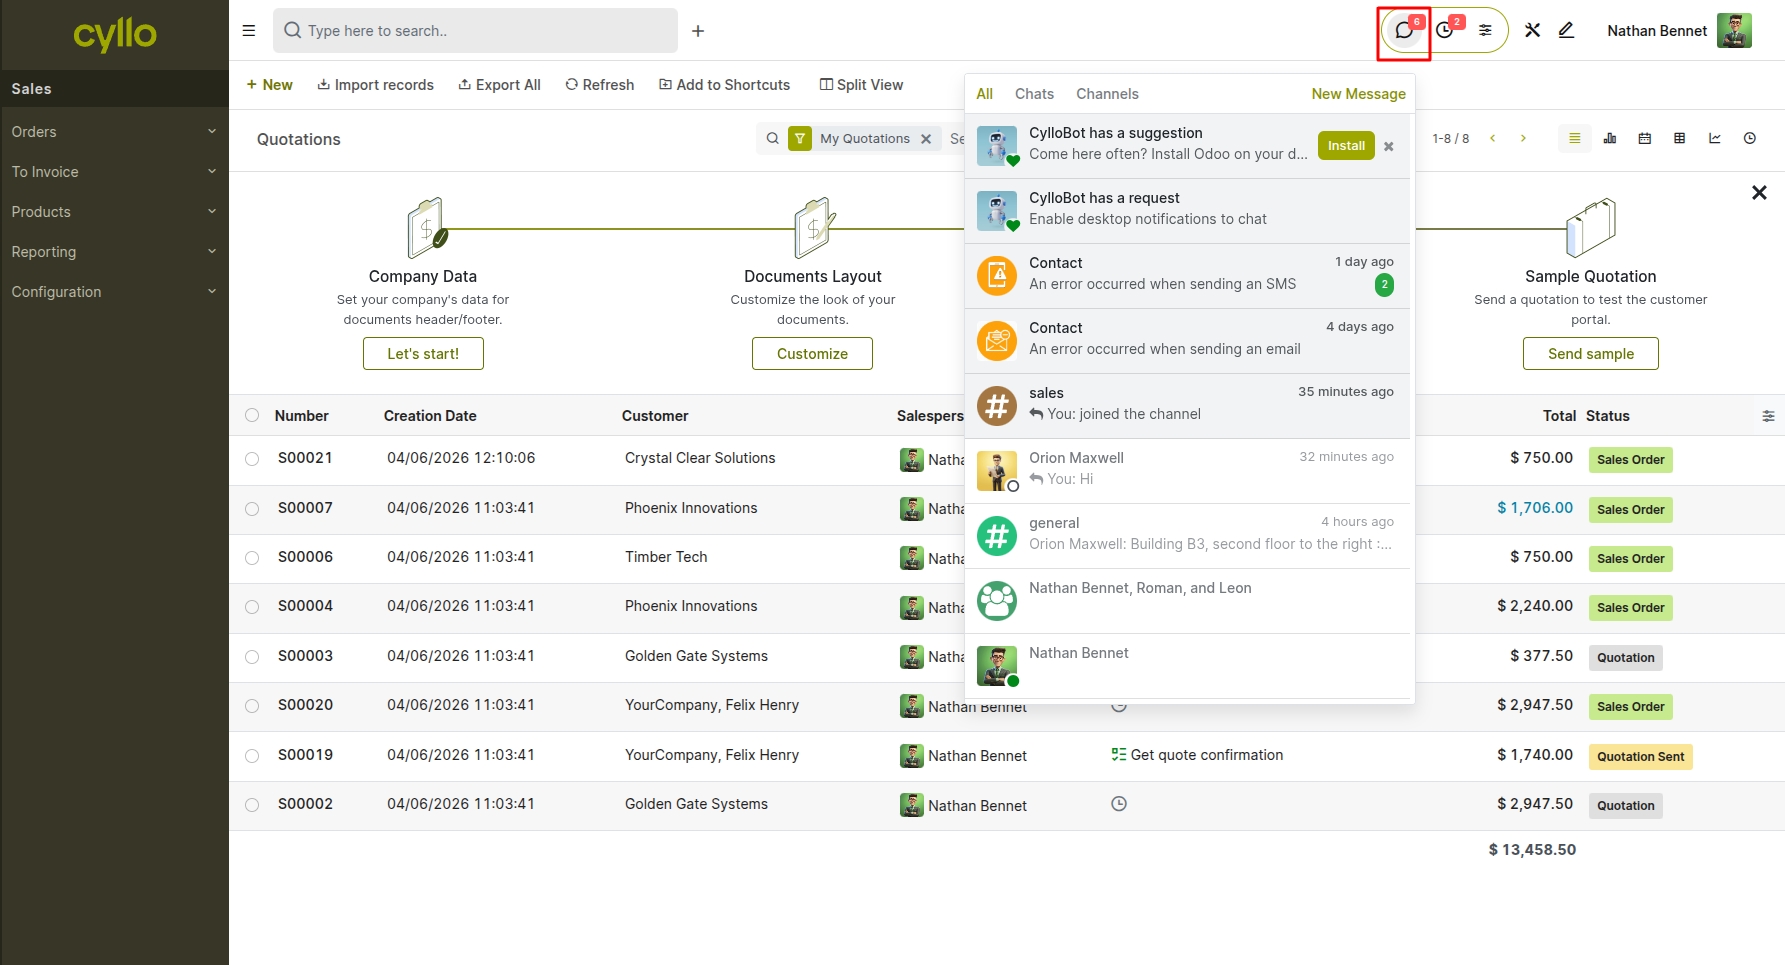
Fig 4.1 — System tray icon in the top navigation bar with an unread message badge and expanded chat popup]
How to use the System Tray:
- Click the Discuss icon (speech bubble) in the top navigation bar from any Cyllo screen
- A dropdown panel shows recent messages and notifications
- Click any conversation to open a floating chat window
- Reply directly from the floating window without navigating away from your current task
Note
The system tray badge displays the number of unread messages, so you are always aware of pending communications at a glance.
5. Configuration & Settings
5.1 Channel Administration
Channel administrators can manage member access, set privacy rules, and configure channel-level settings to keep communication organized.

Fig 5.1 — Channel settings panel showing privacy options and member management
How to configure a Channel:
- Go to Discuss → open a Channel
- Click the Settings (gear) icon in the top-right corner of the channel window
- Set Privacy (Public / Private / Invite-Only)
- Add or remove Members as needed
- Update the Channel Description
- Click Save
Key Fields
- Privacy: Controls who can see and join the channel
- Members: List of users with access to the channel
- Description: Describes the channel's purpose for new or prospective members