

Cyllo Document Management Documentation
Introduction
1. Document Management
Cyllo Documents is a full-featured Document Management System built as a standalone Cyllo application. It gives an organization a central, secure place to upload, organize, share, lock, and govern files while also extending document handling into the Customer Portal and the public website, and synchronizing with external cloud storage providers (Google Drive and Microsoft OneDrive).
The module is designed to feel like a lightweight internal "Drive": documents live inside Workspaces (folders), can be tagged, favorited, locked with a password, shared via public links, archived, trashed (with auto-purge), and converted into CRM leads or Project tasks when required.
It also includes a document request workflow in two flavors:
- Asking a specific user to upload a specific document (e.g., "please upload your ID proof").
- Template-based requests — formal, sequence-numbered requests built from a reusable HTML template (e.g., an offer letter or NDA) that goes through a New → Document Approval → Approved lifecycle and can be downloaded as a PDF.
1.1 Key Features
- File Management: Upload, preview, rename, tag, download (single or as ZIP), email as attachment.
- Organization: Workspaces (folders) with descriptions, visibility rules, and per-workspace document counts.
- Security: Per-document password locking, a configurable Master Password, manager-only override option.
- Lifecycle: Archive / unarchive, soft-delete to Trash with configurable retention, auto-purge via cron, restore from Trash.
- Sharing: Public shareable links with a dedicated preview page, no login required.
- Cloud Sync: Two-way sync connectors for Google Drive and OneDrive, with OAuth2, auto-refreshing tokens, and scheduled sync jobs.
- Integrations: One-click conversion of a document into a CRM Lead or a Project Task.
- Document Requests: Ask a user to supply a document; accept/reject workflow with email notification.
- Document Templates: HTML templates with a digital stamp/signature image, sequence-numbered requests, approval workflow.
- Portal Access: Customers/portal users can view their documents, respond to document requests, and browse/request templates from ‘My documents’.
2. Documents
The Documents serves as the central component of the Cyllo Documents module and acts as the primary storage structure for all document-related information. Every uploaded document is created as a record and contains complete information related to the document, including file details, ownership information, metadata, sharing information, security settings, and associated activities. The model inherits chatter and activity functionalities, enabling users to track document updates, schedule activities, maintain discussions, and manage collaboration directly from the document itself.
Upload Process
- Open the Documents app.
- Select the required Workspace.
- Click the Upload button.
- Choose the document from the local system.
- Upload the file.
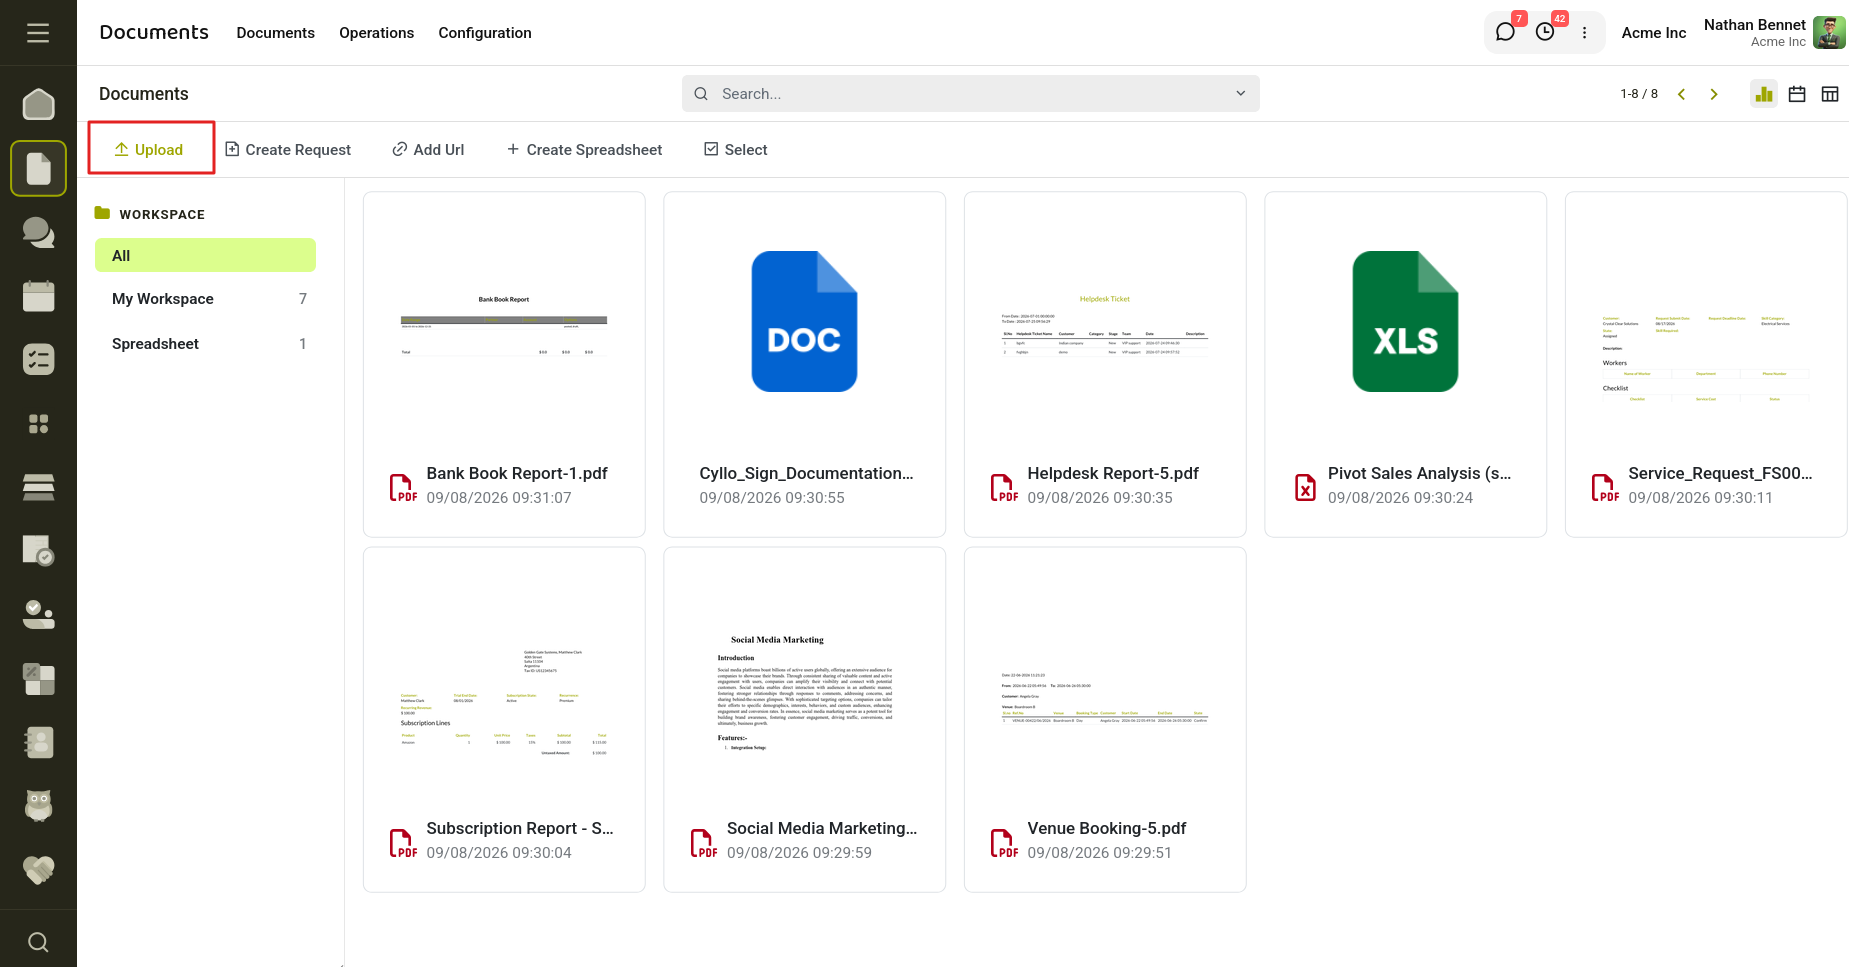
Fig 2.1 — Displays all the uploaded documents.
2.1 Document Actions
The document action menu provides multiple operations that users can perform directly on document records. Each action helps improve productivity and simplifies document handling. Before executing protected operations, the system verifies whether the document is locked and requests password authentication if necessary.
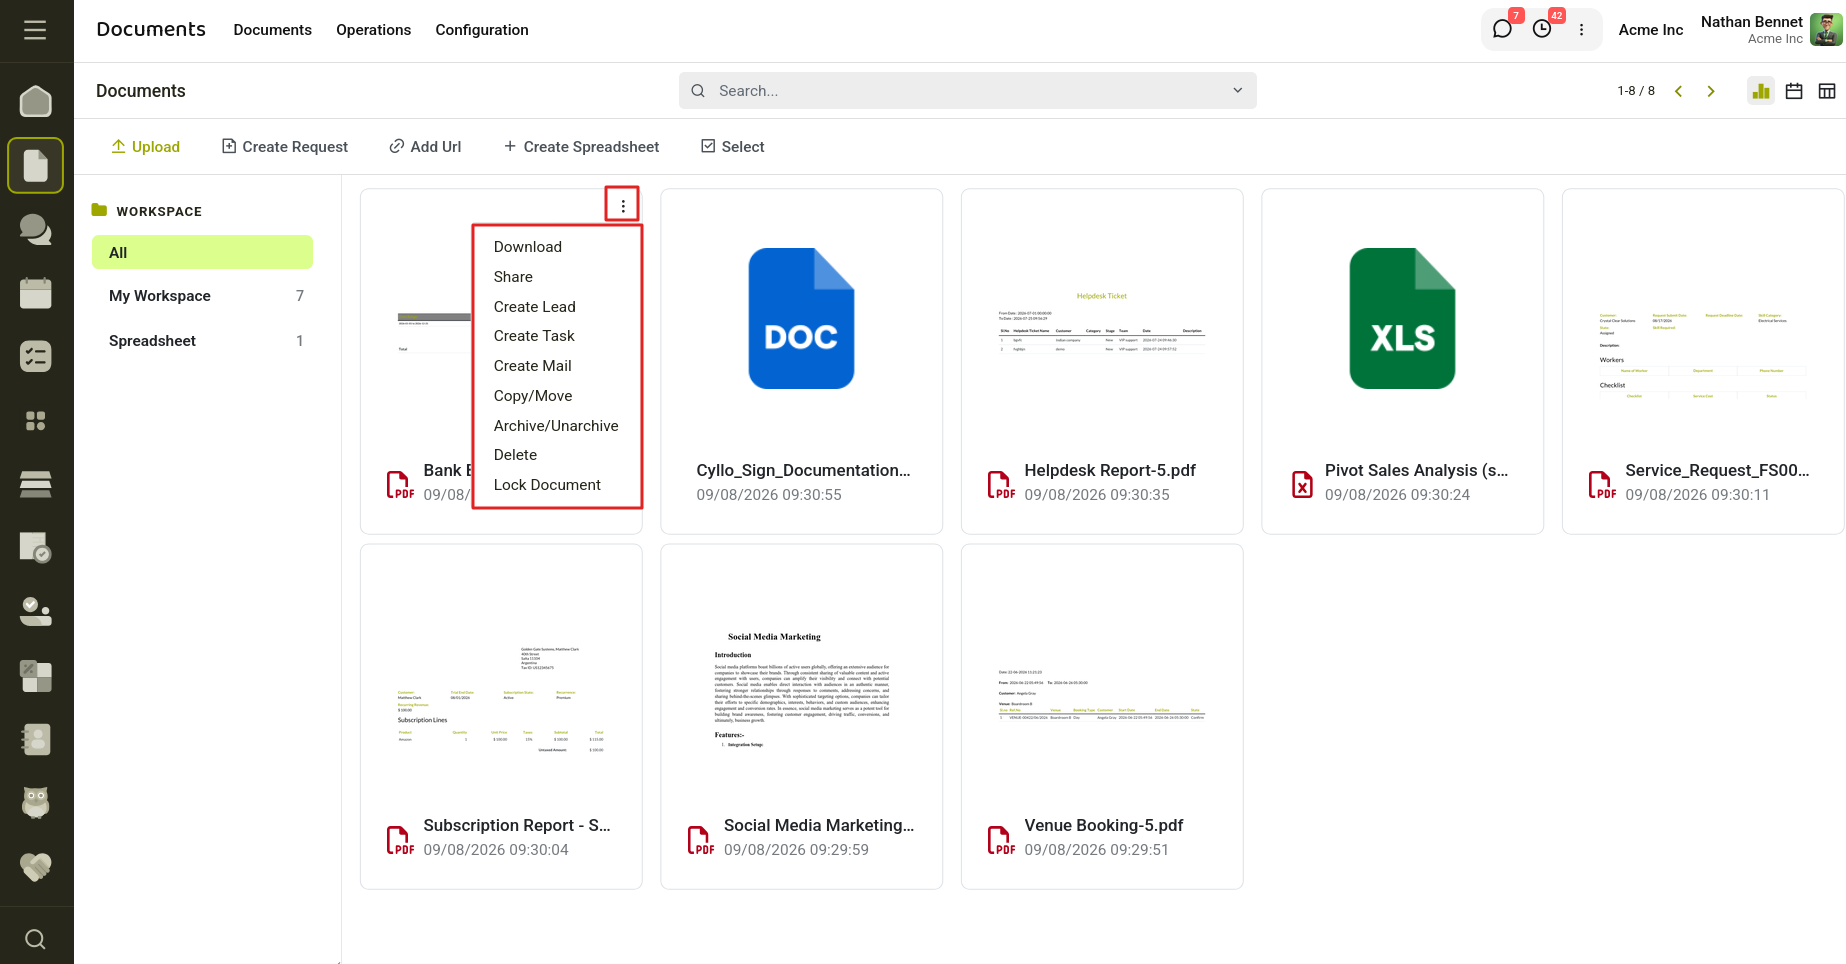
Fig 2.2 — Shows all the Document actions.
1. Share Document
The Share functionality allows users to generate a shareable URL for a document. Users can distribute this link externally for easier collaboration and file access. If the document is password protected, users must provide the correct password before sharing is allowed.
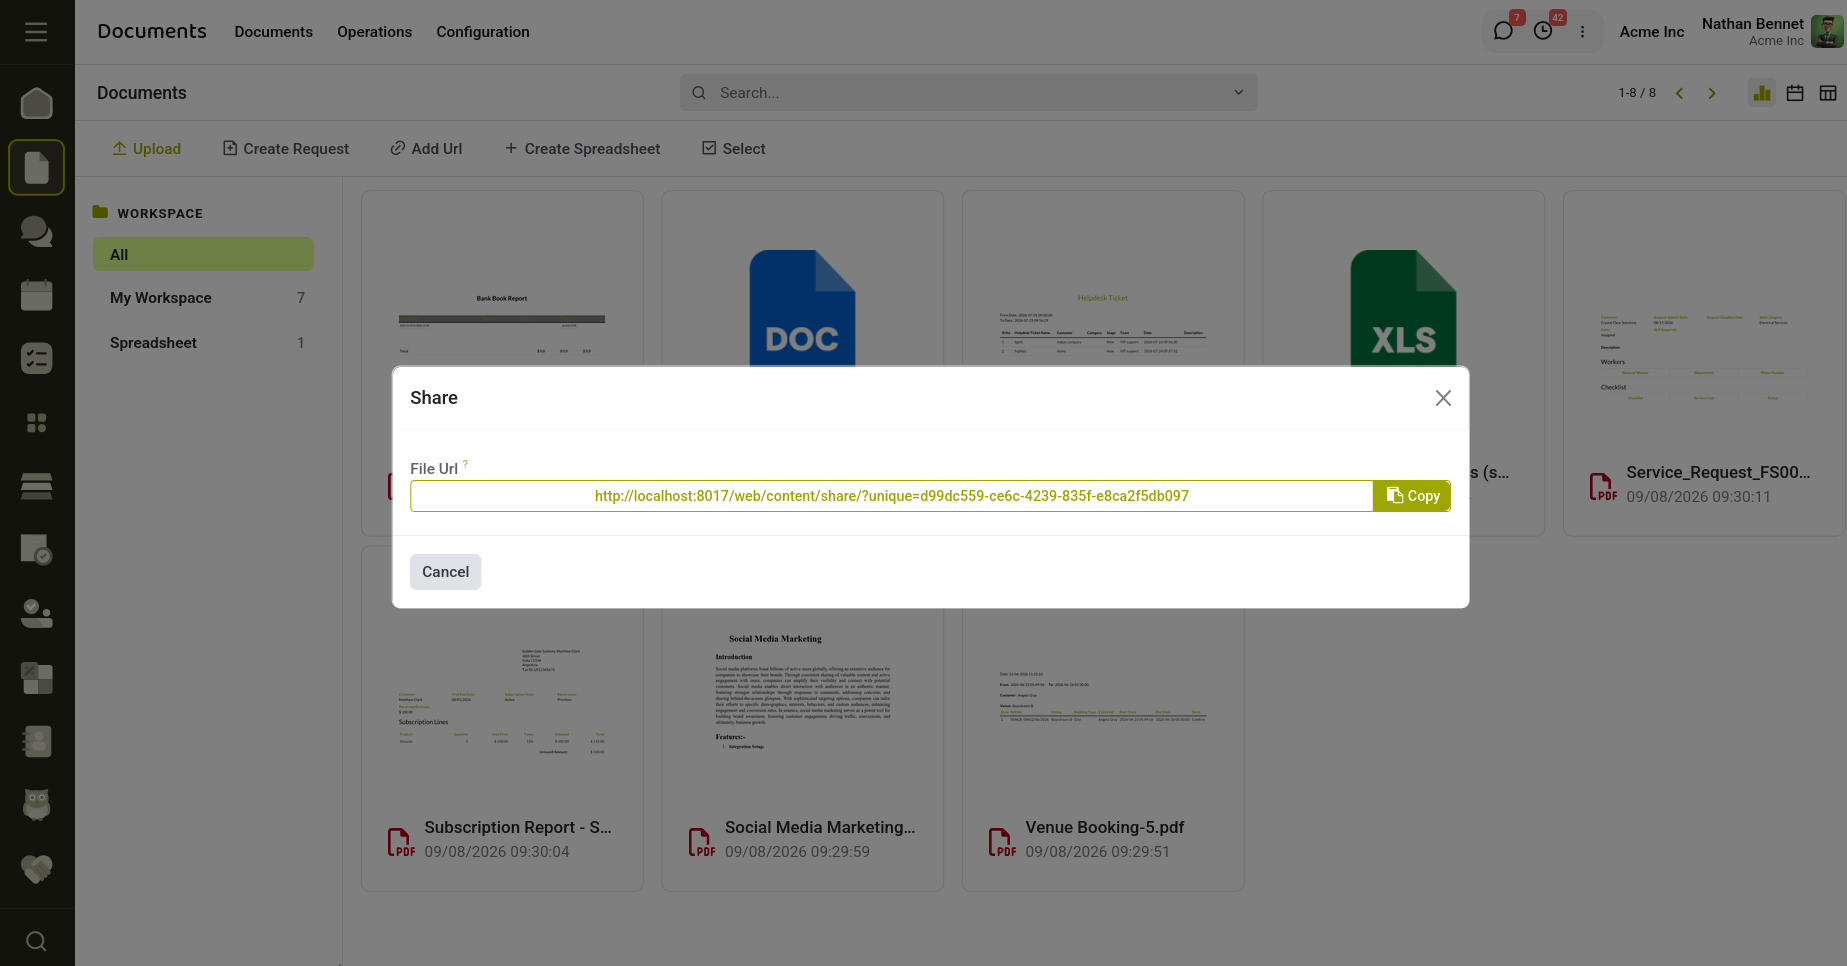
Fig 2.3 — Document sharing through Link.
2. Download Document
Users can download documents directly from the system to their local device. Download functionality generates a secure download URL and allows files to be accessed when required.
3. Send Through Email
Documents can be shared directly through email without manually attaching files. When users select the mail option, an email compose window opens automatically with the selected document attached.
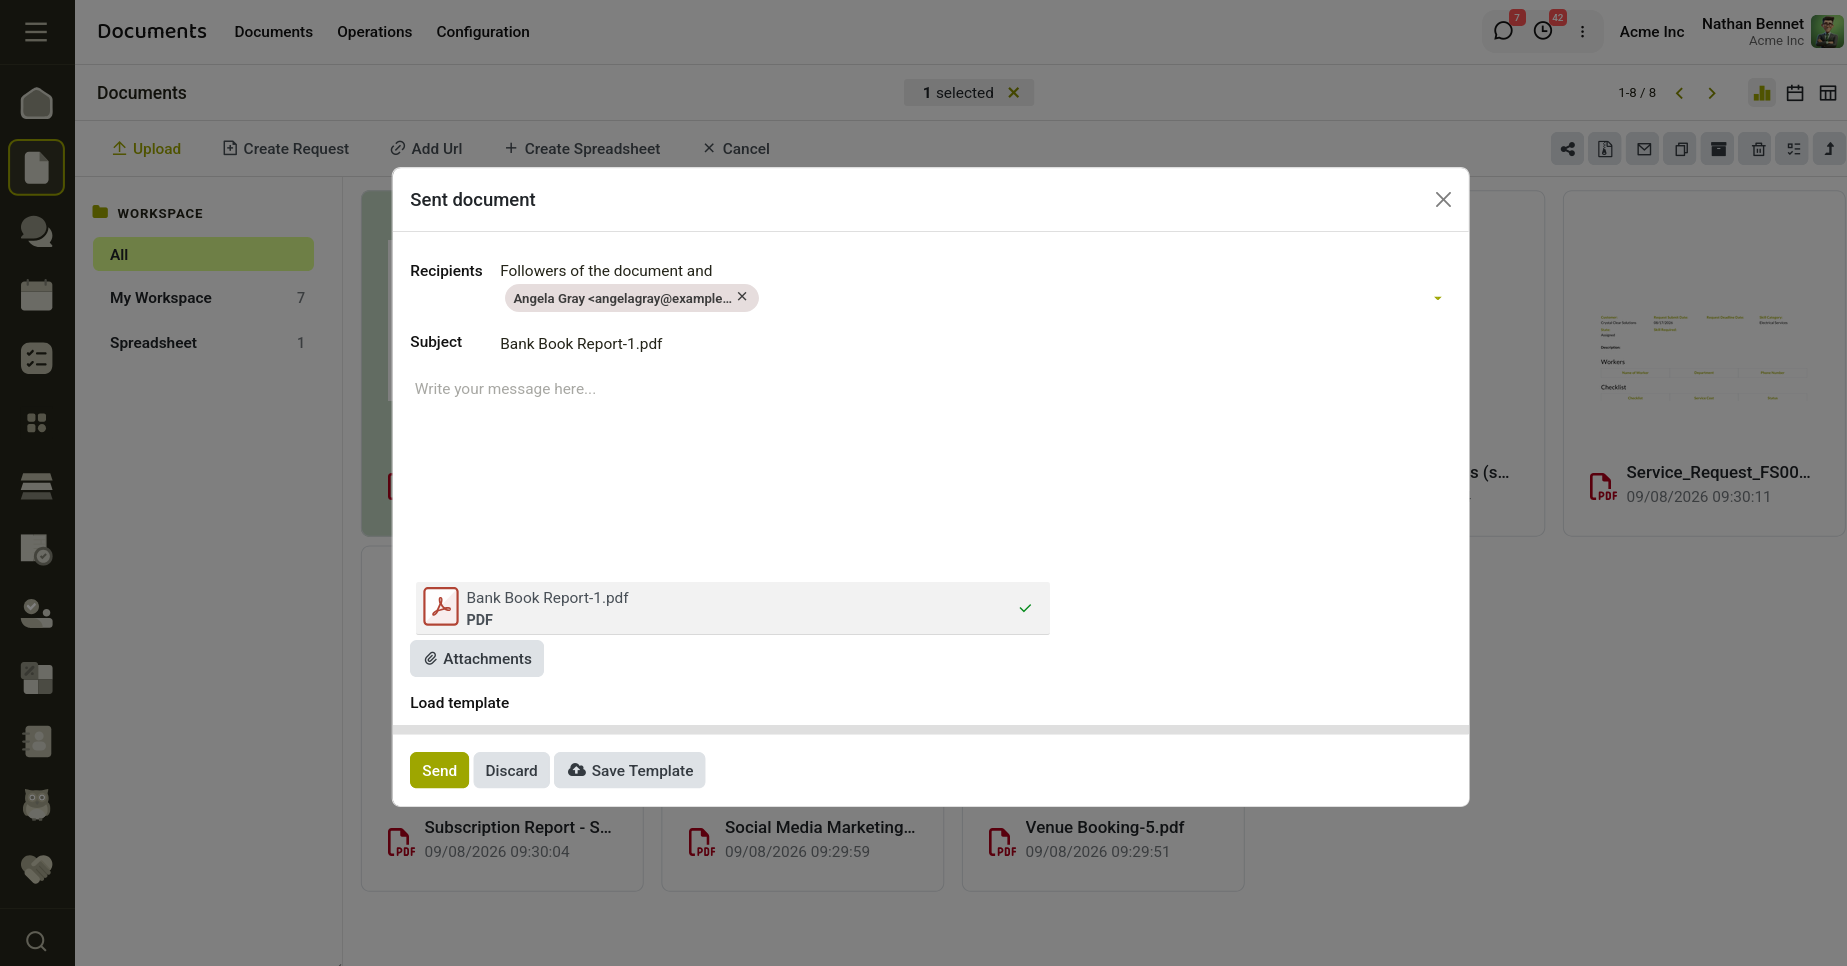
Fig 2.4 — Send Documents.
4. Create CRM Lead
Users can create CRM leads directly from document records if the CRM module is installed. The system automatically generates a lead using the document information.
5. Create Project Task
Project tasks can be generated directly from documents. The document attachment becomes associated with the newly created task, improving workflow integration.
6. Copy or Move Document
Documents can be copied or moved between workspaces for better organization and categorization. This functionality is available to authorized users and helps maintain structured document storage.
7. Archive Document
Instead of permanently deleting files, users can archive documents. Archived documents remain stored in the system but become inactive and hidden from regular views until restored.
8. Delete Document
The system supports both temporary and permanent deletion mechanisms. During soft deletion, documents are moved to the trash section and can be restored later if required. Permanent deletion removes the document completely from the system.
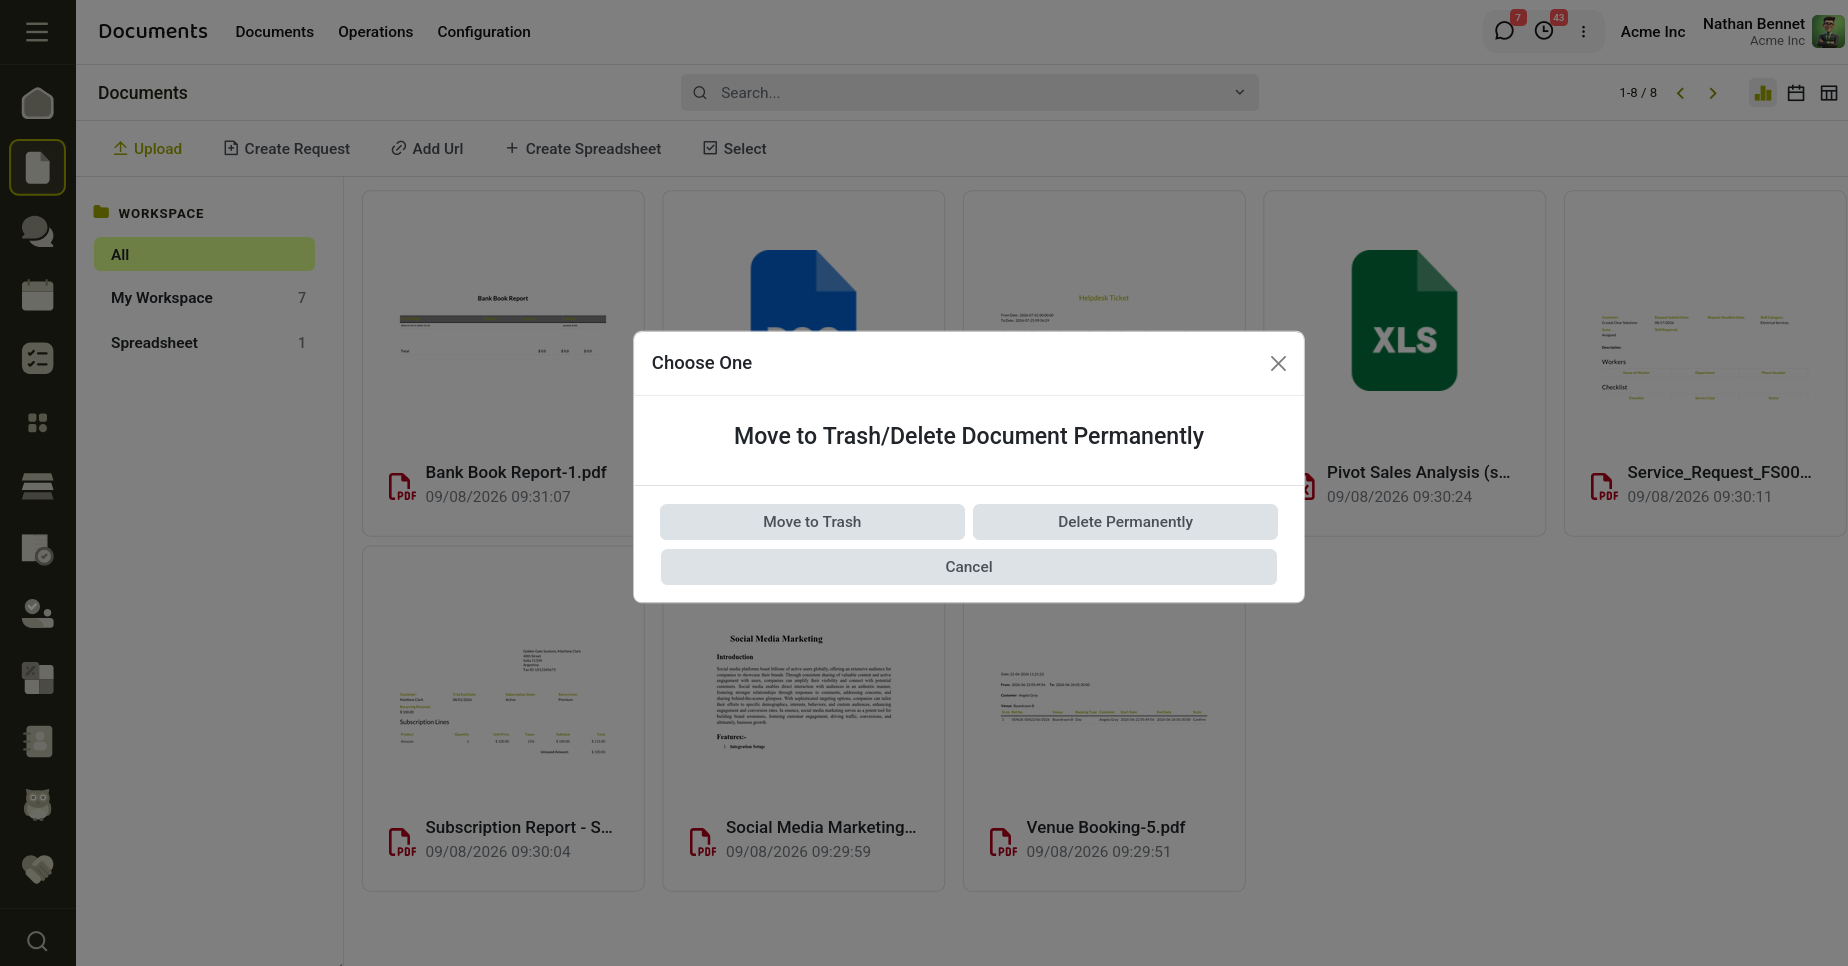
Fig 2.5 — Move documents to trash or delete permanently.
9. Lock and Unlock Document
Sensitive documents can be secured through password protection. Locking a document restricts actions such as sharing, downloading, deleting, moving, emailing, and creating tasks or leads. Users can unlock protected documents by entering the correct password.
3. Operations
3.1 Request a Template
The Request a Template feature allows users to create document requests using predefined document templates. Users can select a template, automatically populate document content and related details, submit the request for approval, preview the generated document, and download it as a PDF. This feature simplifies document generation and ensures consistency across requested documents.
How to Create
- Navigate to the Document → Operations → Request a Template menu.
- Click New.
- Select the required Document Template.
- The system automatically loads the template content and stamp details.
- Verify employee and user details if necessary.
- Save the request.
- Click Send for Approval.
- After approval, preview or download the document.
Key Fields
- Document Template → Selects the template to be used for the request.
- Employee → Employee associated with the request.
- Manager → Related manager from the selected template.
- Requested Date → Date on which the request is created.
- Template → HTML content of the selected document template.
- State → Indicates the current workflow status.
- Company → Company linked with the request.
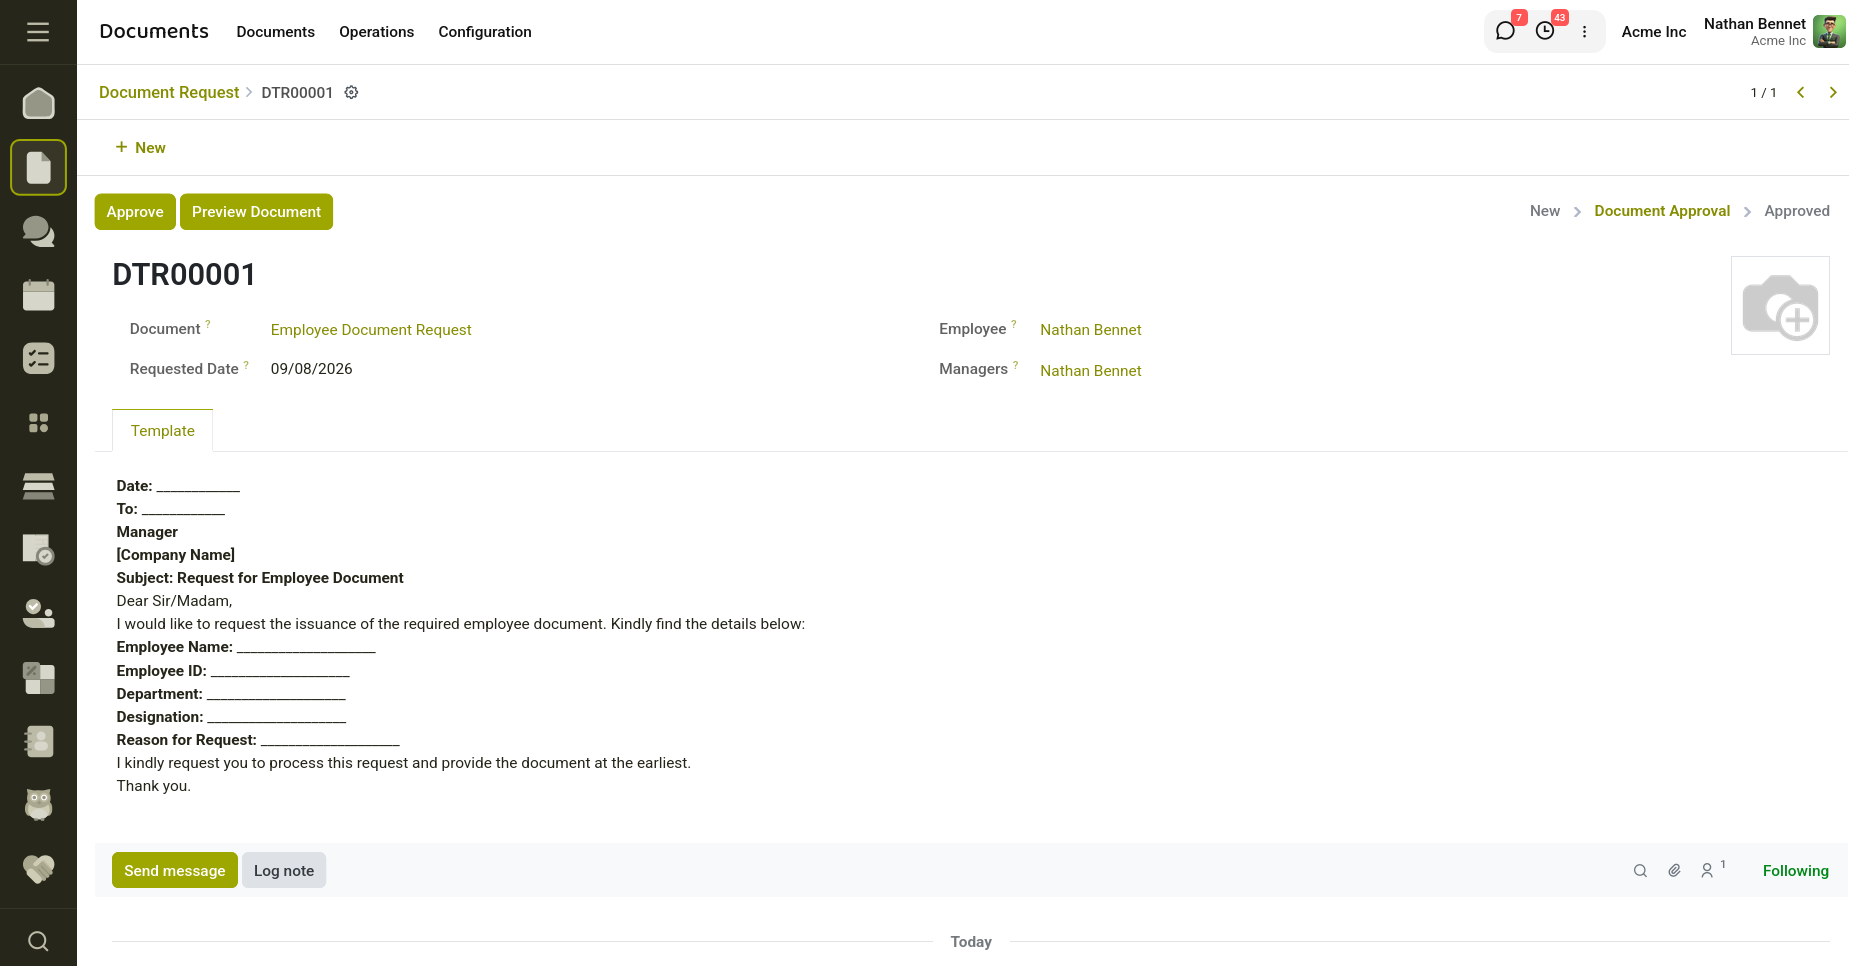
Fig 3.1 — Document request template.
Actions
- Send for Approval: Changes the request status from New to Document Approval for review.
- Approve: Changes the request status from Document Approval to Approved.
- Preview Document: Displays a preview of the generated document along with template content before downloading.
- Download Document: Generates and downloads the requested document as a PDF file.
3.2 Request Document
The Request Document feature allows users to request documents from other users within the system. Users can specify the required document, assign a workspace, select a responsible manager, and send the request through email. The feature supports document request tracking with different workflow stages and includes chatter and activity management for better communication.
How to Create
- Navigate to Documents → Operations → Incoming Requests/Outgoing Requests.
- Click New.
- Select the User from whom the document is required.
- Enter the required document details in Document Needed.
- Select the Workspace.
- Choose the responsible Manager if required.
- Save the request.
- Click Send Request to submit the document request.
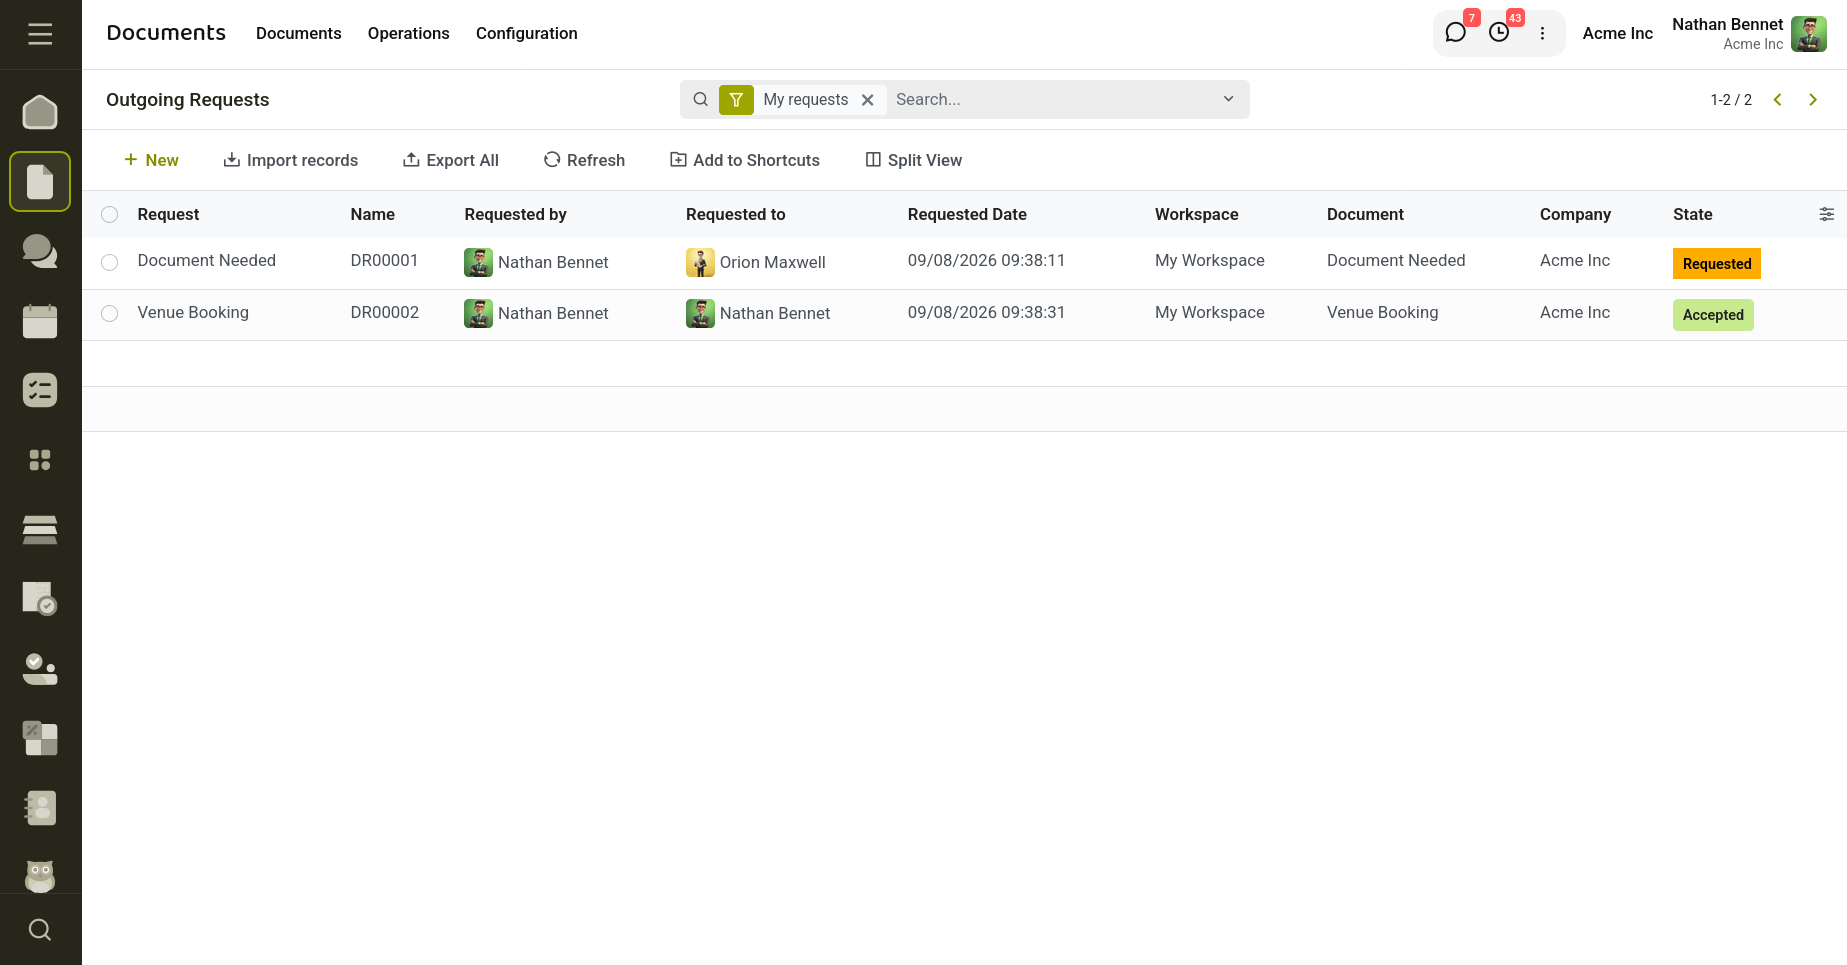
Fig 3.2 — Incoming Requests for Documents.
Key Fields
- User → User from whom the document is requested.
- Requested User → User who created the request.
- Document Needed → Details of the required document.
- Workspace → Workspace associated with the request.
- Manager → Responsible manager for handling the request.
- Workspace Name → Displays the selected workspace name.
- State → Current status of the document request.
- Company → Company associated with the request.
Actions
Send Document Request: Changes the request state from Draft to Requested and sends an email notification to the selected user.
4. Configuration
4.1 Workspace
The Document Workspace feature provides a centralized location for organizing and managing documents. Workspaces help categorize files into separate folders and control document accessibility. The feature also supports integration with cloud platforms such as Google Drive and OneDrive, allowing automatic folder creation and synchronization for better document management.
How to Create
- Navigate to Documents → Configuration → Workspace.
- Click New.
- Enter the Workspace Name.
- Add a Description for the workspace if required.
- Select the Visibility type.
- Select the Company.
- Save the workspace.
- The system automatically creates folders.
Key Fields
- Workspace Name → Name of the document workspace.
- Workspace → Computed display name of the workspace.
- Company → Company associated with the workspace.
- Description → Details about the workspace.
- Visibility → Defines access permissions for users.
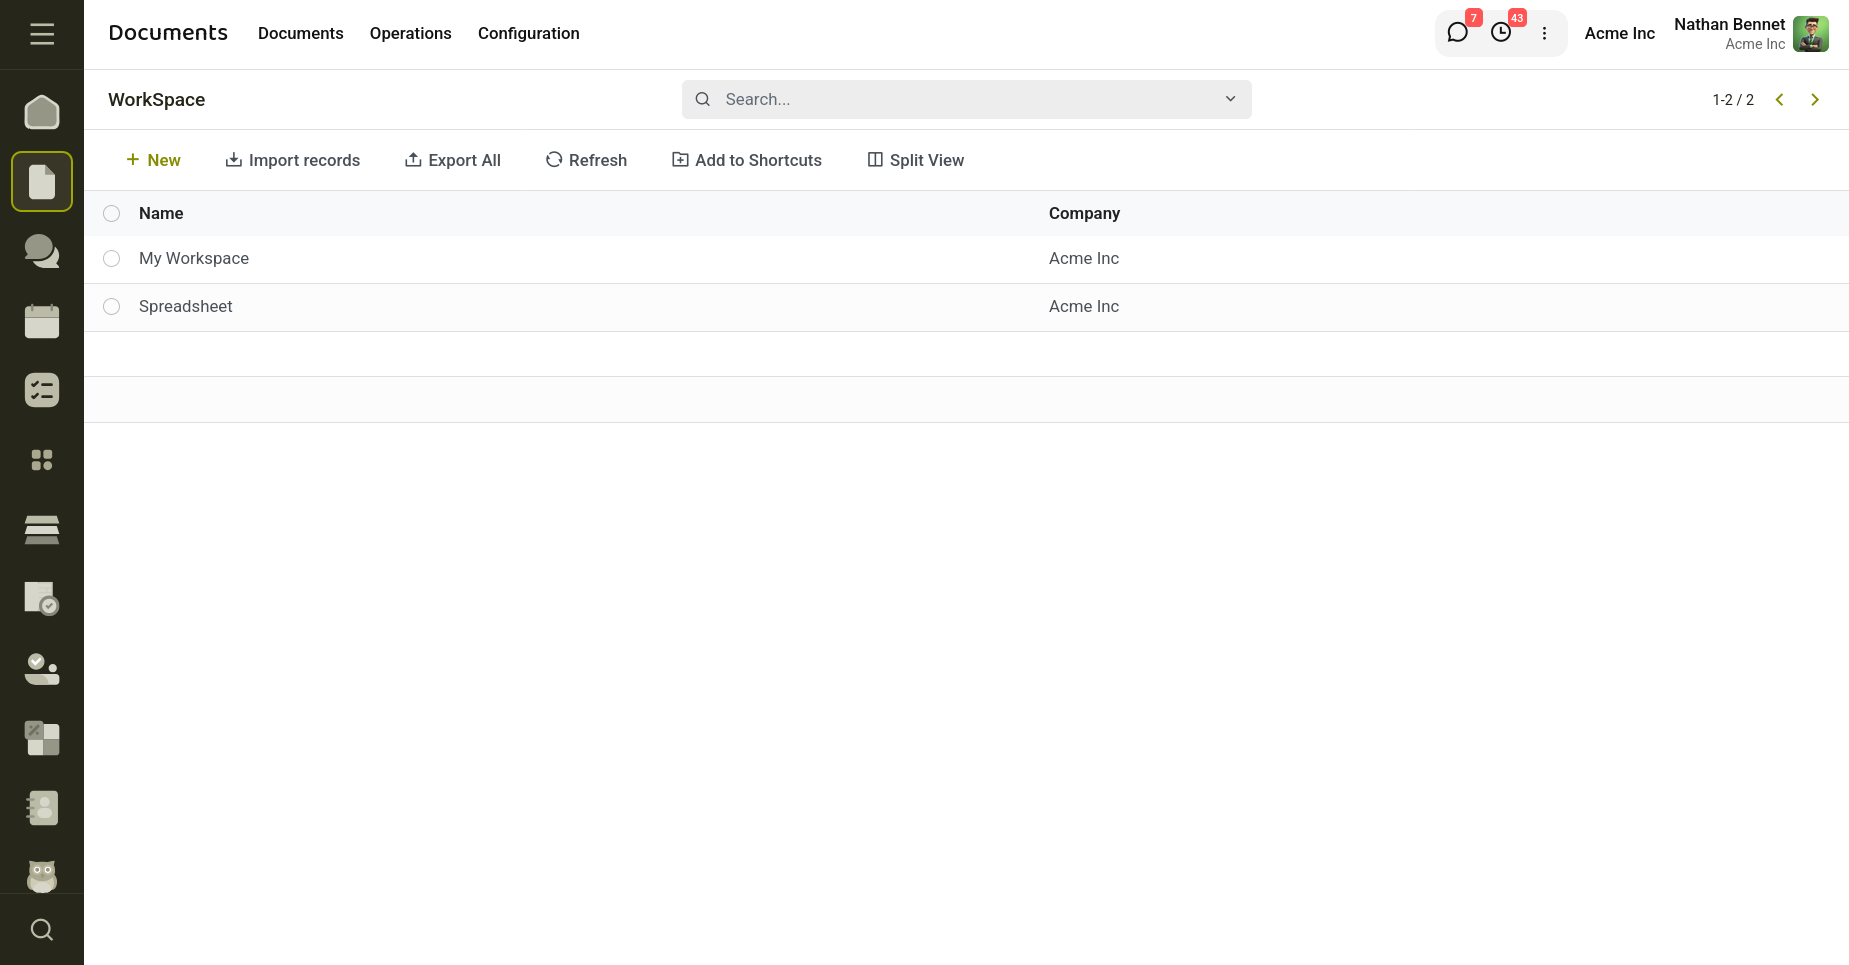
Fig 4.1 — Displays the Workspace form View.
Visibility Options
- Invited Internal Users (Private) → Only invited internal users can access workspace documents.
- All Internal Users → All internal users can access workspace documents.
4.2 Document Trash
The Document Trash feature temporarily stores deleted documents instead of permanently removing them immediately from the system. Users can restore accidentally deleted documents, configure automatic deletion after a specific period, and manage deleted files efficiently. This feature provides an additional safety layer for document recovery and retention management.
How to Access
- Navigate to Documents → Configuration → Trash.
- Deleted documents are automatically moved to the trash section.
- Open the required trashed document.
- Configure the Auto Delete option if required.
- Enter the number of Days for automatic deletion.
- Save the record.
- Click Restore to restore the document if needed.
- Documents exceeding the configured deletion period are automatically removed.
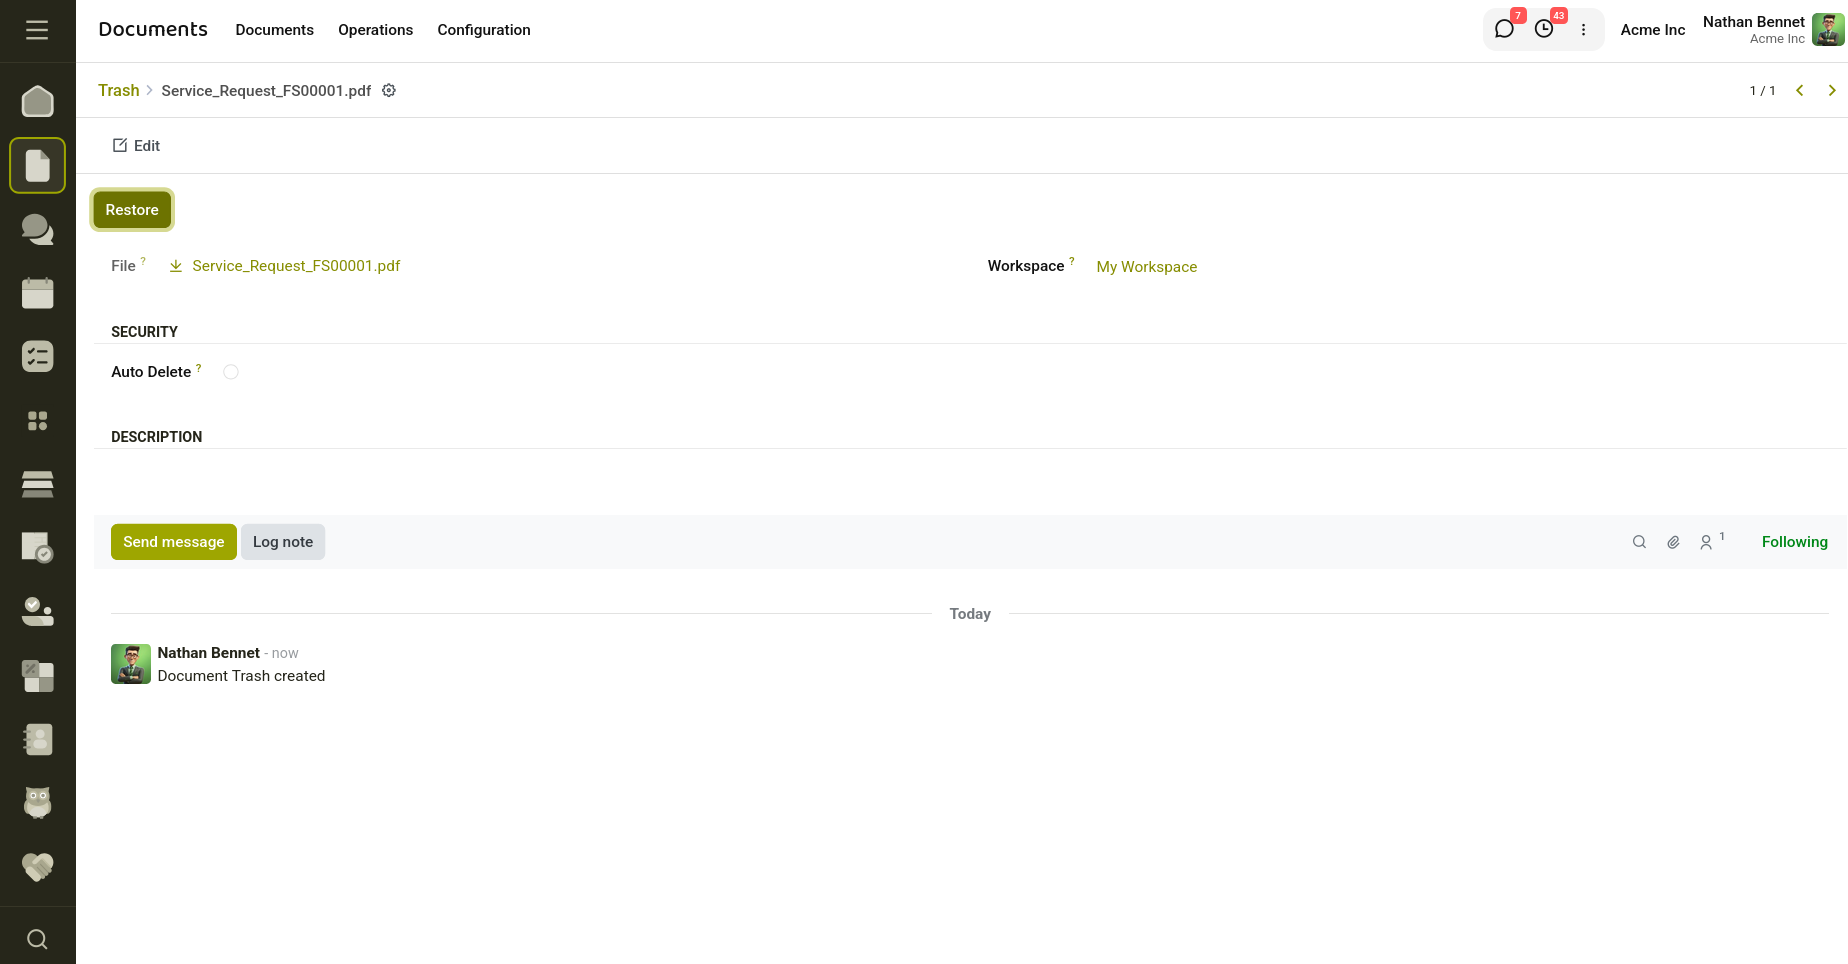
Fig 4.2 — Documents in trash.
Actions
- Restore Document: Restores a deleted document by recreating it in the document storage and removing it from the trash.
- Auto Delete Date Calculation: Automatically calculates the delete date based on the specified number of days.
4.3 Document Tag
The Document Tag feature allows users to classify and organize documents using labels or categories. Tags help users quickly identify, filter, search, and group related documents, improving document management efficiency and accessibility.
How to Create
- Navigate to Documents → Configuration → Tags.
- Click New.
- Enter the Tag Name.
- Save the tag.
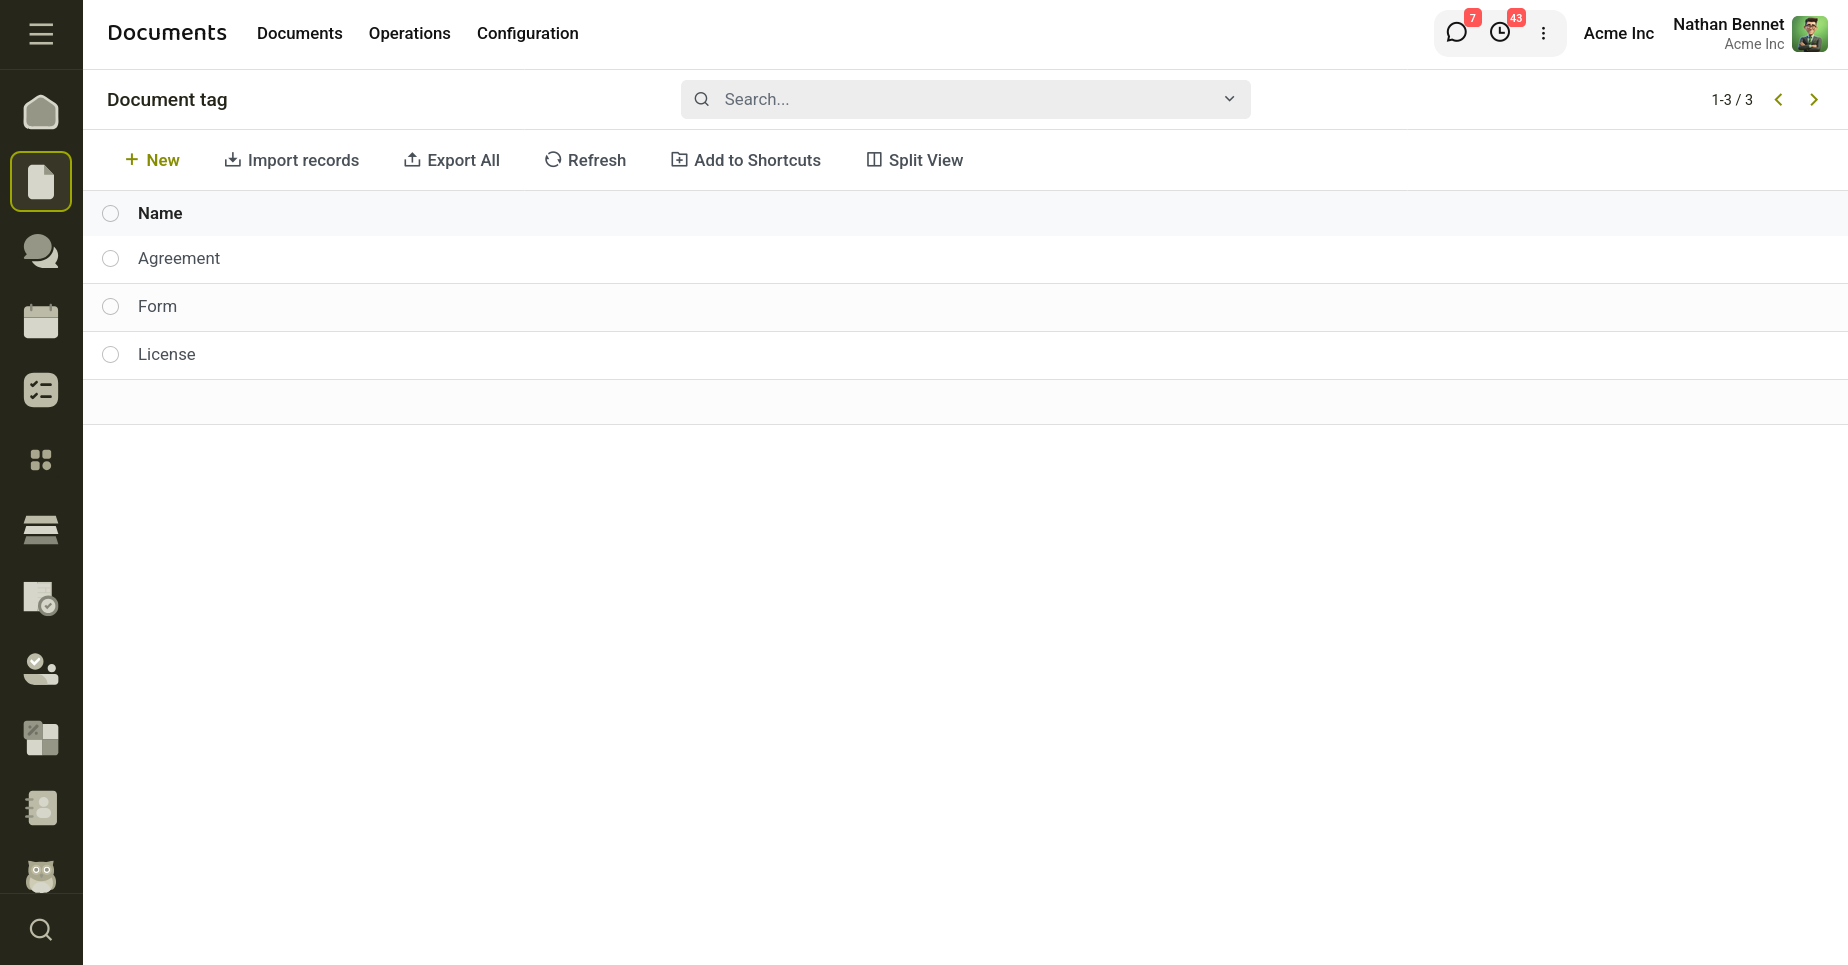
Fig 4.3 — Document tags
5. Website Portal Access
The Portal Access feature enables portal users to securely access and manage documents directly through the website portal. Users can view their assigned documents, track document requests, access document details, download requested files, and interact with shared documents without requiring internal system access. This improves collaboration and provides external users with controlled document availability.
Features Available for Portal Users
- Access personal documents through the portal.
- View document details and associated information.
- Download documents directly from the portal.
- View and track document requests.
- Submit document template requests through the portal.
- Access shared documents through generated links.
- Download multiple selected documents as a ZIP file.
- View document request statuses.
Portal Navigation
- Login to the portal.
- Open My Documents to view available documents.
- Select a document to view details.
- Open Document Requests to view requested documents.
- Create a new template request if required.
- Download documents or generated reports.
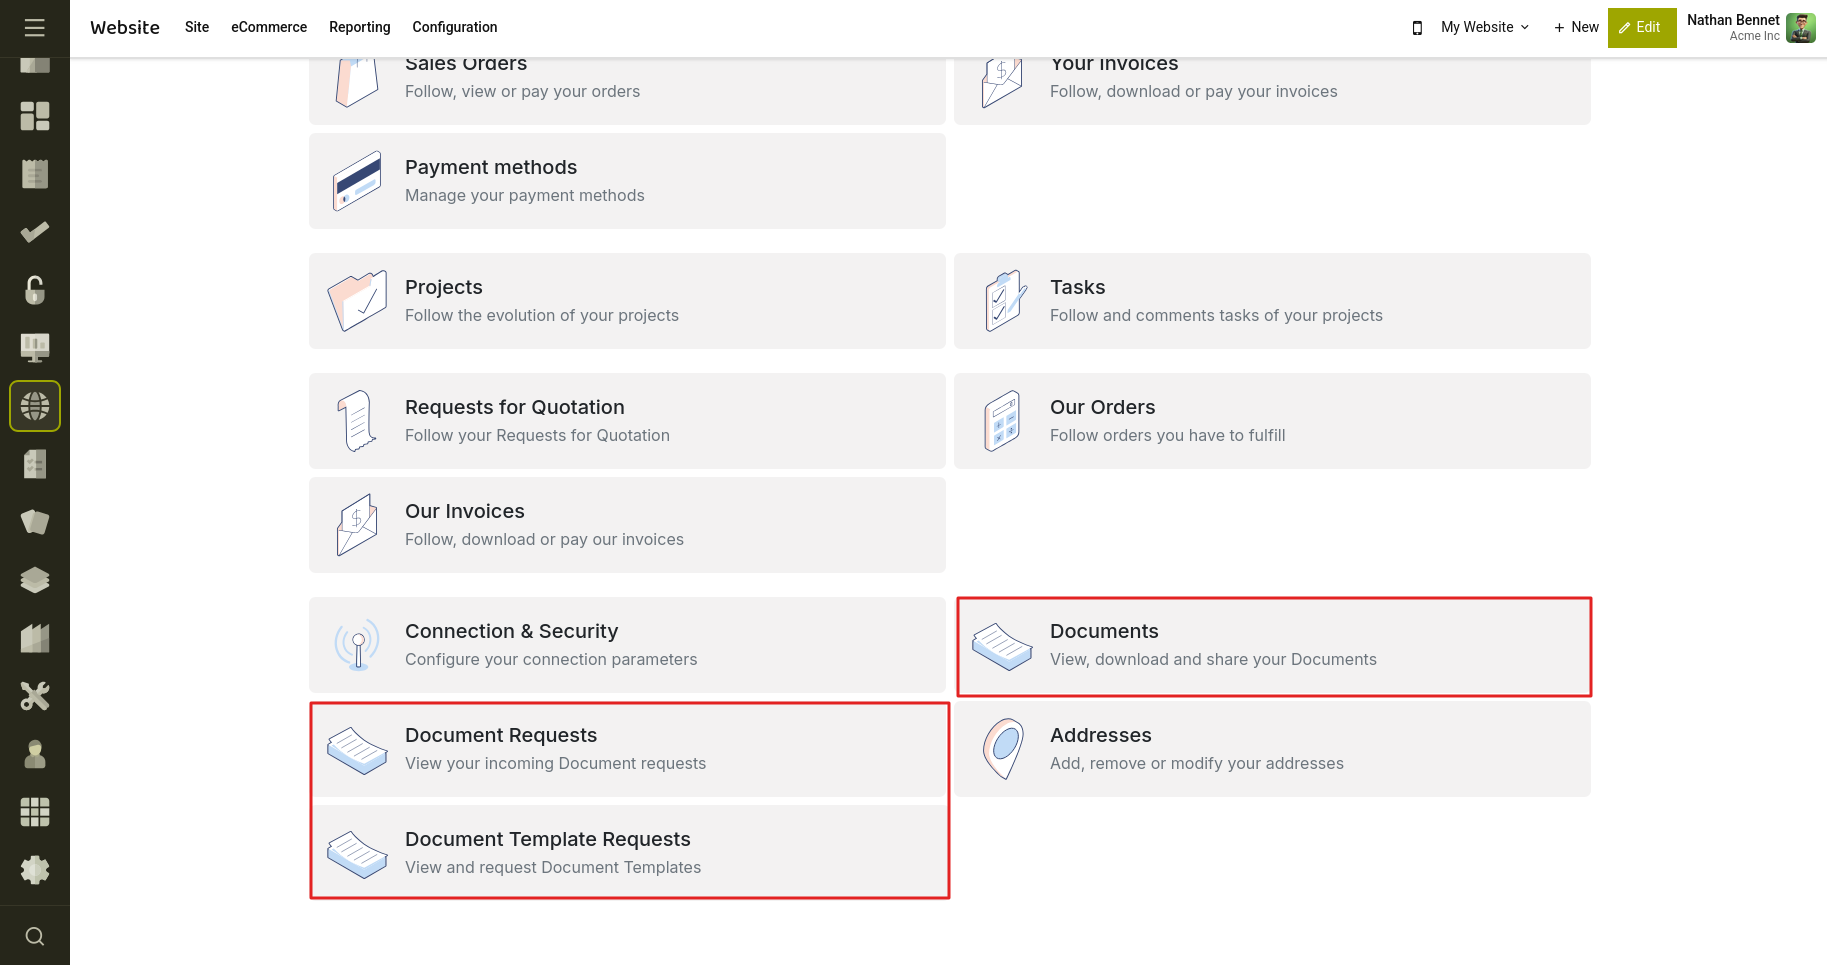
Fig 5.1 — Portal Documents, Document requests and Document template Requests
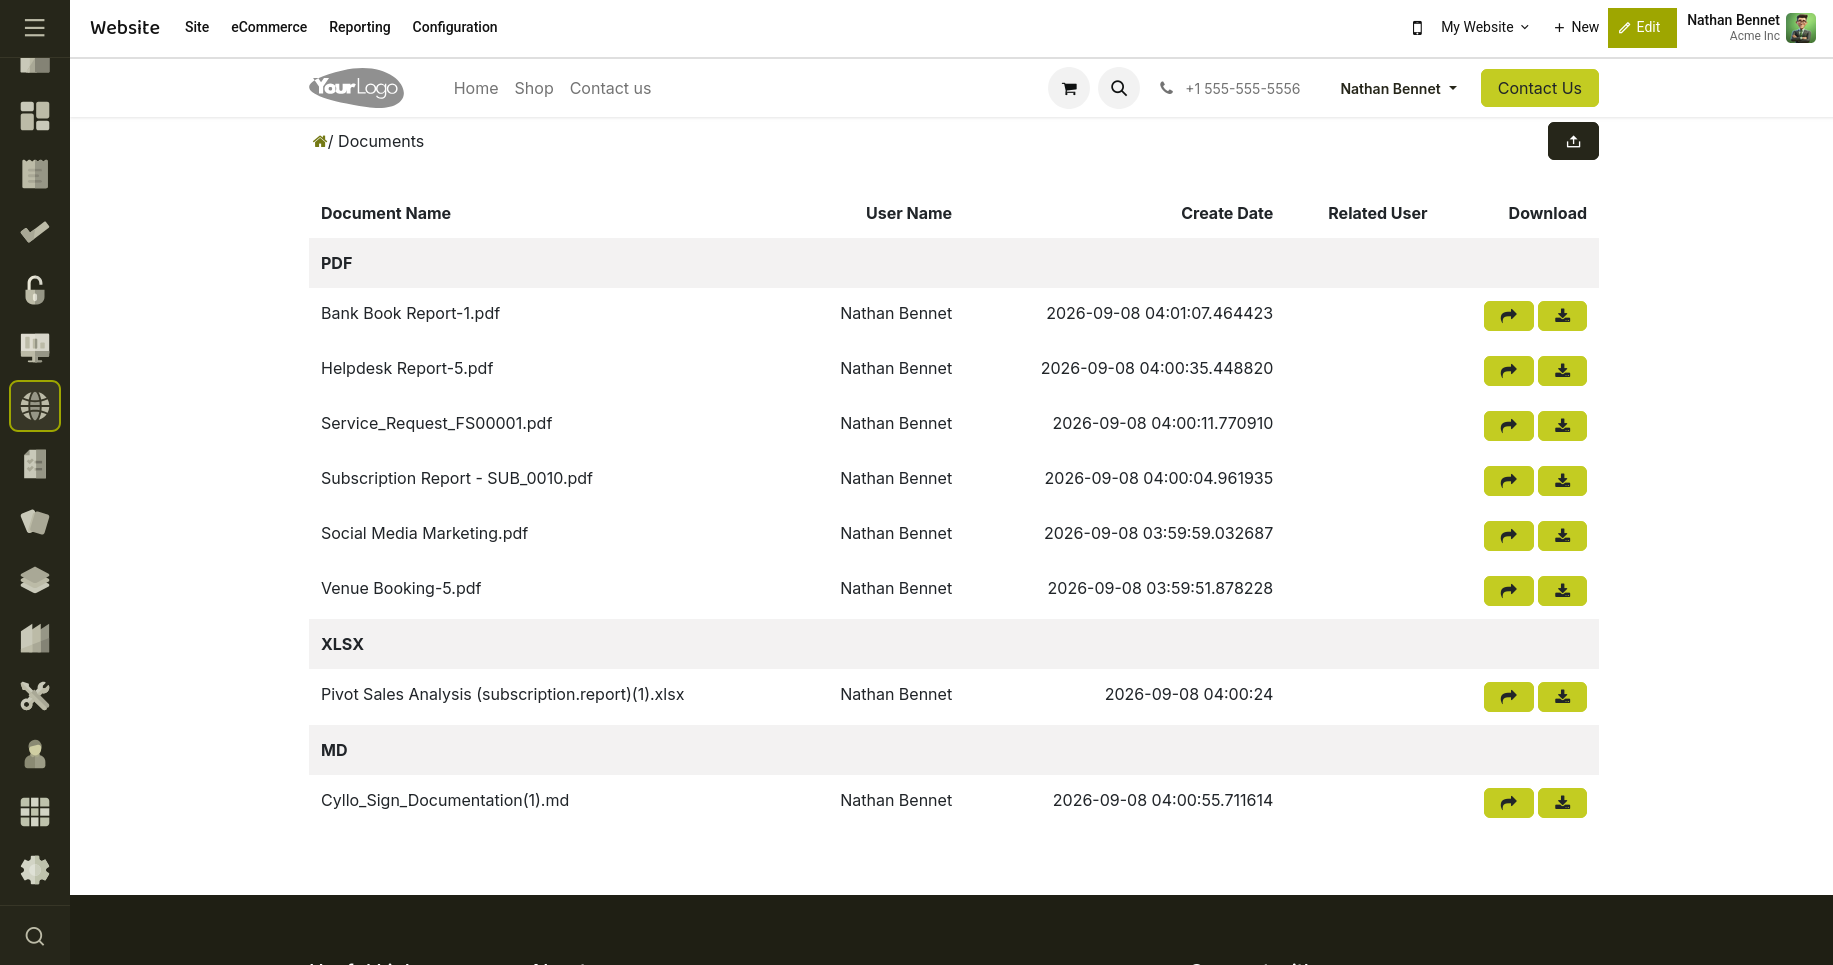
Fig 5.2 — Users Documents.
Document Request from Portal:
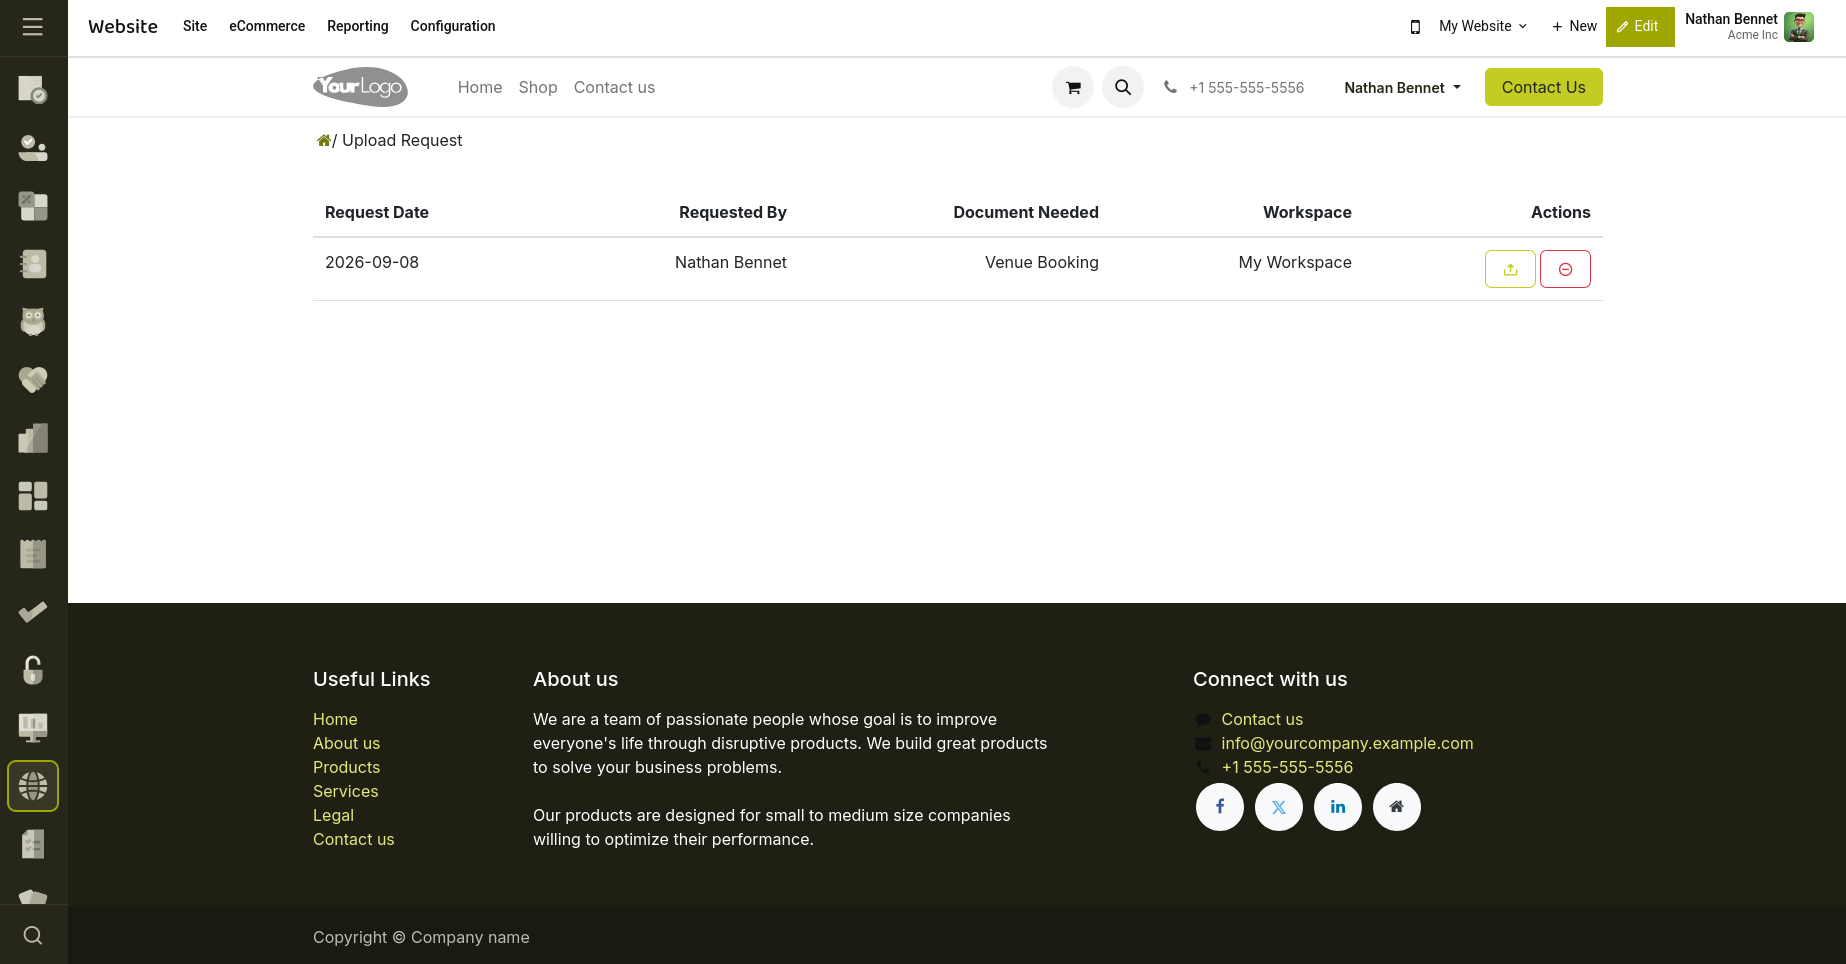
Fig 5.3 — Document Requests from Portal
Document Template Request From Portal
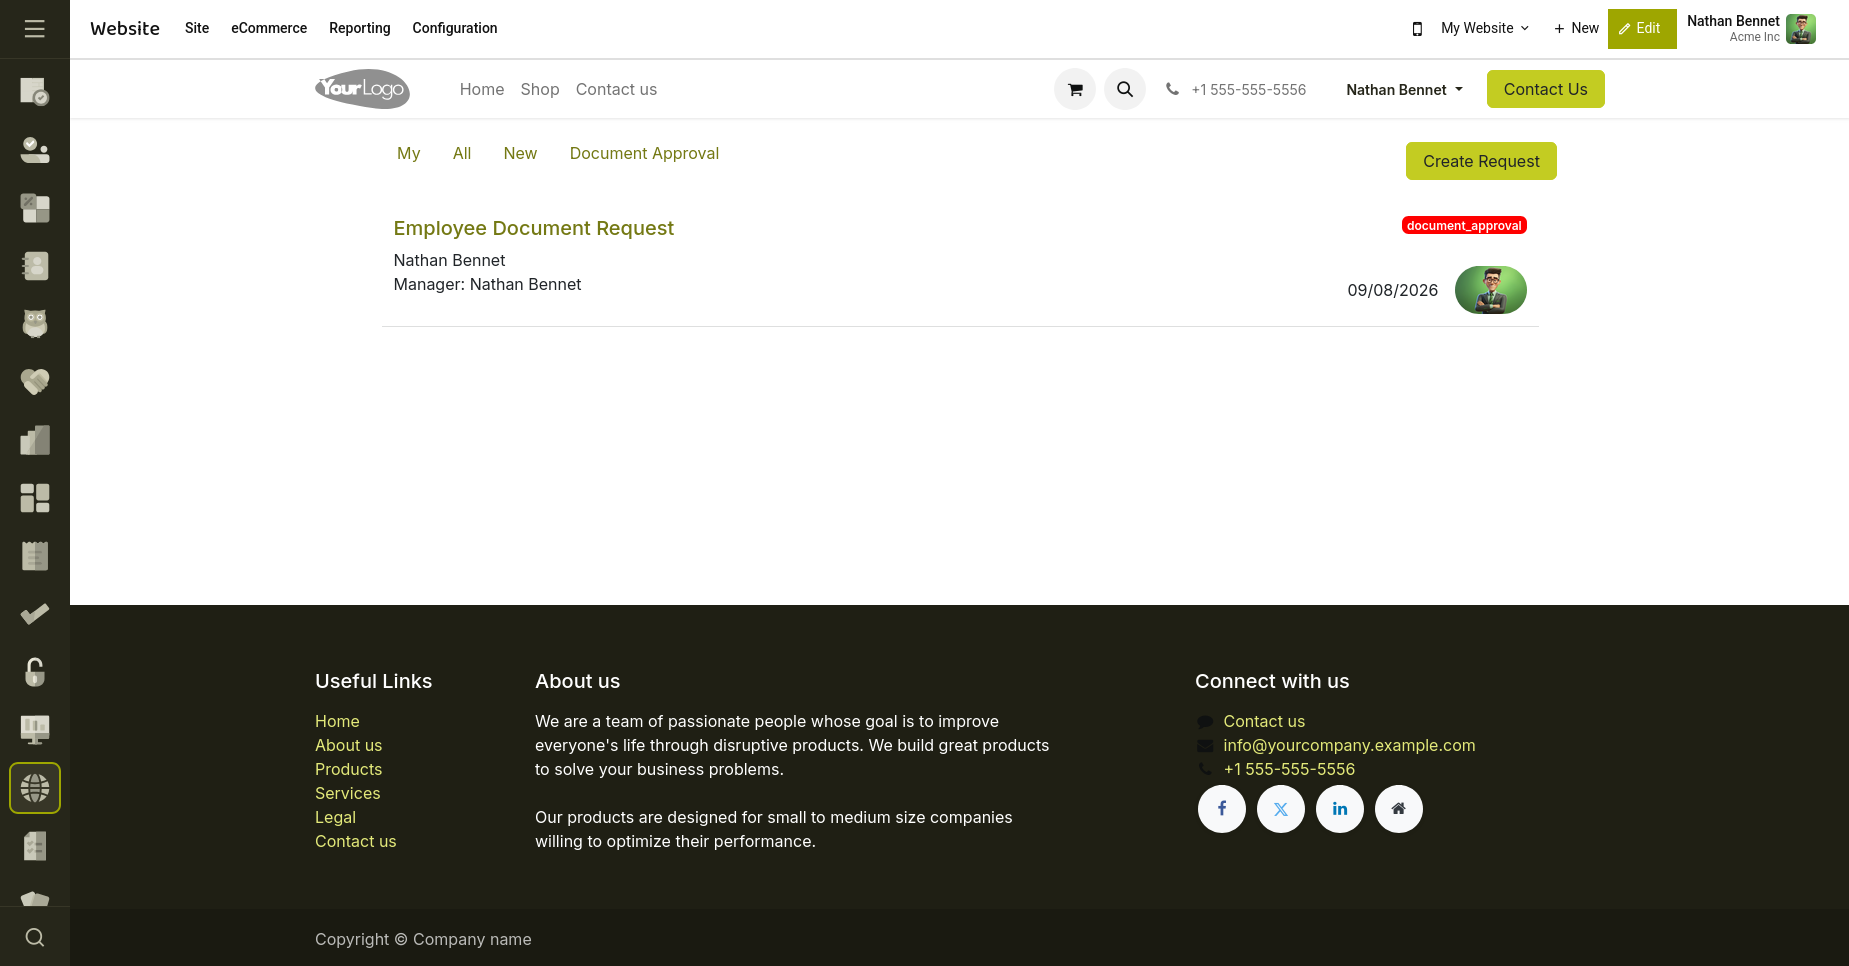
Fig 5.4 — Document template request from portal