

Cyllo Repairs Documentation
Introduction
The Cyllo Repair module can be combined with the Manufacturing and Maintenance modules to guarantee flawless performance. This module is very useful for organizing repair services for goods. The Cyllo Repair module allows for the creation of repair orders to fix products that are either partially or completely damaged. It is among Cyllo Repair's easiest-to-use and most efficient modules.
Repairing is a crucial and unavoidable aspect of a company's operations, applicable to both stored and sold products. It is a valuable responsibility for a company to maintain and carry out repair processes on its products, as this helps increase the credibility of the products and retain customer support. Providing valuable repair services to customers can significantly boost customer satisfaction rates.
Managing repair orders manually can lead to inappropriate situations, confusion, service delays, and even forgotten orders. This can create a sense of discomfort and dissatisfaction in customers, potentially resulting in lost business opportunities.
By implementing a Repair Management system, companies can ensure customer satisfaction and timely return of products in working condition. The Repair module assists in easily running, planning, organizing, executing, monitoring, and operating repair orders within a short timeframe. Additionally, the module's flexible and adjustable design makes it highly effective for interconnecting with other modules across the company's operations.
1. Repair Orders
Upon opening the Repair module, you will be presented with a list view of all repair orders created within the module, as depicted below.
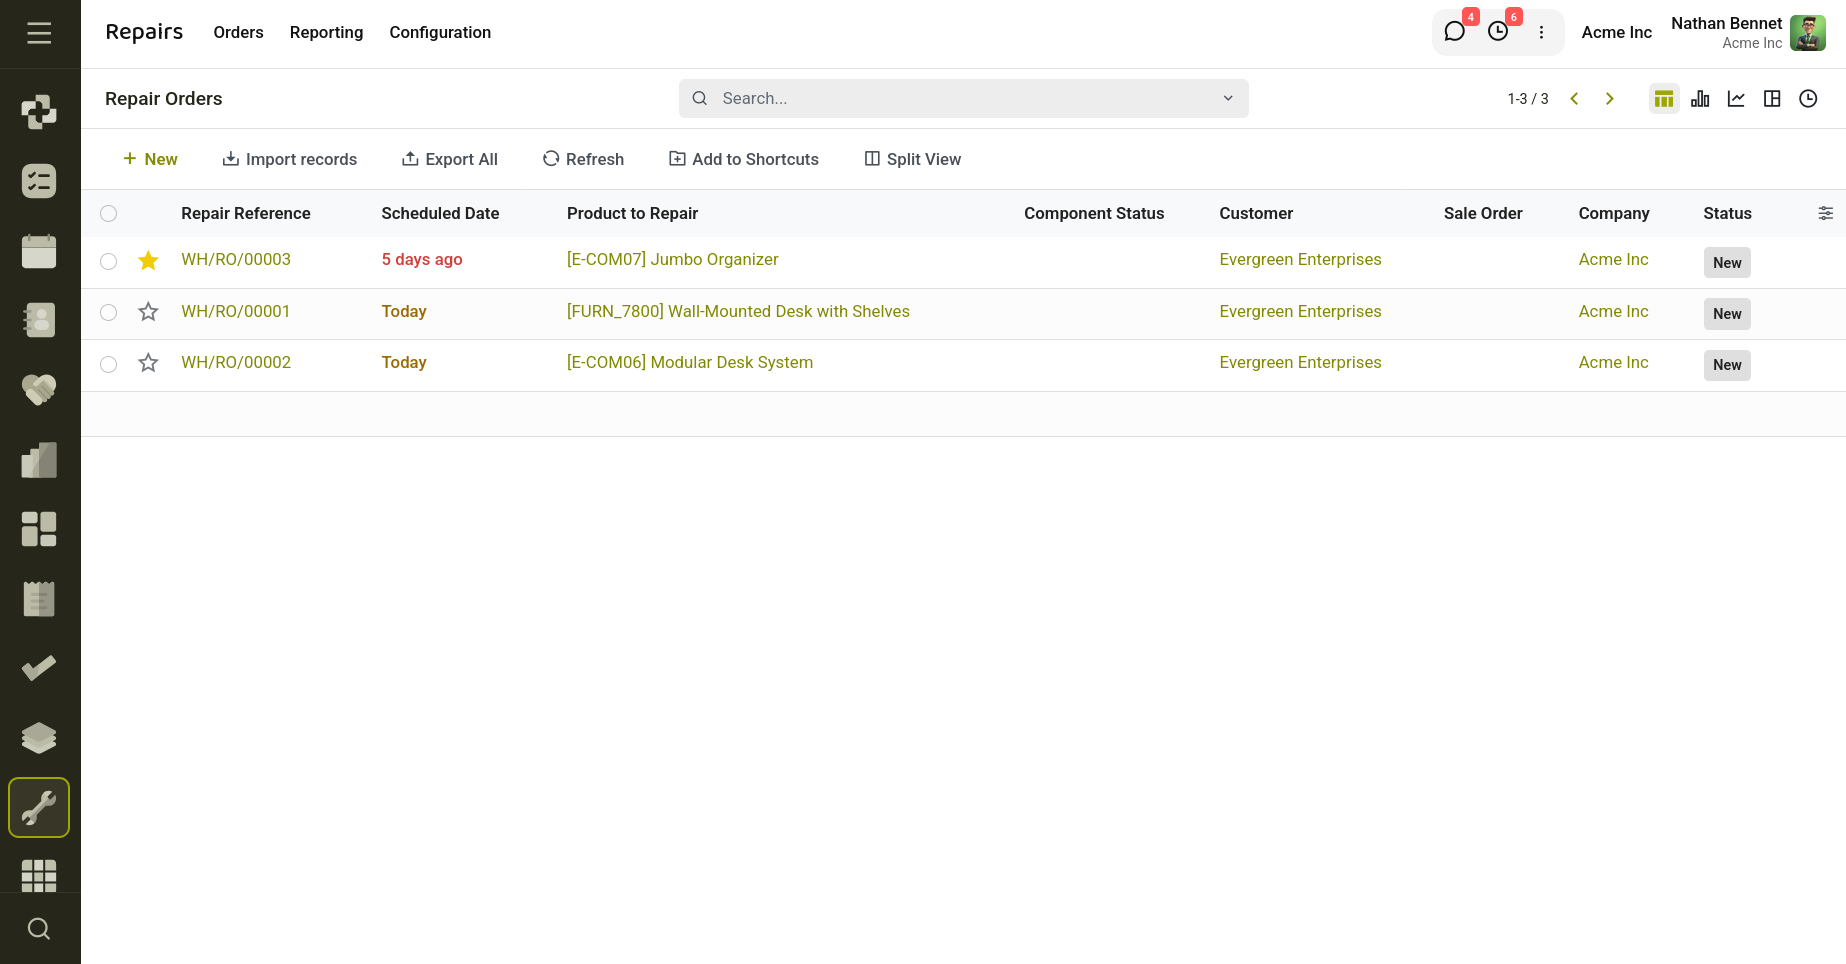
Fig 1.1 — List View of Repair Orders.
In the list view of the Repair module, details such as Repair Reference, Scheduled Date, Product to Repair, Customer, Sale Order, Company, and Status are prominently displayed. The status of repair orders is indicated by various colors, providing a quick visual reference. Each repair order is accompanied by a star icon that can be utilized to highlight the importance of the request.
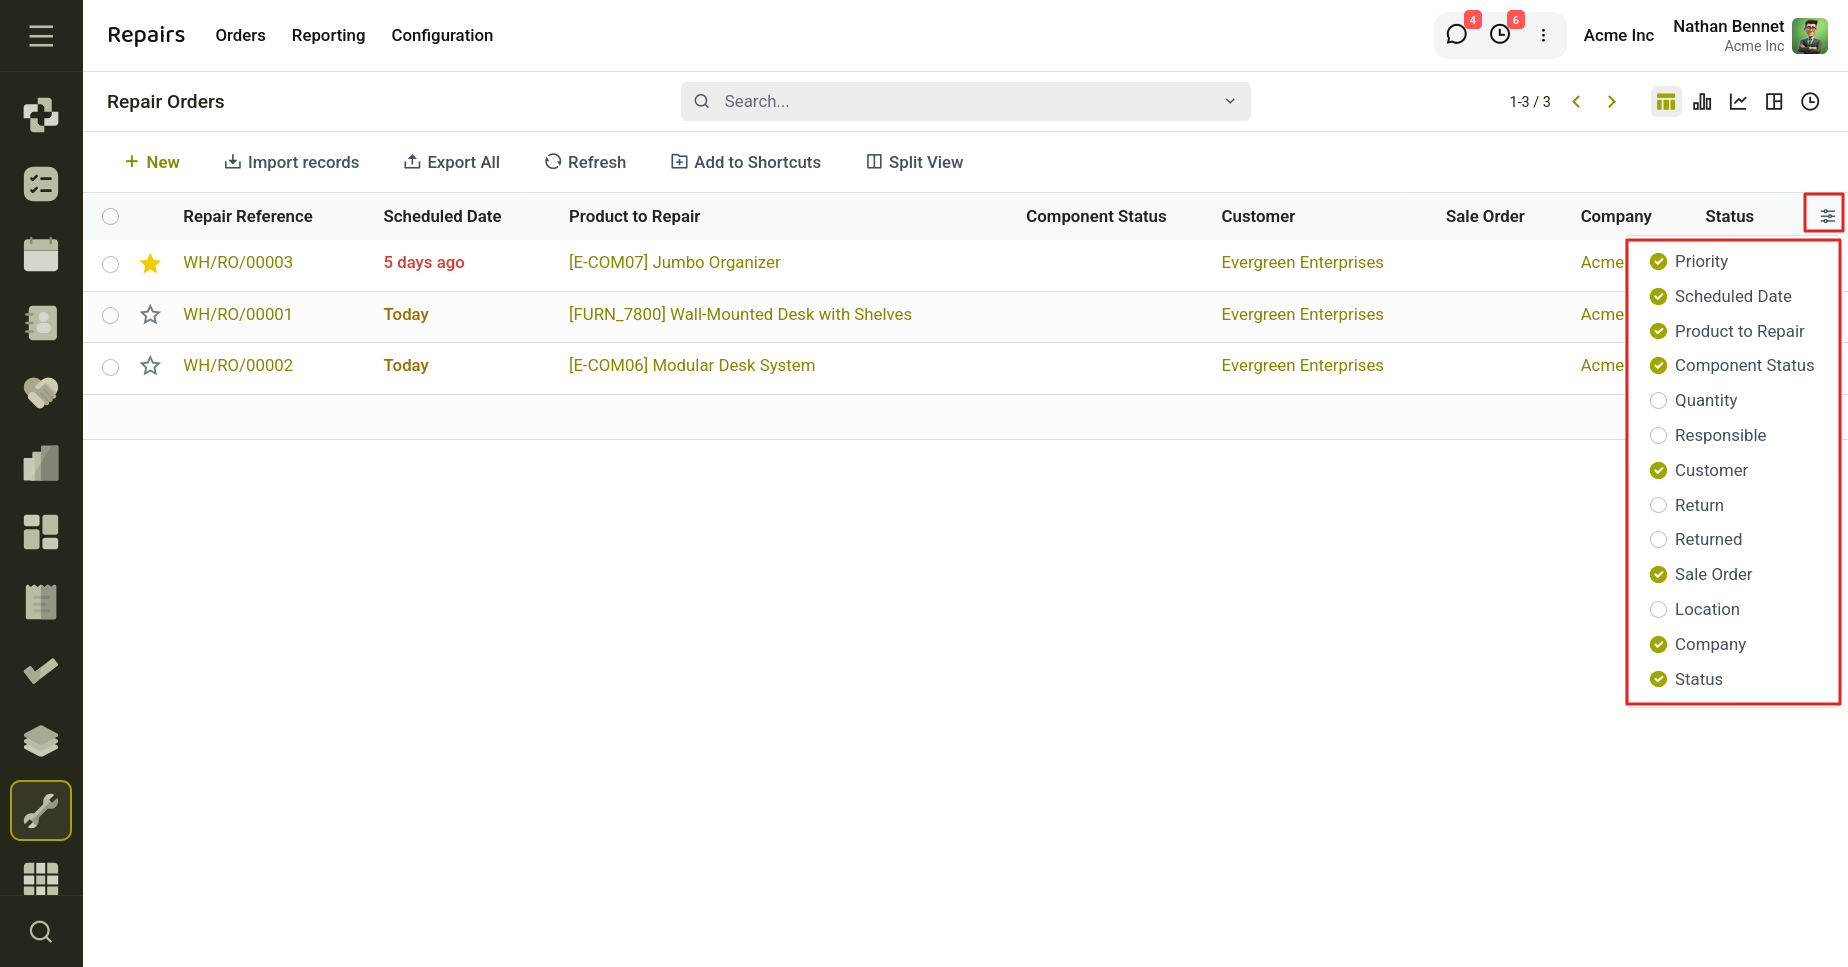
Fig 1.2 — Optional fields to display on List View.
To add new fields, click the icon located in the list view's upper-right corner. From the list, select and enable the necessary fields.
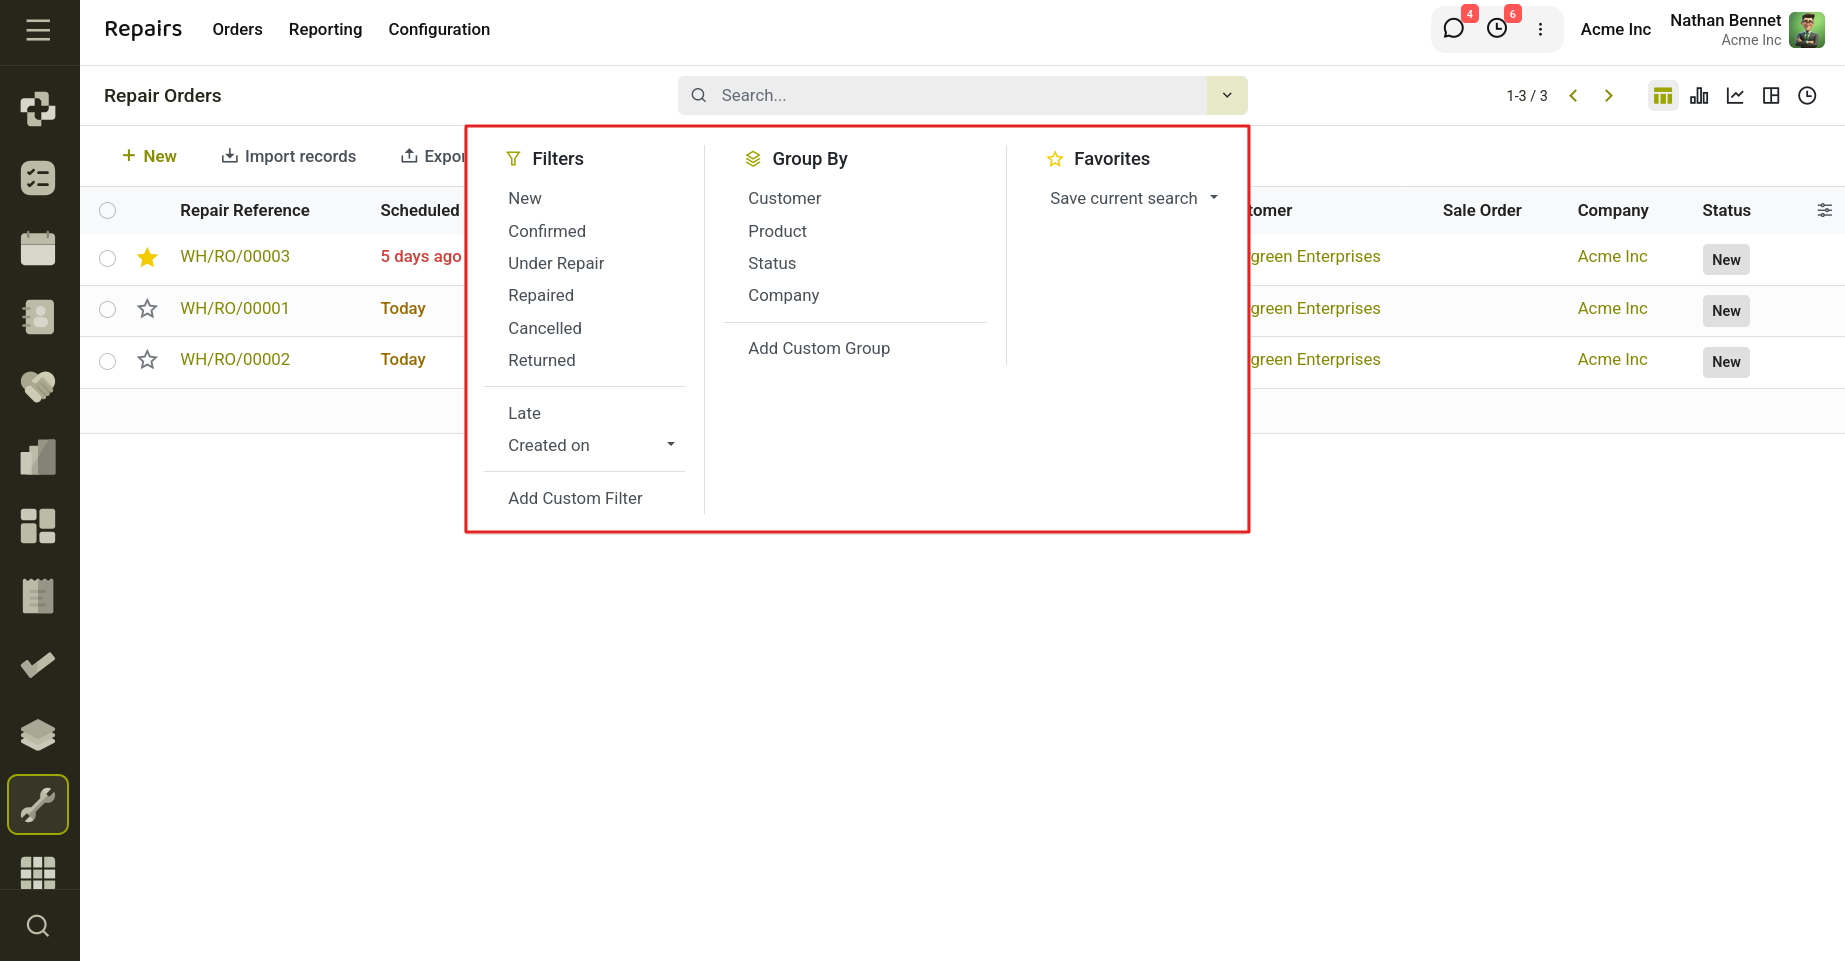
Fig 1.3 — Filters and Groups on search view.
New, Confirmed, Under Repair, Repaired, Cancelled, and Returned are the platform's default filters. Use the Add Custom Filter function to create custom filters for repair requests. You can arrange the repair orders based on Customer, Product, Status, and Company by using the Group By feature.
Select the "New" option to initiate a new repair request. A new form view will be displayed as seen below.
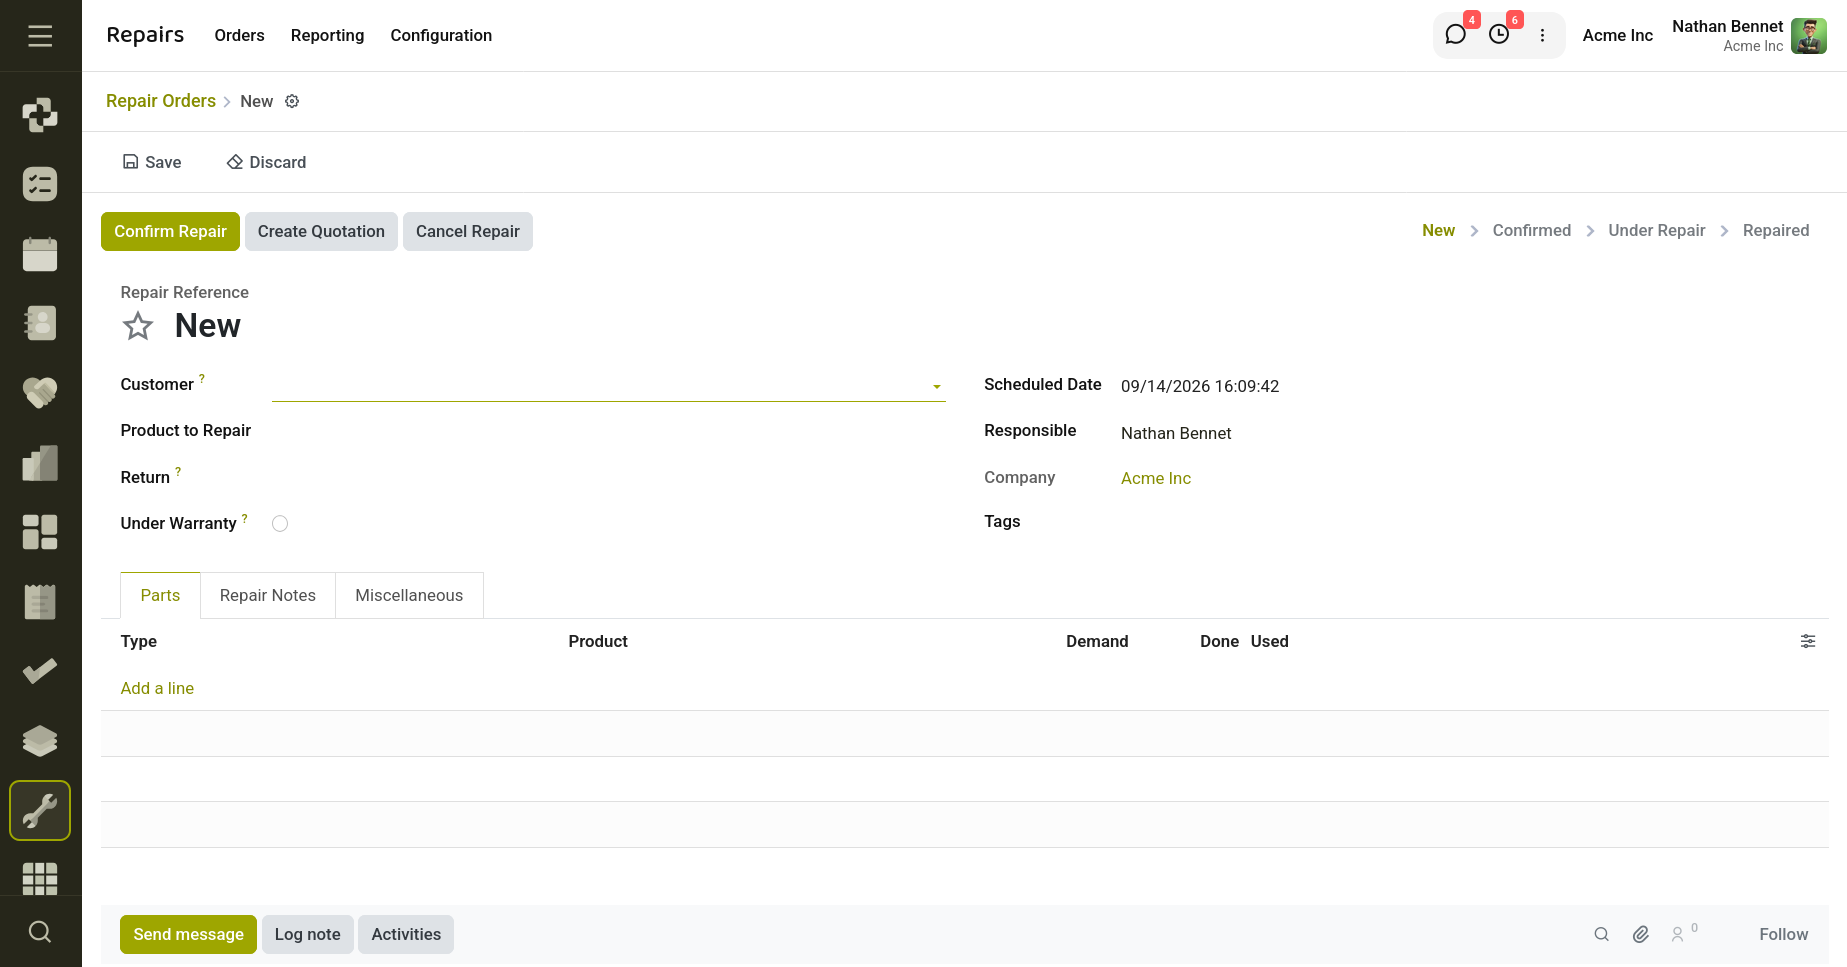
Fig 1.4 — Repair order form.
The fields are
- Customer: Customer name who requested the repair request.
- Product to Repair: Specify the item you want to repair. fill out the Product Quantity section with the product's amount.
- Return: Return order from which the product to be repaired comes from.
- Scheduled Date: Set a date for the product's repair.
- Responsible: The person in charge of doing the repairs
- Under Warranty: The merchandise moved from the repair order will be sold at zero price if it is checked.
- Allocated Duration (Hours): Planned time allocated for completing the repair. This can be configured through repair time allocation policies.
- Progress (%) : Percentage of allocated repair time that has been consumed based on actual working duration.
- Time Status : Displays the repair's time performance status as On Track, Warning, or Overdue.
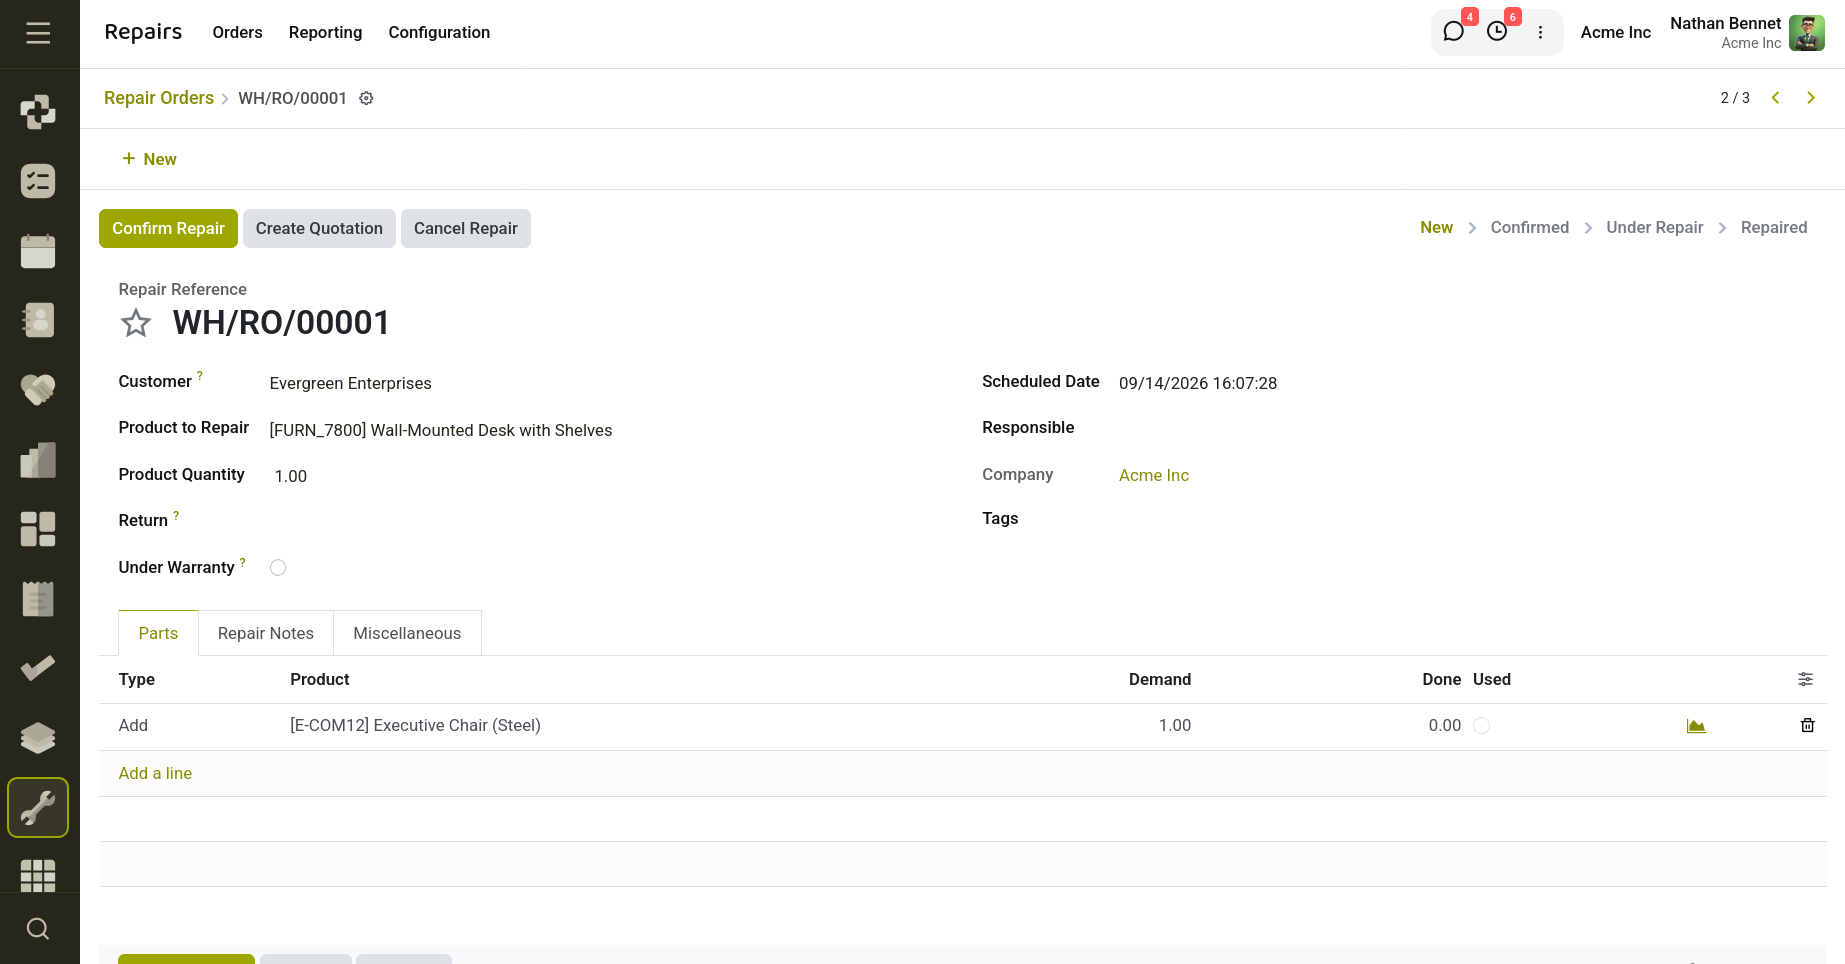
Fig 1.5 — Fill the required fields on the form.
The Parts tab in the Repair module allows you to identify the specific components that need to be changed or added to fix the product. Using the "Add a Line" button, you can provide details about the parts, including the Type (Add, Remove, or Recycle), Product, Description, Quantity, Unit of Measure, Unit Price, and Taxes. This comprehensive information helps track the specific parts required to complete the repair.
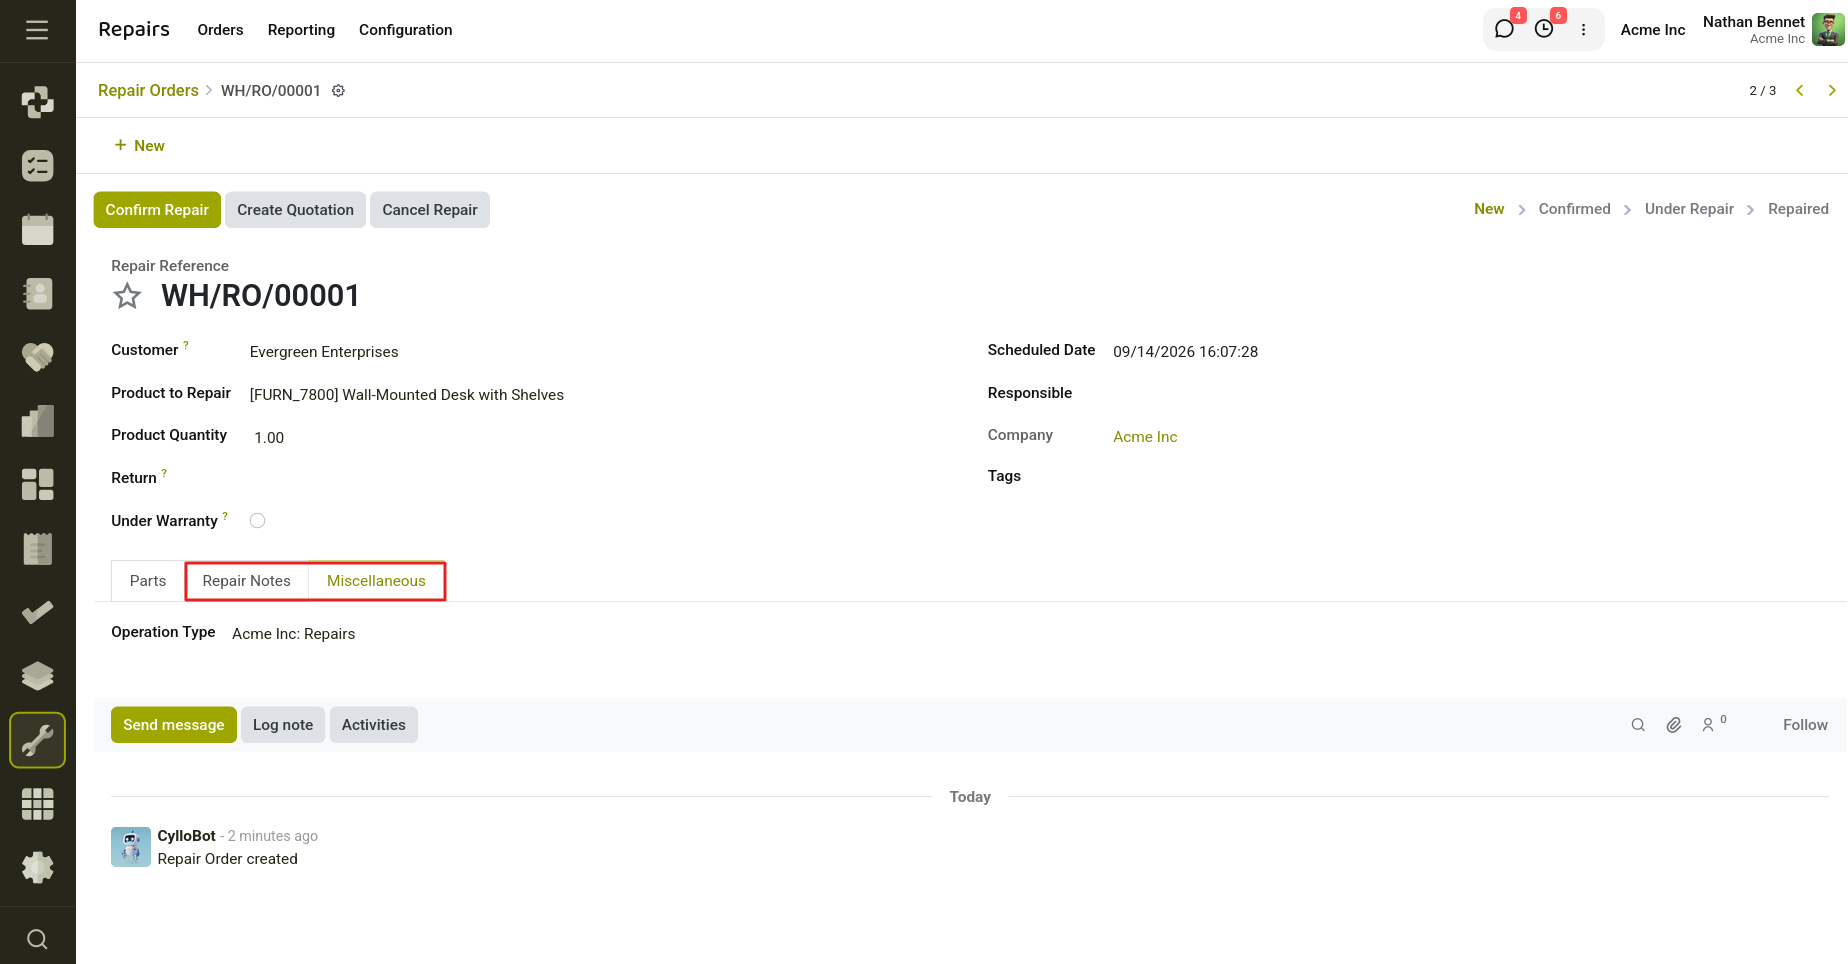
Fig 1.6 — Repair notes and Miscellaneous tab on order form.
The Repair Notes field is designated for entering any internal notes related to the repair order. The Miscellaneous tab is used to specify the Operation Type.
After all the necessary fields have been filled out, the completed repair order will be displayed as shown in the image below.
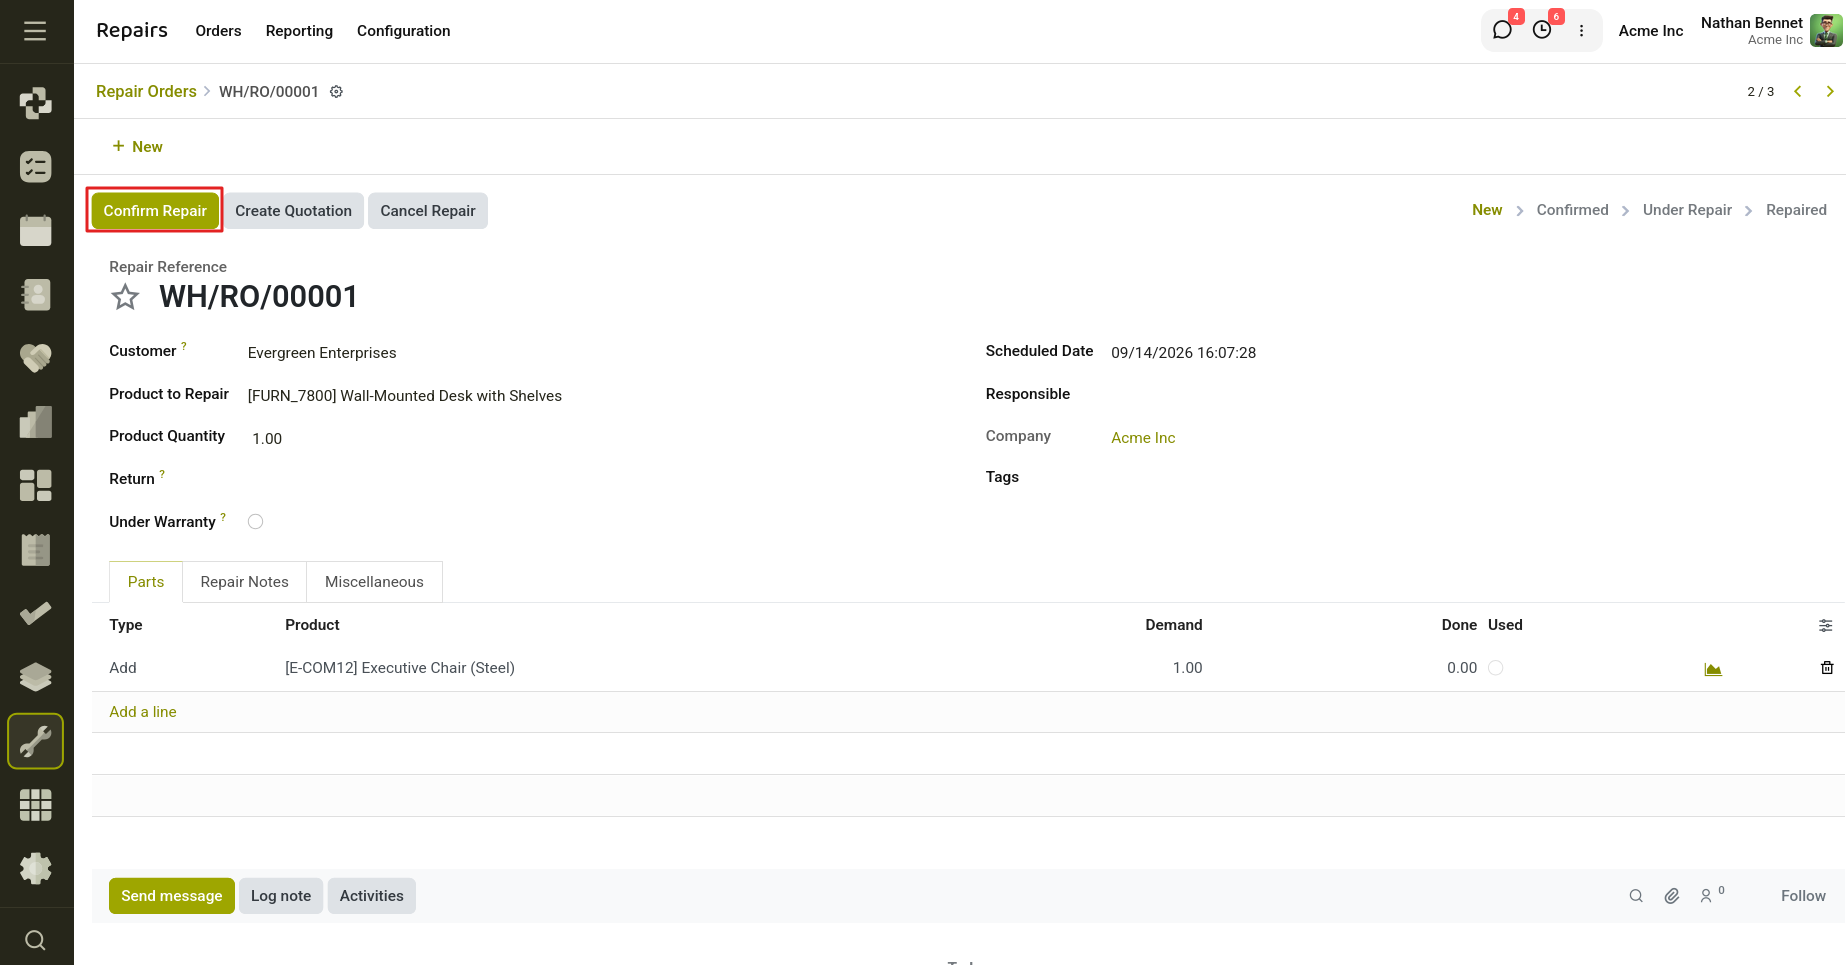
Fig 1.7— Confirm repair to confirm the repair order.
To validate the repair order, you can click the "Confirm Repair" button. The "Create Quotation" option allows you to generate a quotation from the repair order. Use the "Cancel Repair" option if you would like to cancel the order. At this stage, we are confirming the repair order.
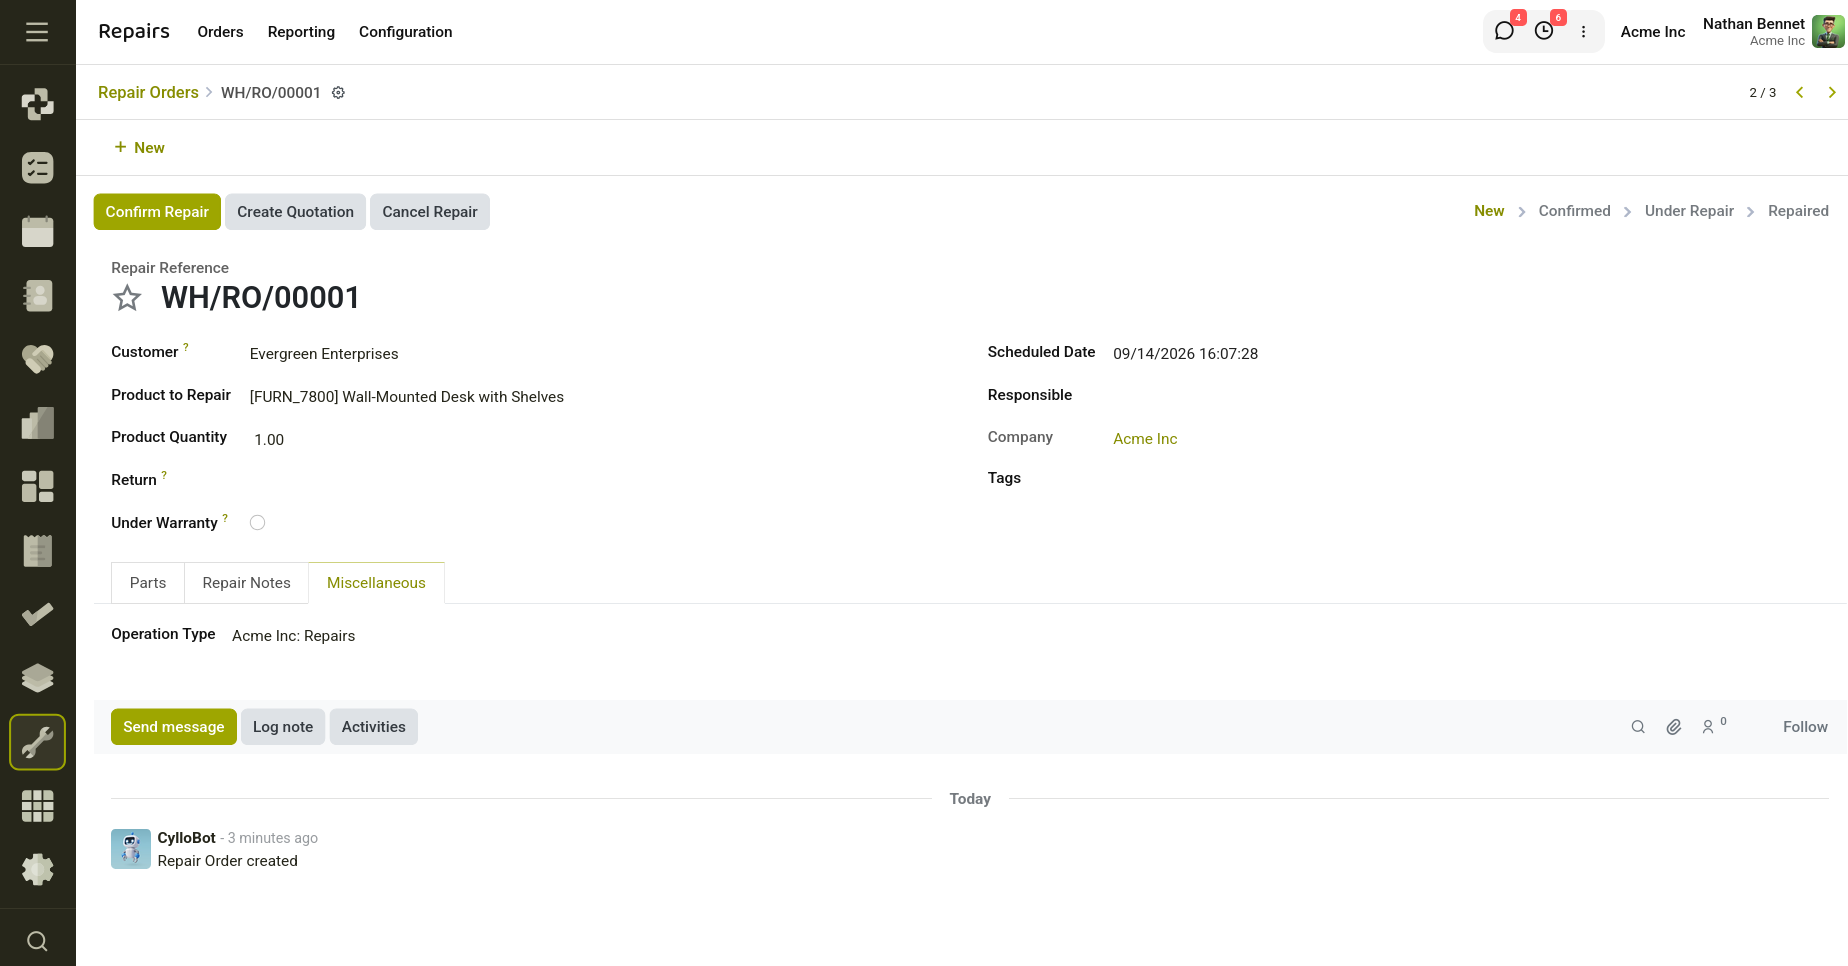
Fig 1.8 — Repair notes and Miscellaneous tab on order form.
Once the repair order has been confirmed, its status changes to Validated, as shown in the screenshot above. To begin the repair process, click the Start Repair button.
When starting a repair, the system verifies the operators assigned to the repair order against the Maximum Active Repairs per Operator setting configured in the application settings. If any assigned operator has already reached the allowed number of active repairs, the system prevents the repair from starting and displays a validation message. This ensures balanced workload distribution and prevents operators from being overloaded with multiple simultaneous repair tasks.
If all assigned operators are within their permitted limits, the repair starts successfully, the repair timer begins tracking working time, and the repair status changes to Under Repair.
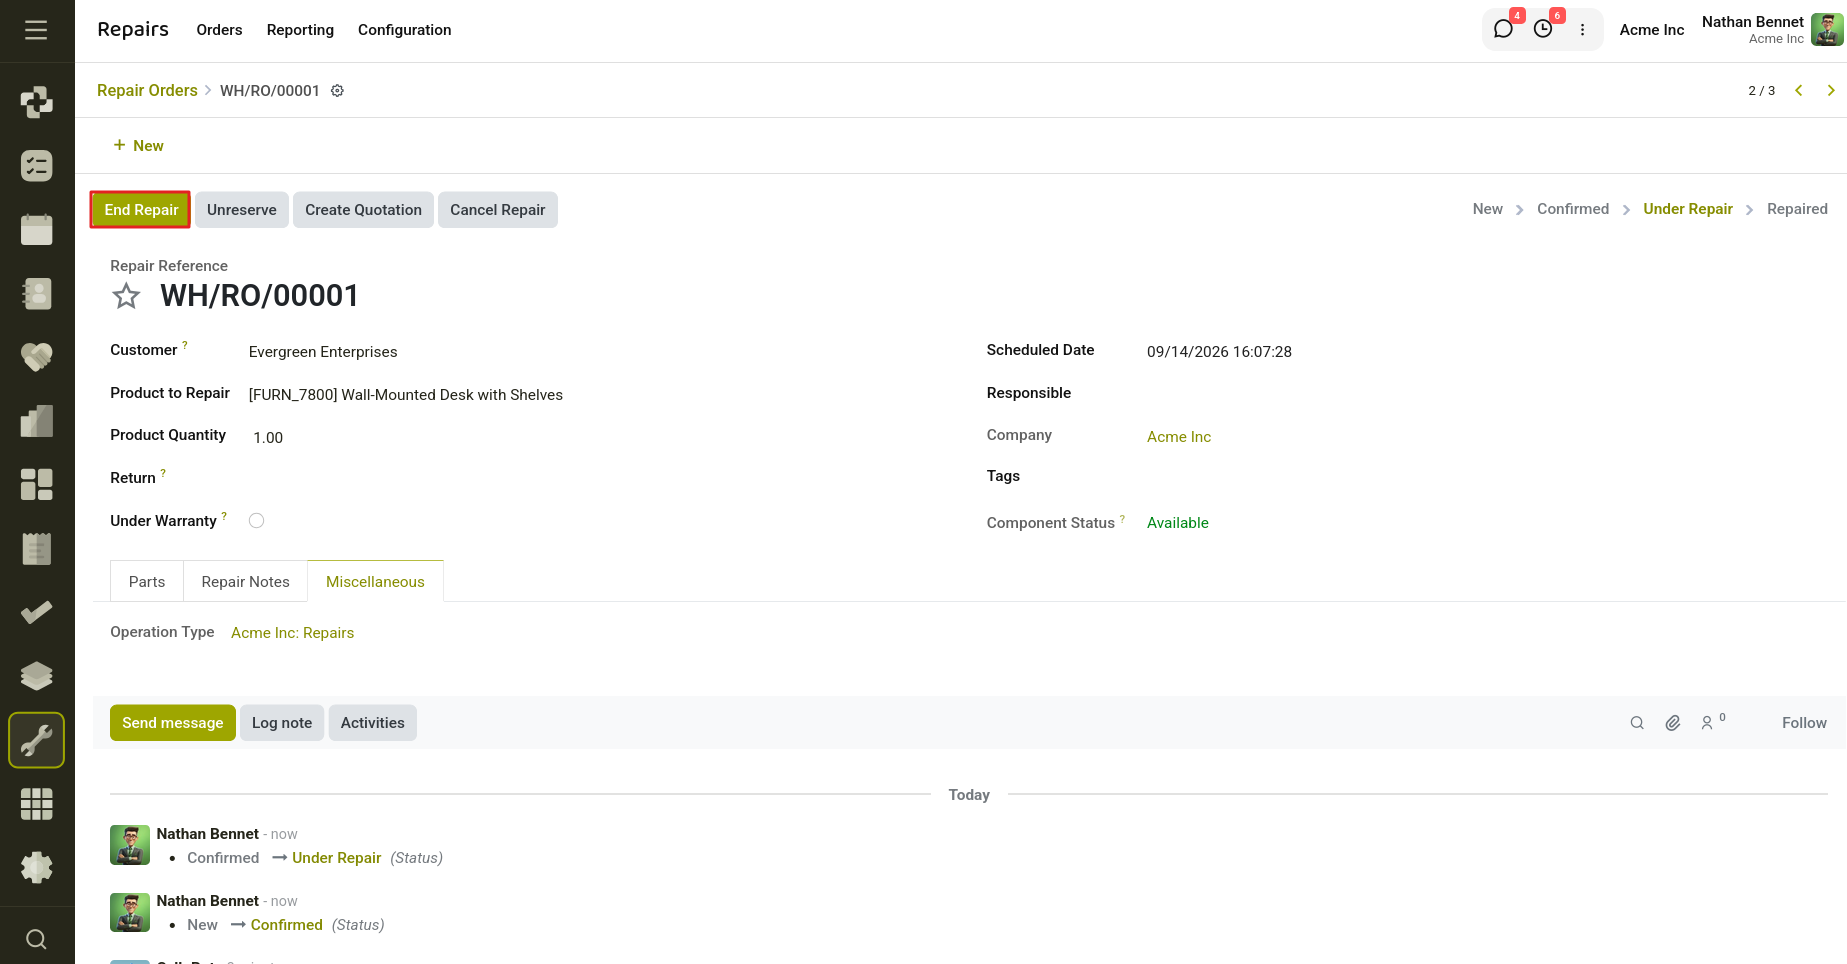
Fig 1.9 — The repair process can be completed by clicking the End Repair button.
While the order is being repaired, its status may be displayed as Under Repair. The repair procedure can be terminated by clicking the End Repair button.
The Product Moves smart tab displays the movement of the product after the repair process. This includes details such as the Date, Reference, Product, Lot/Serial Number, the location the product moved From and To, the Quantity, Unit, and the Status of the movement.
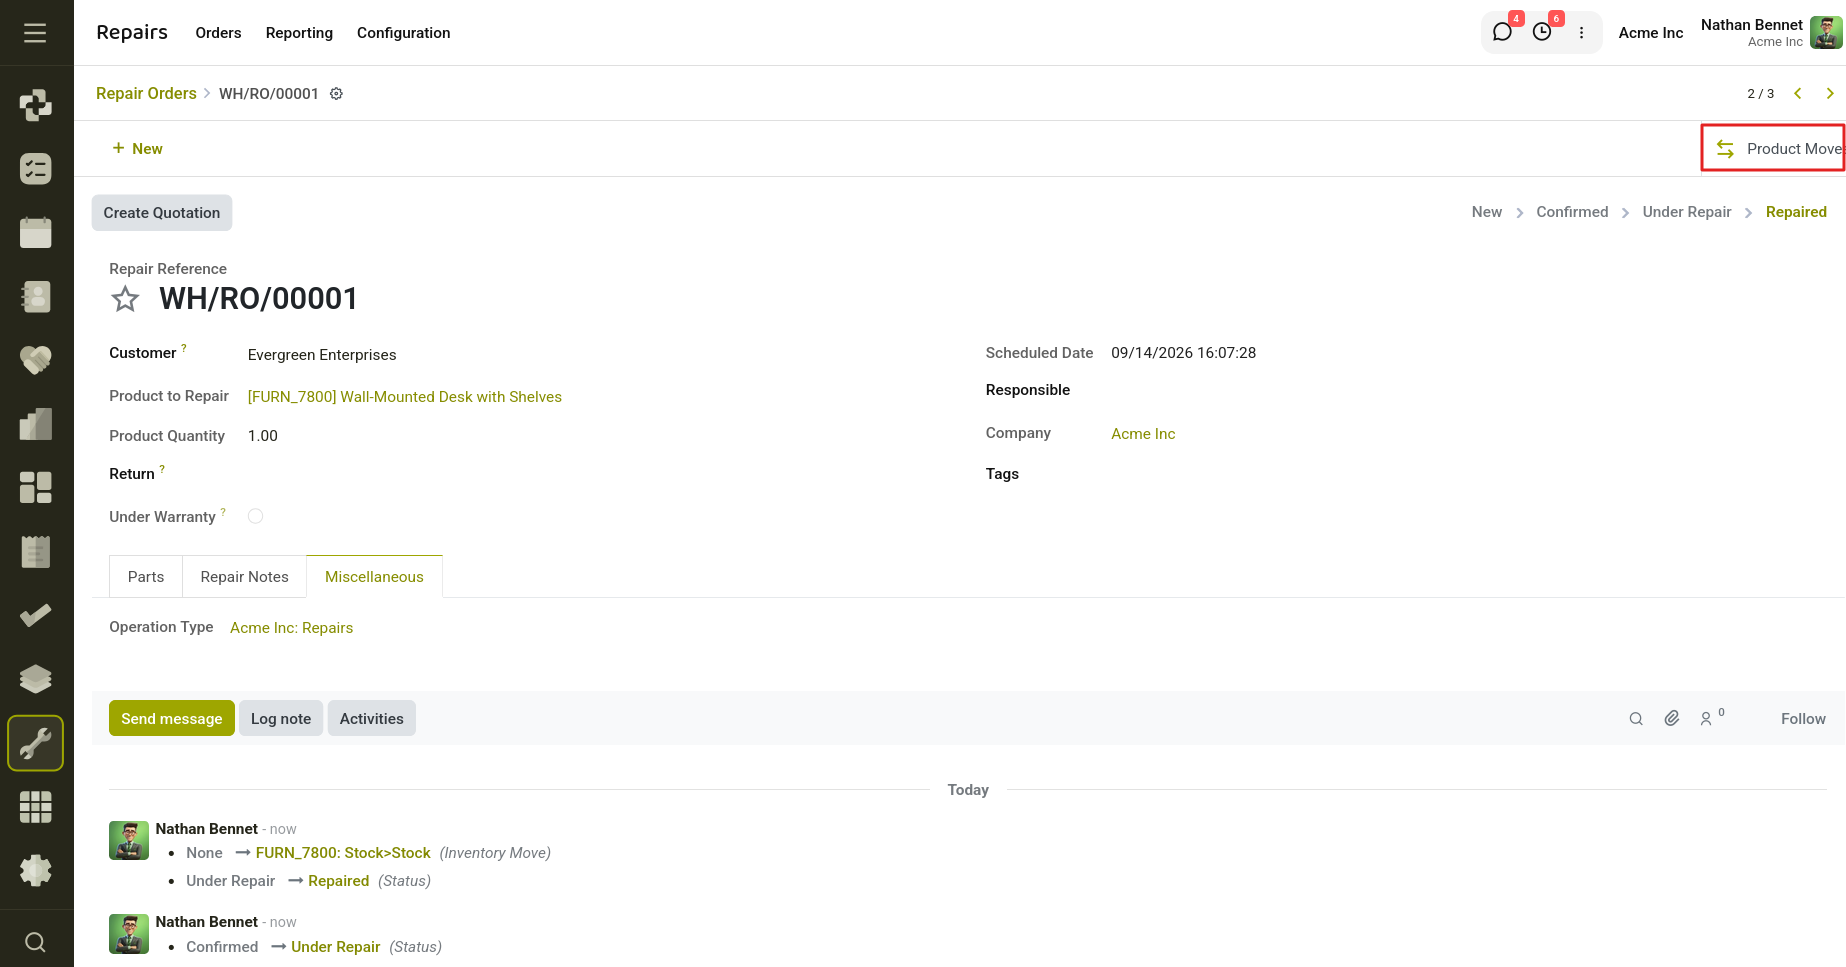
Fig 1.10 — The Product Moves smart tab displays product movement details after repair.
The fix is now finished. By selecting the Create Quotation button, users can produce a new quote based on the repair order.
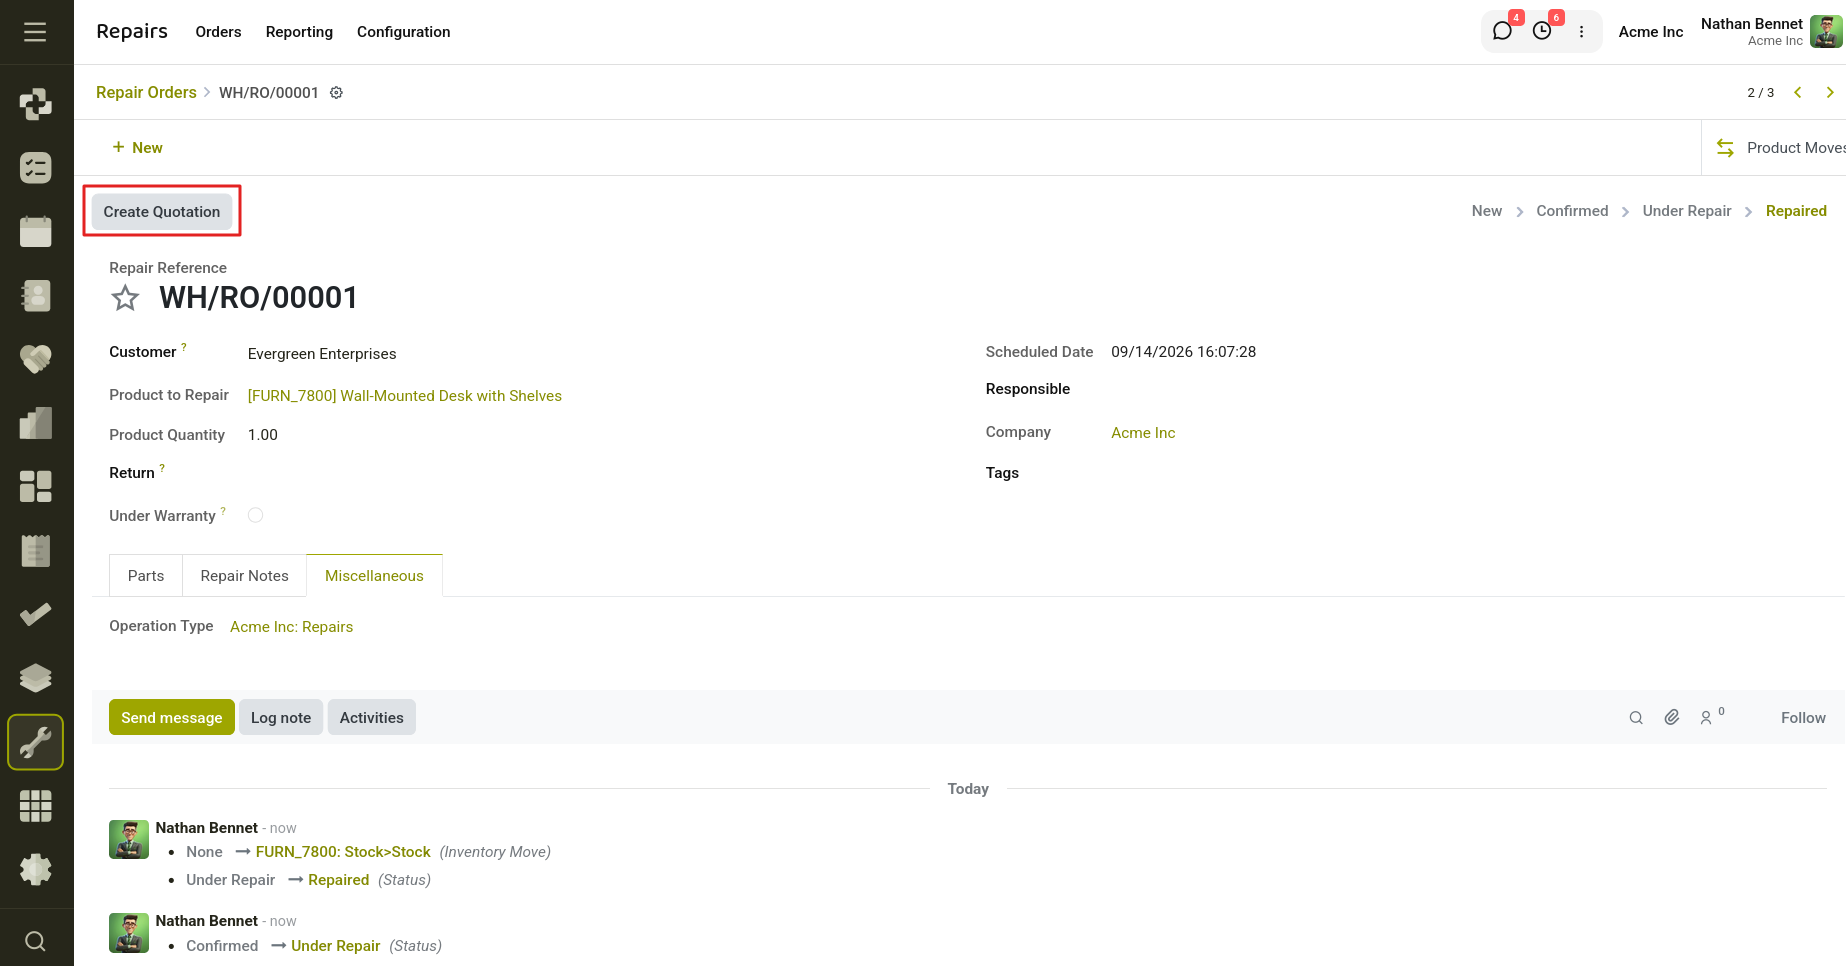
Fig 1.11 — Click the Create Quotation button to generate a quotation from the repair order.
The quotation order shows that the product price is zero dollars if the Under Warranty field on the Repair order is activated.Upon completion of the repair, users can generate the invoice from the Quotation by selecting "Create Invoice" from the menu.
2. Warranty on Repair Order
The Warranty Repair functionality enhances the Repair Orders application by displaying product warranty information directly within the repair process. Warranty status is automatically determined from the linked sale order, enabling service teams to quickly verify warranty coverage, simplify repair decisions, and improve after-sales service efficiency.
Key Benefits
- Instantly view warranty status on the Repair Order form.
- Automatically populate the product when a Sale Order Line is selected.
- Auto-fill customer details from the linked Sale Order.
- Display color-coded warranty status badges for quick identification.
- Automatically evaluate and update warranty status based on expiration dates.
2.1 Creating a Repair Order with Warranty Lookup
Step 1 — Set the Customer In the Customer field, select the customer whose product requires repair. This field was present in the standard Repair module and is not added by this module, but it acts as a filter for the Sale Order field.
Step 2 — Select the Sale Order Click the Sale Order field. The dropdown shows only confirmed or completed sale orders (state in ['sale', 'done']) belonging to the selected customer or their company group.
Note
If you select a Sale Order before setting a Customer, the Customer field is automatically filled with the sale order's partner. This allows you to start from the order rather than from the customer.
Step 3 — Select the Sale Order Line Once a Sale Order is chosen, the Sale Order Line field becomes visible and required. Click it to open a dropdown showing only the lines belonging to the selected sale order. Choose the line corresponding to the product being repaired.
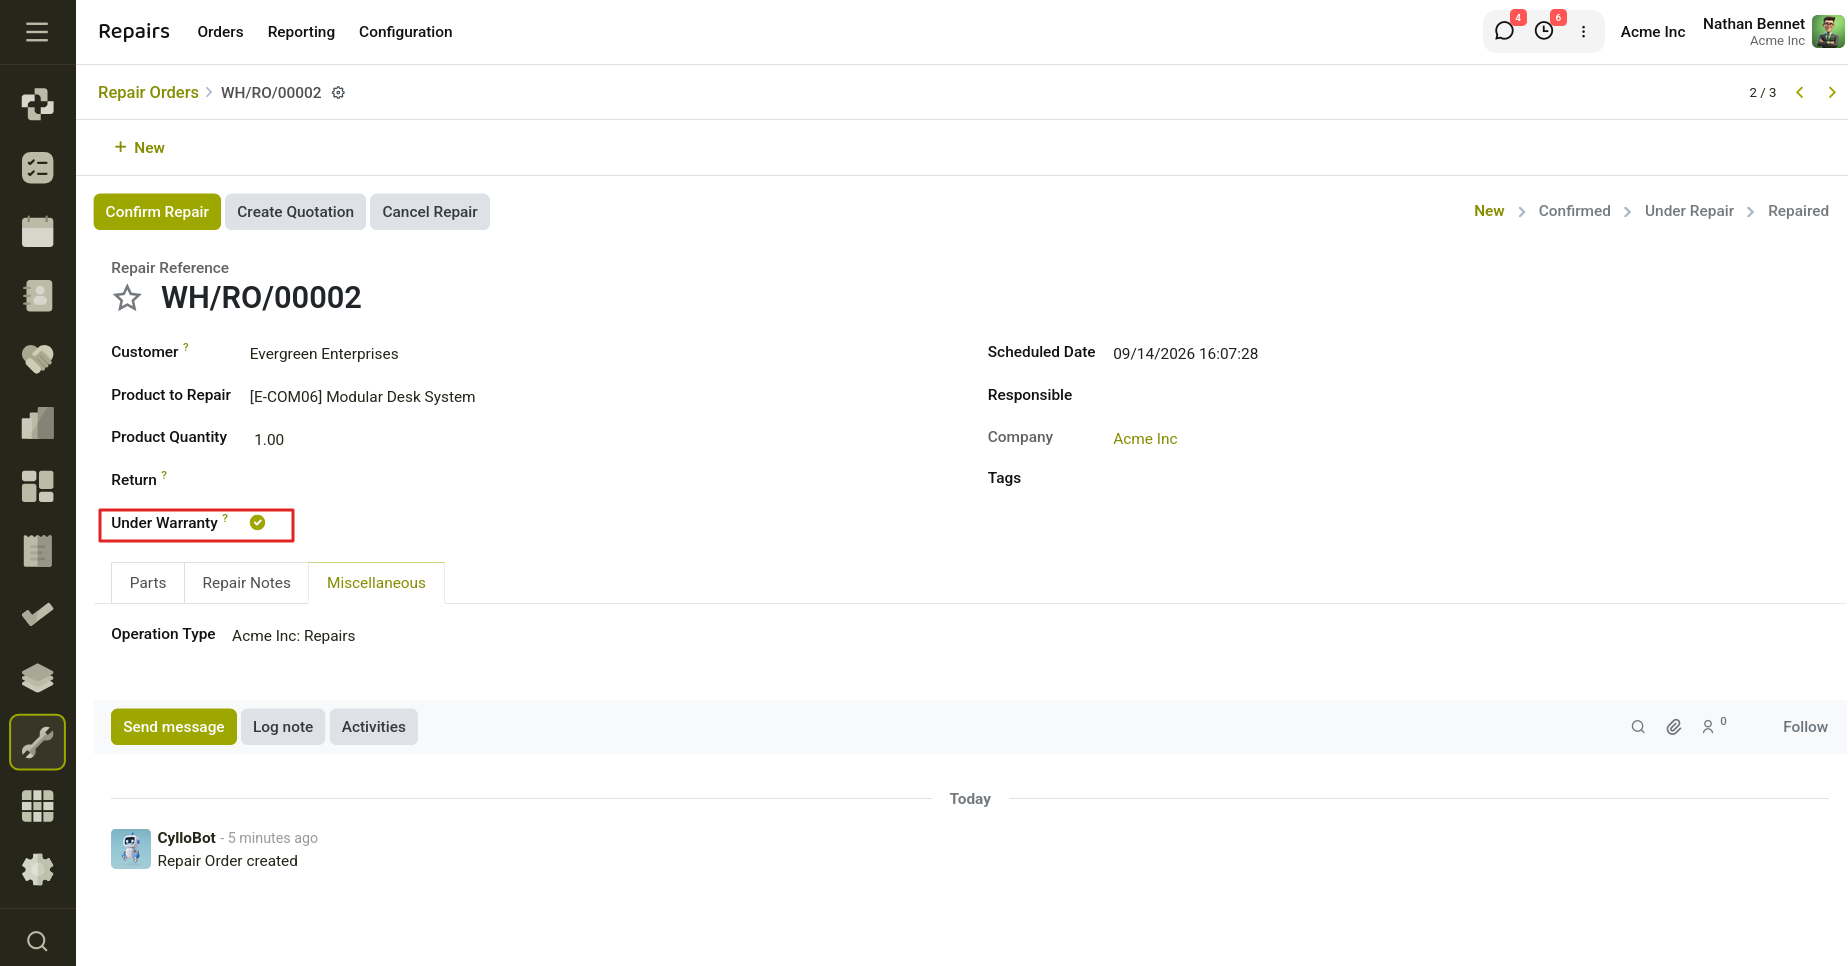
Fig 2.1 — Under warranty option on Repair order.
3. Repair Orders Tags
The Repair module in Cyllo provides a dedicated Repair Orders Tags option under the Configuration menu. This feature allows users to define custom tags that can be applied to repair orders. These configured tags are then displayed alongside the existing repair requests, enabling users to easily identify and categorize the repair orders based on their specific needs. This functionality enhances the organization and management of repair orders, making it easier to track and manage the repair process effectively.
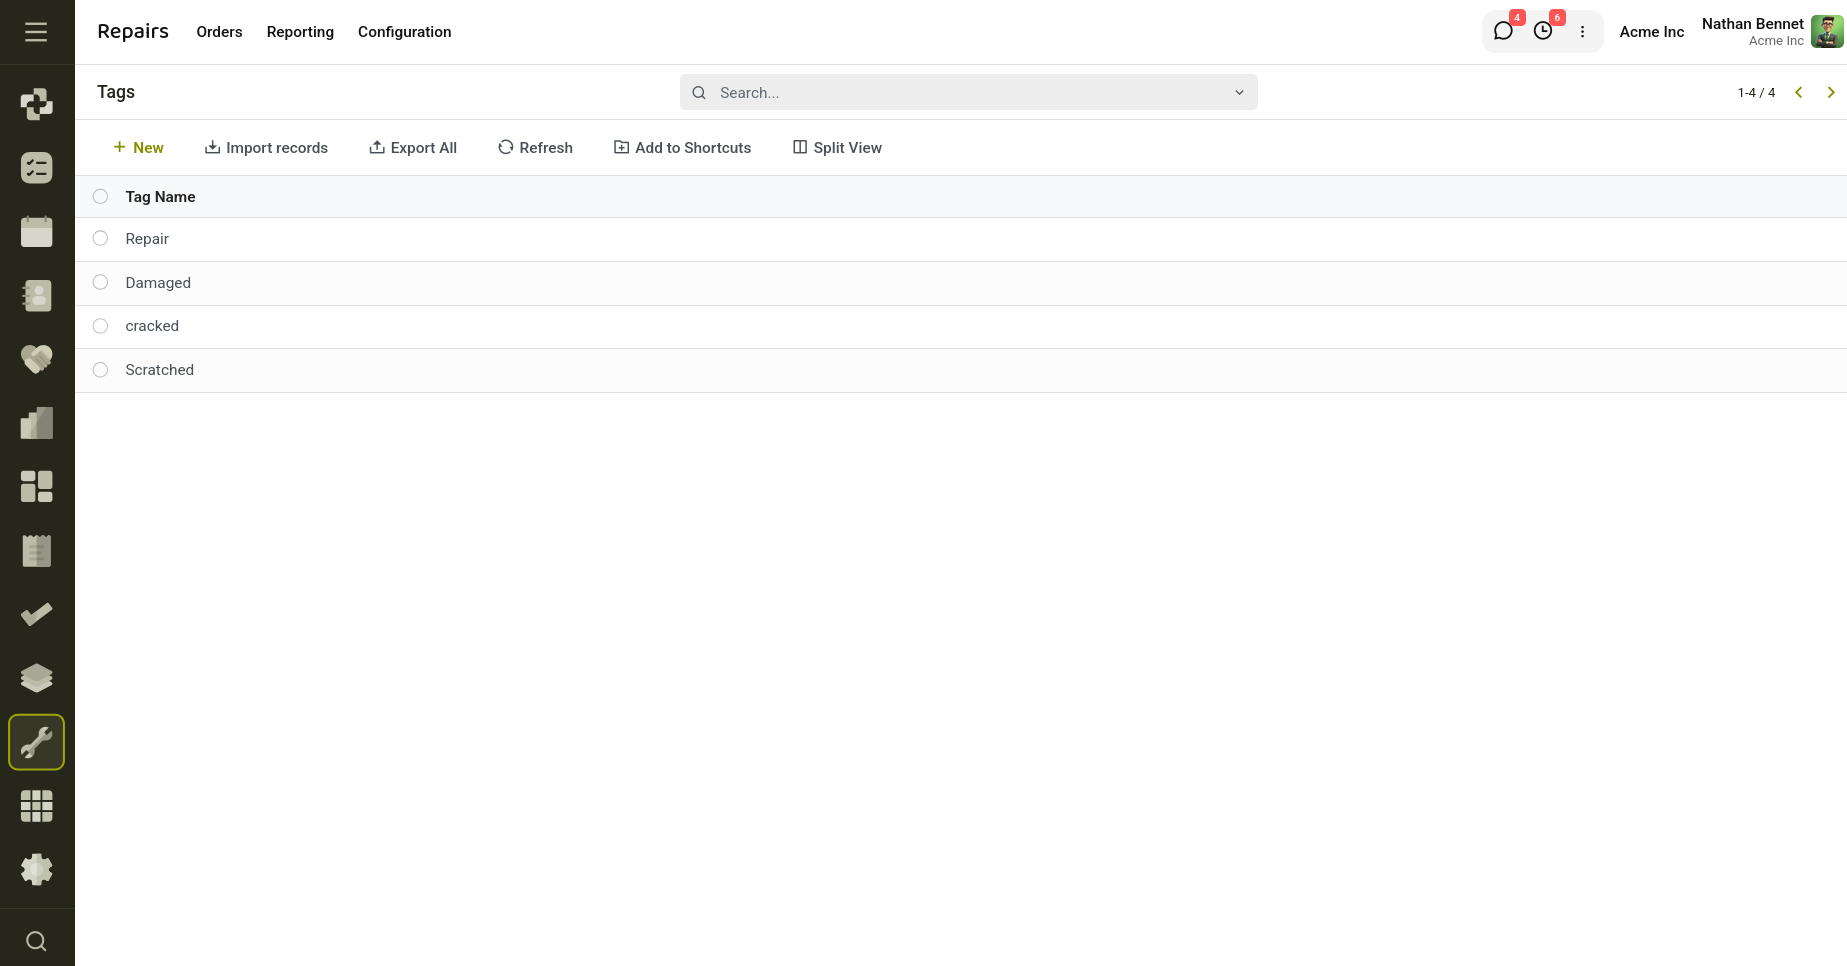
Fig 3.1 — Repair Order Tags.
4. Reporting
With the expanded Reporting tool offered in the Repairs module, you may get informative reports on the repairs your company has completed. Reports that you generate daily, monthly, or annually can be used to assess your repair activity.
You can examine the report in a variety of ways using the system, including bar, line, and pie charts. Additionally, you can use a number of adjustable and default features, such as Favorites, Group By, and Filters. New, Confirmed, Under Repair, Cancelled, Returned, and Customer, Product, Status, and Company are the default filters available in the pane under Group By.
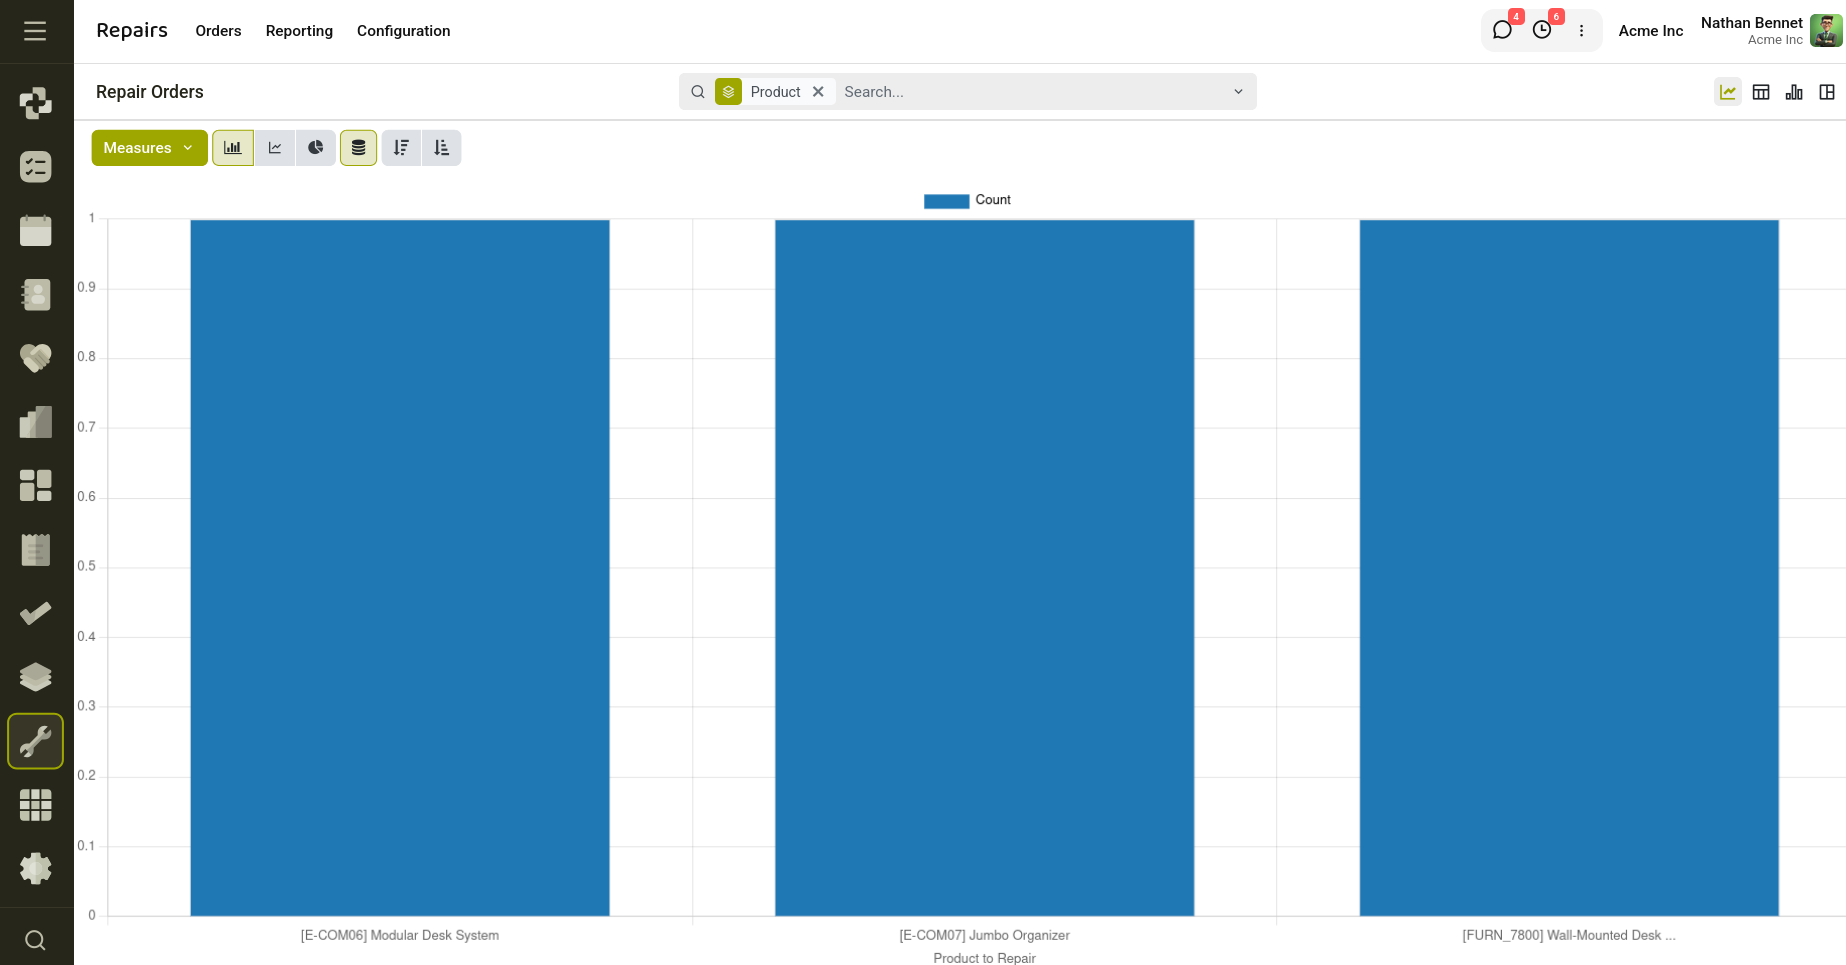
Fig 4.1 — Repair Order Analysis Report
The Repair module in Cyllo facilitates customer service for products purchased and aids manufacturers. Its implementation ensures swift responses and enhanced customer satisfaction.
5. Time Allocation Policies
The Repair Time Allocation Policy feature helps organizations standardize repair durations and measure repair performance effectively. Instead of manually assigning expected repair times for every repair order, administrators can create predefined policies that automatically allocate repair durations based on products or product categories.
These policies serve as repair time benchmarks, allowing businesses to estimate workloads accurately, monitor repair progress, and identify repairs that are taking longer than expected.
To create a new policy, navigate to Repair → Configuration → Time Allocation Policies and create a new record.
Each policy contains the following information:
- Name – A descriptive name for the policy.
- Active – Enables or disables the policy.
- Target Type – Defines whether the policy applies to a specific product or a product category.
- Allocated Duration (Hours) – The expected repair time for the selected target.
Target Types
- Product Category
Select Product Category when the same repair duration should apply to all products within a category.
When Product Category is selected, the Product field is automatically cleared, ensuring the policy applies only at the category level.
- Specific Product
Select Specific Product when a product requires a dedicated repair duration that differs from other products in its category.
When Specific Product is selected, the Product Category field is automatically cleared, ensuring the policy applies only to the selected product.
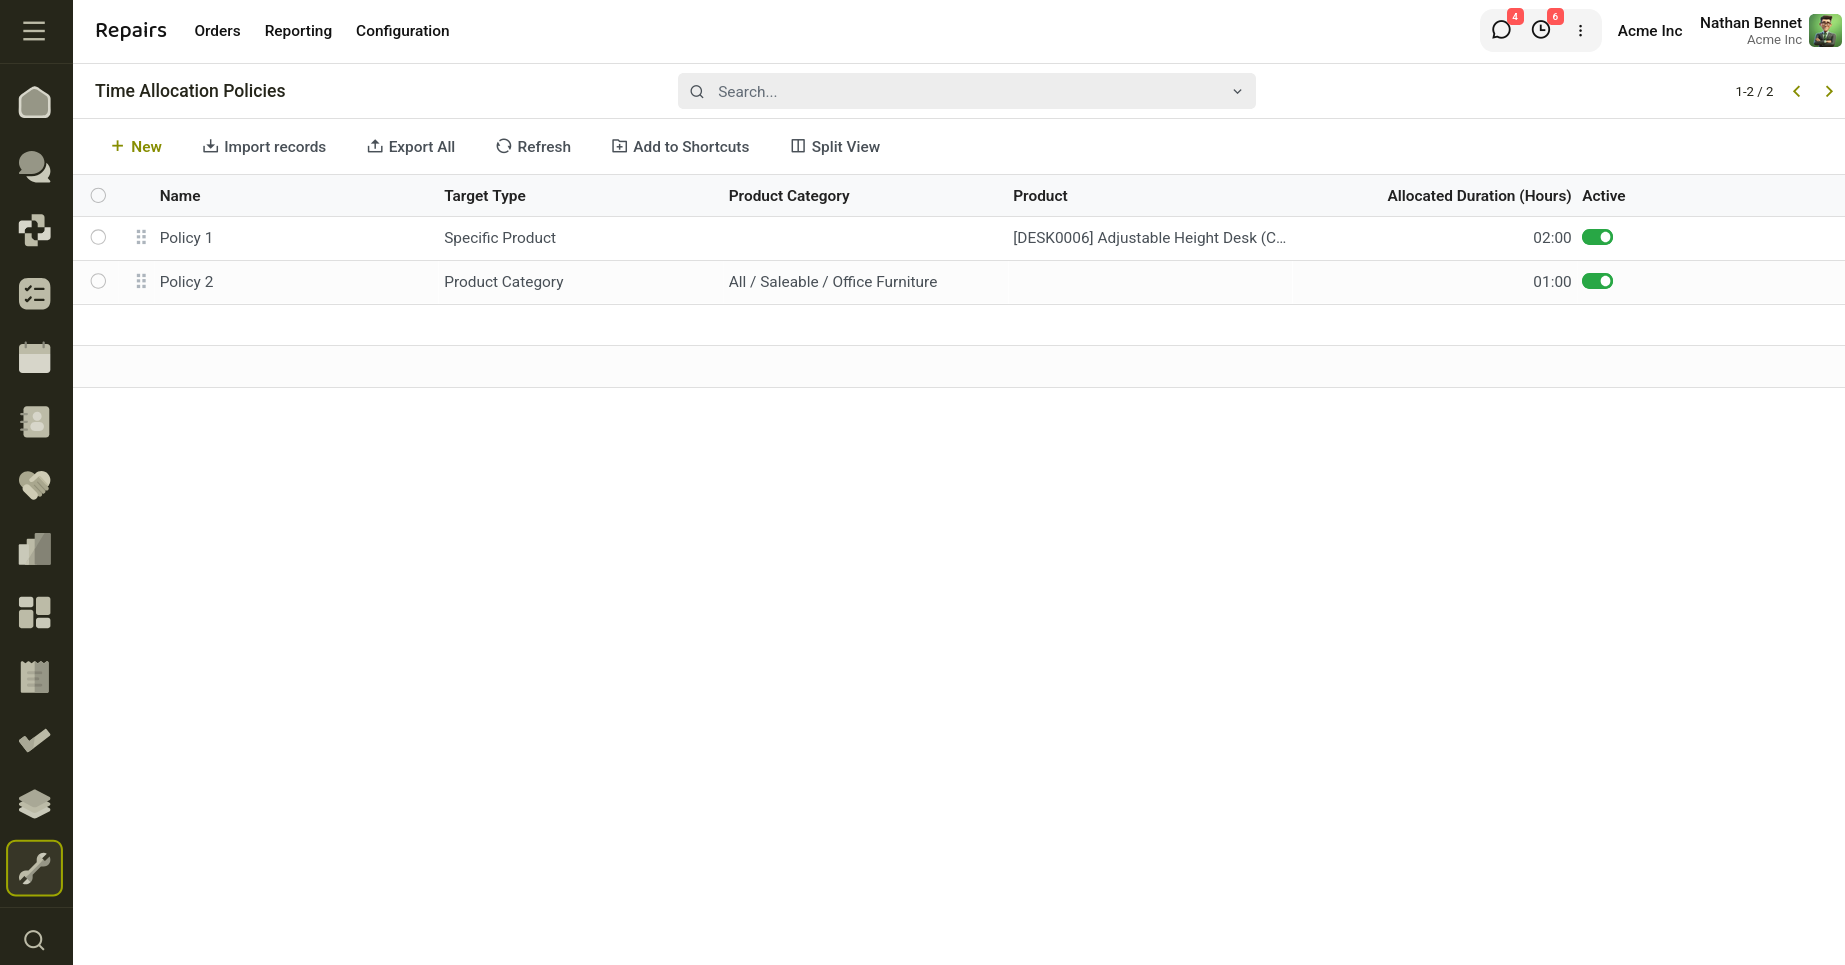
Fig 5.1 — Time Allocation Policies.