

Cyllo Payroll Management Documentation
Introduction
Cyllo's Payroll Management module handles the complete compensation lifecycle — from salary structure configuration through automated payslip generation, batch processing, and payroll journal posting to Accounting. Built as a significant enhancement over normal payroll softwares, it adds Salary Attachments, Resignation Management, and Gratuity Settlement as native features within the same module.
Whether you are running payroll for a handful of employees or hundreds across multiple departments, Cyllo Payroll gives you full control over how salaries are computed, what deductions apply, how end-of-service benefits are calculated, and how every entry posts to your chart of accounts — without leaving the platform or using external spreadsheets.
1. Salary Configuration
Salary Configuration is the foundation of Cyllo Payroll. Before any payslip can be generated, the system must know how compensation is structured — which earnings apply, what deductions are made, and how the net pay is computed. This is all defined through Salary Structures, Rules, and Categories.
1.1 Salary Structures
A Salary Structure is a template that defines all the earnings and deduction rules applied to an employee's payslip. Each employee contract is linked to exactly one salary structure, which Cyllo uses every time a payslip is computed for that employee.
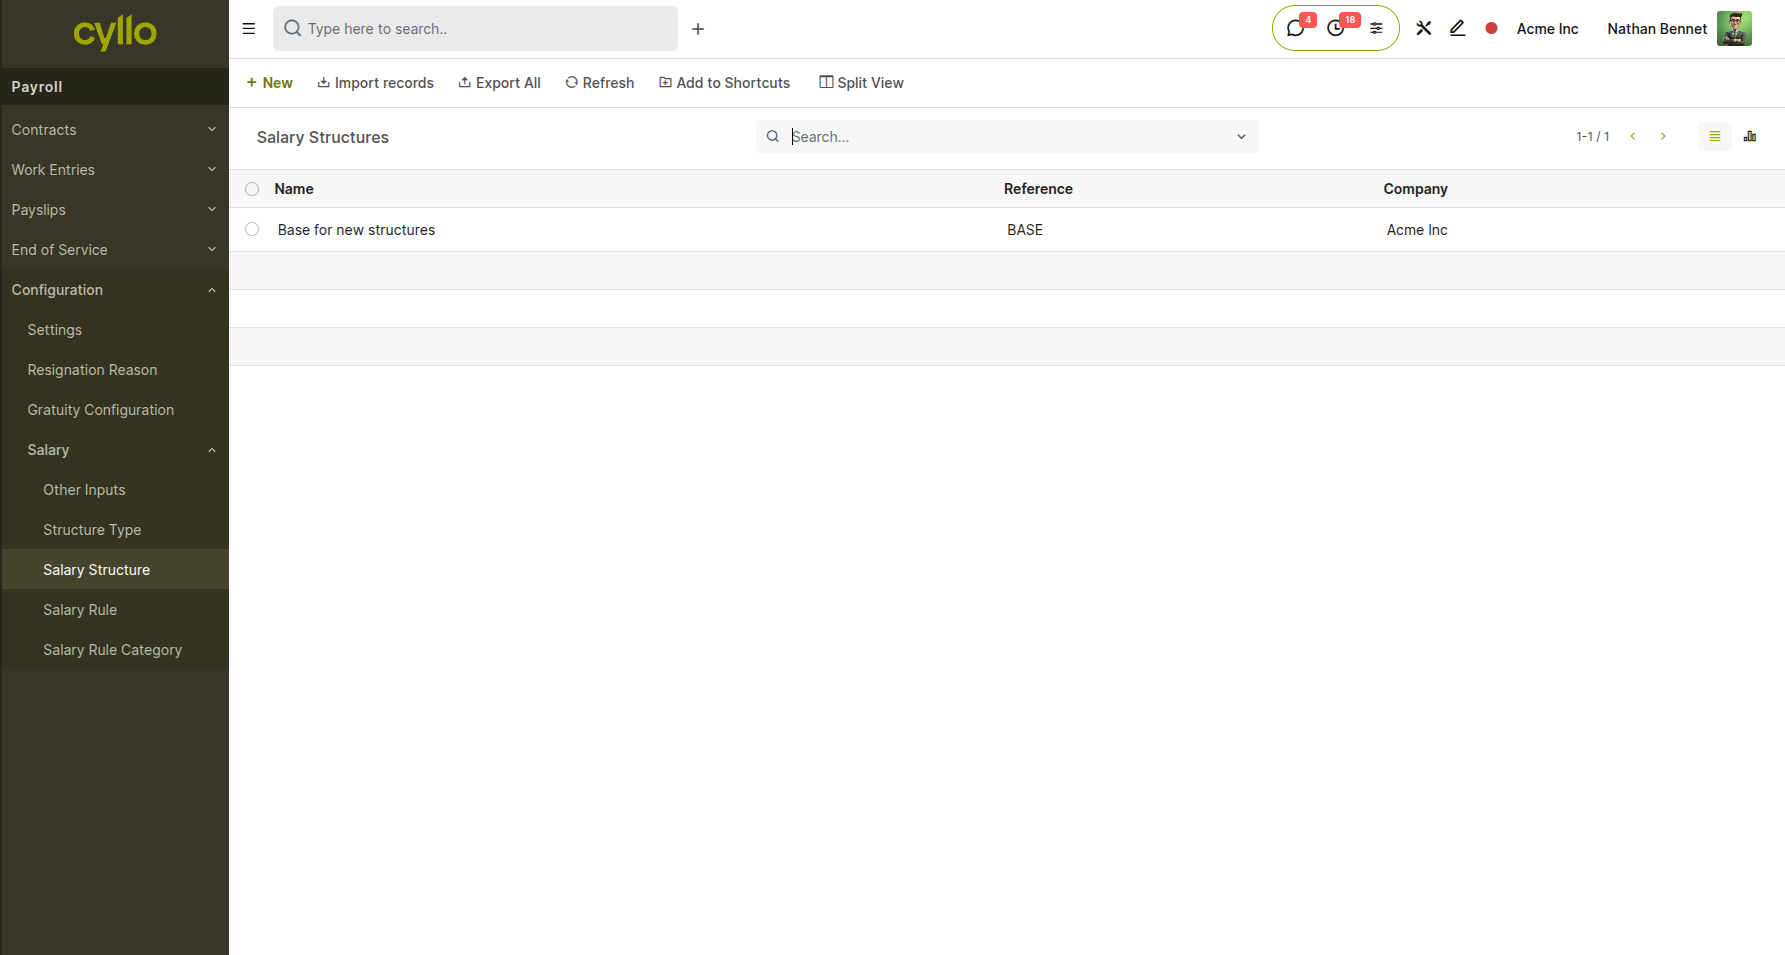
Fig 1.1 — Salary structure list with structure type and linked rules
How to Create a Salary Structure:
- Go to Payroll → Configuration → Salary Structures → New
- Enter the Structure Name (e.g., Monthly Employee, Hourly Worker, Contractor)
- Select the Structure Type: Employee or Worker
- Add Salary Rules in the rules tab — each rule is one line on the payslip
- Set the order of rules — rules computed earlier can be referenced by later ones
- Save the structure
- Link this structure to employee contracts via the Salary Structure field on the contract form
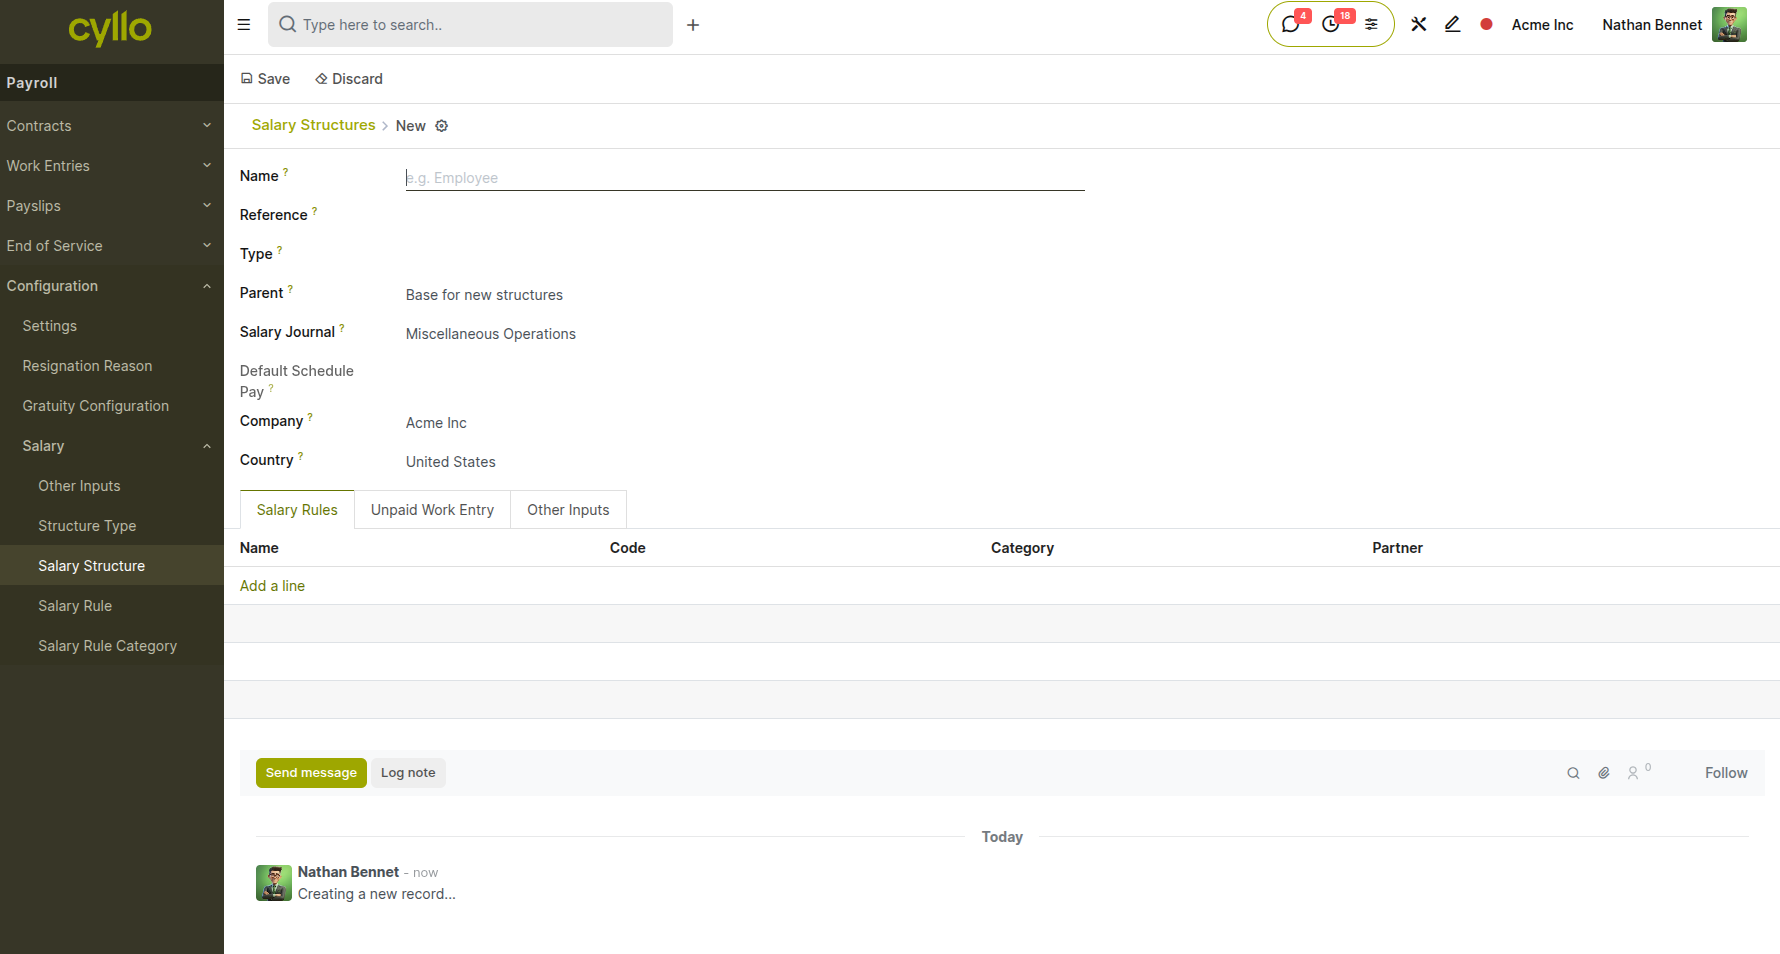
Fig 1.2 — Salary structure form with ordered rules and structure type
Note
Each contract is linked to one Salary Structure. When you compute a payslip, Cyllo evaluates all rules in the structure in the defined order — so Basic Pay must always be computed before any rule that references it.
1.2 Salary Rules & Categories
Salary Rules are the individual computation lines within a Salary Structure — each one representing a specific earning, allowance, deduction, or summary line on the payslip. Rules are grouped into Categories for organisation and reporting.
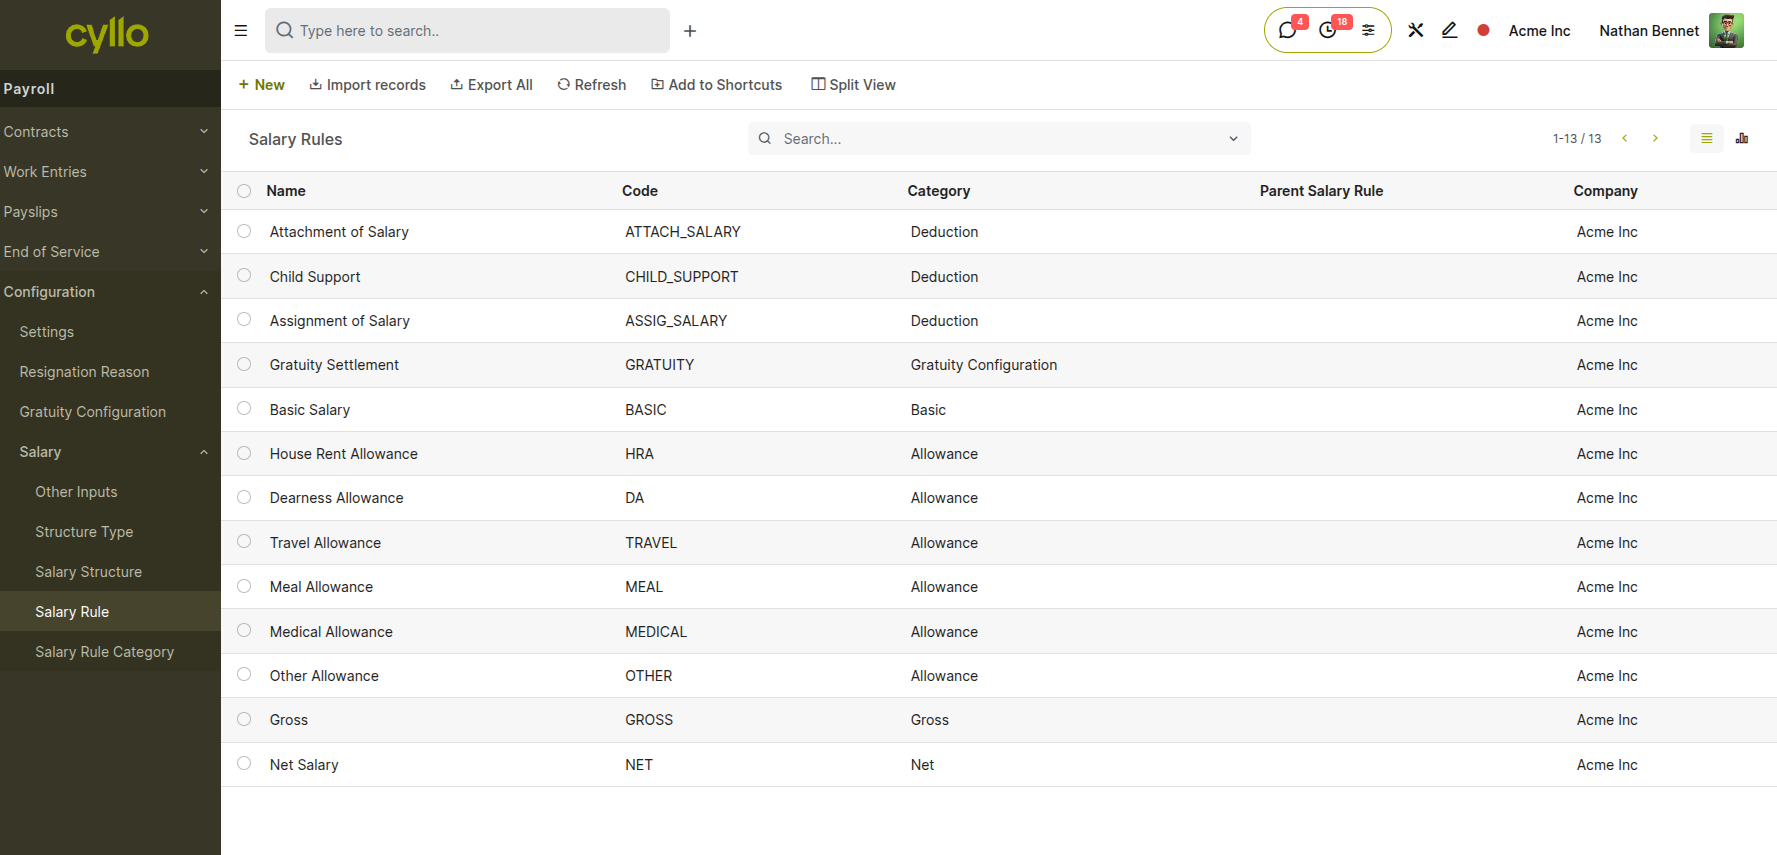
Fig 1.3 — Salary rule form with computation type, category, and condition
How to Create a Salary Rule:
- Open a Salary Structure and go to the Rules tab
- Click Add a line → Create and Edit
- Enter the Rule Name (e.g., Basic Salary, Housing Allowance, Income Tax)
- Enter the Code — a short reference used by other rules (e.g., BASIC, HRA, NET)
- Select the Category: Basic, Allowance, Deduction, Gross, or Net
- Set the Computation: Fixed Amount, % of (another rule), or Python Expression
- Set the Condition: Always True, Range (wage bracket), or Python code
- Save the rule
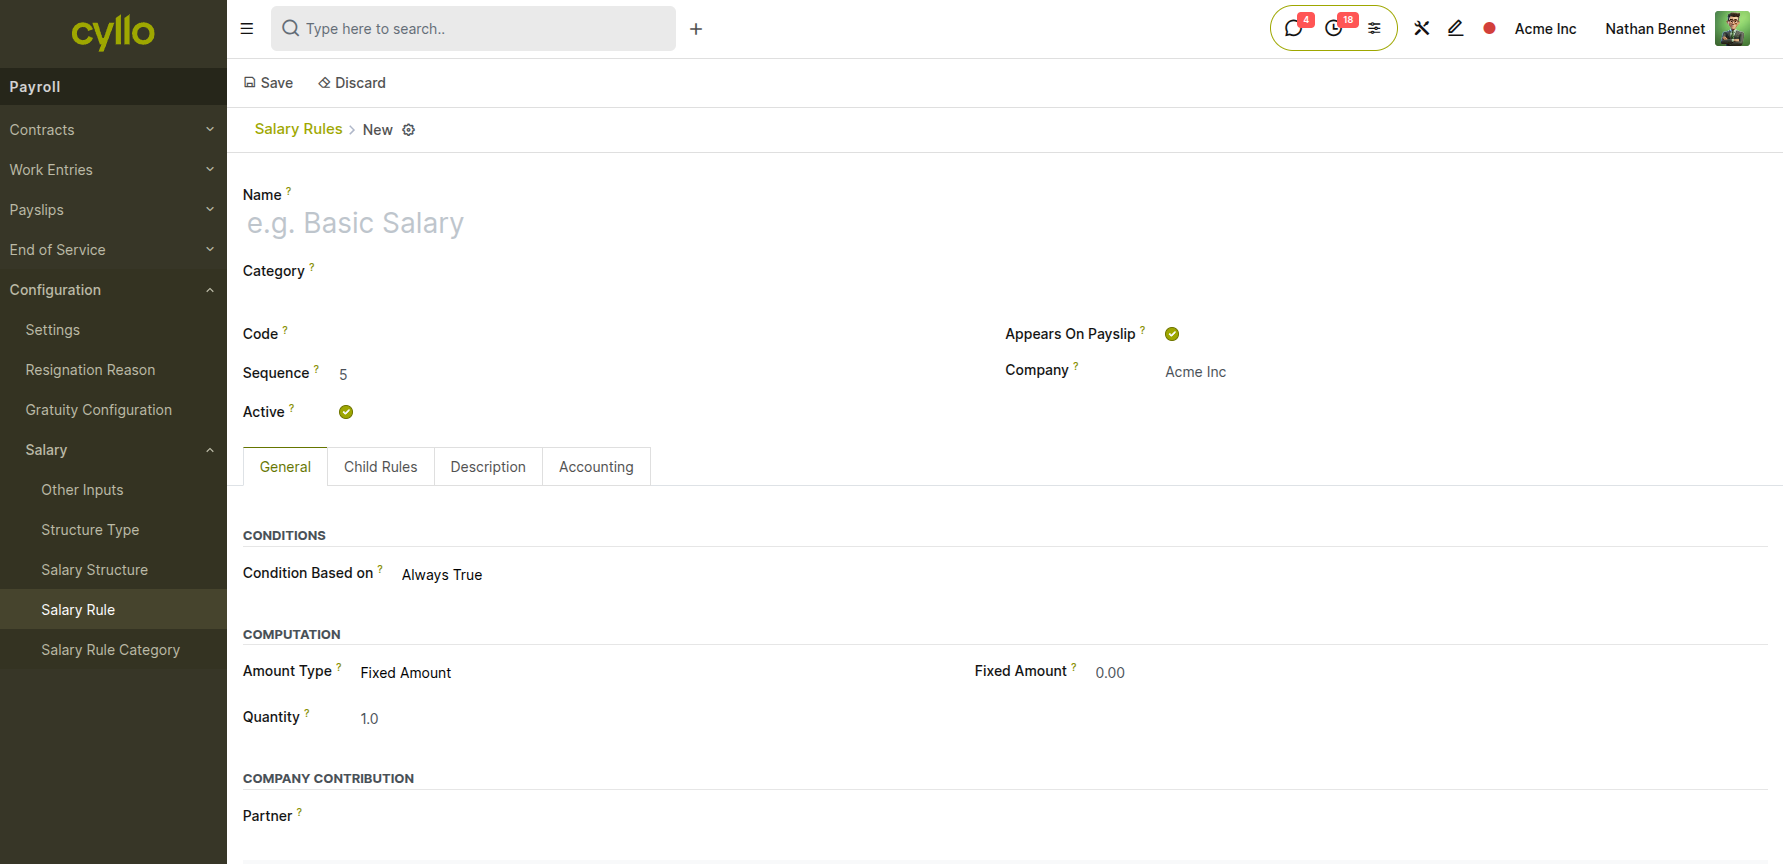
Fig 1.4 — Salary rule with Python expression computation and condition
Note
Rule codes are critical — if you write a rule that references BASIC (e.g., HRA = 40% of BASIC), the code on the Basic Salary rule must be exactly BASIC. Any mismatch will cause computation errors.
Salary Rule Categories Categories group salary rules for display and reporting. The standard categories are:
Basic: The base wage — typically the fixed salary from the contract. This represents the fundamental compensation amount before any additional earnings or deductions are applied.
Allowance: Additional earnings on top of basic salary, such as Housing Allowance (HRA), Transport Allowance, or Meal Allowance. These supplement the base pay with specific benefits tied to employment conditions or company policy.
Deduction: Amounts subtracted from gross pay, including Tax, Pension contributions, or Loan repayments. These reduce the final take-home amount and may be mandatory (statutory deductions) or voluntary (employee-initiated).
Gross: A summary rule that calculates the total of Basic salary plus all Allowances before any deductions are applied. This represents the total earnings before tax and other withholdings.
Net: The final payable amount, calculated as Gross salary minus all Deductions. This is the actual amount the employee receives and represents their take-home pay for the period.
1.3 Work Entry Types
Work Entry Types define the categories of time that appear on an employee's work calendar — such as working days, public holidays, sick leave, or overtime. They determine how each type of time is treated in payroll computation.
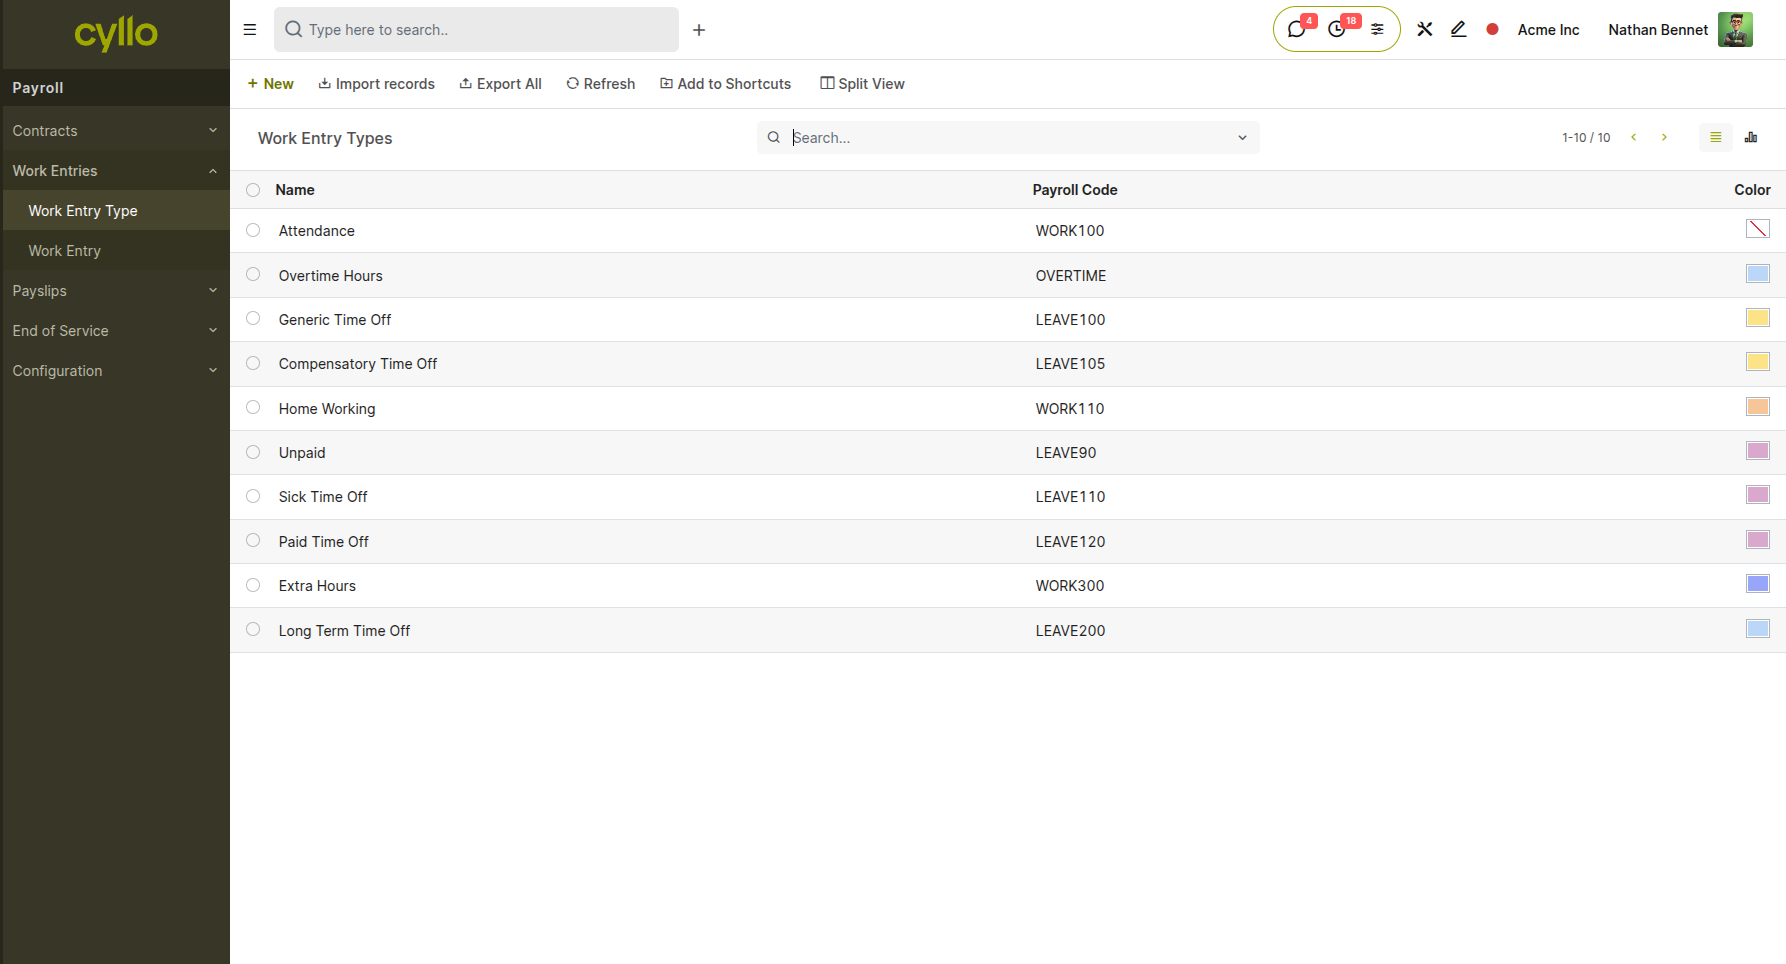
Fig 1.5 — Work entry type configuration with leave type and payroll code
How to Configure Work Entry Types:
- Go to Payroll → Work entries → Work Entry Types → New
- Enter the Work Entry Type Name (e.g., Attendance, Sick Time, Public Holiday)
- Set the Leave Type if this entry type corresponds to a leave category
- Set the Time Off to mark this as a leave-based entry (reduces working days)
- Set the Payroll Code — referenced in salary rule Python expressions
- Set the colour used on the work calendar for quick visual identification
- Save the work entry type
Note
Work Entry Types link the Time Off module to Payroll. When an employee takes approved sick leave, Cyllo creates a Sick Time work entry — and the payroll rule referencing that code can then apply the correct deduction or zero pay.
2. Payslip Generation
Once salary structures are configured and employee contracts are active, Cyllo can generate payslips. Payslips can be created individually per employee or in bulk through Batch Payslips for the entire organisation or a department.
2.1 Individual Payslips
An individual payslip is generated for one employee for a specific pay period. Cyllo automatically loads the employee's active contract, linked salary structure, and validated work entries to compute the final salary.
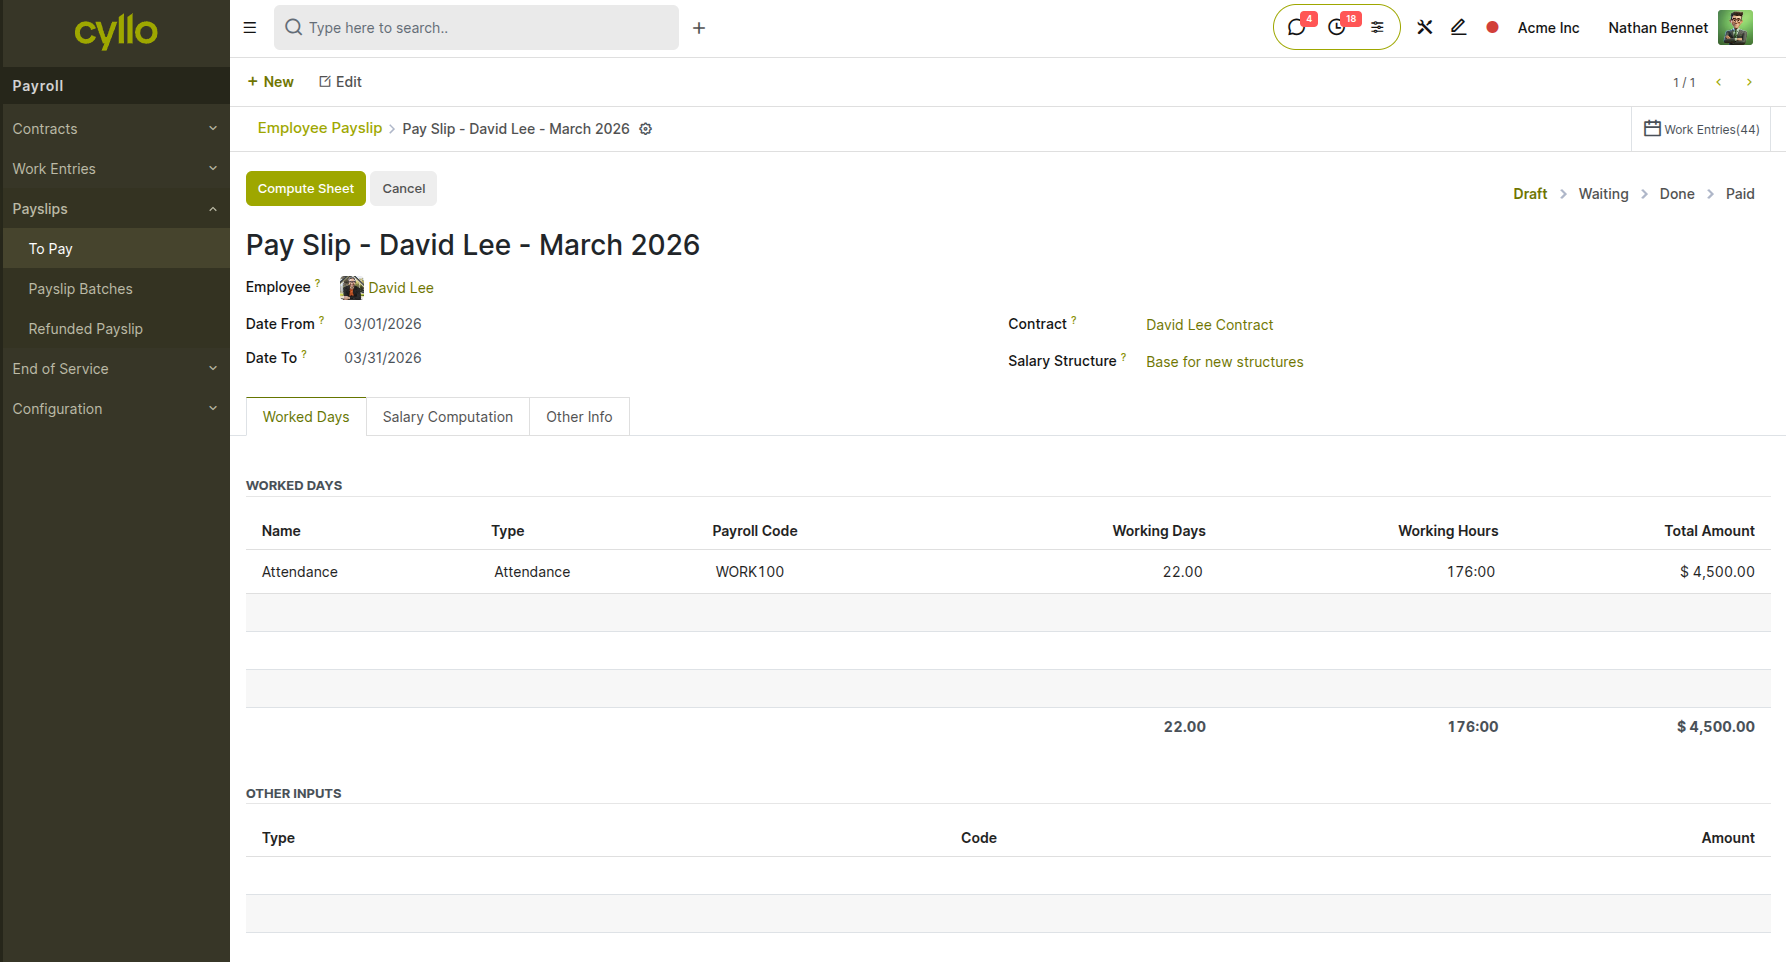
Fig 2.1 — Individual payslip form in draft state with employee and pay period
How to Generate an Individual Payslip:
- Go to Payroll → Payslips → To Pay → New
- Select the Employee
- Set the Pay Period: From date and To date
- The Contract and Salary Structure load automatically from the active contract
- Click Compute Sheet — Cyllo evaluates all salary rules and fills the computation lines
- Review the Salary Computation tab — verify each earning and deduction line
- Click Confirm to validate and post the payslip journal entry to Accounting
- Click Print to generate the payslip PDF for the employee
Key Fields
Employee: The staff member this payslip is for. The system uses this selection to load the active contract and all associated salary configuration.
Pay Period: From and To dates covering the payroll cycle. This defines the exact period for which compensation is being calculated and determines which work entries are included.
Contract: The active contract for the selected employee. This automatically determines the base wage and links to the appropriate salary structure for computation.
Salary Structure: The template defining which rules and computations apply. This controls every earning, allowance, and deduction line that appears on the payslip.
Basic Pay: Base wage pulled from the contract. This is the foundation amount used by other salary rules that calculate percentages or additions.
Gross Salary: Total earnings before deductions. This includes basic pay plus all allowances and represents the employee's total compensation before any withholdings.
Net Salary: Final amount payable after all deductions. This is the actual take-home amount the employee receives after tax, pension, and other deductions are applied.
Status: The payslip progresses through states from Draft (initial creation) to Confirmed (computed and reviewed) to Done (validated and posted to accounting) to Paid (salary disbursed to employee).
Note
Always click Compute Sheet before confirming a payslip. If attendance records or leave approvals have changed since the last computation, the figures will be outdated and the payslip will not reflect the correct amounts.
2.2 Batch Payslips
Batch Payslips allow HR to generate and process payroll for multiple employees at once — reducing a full monthly payroll run from hours to minutes. Batches can be scoped to the entire company, a specific department, or a selected list of employees.
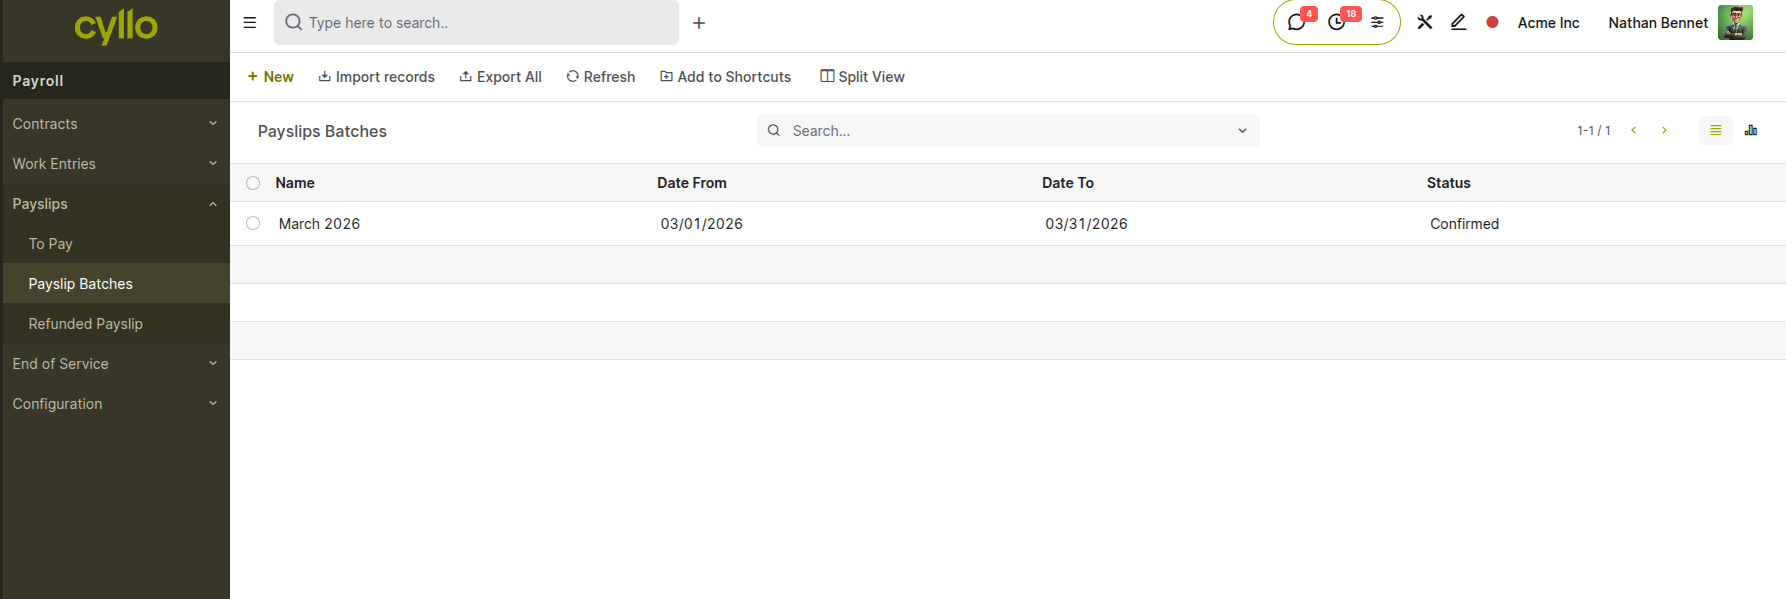
Fig 2.2 — Payslip batch list showing name, pay period, and batch status
How to Run a Payslip Batch:
- Go to Payroll → Payslips → Payslip Batches → New
- Enter the Batch Name (e.g., March 2026 — All Staff)
- Set the Pay Period: From and To dates
- Click Generate Payslips
- In the dialog, select the Department or individual employees to include
- Click Generate — Cyllo creates individual draft payslips for every selected employee
- Click Confirm to compute all payslips in the batch simultaneously
- Review individual payslips if needed — open any payslip from the batch list
- Click Validate to post all payslip journal entries to Accounting
- Mark as Paid once bank transfers or cash disbursements are completed
Fig 2.3 — Batch payslip confirmation dialog with department and employee selection
Batch States
Draft: Batch created — payslips not yet generated or computed. The batch exists as a placeholder but no individual employee payslips have been created yet.
Confirmed: All payslips computed and reviewed — ready for validation. Every employee's salary has been calculated and the figures are ready for final approval before posting to accounting.
Done: Payslips validated and all journal entries posted to Accounting. The payroll has been finalized and the financial impact is now reflected in the company's books.
Paid: Salary disbursed to employees — batch closed for the period. Bank transfers or cash payments have been completed and the payroll cycle is fully finished.
Note
If an employee's payslip has an error in a confirmed batch, open that individual payslip, reset it to Draft, correct the issue, recompute, and re-confirm. The batch does not need to be restarted.
2.3 Work Entries
Work Entries are the calendar-based records of each employee's time — attendance days, leave periods, overtime, and public holidays. Cyllo validates work entries before computing payslips to ensure payroll is based on accurate time data.
Fig 2.4 — Work entries calendar view showing attendance, leave, and overtime per employee
How to Manage Work Entries:
- Go to Payroll → Work Entries → Work Entries
- Select the month using the date navigator
- Review each employee's calendar — entries are colour-coded by type
- Click on any entry to view or edit the details
- Resolve any conflicts flagged in red (overlapping leave and attendance)
- Click Validate All to mark the period's entries as verified
- Proceed to payslip generation — Cyllo uses validated entries for computation
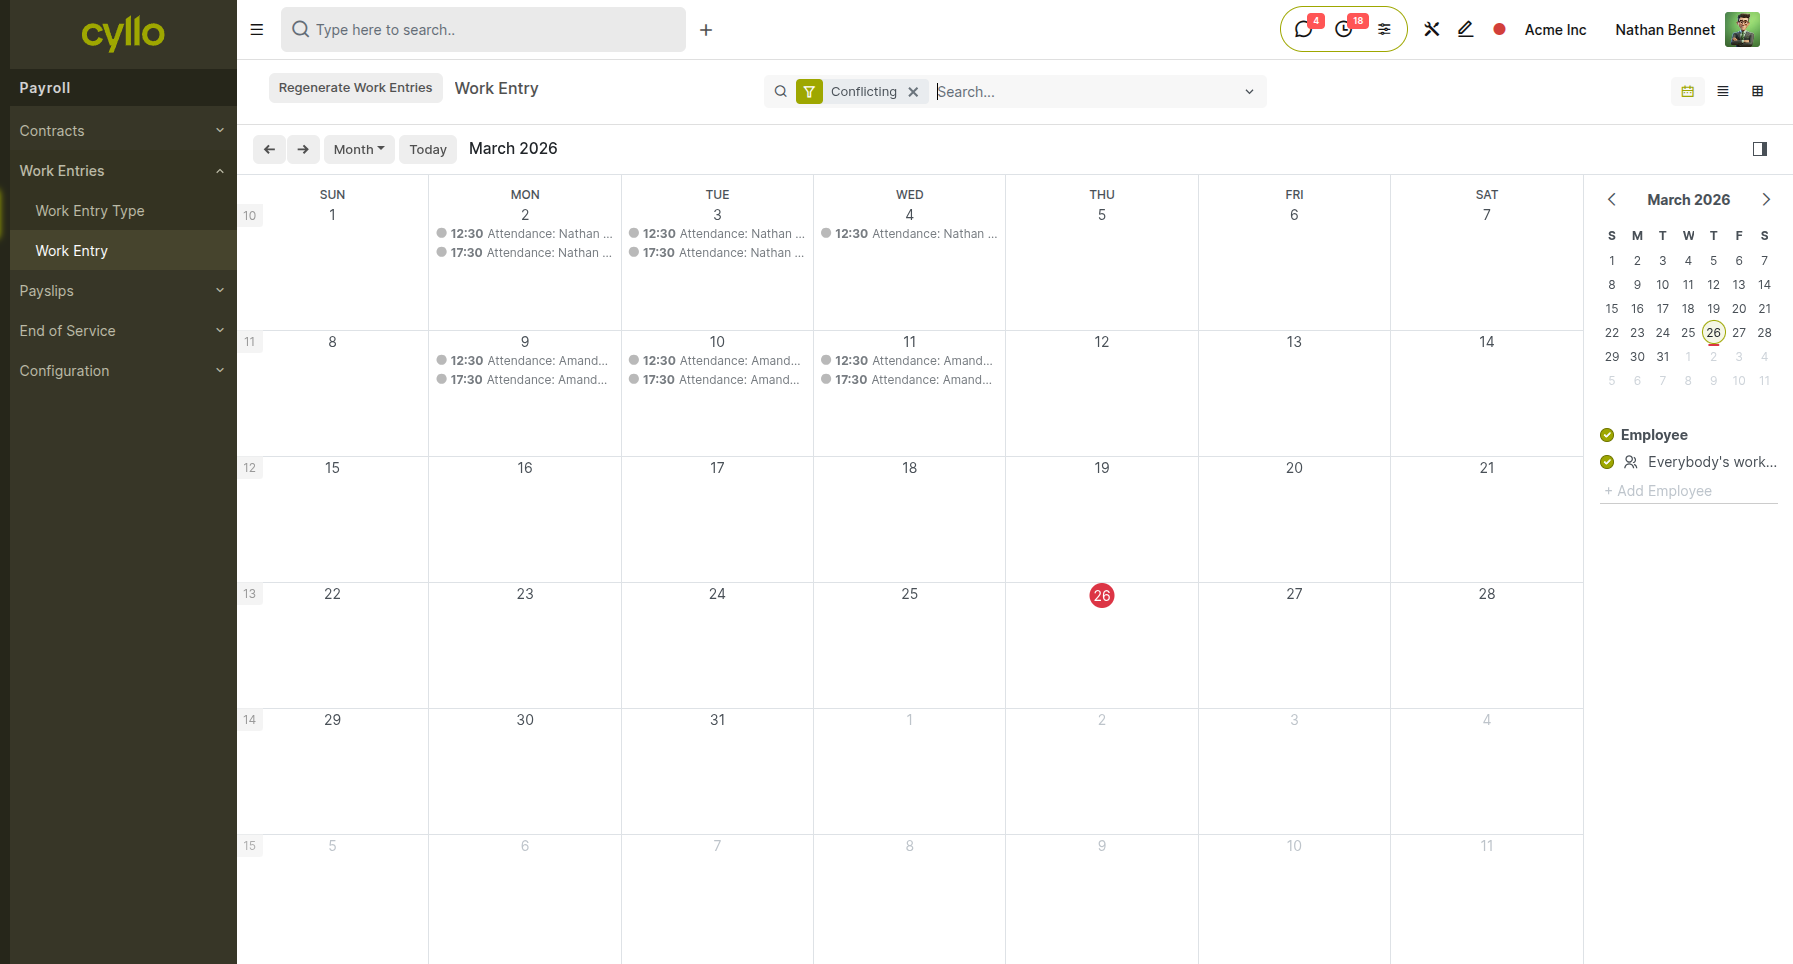
Fig 2.5 — Work entry conflict resolution showing overlapping leave and attendance
Key Fields
Employee: The staff member this work entry belongs to. Each entry is tied to one employee and contributes to their payroll calculation.
Date From / To: The start and end time of this work entry. This defines the exact period covered, whether it's a single day of attendance or a multi-day leave period.
Work Entry Type: The category of the entry — Attendance, Sick Leave, Public Holiday, Overtime, or other configured types. This determines how the time is treated in payroll computation.
Duration: Total hours covered by this entry. This is automatically calculated from the Date From and Date To fields and used in hourly wage calculations.
Status: The validation state of the entry — Draft (not yet verified), Confirmed (validated and ready for payroll), or Conflict (needs resolution due to overlapping entries or data inconsistencies).
Note
Always validate work entries before running payroll. Unresolved conflicts — such as overlapping leave and attendance — will cause payslip computation errors and may result in incorrect salary amounts.
3. Salary Attachments
Salary Attachments are a Cyllo-specific enhancement that allows HR to record mandatory or voluntary deductions and additions outside the standard salary structure — such as court-ordered garnishments, salary advances, loan repayments, or one-time bonuses. They feed directly into payslip computation without requiring changes to the salary structure.
3.1 Creating a Salary Attachment

Fig 3.1 — Salary attachment list showing employee, type, amount, and remaining balance
How to Create a Salary Attachment:
- Go to Payroll → Employees → Open the employee record
- Click the Salary Attachments smart button at the top of the form
- Click New
- Select the Attachment Type: Attachment of Salary, Assignment of Salary, or Child Support
- Enter a Description to identify the reason for the attachment
- Set the Start Date — the first payslip period this applies to
- Set the End Date if the attachment has a defined end (leave blank for ongoing)
- Enter either a Monthly Amount (deducted each payslip) or a Total Amount (spread across payslips until balance is zero)
- Attach supporting documents: court order, loan agreement, or HR approval letter
- Save — the attachment automatically feeds into all future payslip computations for this employee
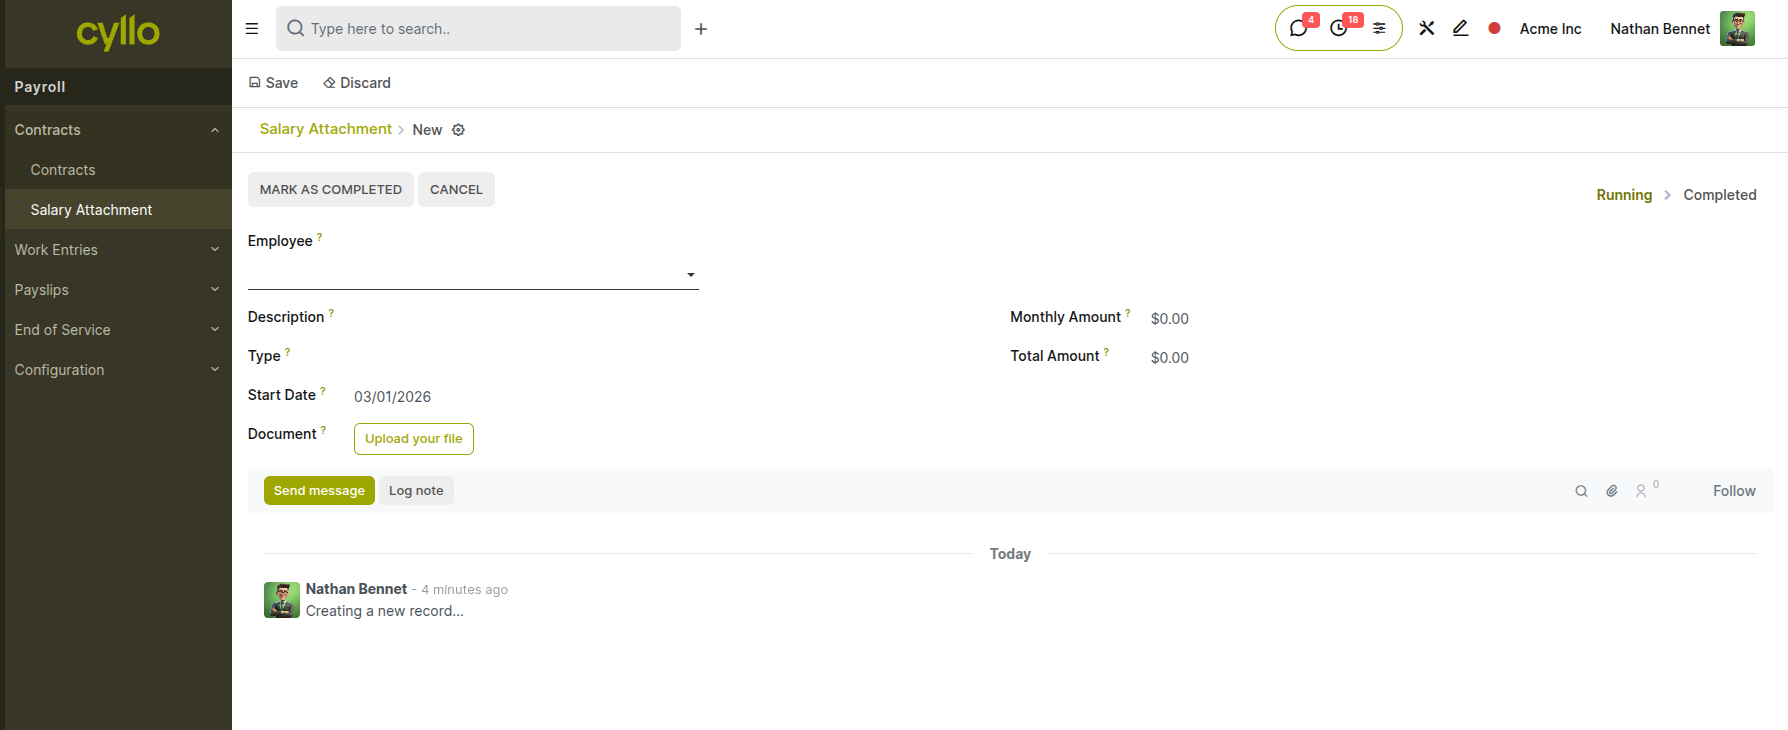
Fig 3.2 — Salary attachment form with type, amount, dates, and document attachment
Key Fields
Employee: The staff member the attachment applies to. This links the deduction or addition to the correct payroll records.
Type: The category of attachment — Attachment of Salary, Assignment of Salary, or Child Support. This determines the legal context and processing rules.
Description: Free text note explaining the reason for the attachment. This provides context for HR and auditing purposes.
Start Date: First payroll period the attachment is applied. The deduction or addition begins from this date forward.
End Date: Last payroll period for the attachment. Leave this blank for open-ended attachments that continue until manually stopped.
Monthly Amount: Fixed amount deducted or added on every payslip during the active period. This creates a consistent recurring entry.
Total Amount: Total sum to be spread evenly across payslips until fully recovered. The system automatically calculates how much to deduct each period until the balance reaches zero.
3.2 Attachment Types
Cyllo supports three standard salary attachment types, each designed for a different legal or HR
scenario:
Attachment of Salary: A court-ordered deduction where a portion of salary is withheld and paid to a third party, such as a creditor. This is a legally mandated garnishment enforced by a court order and must be processed according to the specified terms.
Assignment of Salary: A voluntary deduction agreed to by the employee, such as a salary advance repayment or internal loan. This is initiated by mutual agreement rather than legal requirement and can be modified by consent.
Child Support: A legally mandated deduction for child maintenance payments ordered by a court. This ensures ongoing financial support obligations are met directly through payroll processing.
Note
If you enter a Total Amount instead of a Monthly Amount, Cyllo automatically divides the total across payslips until the balance reaches zero — with no manual tracking required. The Remaining field updates after every payslip run.
4. Resignation Management
The Resignation Management module provides a structured, auditable workflow for managing employee departures. It tracks the full timeline from the moment a resignation is submitted through HR approval, notice period tracking, and final employee record update all within Cyllo Payroll.
4.1 Resignation Requests
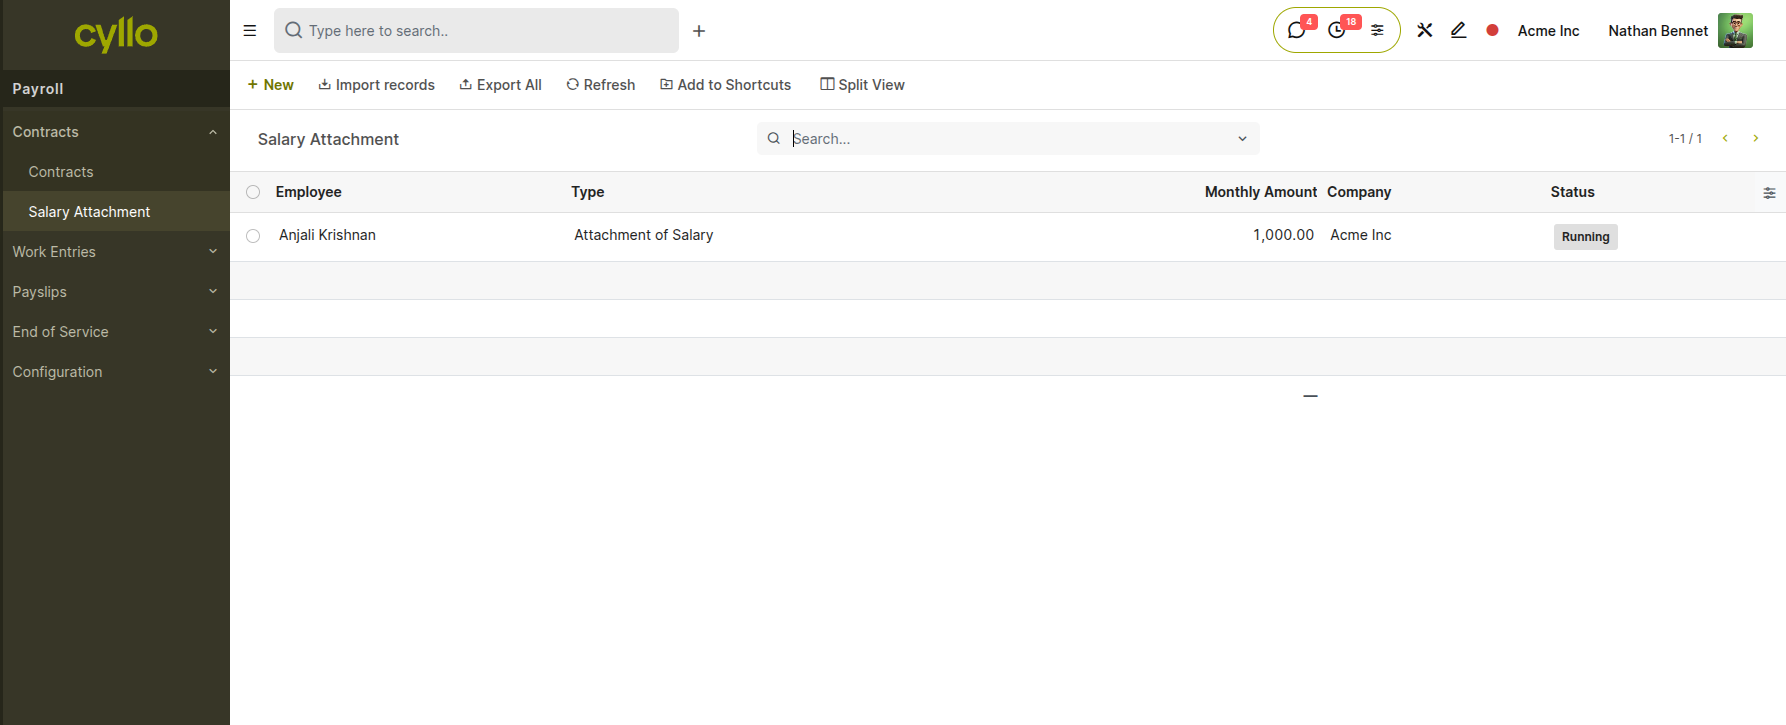
Fig 4.1 — Resignation request list with employee, type, status, and leaving date
How to Create a Resignation Request:
- Go to Payroll → Resignation → Resignation Requests → New
- Select the Employee submitting the resignation
- Set the Resignation Date — the date the employee formally submits their notice
- Enter the Notice Period in days
- Set the Leaving Date — calculated from resignation date plus notice period
- Select the Resignation Type (e.g., Voluntary Resignation, Mutual Agreement, End of Contract)
- Enter the Reason in the description field
- Click Confirm to advance from Draft to Confirmed
- HR manager reviews and clicks Approve — the employee record is marked as resigned
Key Fields
Employee: The staff member submitting the resignation. This links the request to the correct employee record and triggers related workflows.
Resignation Date: Date the employee formally gives notice. This marks the official start of the resignation process and is used to calculate the leaving date.
Notice Period: Number of notice days as per the employment contract. This is typically defined in the contract terms and determines how much advance notice is required.
Leaving Date: Last working day, calculated as resignation date plus notice period. This is the final day the employee will be on payroll and working.
Resignation Type: Category of departure — configurable per company. This classifies the nature of the resignation and may affect gratuity calculations and exit procedures.
Reason: Description of why the employee is resigning. This provides context for HR records and exit interview analysis.
Resignation States
Draft: Request created and saved — not yet formally submitted. The employee or HR is still preparing the resignation details before official submission.
Confirmed: Employee formally submits the resignation for HR review. The request is now official and awaiting management decision.
Waiting: Pending manager or HR decision. The resignation is under review and additional information or approvals may be required.
Approved: Resignation approved — employee marked as resigned on their HR record. The departure is confirmed and exit procedures can begin.
Refused: Request rejected or withdrawn by the employee. The resignation has been cancelled or denied and the employee remains in their current role.
4.2 Resignation Types
Resignation Types categorise the nature of each departure. They are fully configurable per company and can affect how end-of-service benefits and gratuity are calculated.
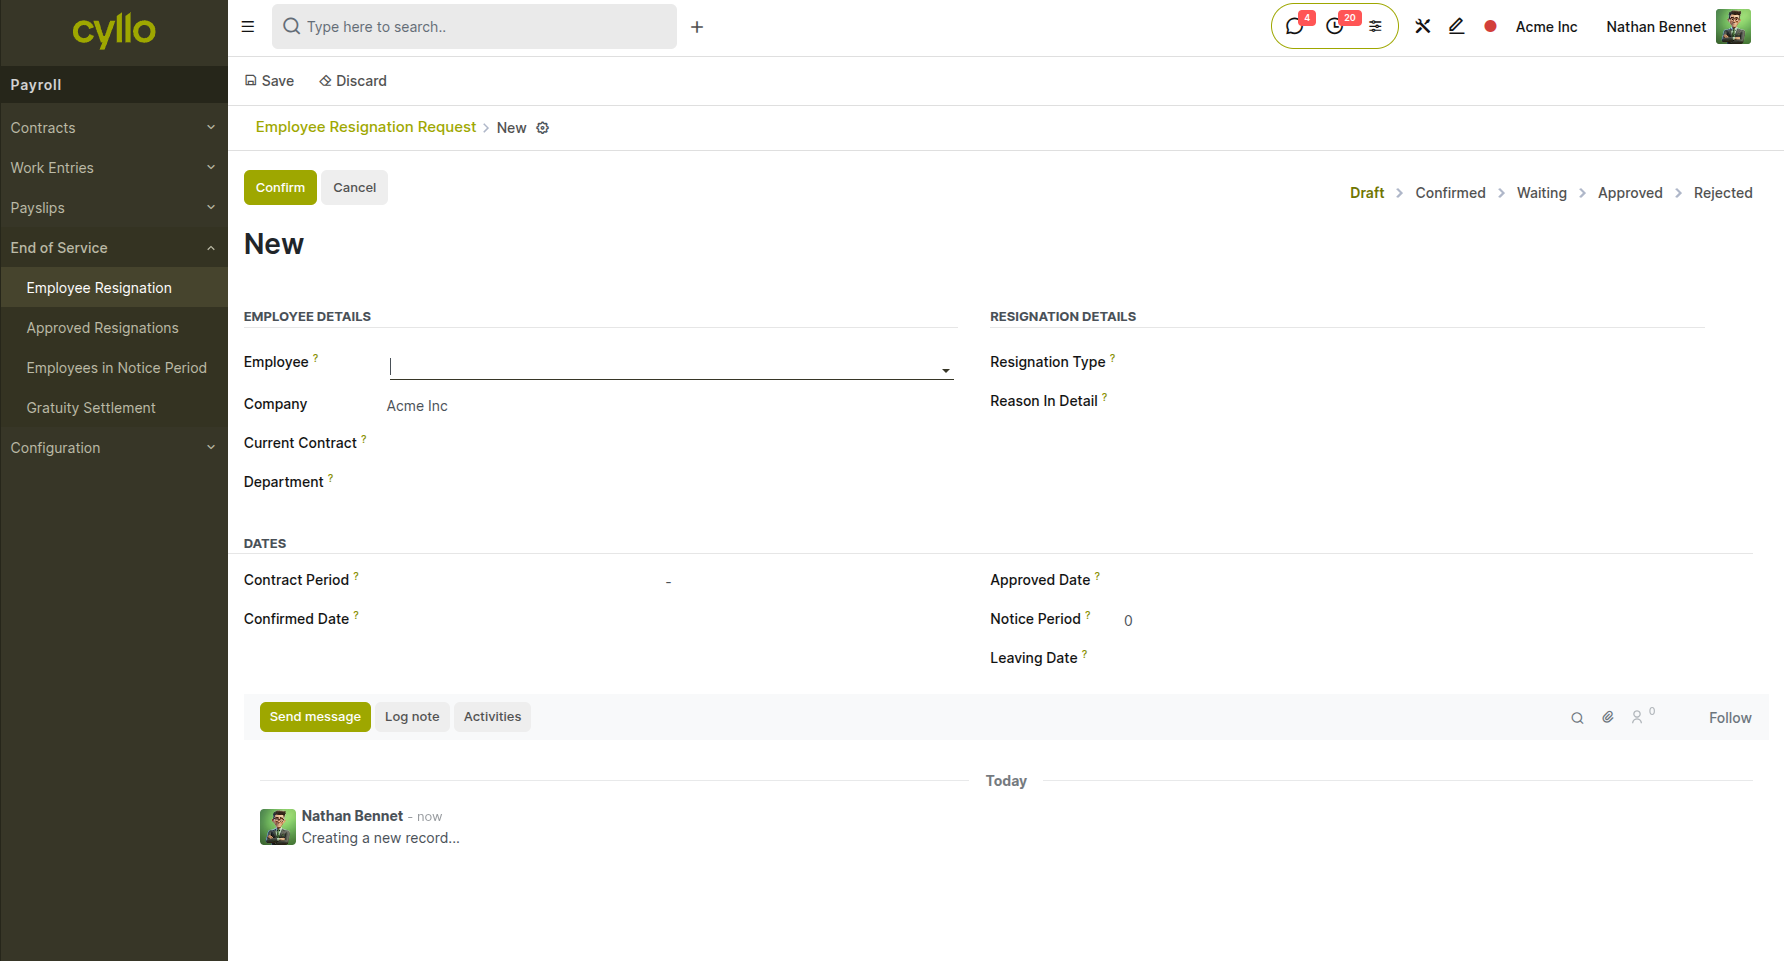
Fig 4.2 — Resignation type configuration list with company-defined categories
How to Configure Resignation Types:
- Go to Payroll → Configuration → Resignation Reasons → New
- Enter the Resignation Type name (e.g., Voluntary Resignation, Termination, Retirement, End of Contract)
- Save
- The type will be available for selection on all future resignation requests
Note
Configure Resignation Types to match your company's HR policy and local labour law categories. Different resignation types may have different gratuity entitlements — align these with your Gratuity Configuration before processing end-of-service settlements.
5. Gratuity Settlement
Gratuity Settlement is a Cyllo-specific module that automates the calculation of end-of-service gratuity benefits when an employee leaves the organisation. It eliminates manual spreadsheet calculations by computing gratuity based on total working years, contract type, and company-configured rate brackets — with a full approval and payment workflow built in.
5.1 Gratuity Calculation
How to Create a Gratuity Settlement:
- Go to Payroll → configurations→ Gratuity configuration→ New
- Select the Employee
- The system automatically fills: Joining Date, Leaving Date, and Total Working Years
- Review the Training Period field — days of leave taken are auto-deducted from gratuity years
- Select the Contract Type: Limited or Open
- The Gratuity Amount is calculated automatically based on configured rate brackets
- Review the computed amount and supporting breakdown
- Click Confirm → HR reviews and clicks Approve → Finance marks as Paid after disbursement
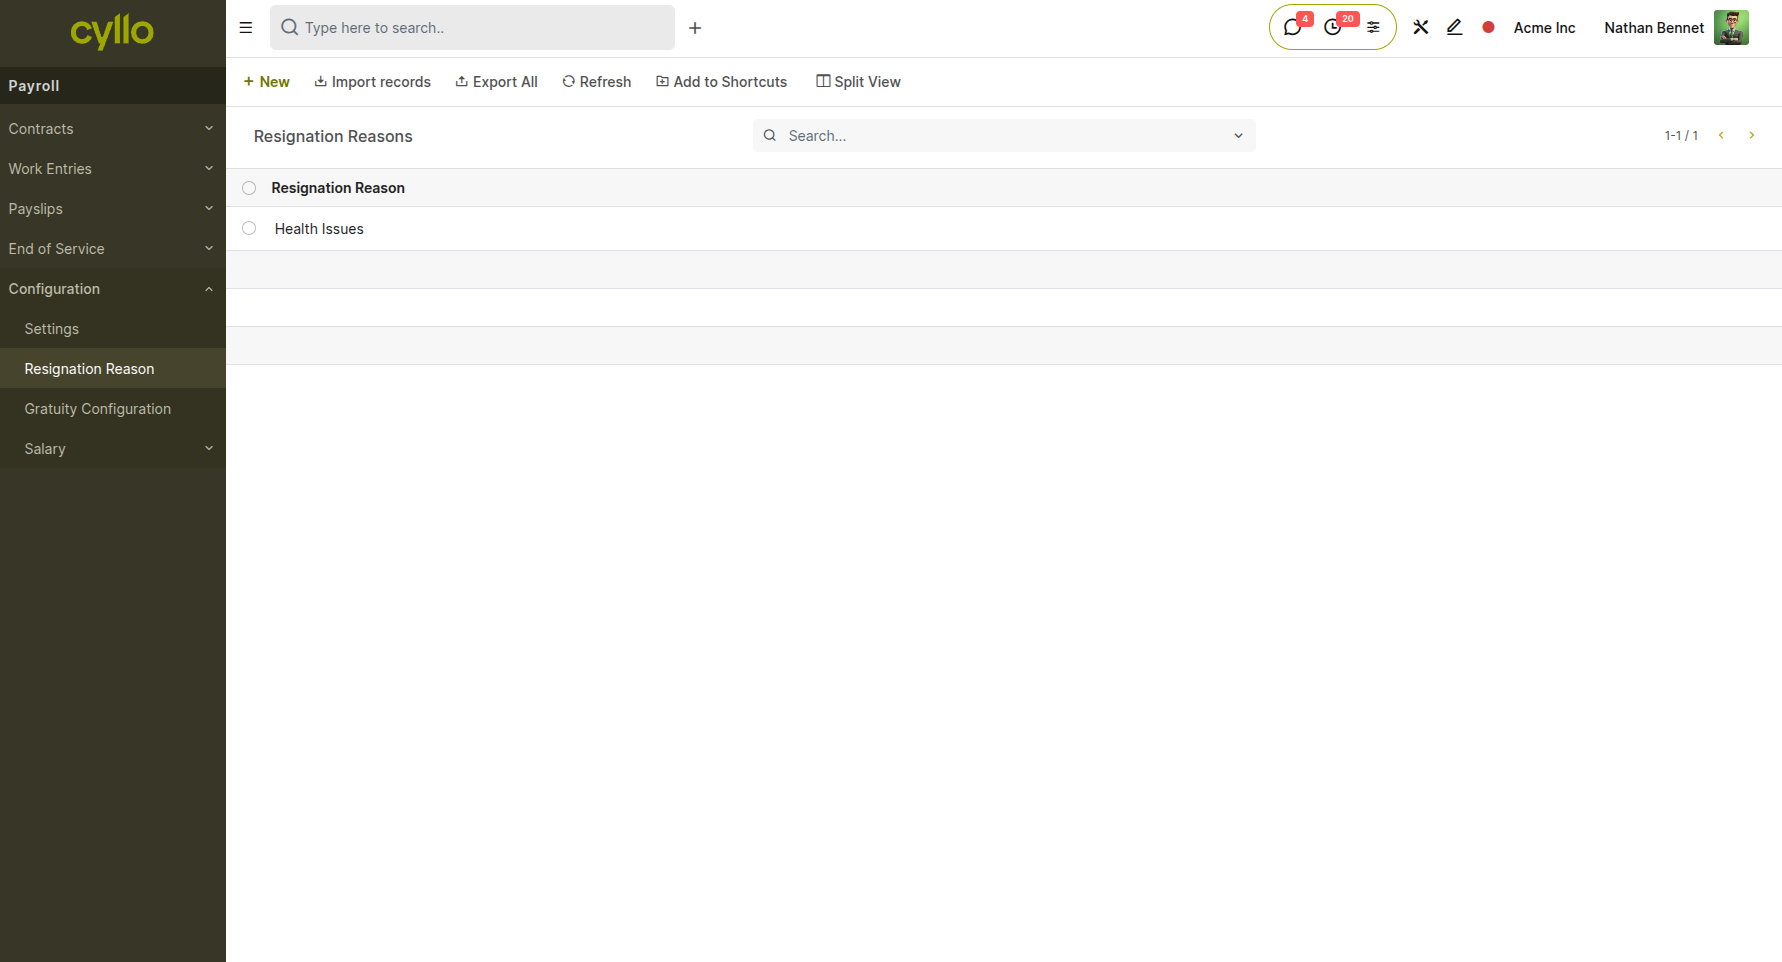
Fig 5.1 — Gratuity settlement form with auto-calculated years, wage type, and amount
Key Fields
Employee: The departing staff member. This links the gratuity calculation to the correct employee record and pulls in all necessary employment history data.
Joining Date: First day of employment, auto-filled from the employee record. This marks the start of the service period used in gratuity calculations.
Leaving Date: Last working day, auto-filled from the resignation record. This marks the end of the service period and determines the total working duration.
Total Years: Calculated working years derived from leaving date minus joining date. This is the raw duration of employment before any adjustments.
Training Period: Leave days deducted from total years for gratuity calculation. Unpaid leave or other non-working periods may reduce the gratuity-eligible service time.
Gratuity Years: Final years used in computation, calculated as Total Years minus Training Period. This is the adjusted service duration that determines the final benefit amount.
Contract Type: Either Limited (fixed-term contract) or Open (permanent employment). This affects which gratuity rate bracket is applied.
Wage Type: Monthly or Hourly — determines how the base salary is used in the calculation. Monthly employees use their monthly salary while hourly workers use an hourly rate.
Gratuity Amount: Final calculated benefit, auto-computed from years and rate brackets. This is the total end-of-service payment the employee is entitled to receive.
5.2 Gratuity Configuration
Gratuity rate brackets define how much gratuity an employee earns per year of service within each duration tier. These are configured per company and can reflect local labour law requirements. How to Configure Gratuity Rate Brackets:
- Go to Payroll → Configuration → Gratuity Configuration → New
- Enter the Configuration Name
- Add bracket lines: set From Years, To Years, and Rate (days of salary per year)
- Example: 0–5 years = 21 days/year; 5+ years = 30 days/year
- Set the Contract Type this configuration applies to: Limited or Open
- Save — Cyllo uses this configuration automatically when computing settlements
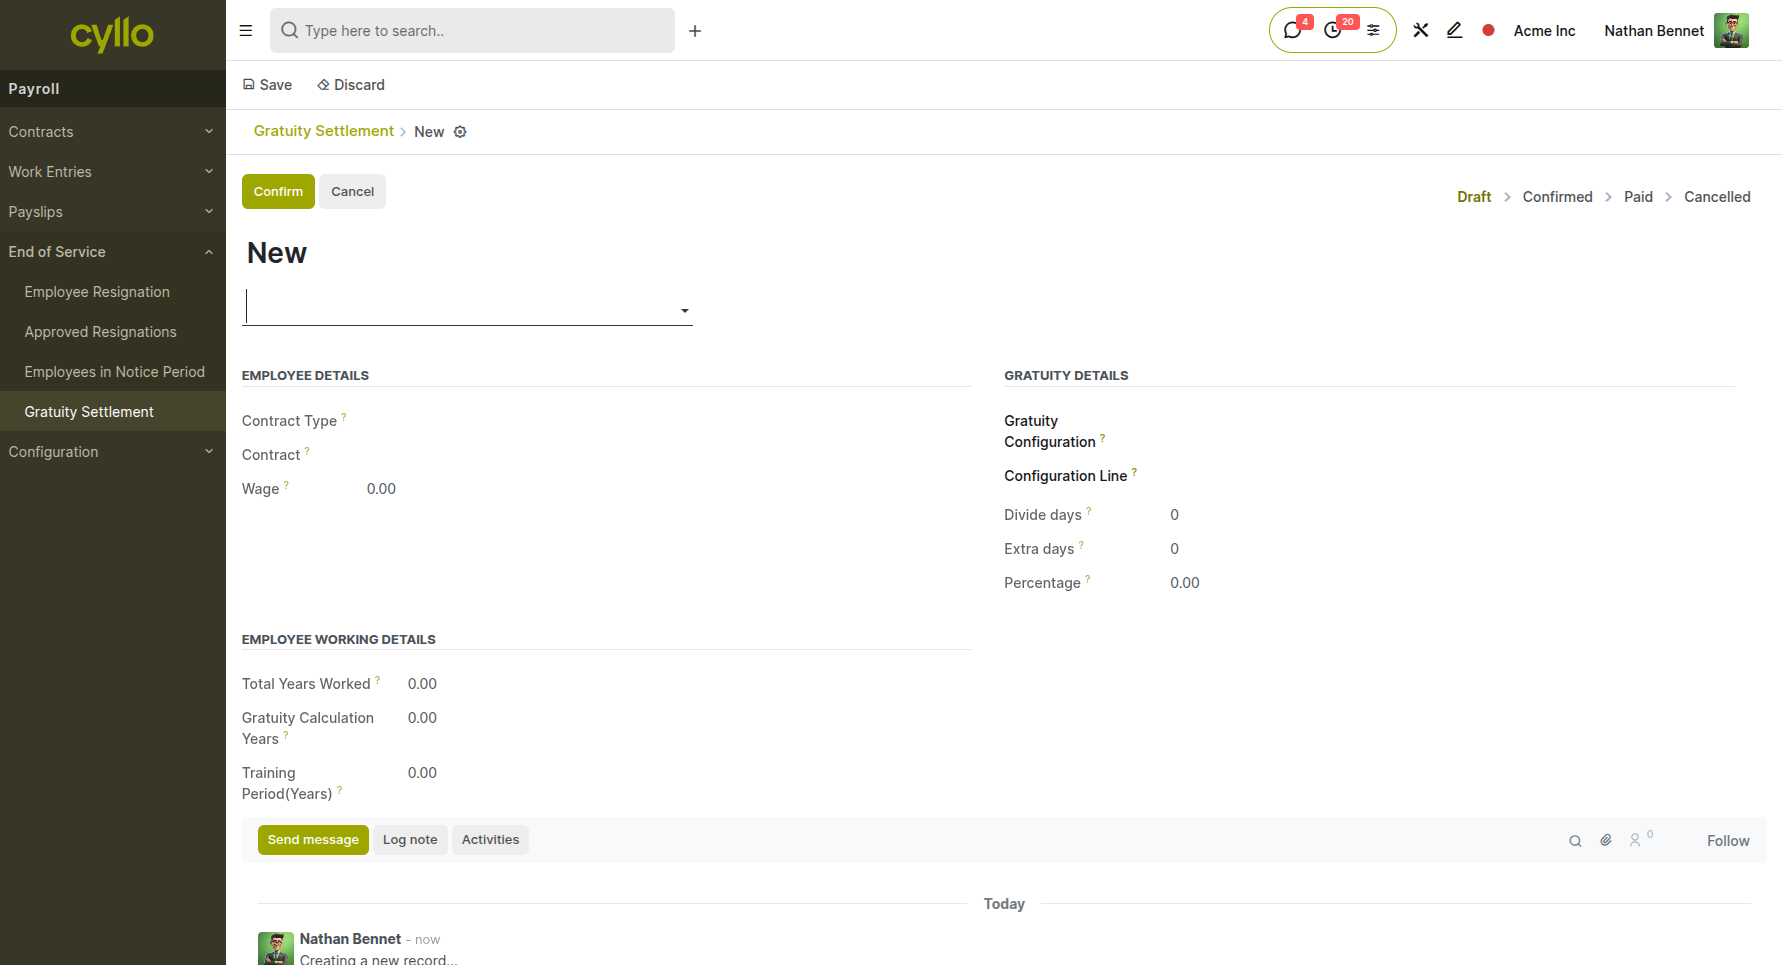
Fig 5.2 — Gratuity rate bracket configuration with duration tiers and daily rates
Example : Gratuity Calculation
Employee: John Smith
Total Working Years: 6 years 4 months
Training Period: 45 days
Gratuity Years: 6.17 years (after deducting training period)
Rate for 0–5 years: 21 days salary per year
Rate for 5+ years: 30 days salary per year
Monthly Salary: 5,000
Daily Rate: 5,000 / 30 = 166.67 per day
Gratuity for 0–5 years: 5 × 21 × 166.67 = 17,500.35
Gratuity for 5–6.17 years: 1.17 × 30 × 166.67 = 5,850.09
Total Gratuity: 23,350.44
5.3 Gratuity States
Draft: Settlement record created — calculation not yet reviewed. The gratuity amount has been computed but HR has not yet verified the figures.
Confirmed: Gratuity amount reviewed and confirmed by HR. The calculation has been checked against the employee's records and is accurate.
Approved: Settlement approved by Finance or management for payment. The gratuity has been authorized and can proceed to disbursement.
Paid: Gratuity amount disbursed to the employee — record closed. The final payment has been completed and the settlement is finished.
Cancelled: Settlement cancelled — for example, if the employee rescinds their resignation before the leaving date. The gratuity calculation is voided and will not be paid.
Note
Always create the Gratuity Settlement after the Resignation is Approved. The system pulls the joining and leaving dates from the linked employee and resignation records — ensure both are accurate before computing the settlement.