

Cyllo Website Documentation
Introduction
The Website module in Cyllo ERP is a fully integrated, browser-based web publishing platform that allows businesses to build, manage, and publish professional websites without writing a single line of code. Using the drag-and-drop page builder, teams can create landing pages, product pages, blog posts, and contact forms using pre-built content blocks — all directly from the Cyllo interface. The result is a live website that is always connected to the same database used by your sales, inventory, and accounting teams.
Because the Website module shares the Cyllo ERP database, every interaction on the website is immediately reflected across connected modules. A contact form submission automatically creates a lead in CRM. A product purchased on the eCommerce store generates a sales order in the Sales module and triggers stock deduction in Inventory. Blog posts are published and managed alongside the same content pipelines used by your marketing team in Email and Social Media Marketing. There is no need to maintain a separate CMS or synchronize data between systems.
This documentation covers the complete Website module — from enabling the module and running the setup wizard, through building pages, configuring themes, managing blog content, setting up eCommerce, capturing leads via forms, enabling the customer portal, and managing multiple websites from a single Cyllo instance. Whether you are a content editor publishing blog posts or a web administrator configuring domains and access permissions, this guide provides comprehensive, step-by-step instruction for every feature of the Cyllo Website module.
1. Getting Started
This section covers the initial steps required before your website goes live — installing the module, running the setup wizard, and understanding the website structure in Cyllo.
1.1. What is the Website Module?
The Website module in Cyllo is a no-code content management and publishing system built directly into the ERP. It replaces the need for a separate CMS such as WordPress or Wix by providing a drag-and-drop editor, theme management, blog engine, eCommerce storefront, and customer portal — all in one place, connected to the same Cyllo database used for business operations. Unlike standalone website builders, Cyllo's Website module is data-aware. Product pages display real inventory availability. The customer portal shows live order statuses. Contact form submissions flow into CRM without any API configuration. This deep integration means the website is not a separate tool — it is a customer-facing extension of your Cyllo ERP.
Note
The POS module needed to be installed first from apps. Cyllo automatically creates a default POS shop called Shop for you to configure. If you plan to run an online store, install both the Website and eCommerce modules. The eCommerce module adds product catalog pages, the shopping cart, and checkout flow to your website.
1.2. Website Setup Guide
After installation, Cyllo launches a guided setup wizard to configure the essential website properties — name, domain, language, and default theme. Completing the wizard gives you a fully functional website skeleton ready for content. Cyllo has a self website builder that works based on what kind of website is needed. Also users can start from scratch and build it.
Self Website Builder:
- After installing the Website module, open Website from the main menu.
- If no website exists → Odoo shows setup wizard.
- Choose Website Type.
- Choose a starting Color theme from the available options (themes can be changed later).
- Select Pages and Features.
- Click the ‘Let's do it’ button. Cyllo creates your website and opens the page builder on the homepage.
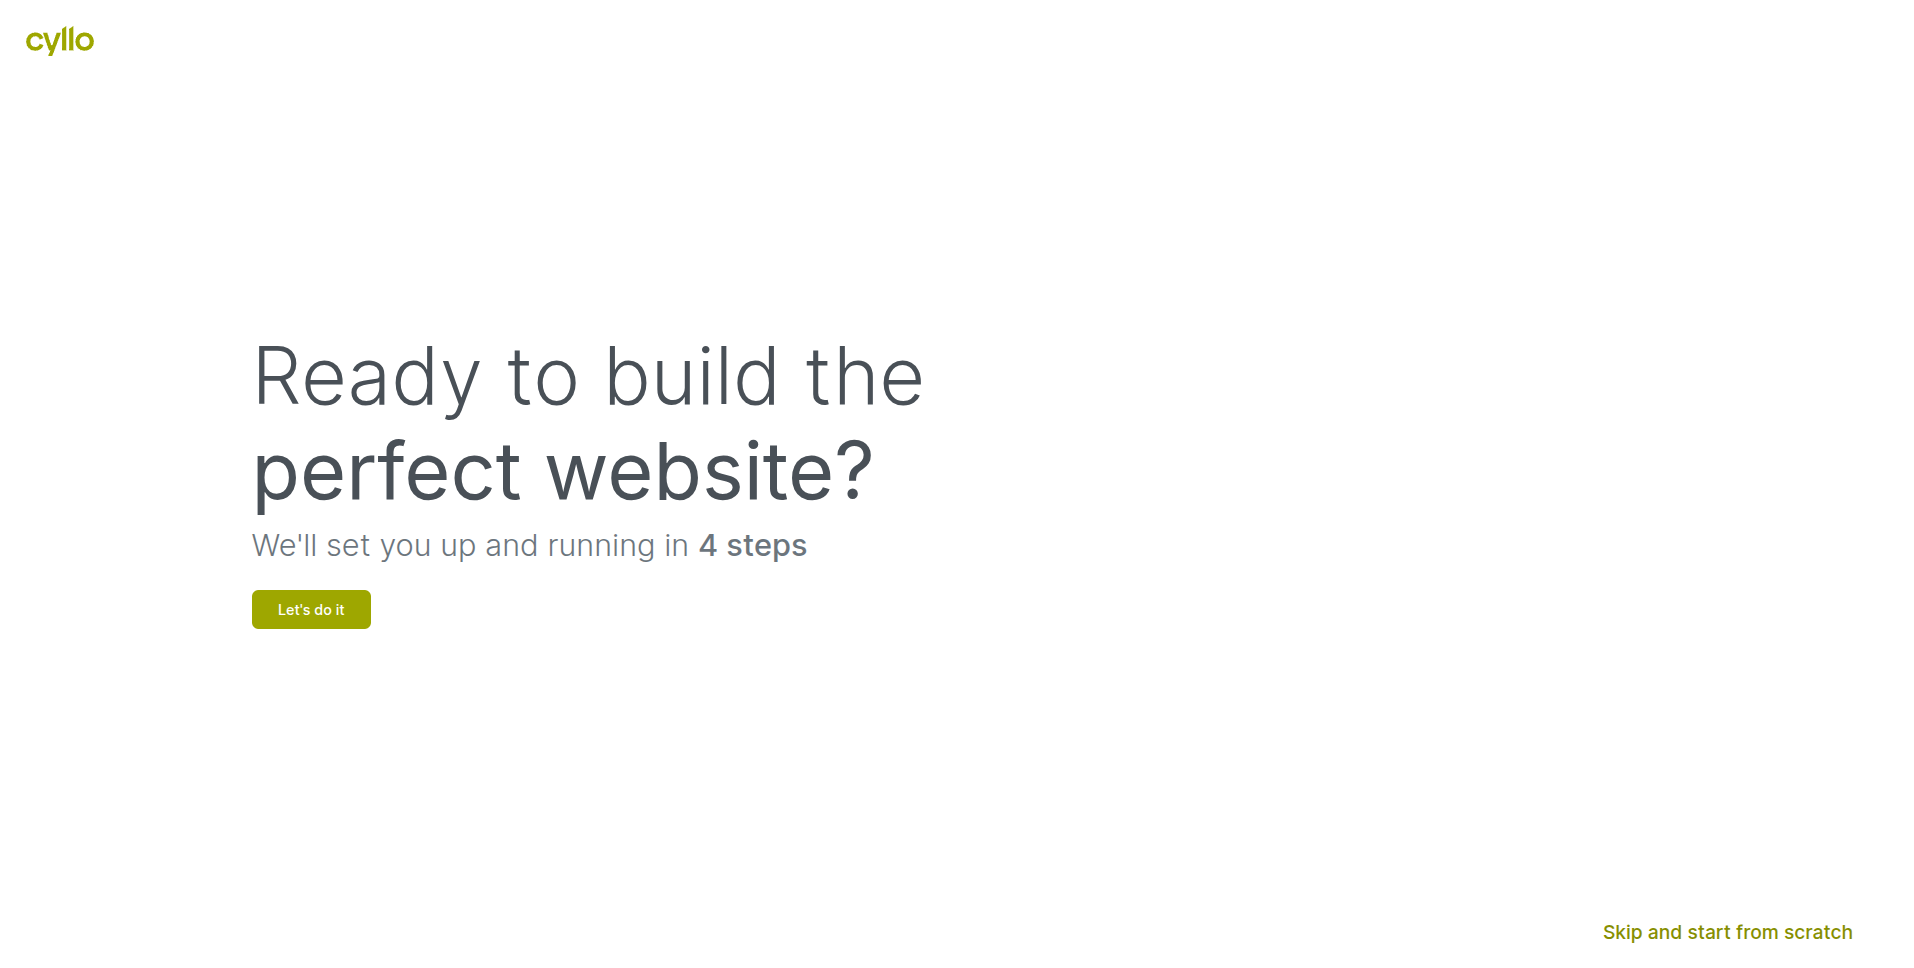
Fig 1.1 — Website setup page — with 'Let's do it button
Start from scratch:
- After installing the Website module, open Website from the main menu.
- Click ‘Skip and start from scratch’.
- Choose a starting Theme from the available options (themes can be changed later).
- Cyllo creates a default website.
TIP
You can change these settings at any time from Website → Configuration → Settings.
2. Page Builder
The page builder is the core tool for creating and editing website content. It provides a live visual editing environment where changes are seen instantly as they are made, without switching between edit mode and preview mode.
2.1. Drag-and-Drop Editor Overview
The drag-and-drop editor opens whenever you click Edit on any website page. It overlays an editing toolbar on the live page and allows you to drag content blocks from the panel onto the page, rearrange existing blocks, and configure each element's content, style, and layout directly on screen.
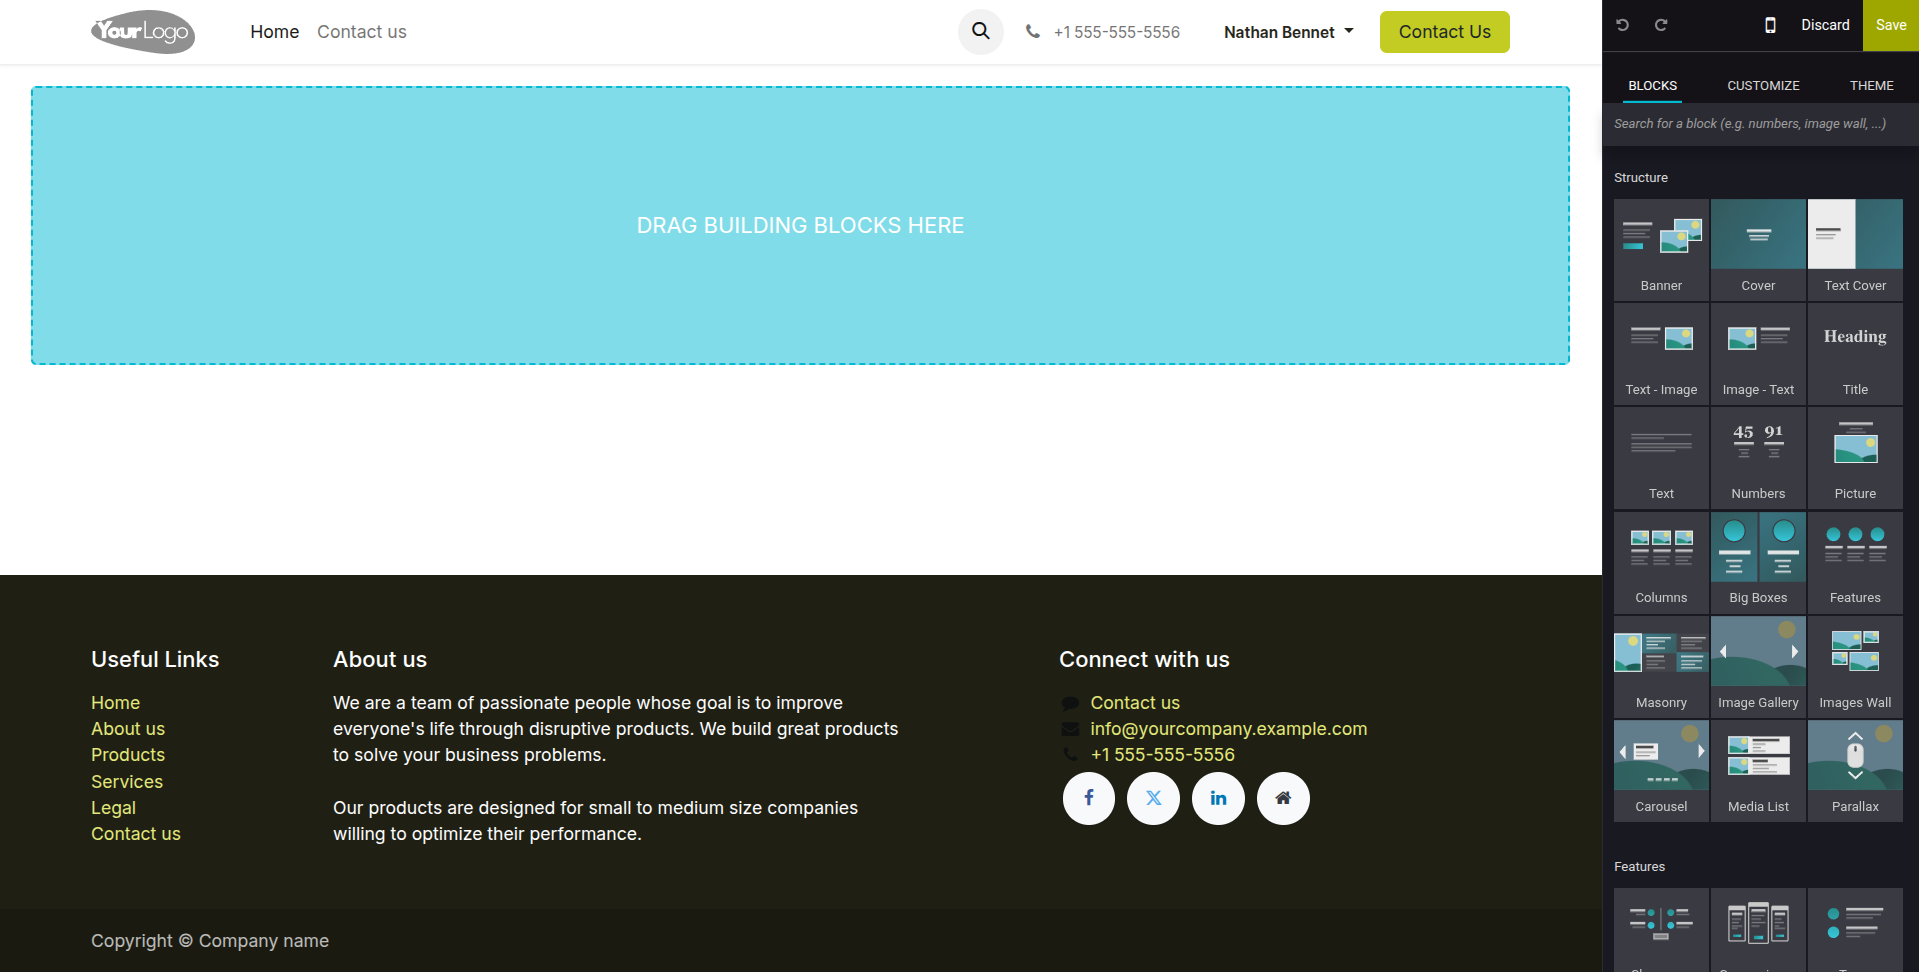
Fig 2.1 — Cyllo page builder — editing toolbar at top, block panel on the right, and live page with selected block highlighted
Key Interface Areas
- Top Toolbar: Contains Save, Discard, Mobile View toggle.
- Block Panel (right): Categorized library of content blocks — Text, Images, Features, Quotes, Banners, and more.
- Page Canvas: The live editable page. Click any element to select it and reveal its editing options.
- Element Options Bar: Appears above a selected element — move up/down, duplicate, delete, or configure the block.
Note
Changes made in the editor are auto-saved as drafts. Click Save to make changes permanent, or Discard to revert to the last saved version.
2.2. Building Blocks
Building blocks are the pre-designed content sections that make up every Cyllo website page. Each block is a self-contained unit — a banner, a two-column text layout, a product feature grid, a testimonial carousel — that can be dragged onto the page and customized without any coding.
- Open the page you want to edit and click Edit in the top-right corner.
- In the block panel on the right, browse or search for the block type you want to add.
- Drag the block from the panel and drop it onto the page canvas at the desired position.
- Click inside the block to edit text, replace images, or adjust settings.
- Use the element options bar to move the block up or down, duplicate it, or delete it.
- Click Save when done.
Fig 2.2 — Block panel with a selected element — Image, Text, Features, Quotes, Banner, and Table blocks visible
Commonly Used Block Categories :
| Block Category | Typical Use |
|---|---|
| Structure | Column layouts (1, 2, 3 columns) for organizing page sections. |
| Text | Headings, paragraphs, quotes, and call-to-action text blocks. |
| Image / Video | Single images, image galleries, video embed blocks. |
| Features | Icon-and-text feature grids for listing product or service benefits. |
| Banner | Full-width hero images with overlay text and CTA button. |
| Numbers & Charts | Statistics, counters, and simple chart visualizations. |
| Team | Staff profile cards with name, role, and photo. |
| Testimonials | Customer quote carousels and review grids. |
| Call to Action | Highlighted sections with buttons directing visitors to take action. |
2.3. Page Templates
Page templates are pre-built full-page layouts that provide a starting point for common page types — homepage, about us, contact, pricing, and more. Instead of building a page block by block from scratch, you can select a template that matches your intended layout and customize the content within it.
- Go to a Website, click the ‘+ New’ button at the top right corner.
- In the dialog, click ‘Page’ to browse the available templates.
- Select a template that matches the page type you are building.
- Enter the page name, then click Create.
- The page opens in the editor with the template content pre-loaded. Edit text, images, and blocks as needed.
- Click Save and Publish when the page is ready to go live.
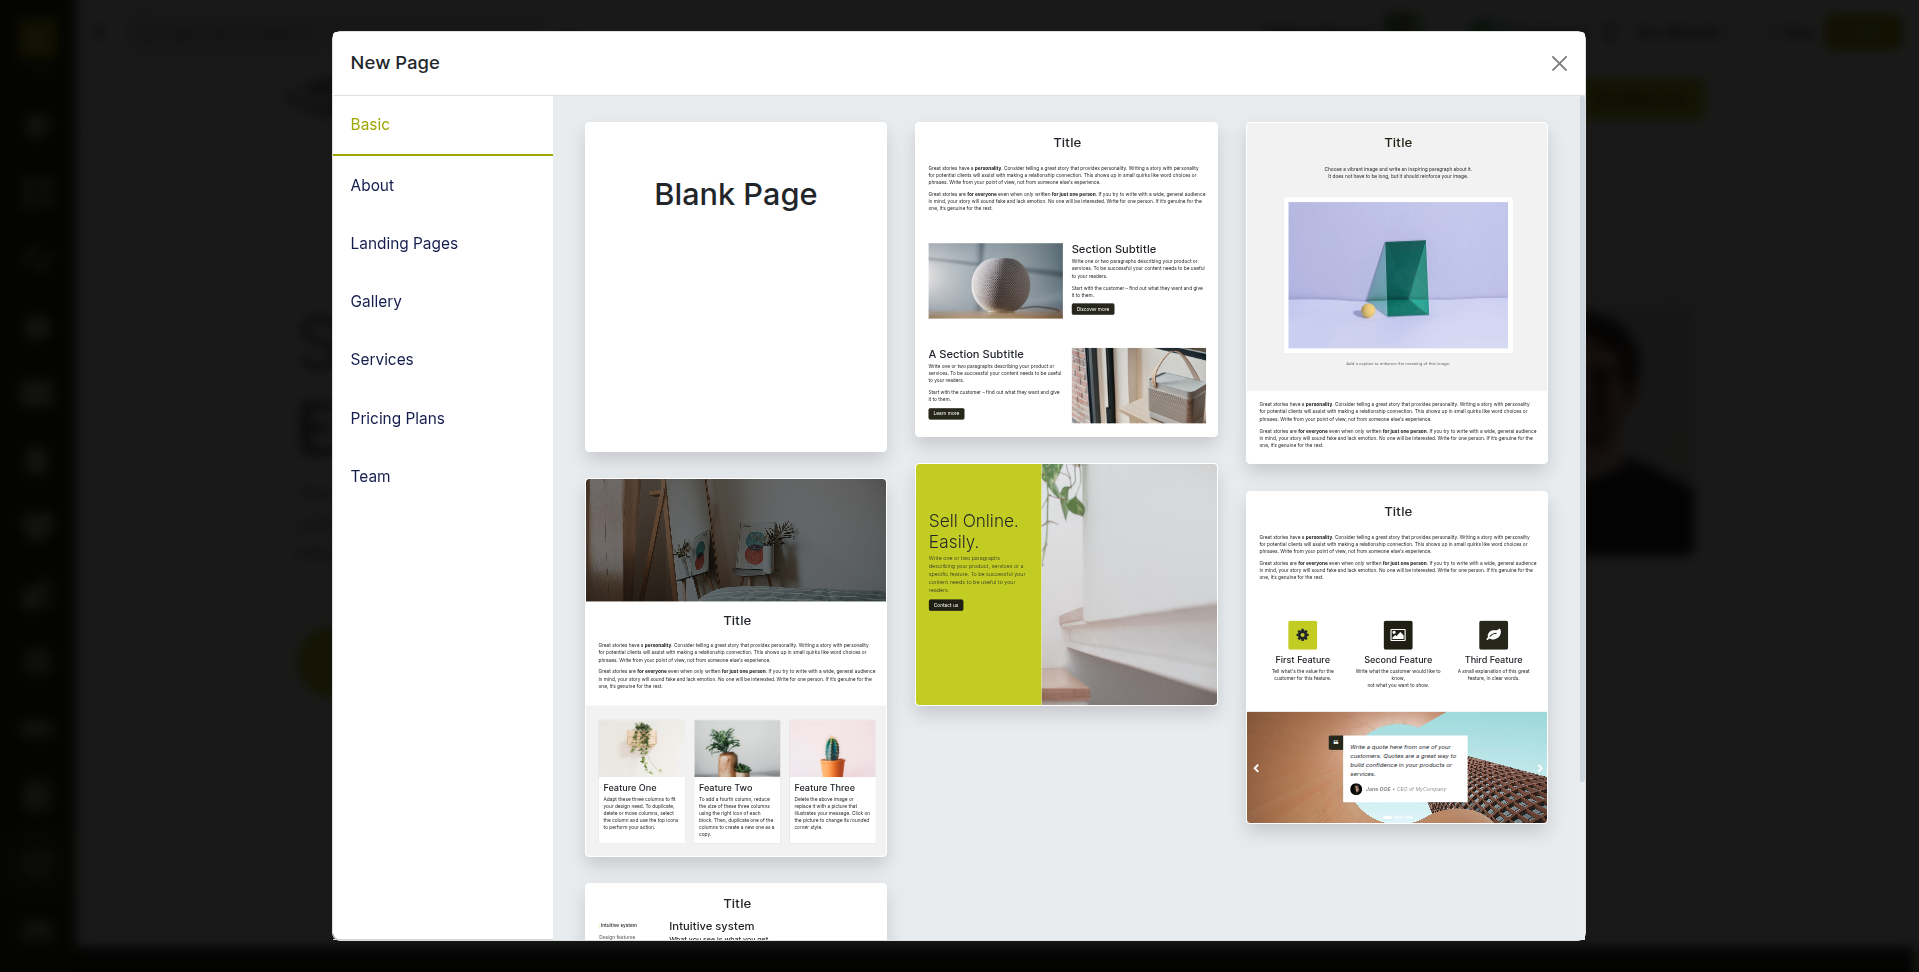
Fig 2.3 — New page dialog — template selection grid showing About, Gallery, Pricing, and Landing Page templates
TIP
Templates are a starting point only — every block in a template can be edited, moved, or deleted. You are never locked into the template layout after selecting it.
2.4. Creating & Managing Pages
All pages on your Cyllo website are managed from the Website backend. You can create new pages, set their visibility, configure their URL, and control whether they appear in the navigation menu — all from a single management interface.
- Go to Website → Site → Content → Pages.
- Click New to create a new page. Enter the page title and URL slug.
- To edit an existing page, click its name to open it in the frontend, then click Edit.
- To publish or unpublish a page, use the Published / Unpublished toggle in the top editing bar, or toggle the status column in the Pages list.
- To delete a page, open it and select Action → Delete, or select it in the list and click Delete.
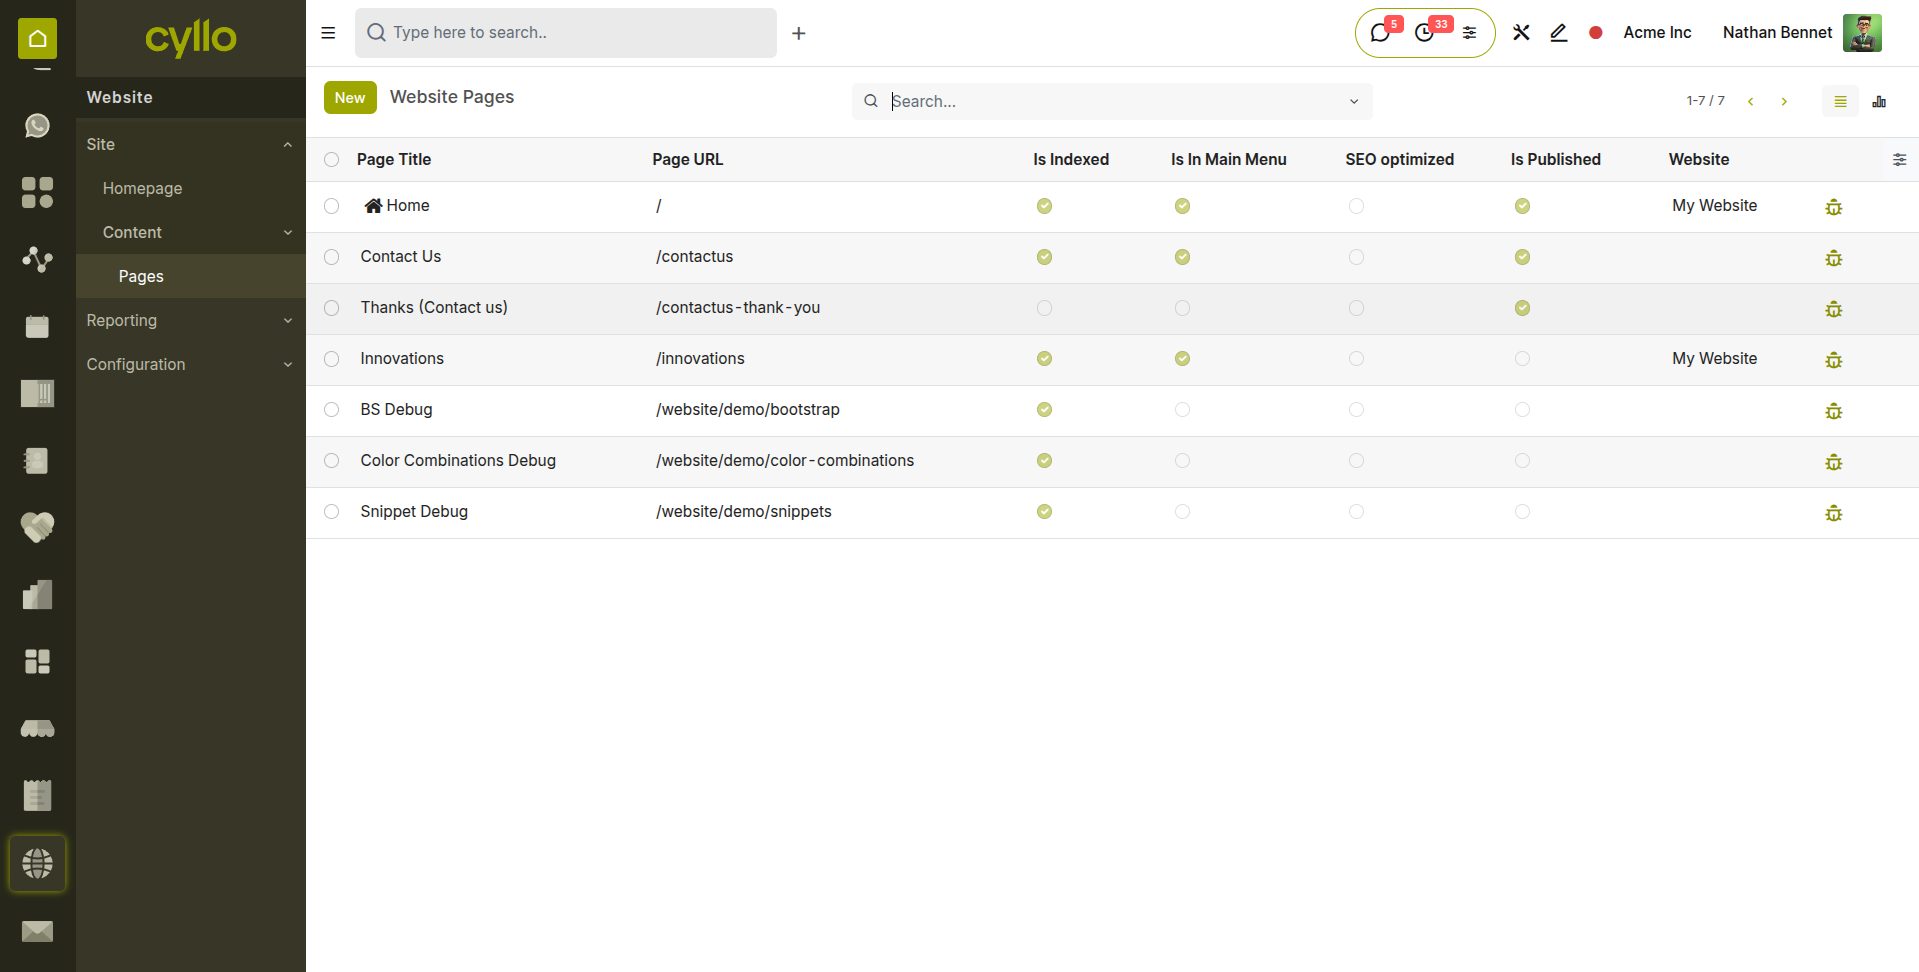
Fig 2.4 — Website Pages list — page name, URL, published status toggle, and last updated date columns
Key Page Properties
- URL: The web address of the page (e.g. /about-us). Must be unique across the website.
- Published: Controls whether the page is publicly visible. Unpublished pages are only visible to logged-in website editors.
- In Menu: Determines if the page appears in the navigation menu automatically.
- Is Homepage: Marks this page as the site's homepage, loaded when visitors access the root URL.
2.5. Navigation Menu Management
The navigation menu is the top-level site header menu that appears on every page. Cyllo's menu editor allows you to add pages, create dropdown groups, include external links, and reorder items — all without touching code.
- Go to Website → Site → Menu Editor.
- Click Add Menu Item to add a new menu entry. Select whether it links to an internal page, a URL, or acts as a dropdown header.
- Drag menu items up or down to reorder them. Drag an item slightly to the right beneath another to make it a dropdown child.
- Click the edit icon next to any item to rename it or change its link target.
- Click Save when the menu structure is complete.
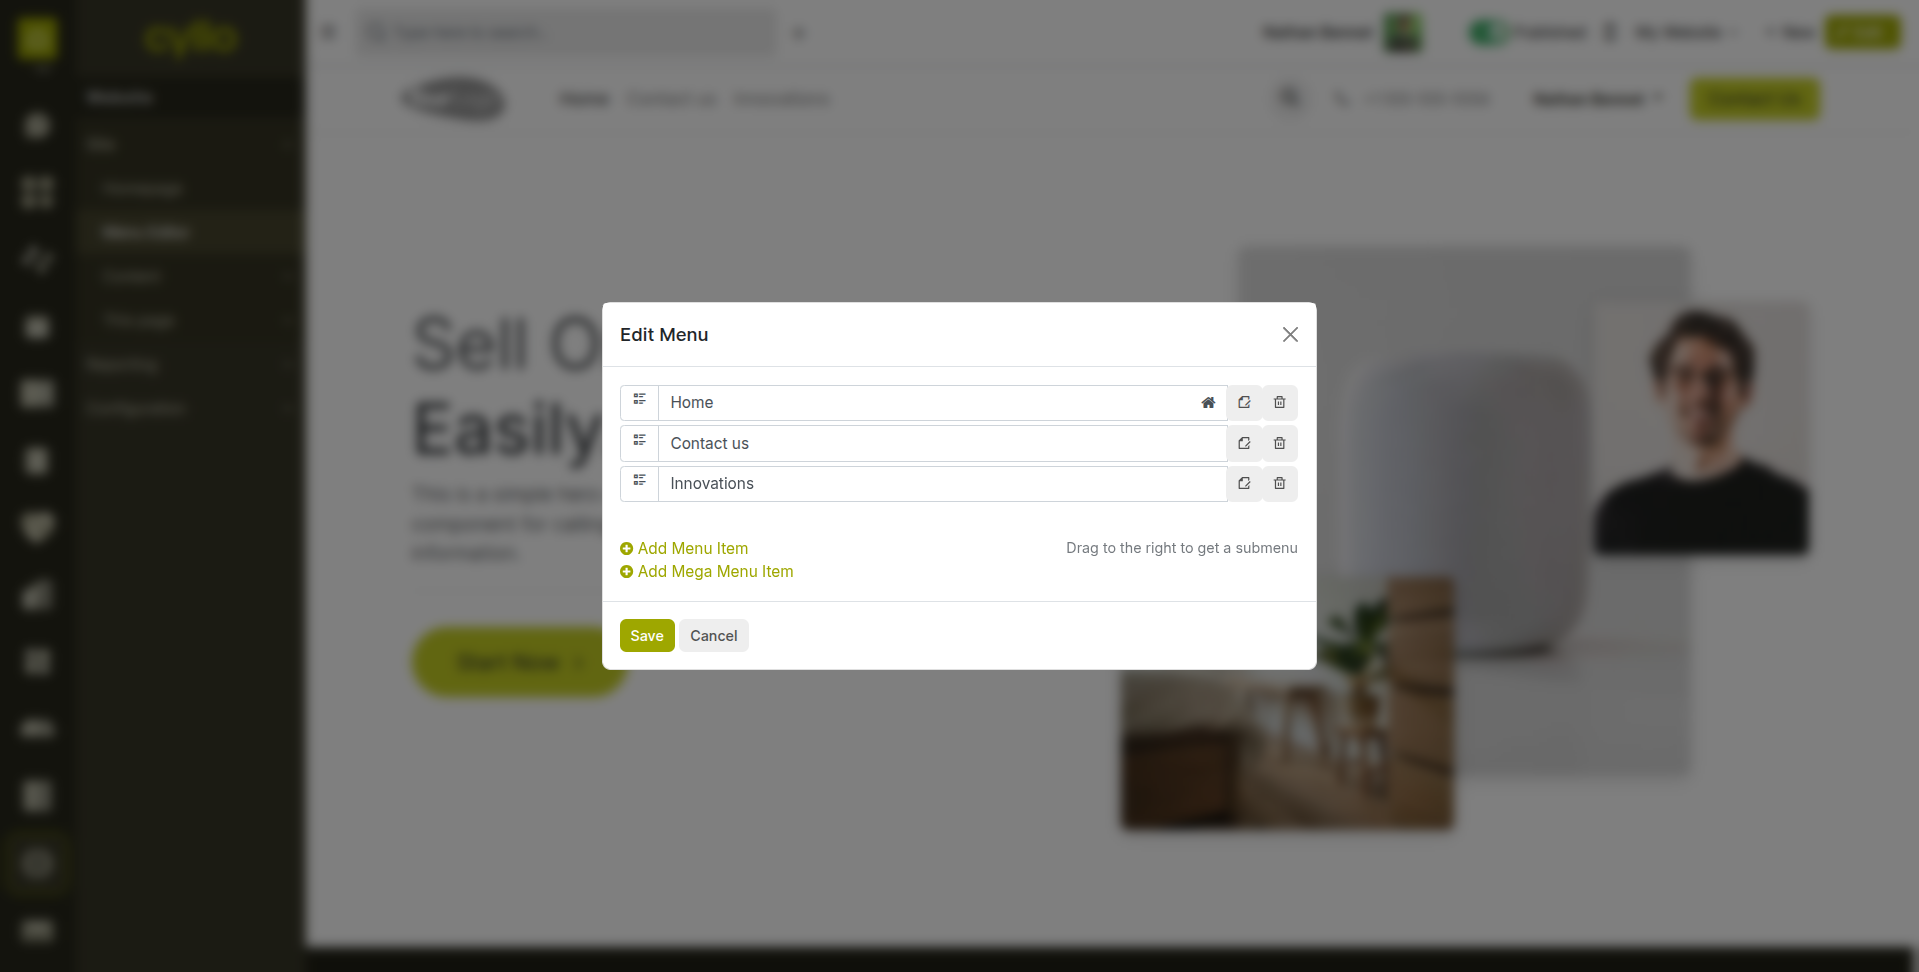
Fig 2.5 — Navigation menu editor — draggable menu items with dropdown nesting, Add Item button, and link target configuration
Note
Menu changes apply immediately to all pages on the website. There is no per-page menu — the same menu appears site-wide unless customized via theme settings.
3. Design & Themes
Cyllo provides a theme system that controls the overall visual identity of your website — colors, fonts, spacing, header style, and footer layout. All theme customization is done visually without writing CSS.
3.1. Choosing a Theme
Themes define the baseline visual style of the entire website. Cyllo includes multiple built-in themes, each with a distinct design character — clean and minimal, bold and colorful, professional and corporate. Switching themes applies the new visual style to all existing pages while preserving the content.
- Go to the Website, click ‘Edit’.
- Select the ‘THEME’ tab to get the theme editor.
- Click ‘Switch Theme’ to browse the available themes.
- Click Select to apply the theme. Cyllo applies it across all pages immediately.
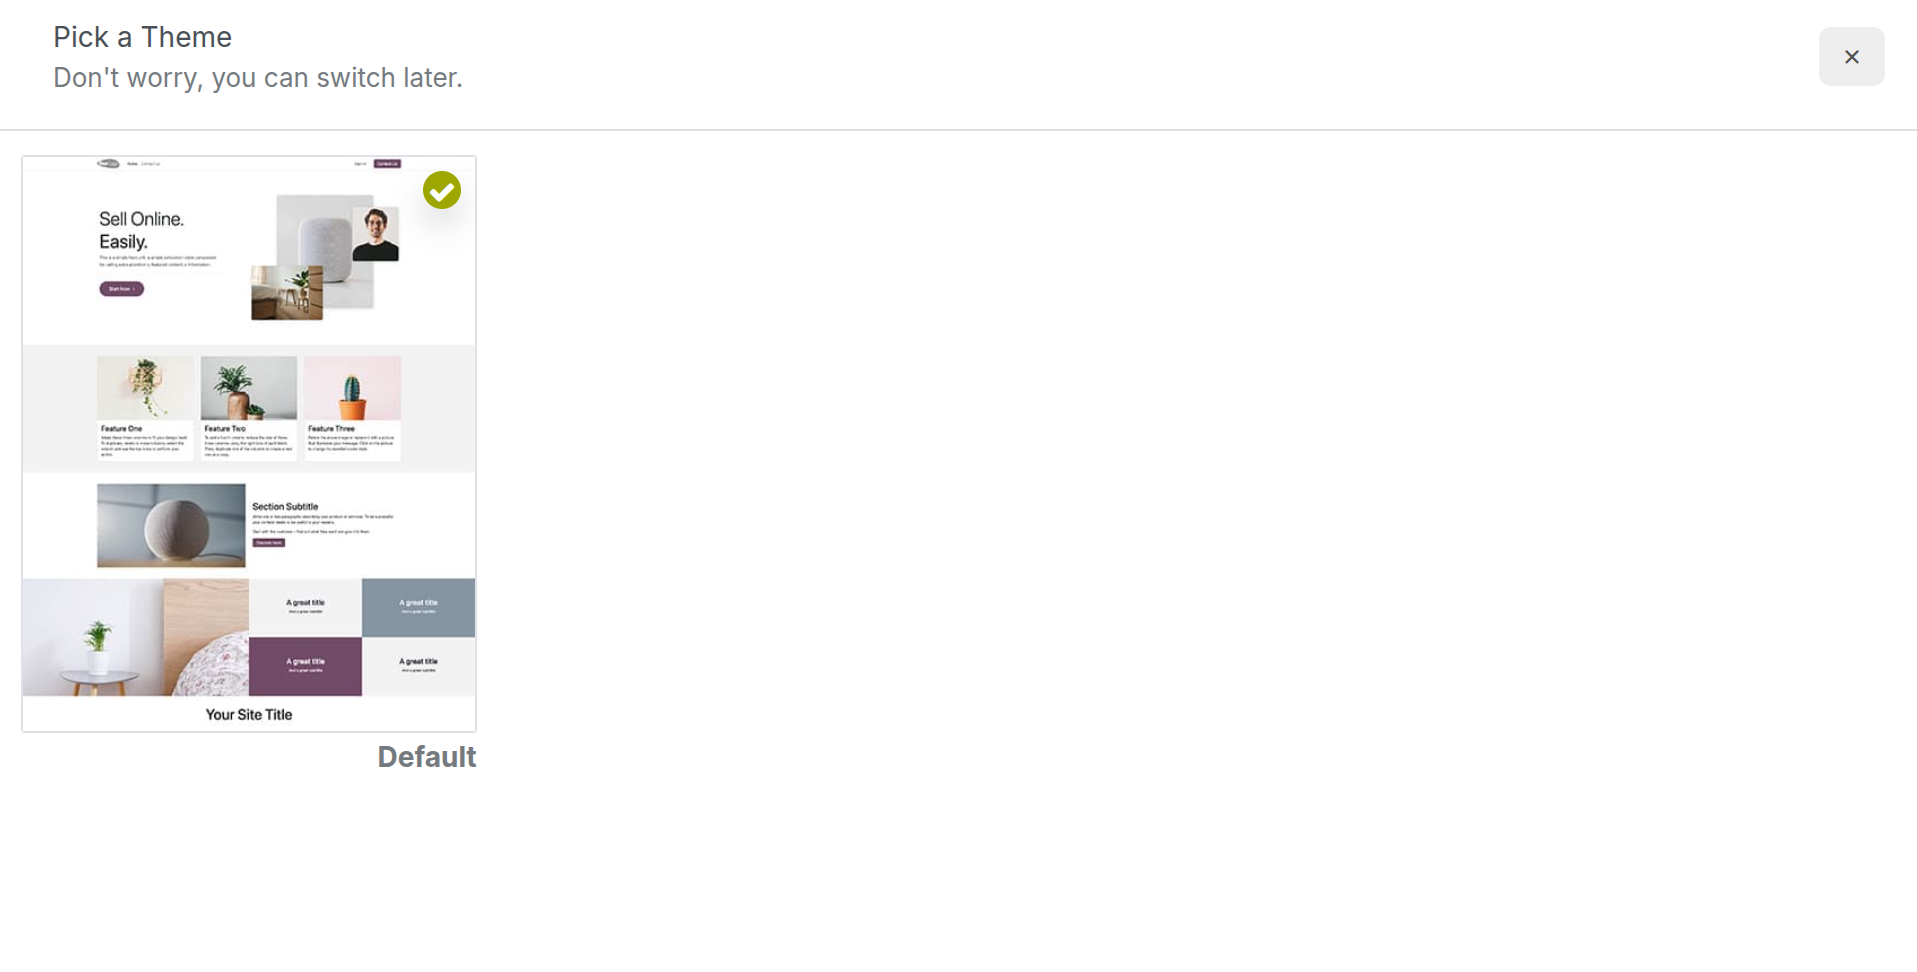
Fig 3.1 — Theme grid screen — grid of available themes with preview thumbnails and Select button
WARNING
Switching themes may change the styling of custom blocks or sections that used theme-specific color classes. Review all key pages after switching to confirm the layout appears as intended.
3.2. Customizing Colors & Fonts
Within any theme, you can customize the core design tokens — primary and secondary colors, body and heading fonts, button styles, and spacing — through the website customizer. These changes propagate across all pages automatically.
- Go to the Website, click ‘Edit’.
- Select the ‘THEME’ tab to get the theme editor.
- Under Colors, click any color swatch to open the color picker and set your brand colors.
- Under Fonts, select the heading font and body font from the available Google Fonts options.
- Under Buttons, adjust the corner radius, size, and style (filled, outlined) of CTA buttons.
- Preview changes live on the page canvas. Click Save when satisfied.
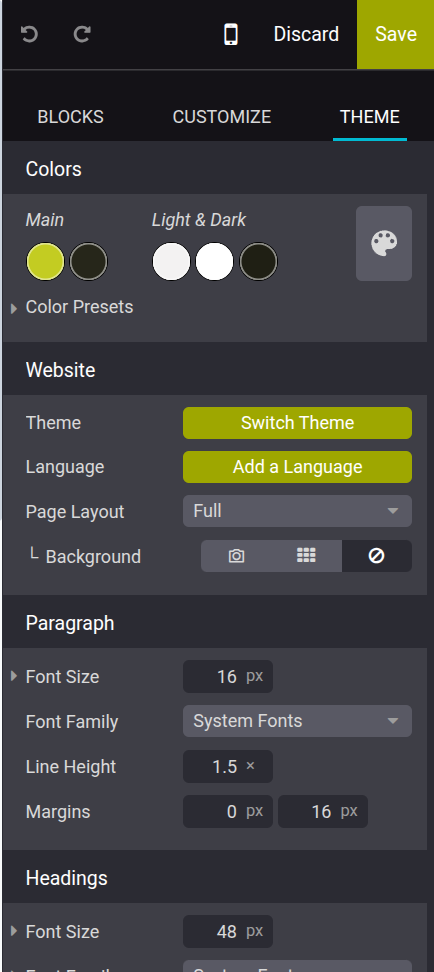
Fig 3.2 — Website customizer panel — Colors section with brand color swatches, Fonts section with heading and body dropdowns
TIP
Stick to a palette of two to three colors — your primary brand color, a secondary accent, and a neutral background. Cyllo applies these consistently across all blocks and buttons
3.3. Header & Footer Configuration
The website header and footer appear on every page. The header typically contains the company logo, navigation menu, and a call-to-action button. The footer contains contact information, secondary navigation links, and social media icons. Both are configured from the page editor.
- Open the website frontend and click Edit.
- Click directly on the header area. The header editing panel opens on the right.
- Upload your company logo by clicking the logo placeholder. Set the logo size and alignment.
- Choose the header layout (centered, left-aligned, logo left / menu right) from the available styles.
- To edit the footer, scroll to the bottom of the page and click on the footer area.
- Edit footer columns — add links, contact details, social media icons, and a newsletter signup form using the footer block options.
- Click Save when done.
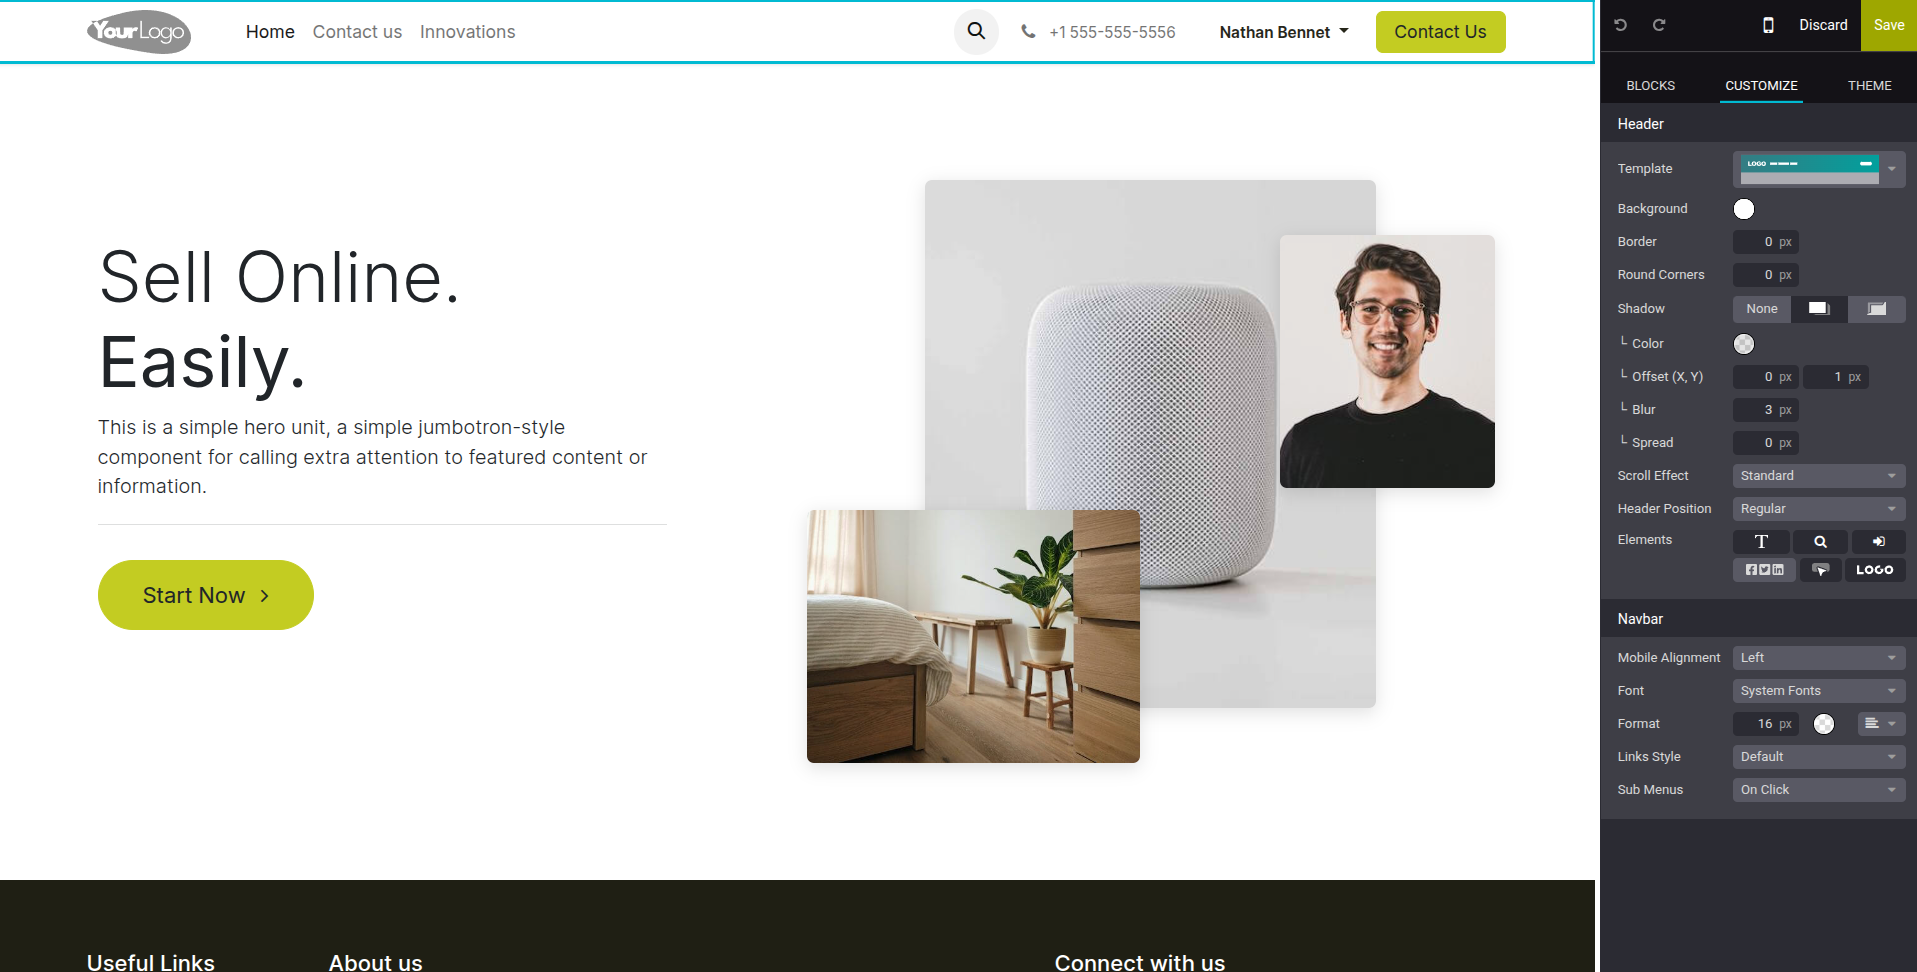
Fig 3.3 — Website editor — header block selected showing logo upload, layout selector, and menu alignment options in the right panel
3.4. Mobile & Responsive Design
All Cyllo website pages are responsive by default — they automatically adapt their layout for mobile, tablet, and desktop screen sizes. The page builder provides a mobile preview mode so you can verify how each page looks on smaller screens before publishing.
- In the page editor, click the Mobile View icon in the top toolbar (phone icon).
- The canvas switches to a mobile-width preview. Review how each block stacks and resizes.
- If a block's mobile layout needs adjustment, select it and use the responsive options in the element panel to hide it on mobile, change column stacking order, or adjust spacing.
- Switch back to Desktop View to confirm the desktop layout is unaffected.
- Click Save.
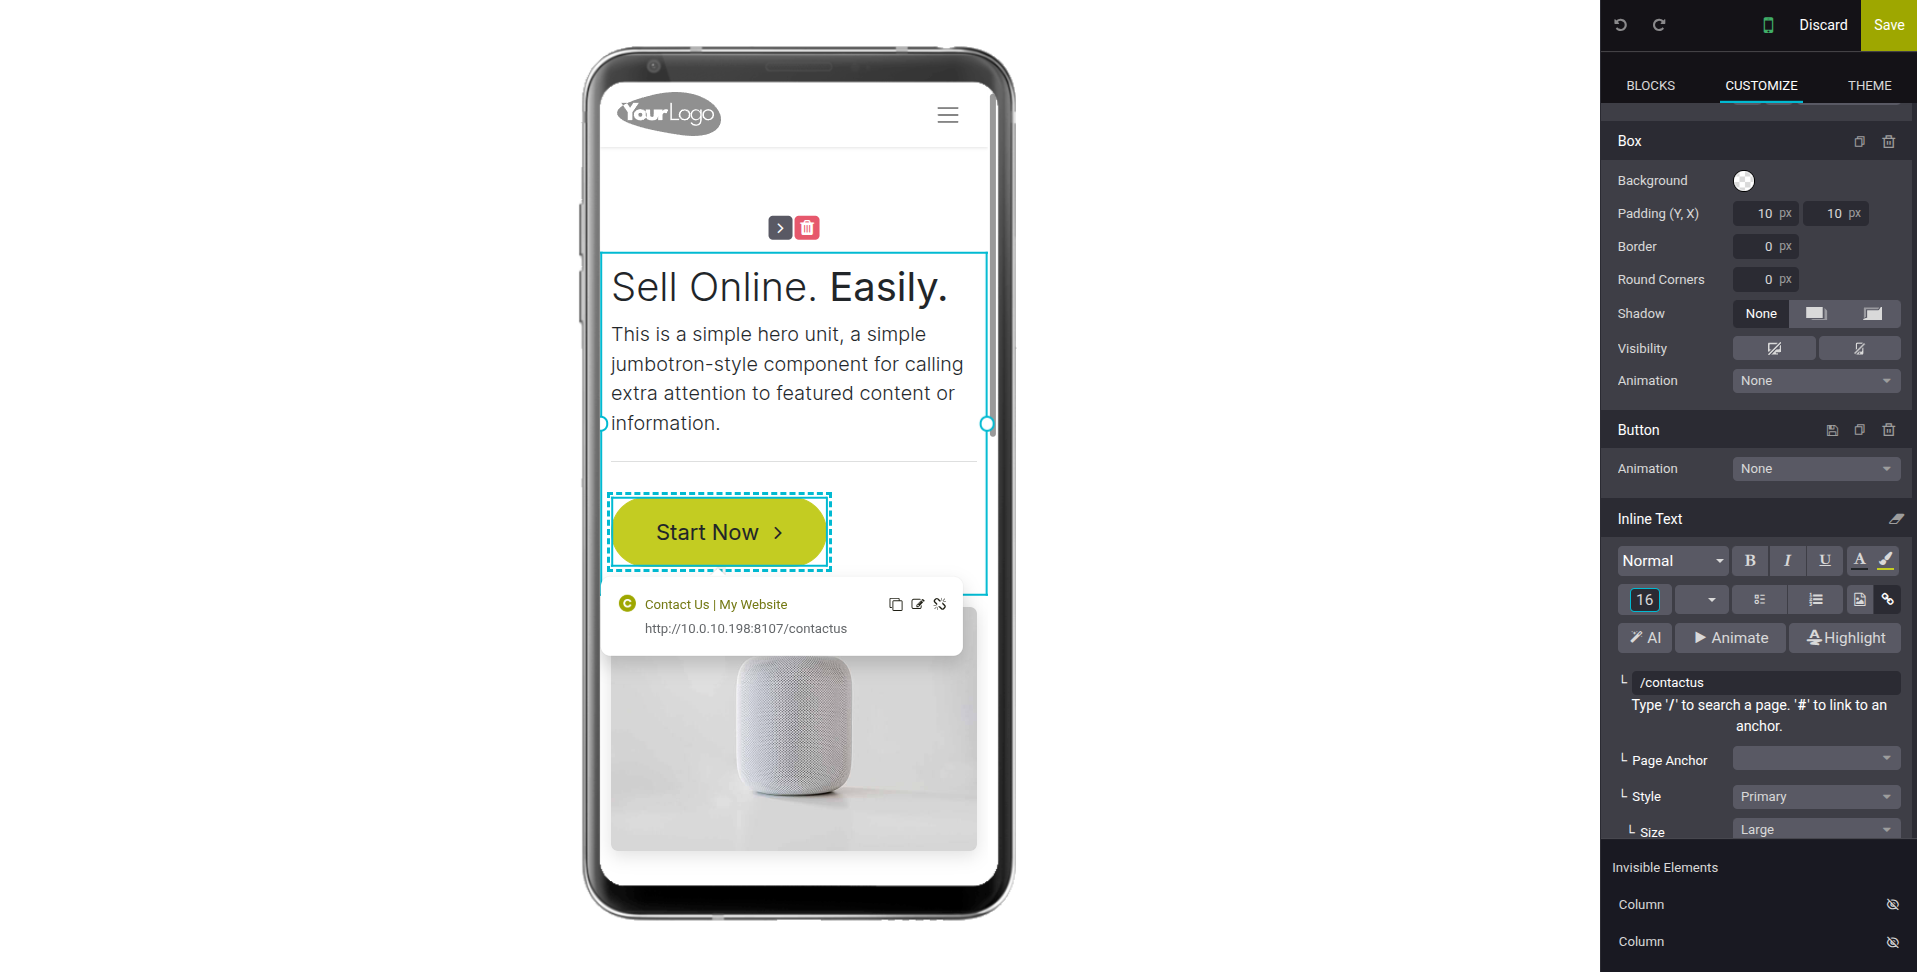
Fig 3.4 — Page editor in mobile preview mode — narrow canvas showing stacked single-column layout of a two-column desktop block
Note
Some building blocks have specific mobile behavior settings — for example, image-text blocks can be configured to show the image above or below the text on mobile screens.
4. SEO & Visibility
Cyllo's Website module includes built-in SEO tools to help your pages rank in search engines. Meta titles, descriptions, keywords, canonical URLs, and structured data are all manageable directly from the page editor without any SEO plugin.
4.1. URL Management & Redirects
When pages are renamed, moved, or deleted, their old URLs can leave broken links that harm SEO rankings and user experience. Cyllo's redirect management tool allows you to map old URLs to new destinations, preserving search engine authority and preventing 404 errors.
- Go to Website → Configuration → Redirects.
- Click New to create a redirect rule.
- In the URL From field, enter the old URL path (e.g. /old-page).
- In the URL To field, enter the destination path (e.g. /new-page).
- Select the redirect type — 301 (permanent, passes SEO authority) or 302 (temporary).
- Click Save. The redirect is active immediately for all visitors.
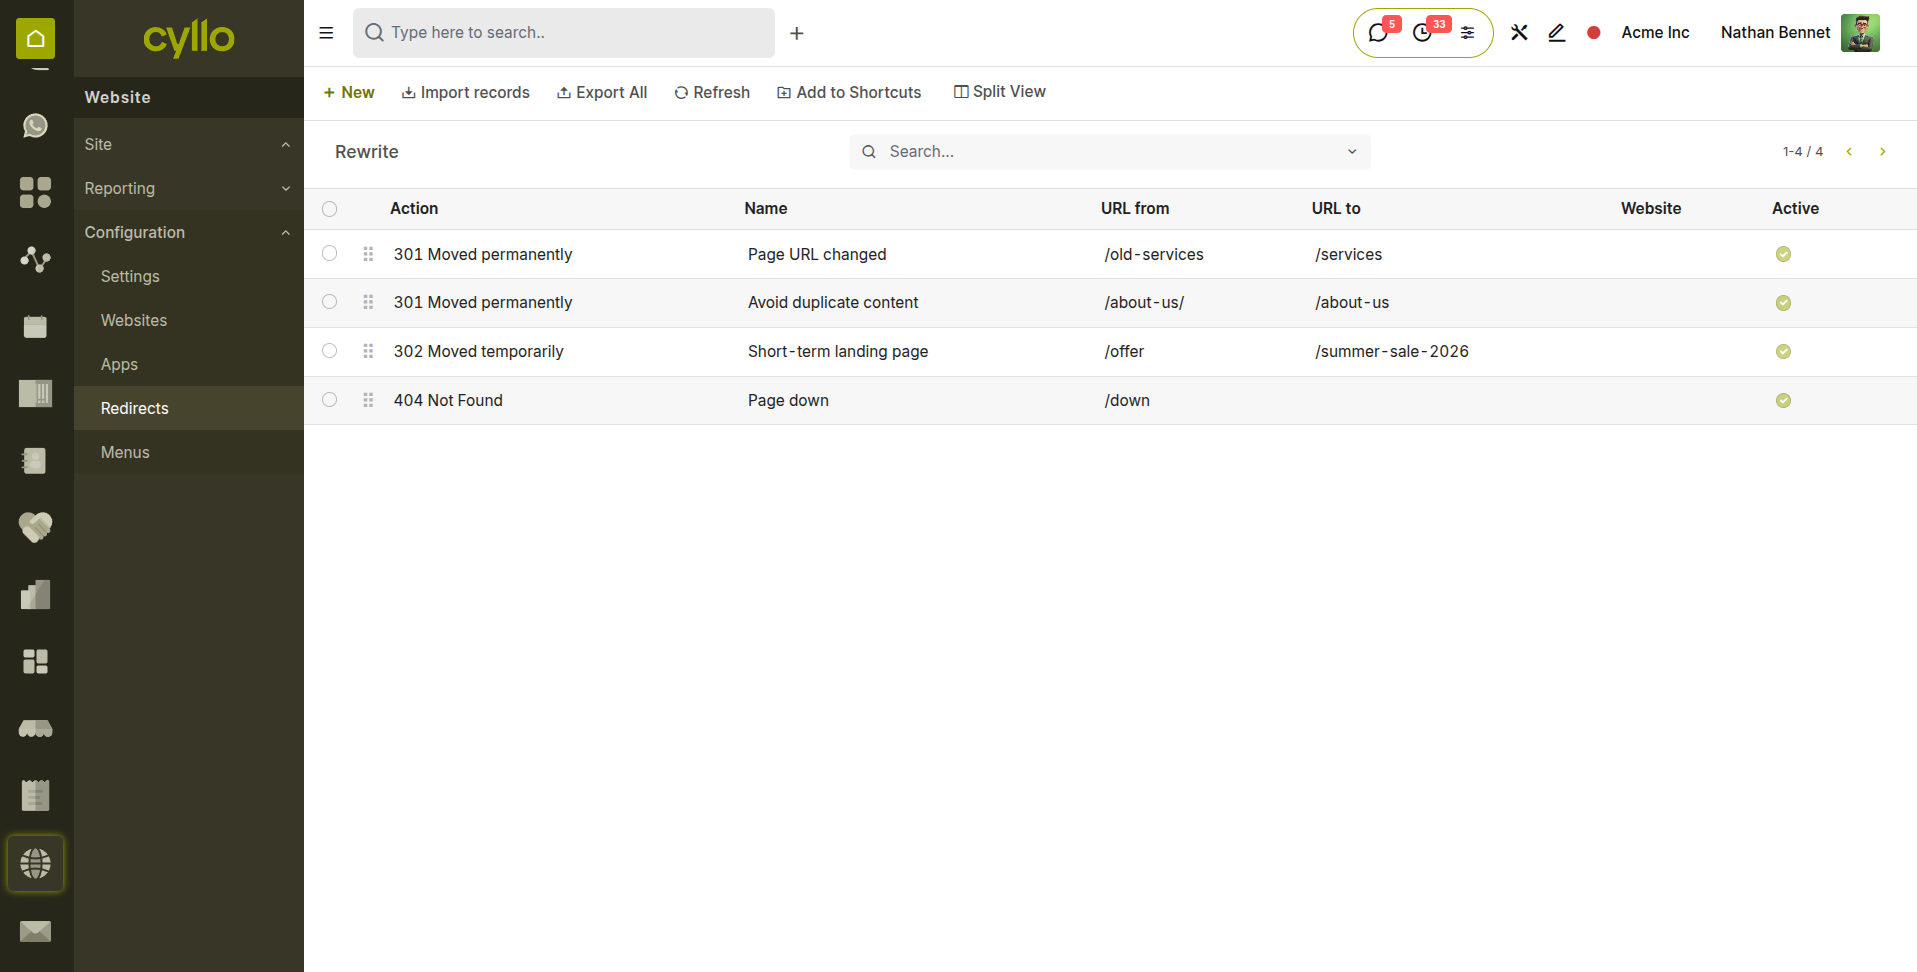
Fig 4.1 — Redirects list — URL From, URL To, redirect type (301/302), and active status columns
TIP
Use 301 redirects when a page has permanently moved. This transfers accumulated search engine ranking from the old URL to the new one. Use 302 only for temporary redirects such as seasonal promotions.
4.2. Sitemap & Robots.txt
Cyllo automatically generates an XML sitemap listing all published pages on your website. The sitemap is submitted to search engines to help them discover and index your content more efficiently. The robots.txt file instructs search engine crawlers which pages to crawl and which to skip.
- Sitemap: Automatically generated and updated at /sitemap.xml whenever pages are published or unpublished. No manual action required.
- Robots.txt: Located at /robots.txt. Configure it from Website → Configuration → Settings under the SEO section.
- Indexing Control: Individual pages can be excluded from search engine indexing by disabling the Indexed toggle in the page's SEO settings.
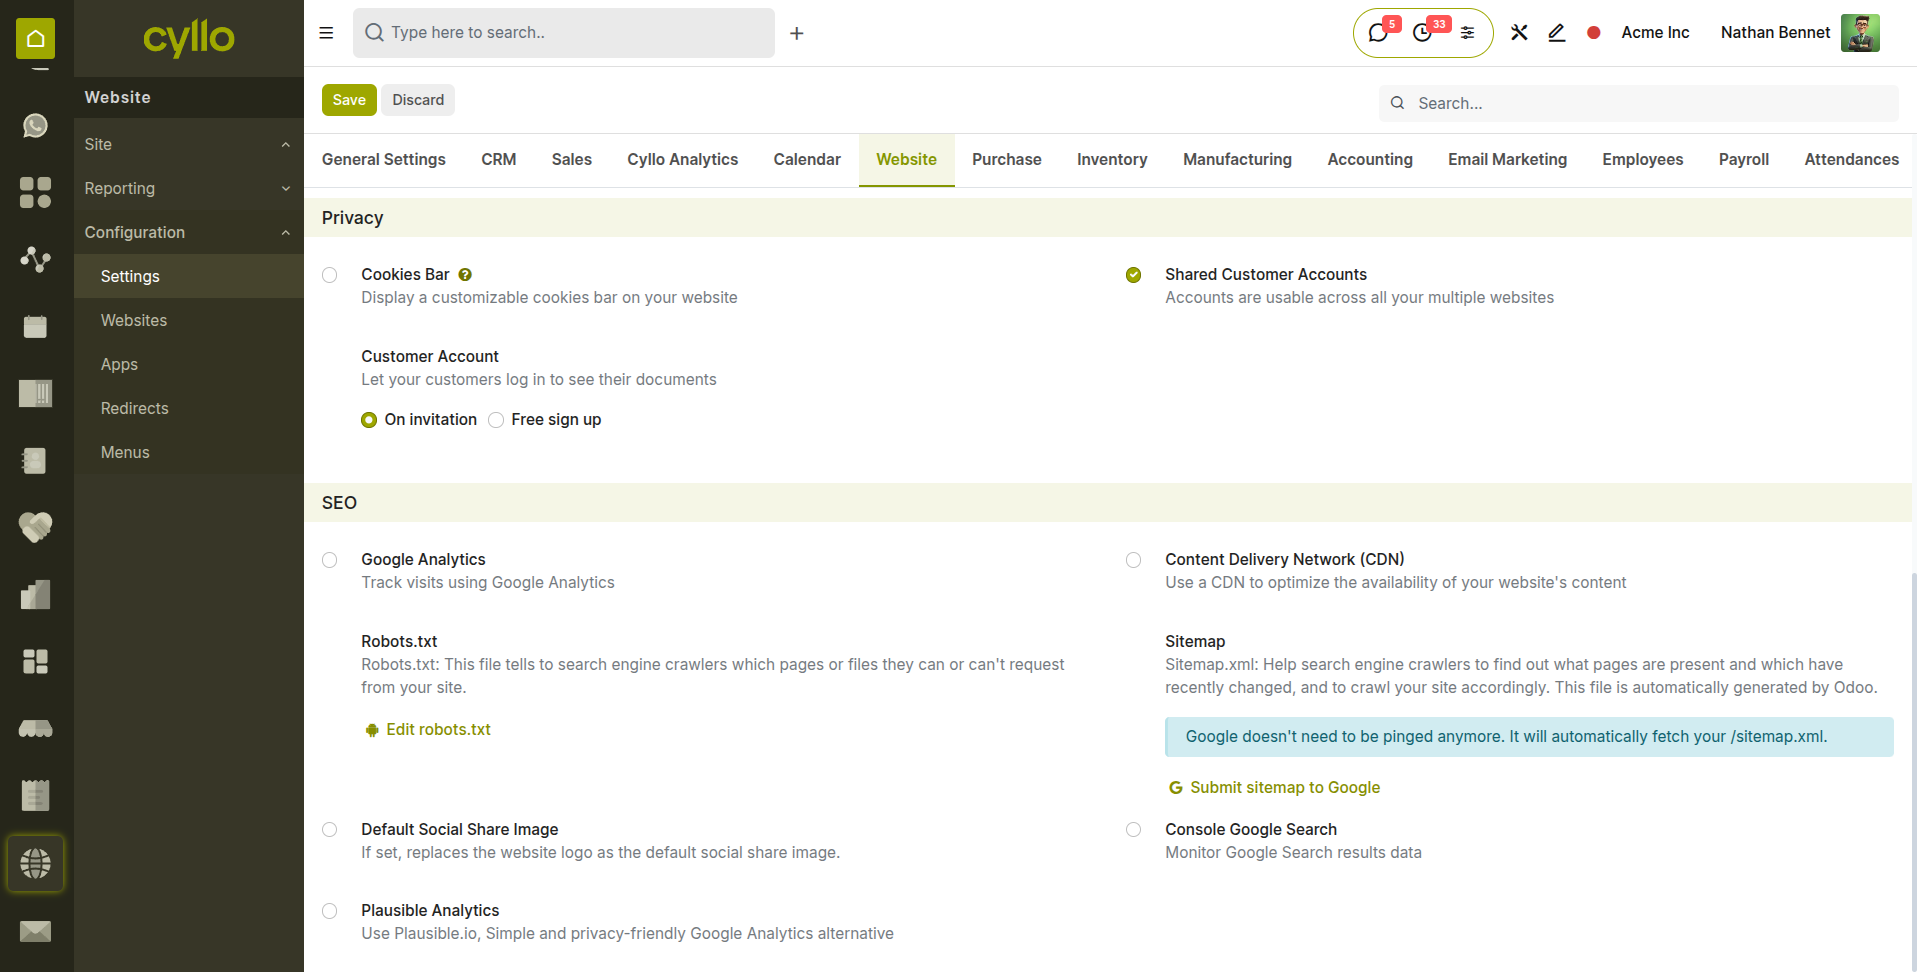
Fig 4.2 — Website SEO settings — Robots.txt text editor and Sitemap URL with copy button
Note
Always verify your sitemap is accessible and correctly lists your key pages after major content updates. You can view it by navigating to your-website.com/sitemap.xml in a browser.
4.3. Google Analytics & Tag Manager Integration
Cyllo's Website module supports direct integration with Google Analytics and Google Tag Manager. Once connected, visitor data — sessions, page views, traffic sources, and conversion events — is tracked automatically on every page without inserting code into individual pages.
- Go to Website → Configuration → Settings.
- Under the Integrations section, locate the Google Analytics field.
- Enter your Google Analytics Measurement ID (format: G-XXXXXXXXXX for GA4).
- To use Tag Manager instead, enter your GTM Container ID (format: GTM-XXXXXXX) in the Google Tag Manager field.
- Click Save. Tracking scripts are automatically injected into all published pages.
Note
If both Google Analytics and Google Tag Manager are configured, use Tag Manager to fire the Analytics tag rather than entering both IDs — this prevents duplicate tracking.
5. Blog Management
The Website module includes a full-featured blog engine for publishing regular content — articles, news, tutorials, and updates. Blog posts are indexed for SEO, categorized by tags, and displayed in a dedicated blog listing page on the website.
5.1. Creating a Blog
A blog is a named collection of posts that appears as a section on your website. You can create multiple blogs to separate content by topic — for example, a Company News blog and a Product Tutorials blog — each with its own listing page and RSS feed.
- Go to a Website, click the ‘+ New’ button at the top right corner.
- In the dialog, click Blog to browse the available templates.
- Enter the Blog Name (e.g. Company News, Industry Insights).
- Enter a Blog Subtitle — a short description that appears under the blog title on the listing page.
- Click Save. A new blog listing page is created automatically on your website.
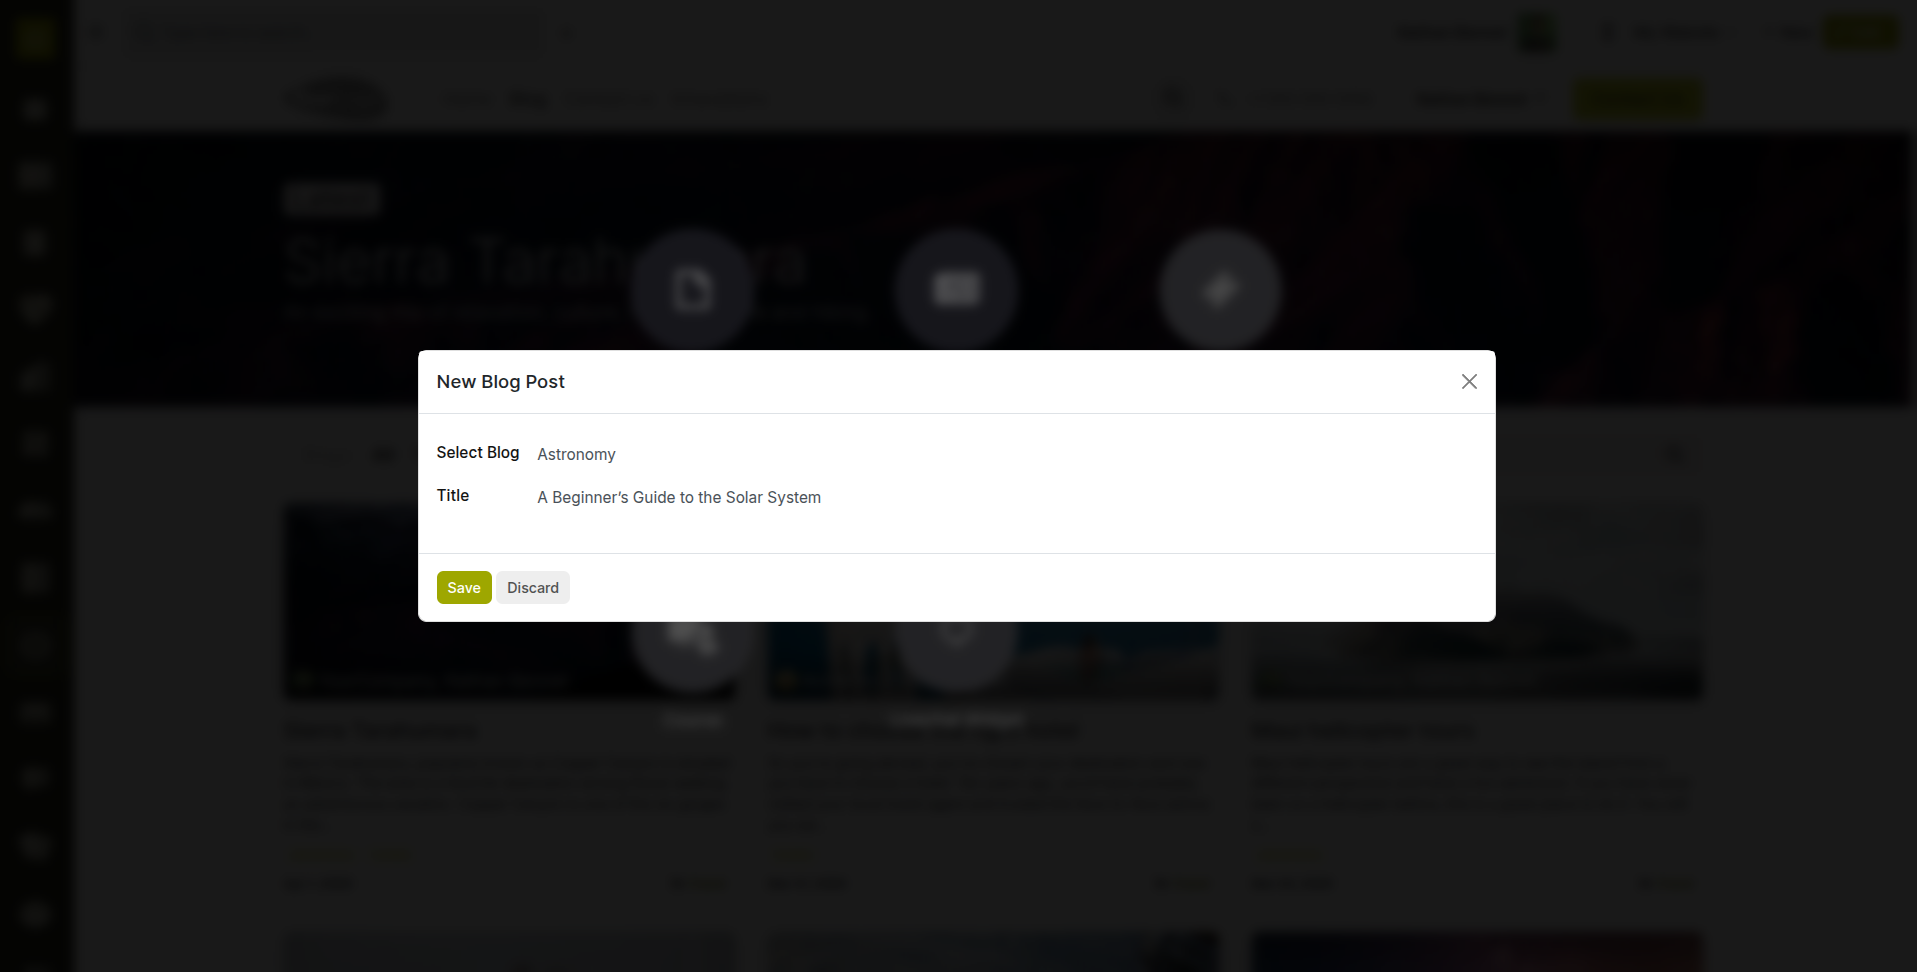
Fig 5.1 — Blog creation form — Blog Name and Blog Type
Note
If the Multi-Blog module (cyllo_website_multi_blog) is installed, you can control which blogs are visible on each individual website in a multi-website setup. See Section 9 for multi-website management.
5.2. Writing & Publishing Blog Posts
Blog posts are written and edited using the same drag-and-drop page editor used for all website pages. Each post supports rich text, images, video embeds, and custom building blocks — making it easy to produce visually engaging content alongside standard article text.
- Install Blog module.
- Go to Website → Configuration → Blog → Blogs and click New.
- Add blog name and subtitle.
- Go to a Website, click the ‘+ New’ button at the top right corner.
- In the dialog, click ‘Blog’ to add the available blogs.
- Click Continue. The post opens in the page editor.
- Write your content using text blocks. Add images, videos, or other building blocks as needed.
- When ready to publish, click the Published toggle in the top toolbar. The post becomes publicly visible immediately.
- To schedule the post for future publication, set the Published Date to a future date and time before publishing.
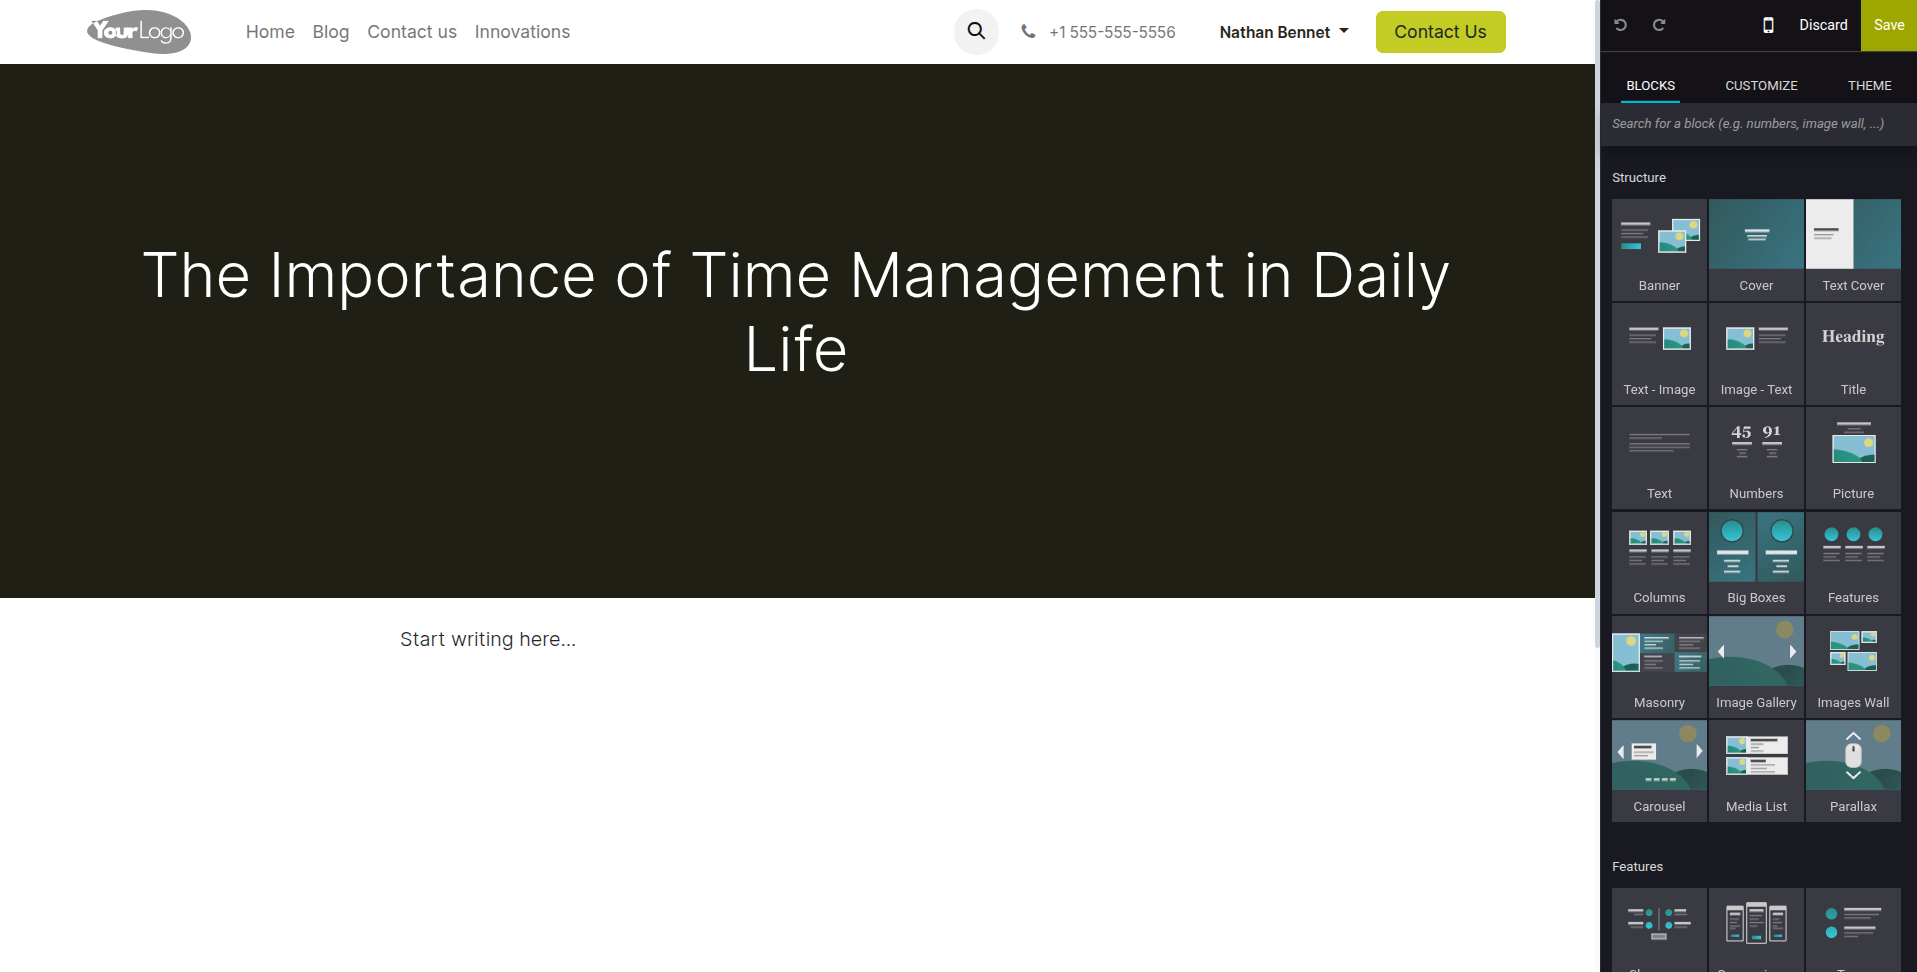
Fig 5.2 — Blog post editor — article text in the canvas with cover image, tags, and Published toggle visible in the top toolbar
Key Blog Post Fields
- Blog: The parent blog this post belongs to (e.g. Company News).
- Tags: Labels that categorize the post and allow readers to filter by topic.
- Cover Image: The featured image shown in the blog listing grid and at the top of the post.
- Meta Description: The SEO summary for this post. Auto-generated from the first paragraph if left blank.
- Allow Comments: Enables a comment section at the bottom of the published post.
TIP
Use consistent, specific tags rather than broad ones. For example, use 'Inventory Management' and 'Barcode Scanning' rather than a generic 'Features' tag — specific tags attract more targeted search traffic.
6. Forms & Lead Capture
Cyllo's Website module integrates form submission directly with the CRM module. Every time a visitor submits a form on your website, a lead is automatically created in CRM — no third-party form tool or webhook configuration required.
6.1. Contact Us Form
The Contact Us page is a standard website page that includes a built-in inquiry form. When a visitor submits the form, Cyllo creates a CRM lead with the visitor's name, email, phone, and message automatically, and sends a notification email to the responsible sales team.
- The Contact Us page is created by default during the website setup wizard. If it is missing, go to Website → Pages → New Page and select the Contact template.
- Open the Contact Us page in the editor. The contact form block is pre-placed on the page.
- Click the form block to configure it: set the email address where submission notifications are sent, and customize the form field labels.
- Add or remove form fields using the field configuration panel — toggle Name, Phone, Company, and Message fields on or off as needed.
- Save and publish the page.
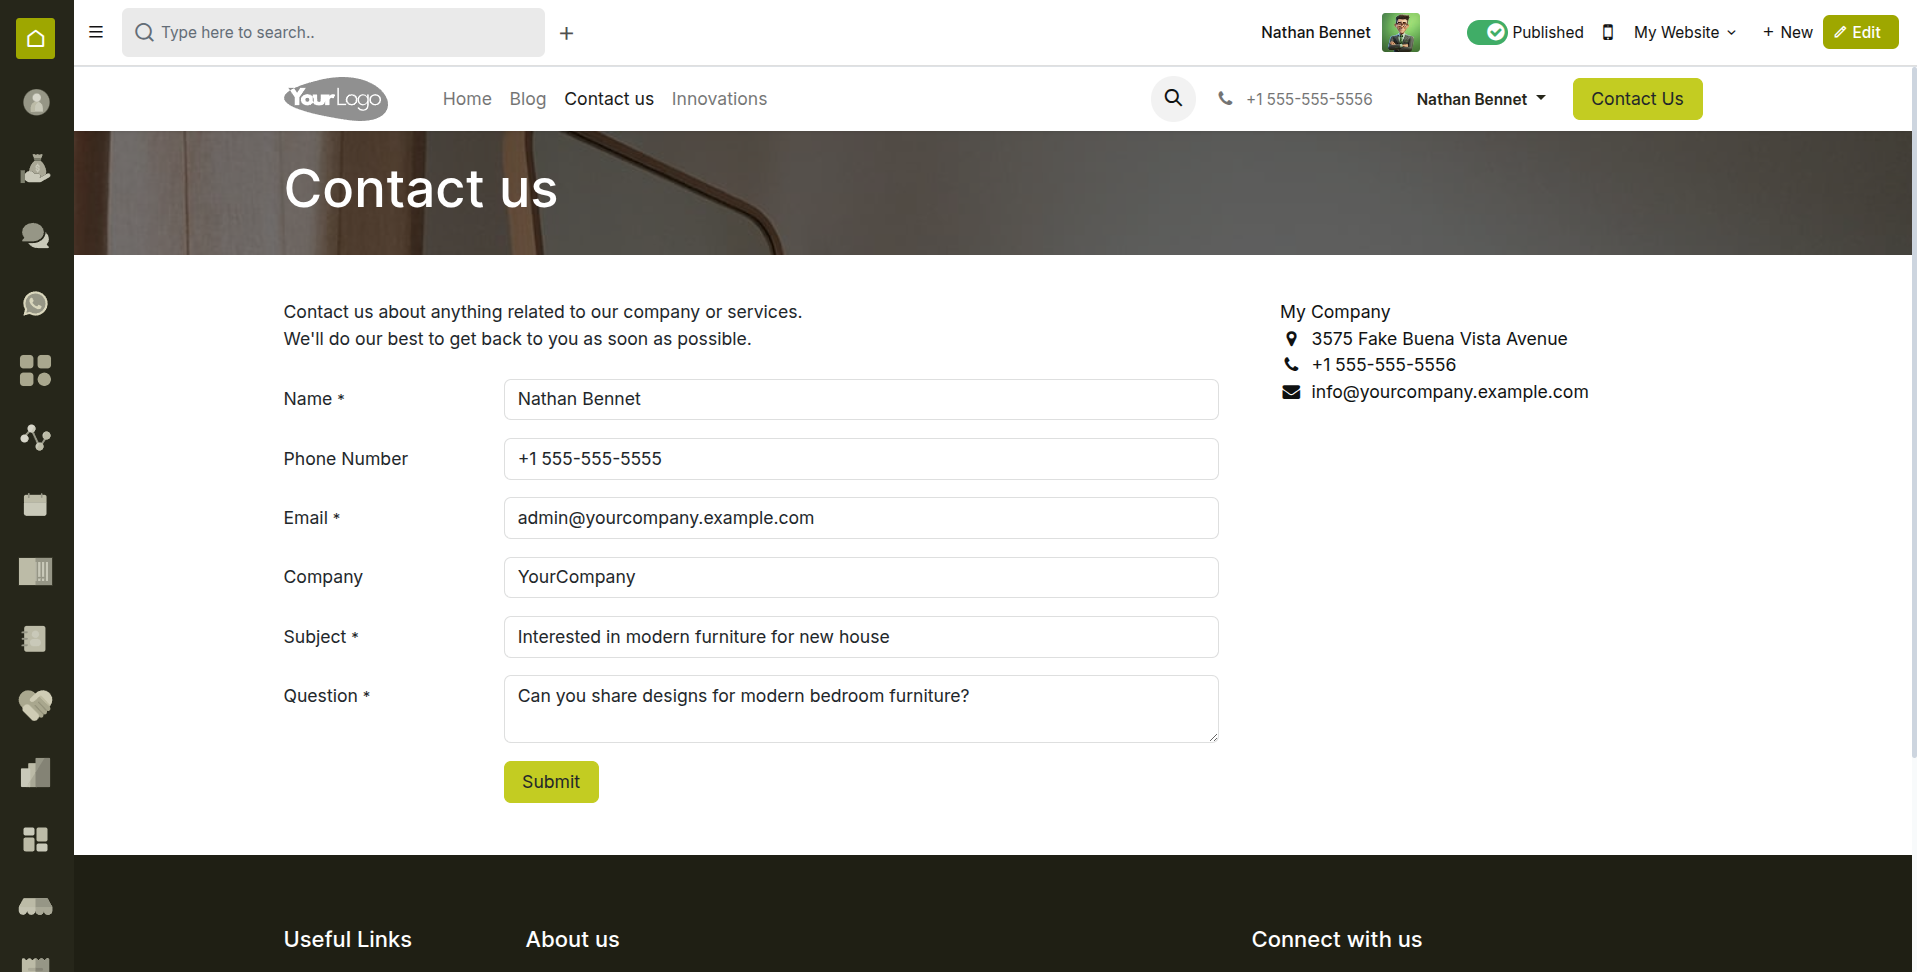
Fig 6.1 — Contact Us page — form block with name, email, phone, and message fields
Note
By default, Contact Us submissions create leads in the CRM module assigned to the default sales team. Go to CRM → Configuration → Sales Teams to set which team receives website leads.
6.2. Custom Web Forms
Beyond the Contact Us form, any page on your website can include a custom form block. The form builder allows you to add any combination of text fields, dropdowns, checkboxes, date pickers, and file uploads — and map submissions to CRM leads, Helpdesk tickets, or any other Cyllo record type.
- Open the page where you want to add a form in the editor.
- Drag the Form building block from the block panel onto the page.
- Click the form block to open its configuration panel.
- Select the Form Action — where submissions should go: Send an Email, Create a Lead, Create a Task, Create a Ticket, or a custom action.
- Add fields using the Add a Field button. For each field, set the label, field type, and whether it is required.
- Set the Confirmation Message or redirect URL shown after successful submission.
- Save and publish the page.
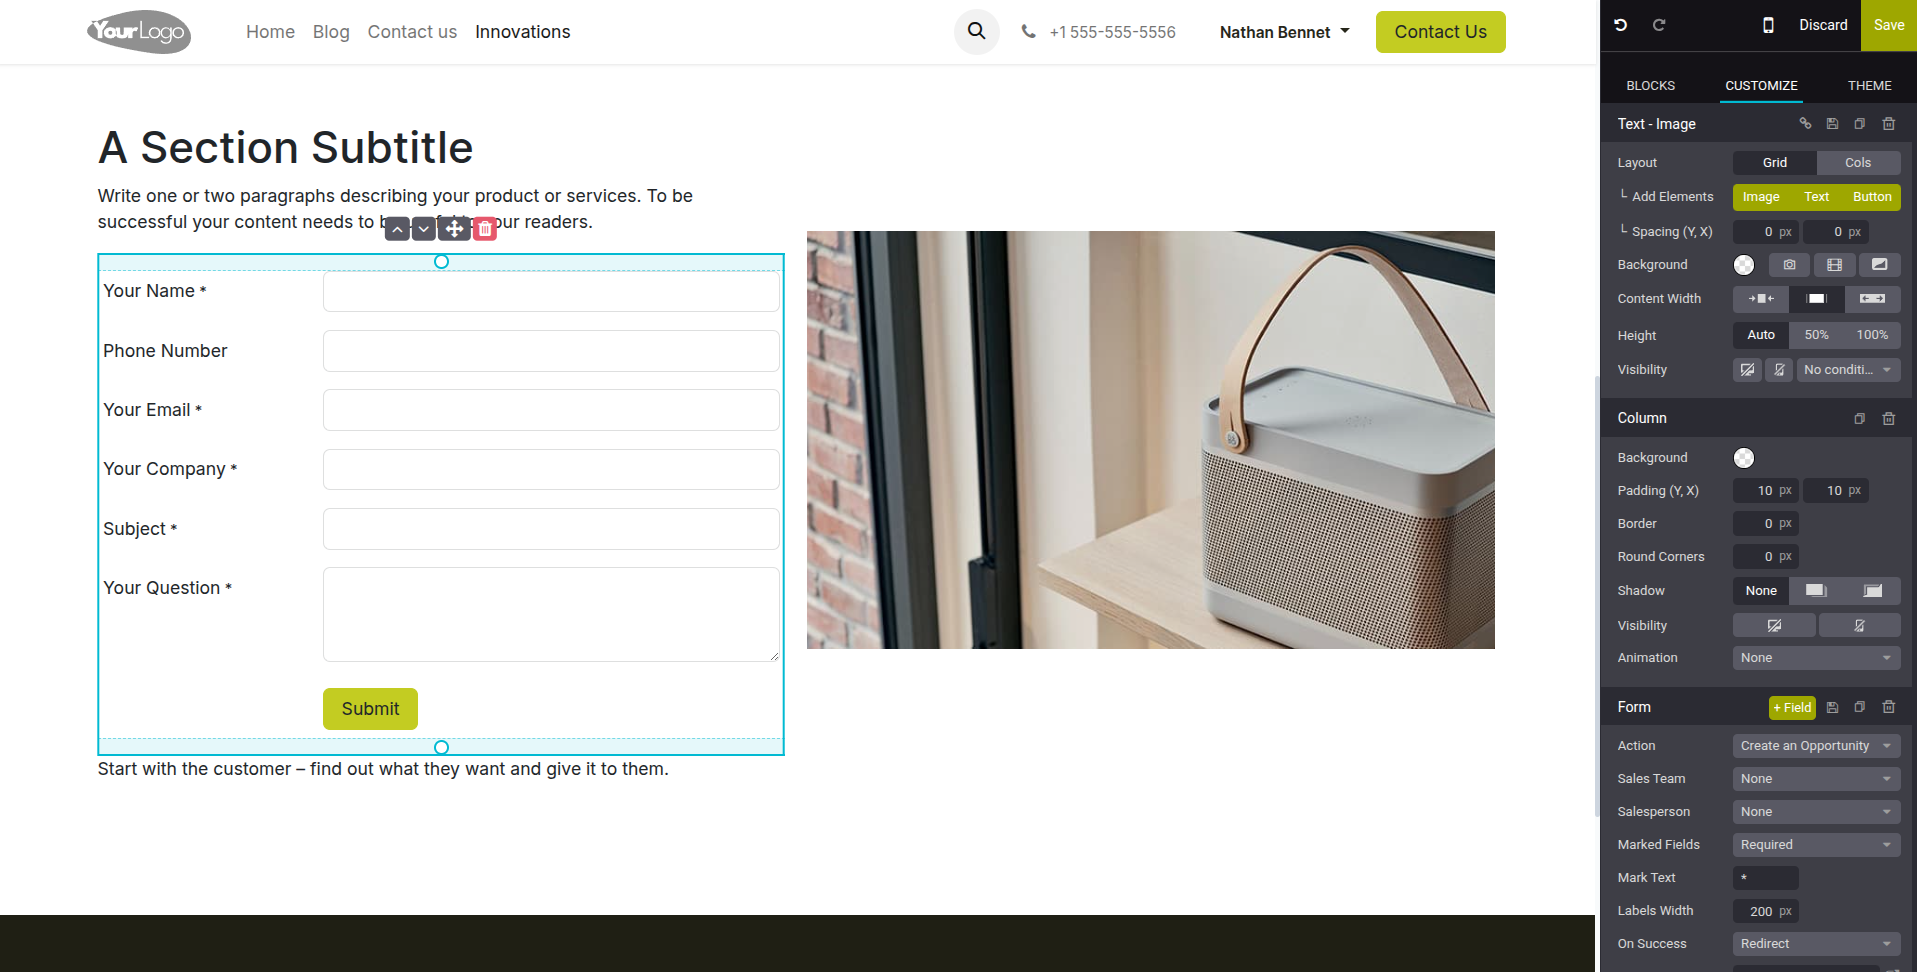
Fig 6.2 — Form block configuration panel — field list with type selectors, Action dropdown set to 'Create an Opportunity, and Confirmation Message field
TIP
For marketing campaigns, use a custom form with a dedicated landing page rather than the general Contact Us page. This gives you a unique URL to track campaign performance separately in Analytics.
7. Customer Portal
The Customer Portal is a secure self-service section of the Cyllo website where customers log in to view their orders, invoices, subscriptions, and account details. It reduces support load by giving customers direct visibility into their transaction history.
7.1. My Account Overview
The My Account section is automatically added to every Cyllo website when the Portal feature is active. Customers reach it by clicking the Log In or My Account link in the website header. Once logged in, they see a dashboard of their recent activity across all connected modules.
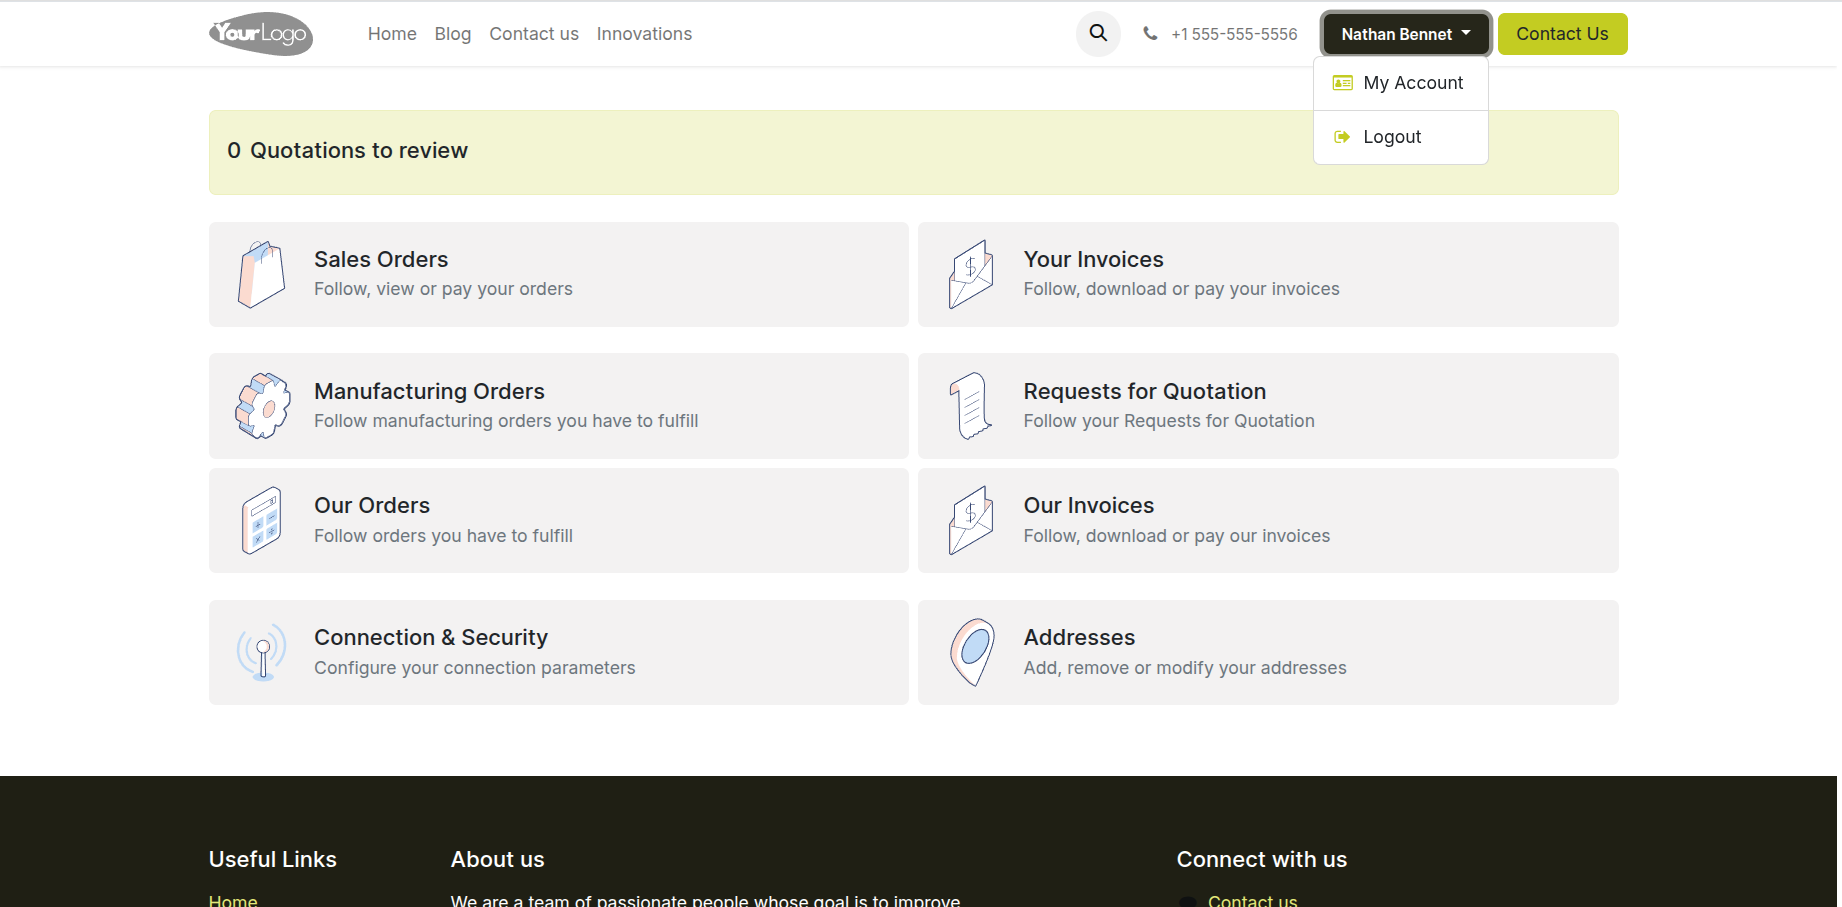
Fig 7.1 — Customer portal My Account page — dashboard showing recent orders, invoices, MOs, and account settings tiles
- Sales Orders: Customers can view all their orders, check delivery status, and download order confirmations.
- Invoices: All invoices are listed with payment status. Customers can download PDF copies or pay outstanding invoices online.
- Subscriptions: If the Subscription module is installed, customers can view active subscriptions, renewal dates, and manage their plan.
- Documents: Signed contracts, delivery notes, and other shared documents are accessible here.
- Account Settings: Customers can update their contact details, delivery addresses, and change their portal password.
7.2. Order History & Tracking
Customers can view the full history of their purchases from the portal and track the current status of any active order. Order status updates in Cyllo's backend (confirmed, shipped, delivered) are reflected in the portal automatically.
- The customer logs in at your-website.com/my/account using their email and portal password.
- From the dashboard, they click Orders to see the full order list.
- Clicking an order opens its detail page showing order lines, quantities, pricing, delivery address, and current status.
- If the order has been shipped, the delivery tracking reference (if entered in the delivery record) is shown on the order page.
- Customers can download their order confirmation and invoice as PDF from this page.
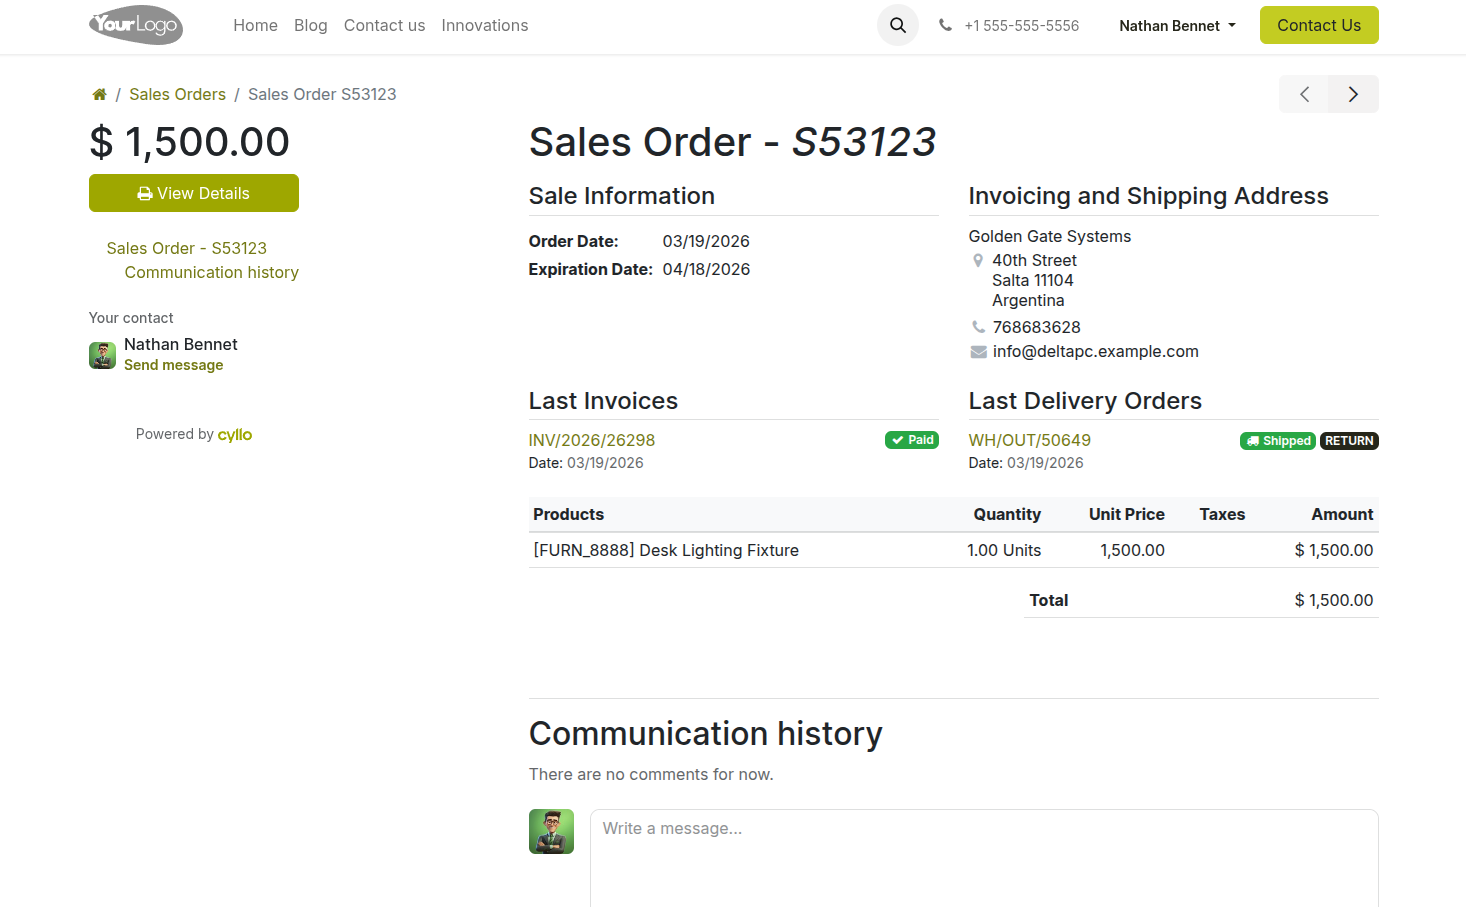
Fig 7.2 — Customer portal Order detail page — order lines, total, delivery address, status badge, and Download Invoice button
Note
Customers only see their own orders. Portal access is strictly isolated per customer account — one customer's data is never visible to another.
7.3 Portal Access Configuration
Portal access is granted per contact in Cyllo. When a customer is given portal access, they receive an email invitation with a link to set their password and log in. Access can be granted individually or for multiple contacts at once.
- Go to Contacts and open the contact record for the customer.
- Click Action → Grant Portal Access.
- In the portal access dialog, confirm the email address is correct and click Grant Access.
- The customer receives an invitation email with a link to set their password and activate their account.
- To revoke portal access, go to the same contact and click Action → Revoke Portal Access.
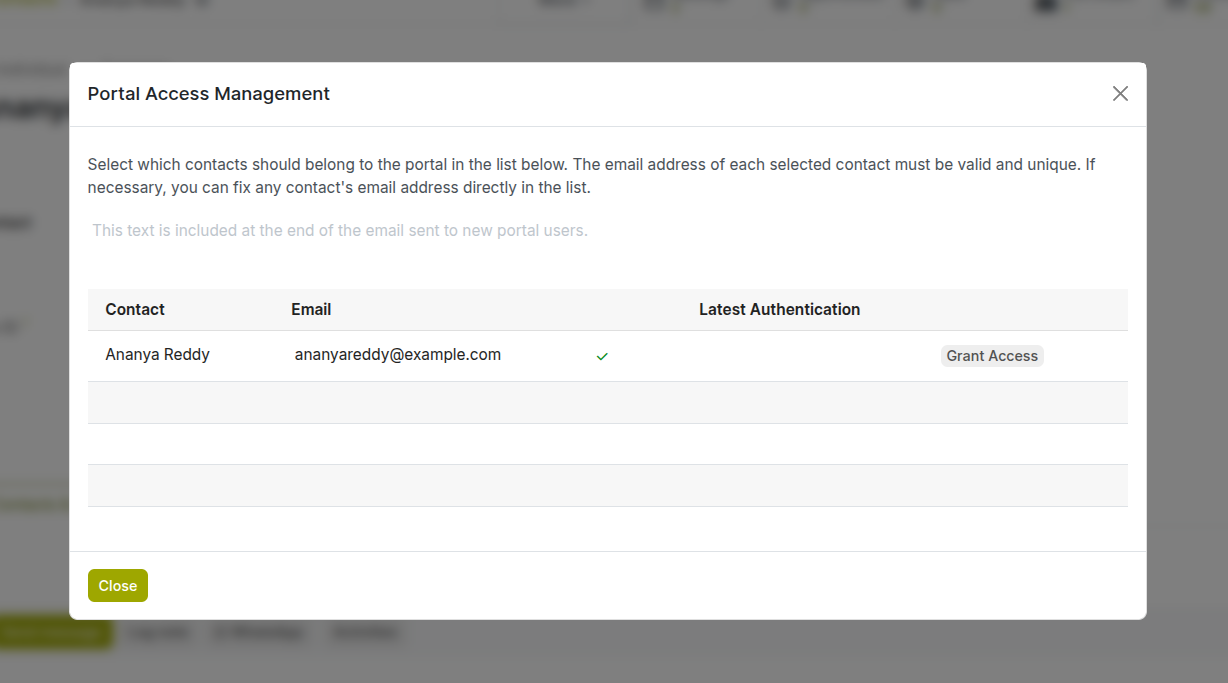
Fig 7.3 — Contact form — Action menu open with 'Grant Portal Access' option and portal access confirmation dialog
TIP
When onboarding a new customer, grant portal access as part of the welcome process. Customers with portal access can self-serve order tracking inquiries, reducing incoming support requests.
8. Multi-Website Management
Cyllo allows you to manage multiple separate websites from a single ERP instance. Each website has its own domain, content, theme, and product catalog, while sharing the same back-end database, product records, and customer data.
8.1. Creating Multiple Websites
Additional websites are created from the Website configuration menu. Each website is an independent publishing environment — it has its own homepage, navigation, pages, and blog — but draws products and customer data from the shared Cyllo database.
- Go to Website → Configuration → Settings.
- In the top-left corner of the settings page, click the website name dropdown to see the current website list.
- Click New Website to create a new website.
- Enter the Website Name and Company it belongs to (relevant in multi-company setups).
- Optionally, enter the domain to be assigned to this website.
- Click Create. Cyllo opens the new website setup wizard for this second site.
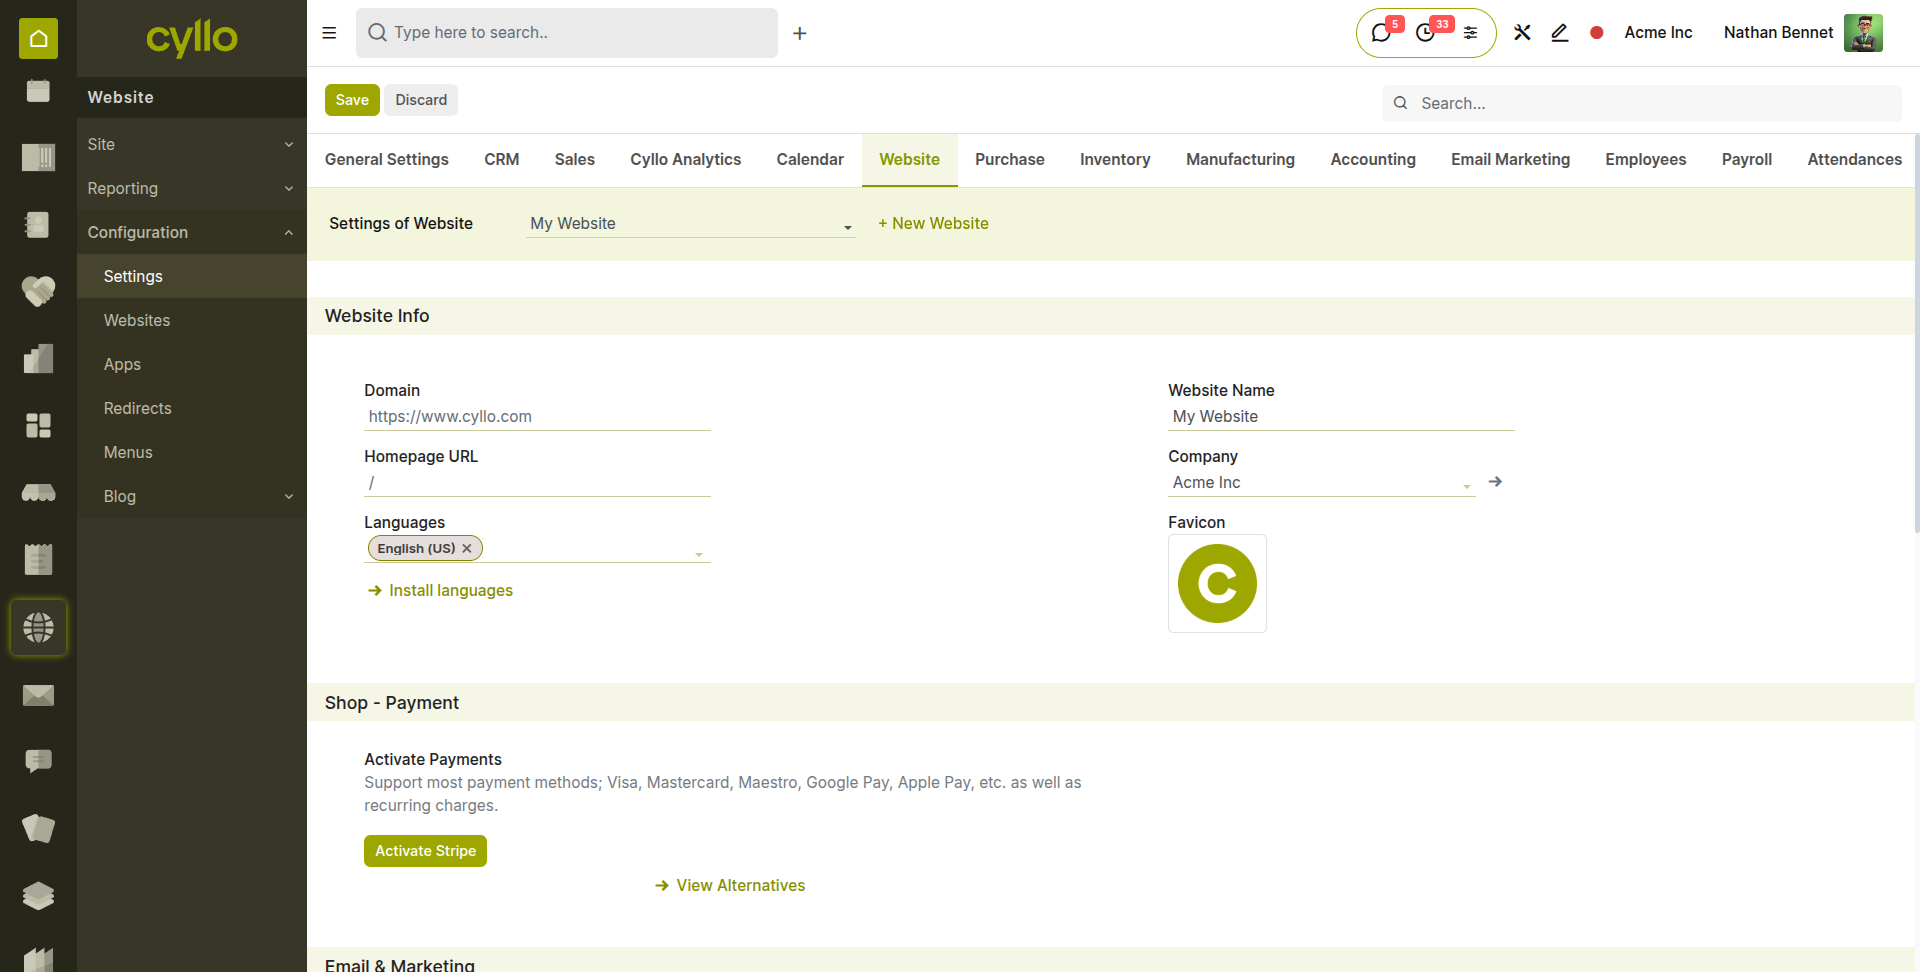
Fig 8.1 — Website settings — top-left website dropdown showing two sites listed with a 'New Website' option at the bottom
Note
Each website requires its own domain to be fully separated in production. During development, both websites are accessible from the same Cyllo URL using the website switcher in the backend.
8.2. Domain Configuration
Each website can be mapped to a custom domain so that visitors reach the correct website based on the URL they type. Domain mapping requires both a DNS configuration at your domain registrar and a domain entry in Cyllo's website settings.
- At your domain registrar, create an A record pointing your domain (e.g. www.yourcompany.com) to the IP address of your Cyllo server.
- In Cyllo, go to Website → Configuration → Settings and select the website you want to configure.
- In the Domain field, enter the full domain (e.g. www.yourcompany.com).
- Click Save. Cyllo routes all requests for that domain to this website automatically.
- If SSL is required (HTTPS), enable SSL from the same settings page or configure it at the web server level.
WARNING
DNS propagation after changing A records can take up to 48 hours. Test domain routing after propagation is complete, not immediately after making the DNS change.
8.3. Per-Website Content Control
In a multi-website setup, content items — pages, products, blog posts — can be assigned to specific websites. Items assigned to one website do not appear on others. Items with no website assignment are shared across all websites by default.
- Pages: Each page has a Website field. Set it to restrict the page to a specific website, or leave blank for all sites.
- Products (eCommerce): Products can be published on selected websites only. Open the product, go to the Sales tab, and set the Website field.
- Blog Posts: If cyllo_website_multi_blog is installed, each blog is assigned to specific websites. See Section 5.4.
- Menus: Navigation menus are per-website — each website has its own independent menu structure.
- Themes: Each website can use a different theme. Switch themes from Website → Configuration → Themes with the target website active.
9. Troubleshooting
This section covers the most frequently encountered issues when using the Cyllo Website module — publishing problems, form integration failures, payment issues, and configuration errors — with step-by-step guidance to resolve each.
9.1. Common Issues & Solutions
| Issue | Likely Cause | Solution |
|---|---|---|
| Page changes not visible after saving | Browser caching the old version | Hard-refresh the browser (Ctrl+Shift+R or Cmd+Shift+R). Clear browser cache if the issue persists. |
| Page shows 404 after renaming | Old URL not redirected | Go to Website → Configuration → Redirects and create a 301 redirect from the old URL to the new one. |
| Images not loading on published page | Image file too large or wrong format | Re-upload the image in JPG or PNG format under 2MB. Use the image optimizer in the editor if available. |
| Editor not loading / spinning indefinitely | JavaScript error or extension conflict | Disable browser extensions (especially ad blockers) and reload. Try in an incognito window. |
| Menu item not appearing for visitors | Page is unpublished or menu item not saved | Verify the page is published and the menu was saved after adding the item. |
| eCommerce products not appearing in shop | 'Available in POS' or 'Website Published' not enabled | Open the product form → Sales tab and enable Website Published. |
| SSL not working after domain setup | DNS not propagated or certificate not installed | Wait 24–48 hours for DNS propagation. Verify SSL certificate is installed at the server level. |
9.2. Page Not Publishing
When a page appears to be saved but remains invisible to public visitors, the most common causes are an unpublished state, a user permission issue, or a website assignment mismatch in a multi-website setup.
- Open the page in the frontend editor and check the Published toggle in the top toolbar. It should be green and read 'Published'. If it shows 'Unpublished', click it to publish.
- If the toggle is published but visitors cannot see the page, check whether the page is assigned to the correct website in the Page Properties (Website field).
- Verify the page URL does not conflict with another page. Duplicate URLs cause one page to be silently overridden.
- Check that the page URL does not contain characters that your web server blocks (avoid special characters and spaces in URL slugs).
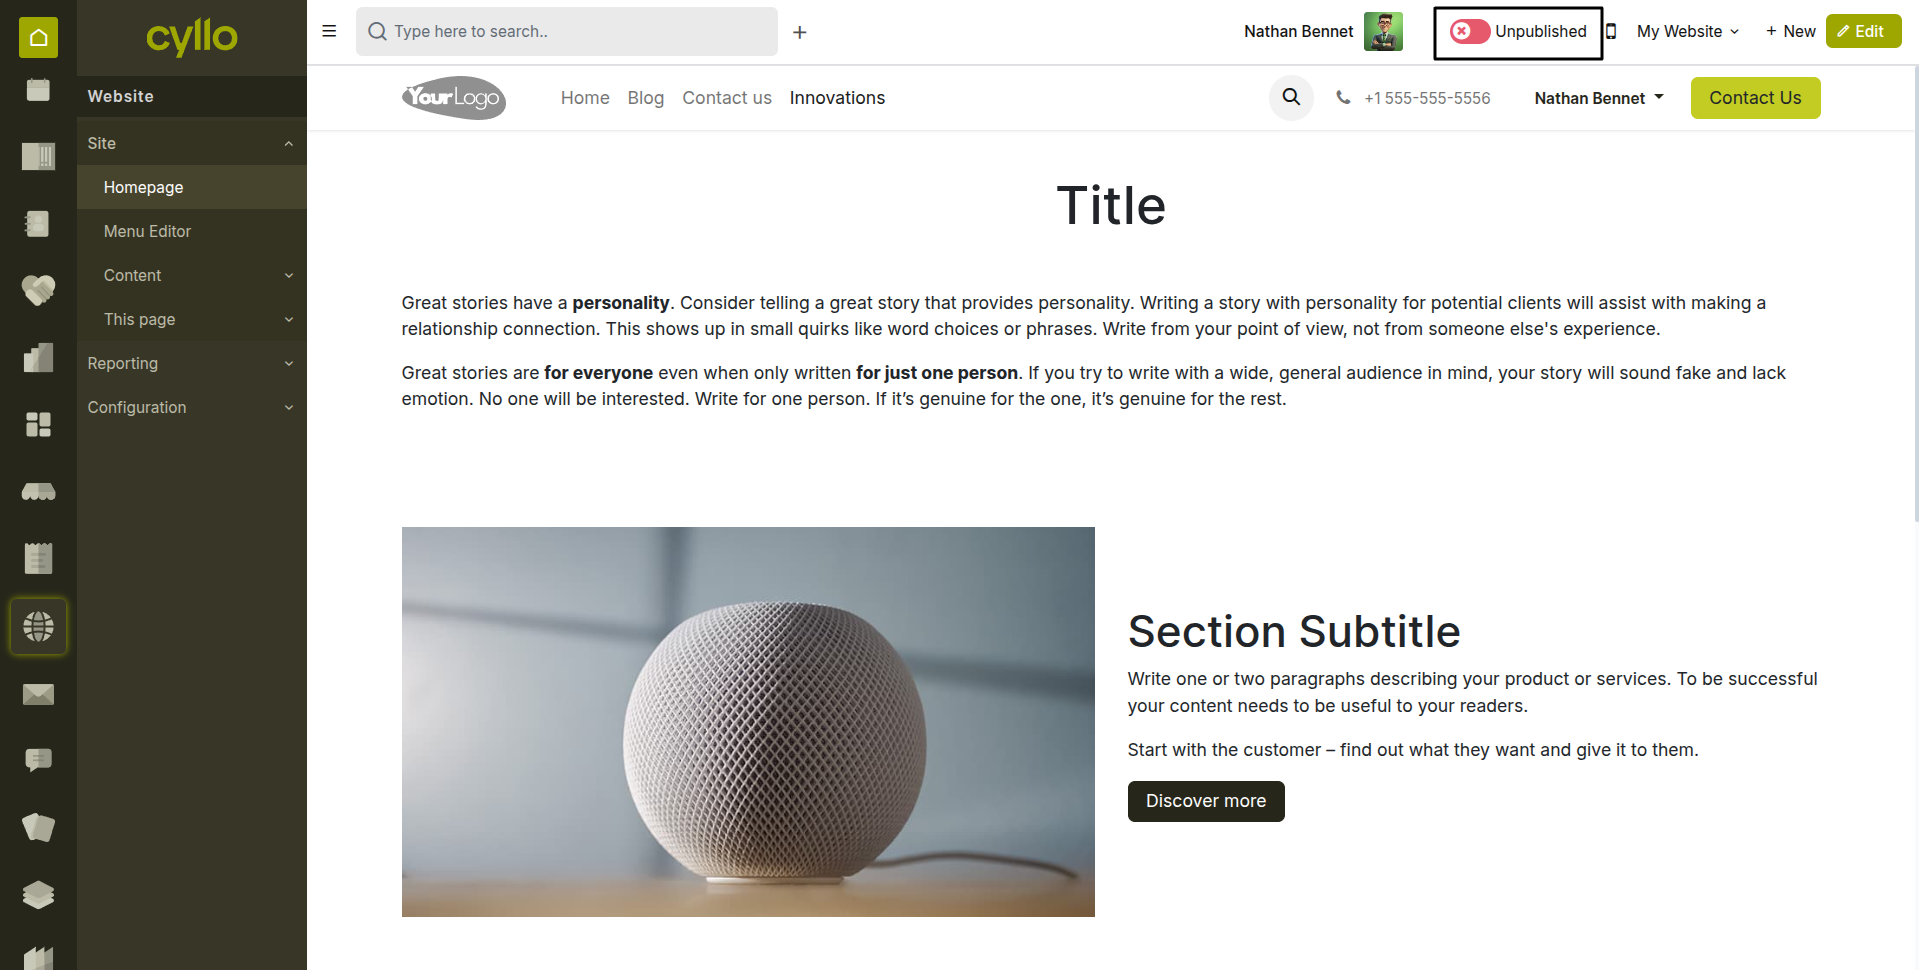
Fig 9.1 — Page editor top toolbar — Published/Unpublished toggle showing the two states with color indicators
9.3. Forms Not Creating CRM Leads
When website form submissions are not appearing as CRM leads, the issue is typically a misconfigured form action, an email delivery failure blocking the notification, or a CRM sales team assignment issue.
- Open the page containing the form in the editor and click the form block to view its settings.
- Confirm the Form Action is set to Create a Lead and not Send an Email or another option.
- Check that the CRM module is installed. Forms can only create leads if CRM is active.
- Go to CRM → Configuration → Sales Teams and verify the website sales team exists and has at least one member assigned.
- Submit a test form entry and check CRM → Sales → All Leads immediately after, filtering by source = Website.
- If leads appear in All Leads but not in My Pipeline, the assignment rule is routing them to a different salesperson. Adjust the assignment rule in CRM → Configuration → Assignment Rules.